This blog will guide you to generate SSH key pairs on Windows 11.
Generate SSH Keys in Windows 11
As we have explained, the SSH key pair contains a Private/Public key that is used to access the SSH server. To generate SSH keys on Windows 11, follow the below-mentioned steps:
Step 1: Verify OpenSSH Client is Installed
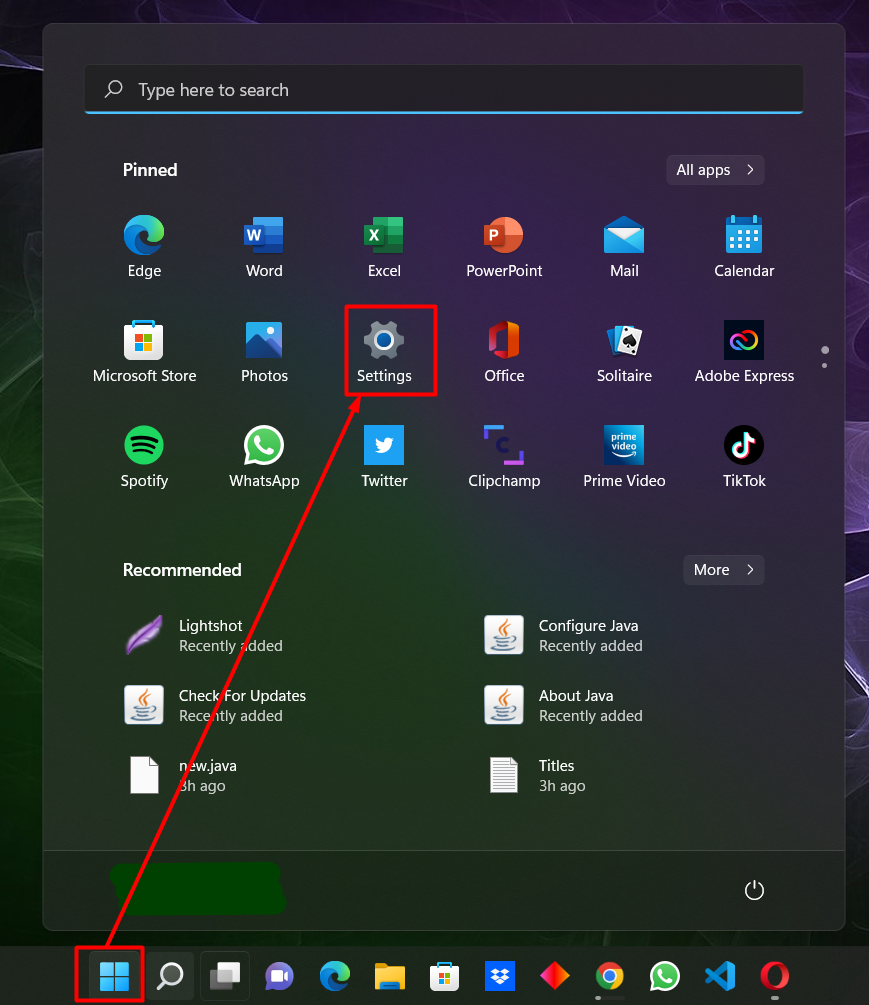
It is required to verify first whether the OpenSSH client is installed on the system or not. To do this, click on the Windows icon from the taskbar and select “Settings” from pinned list of applications:
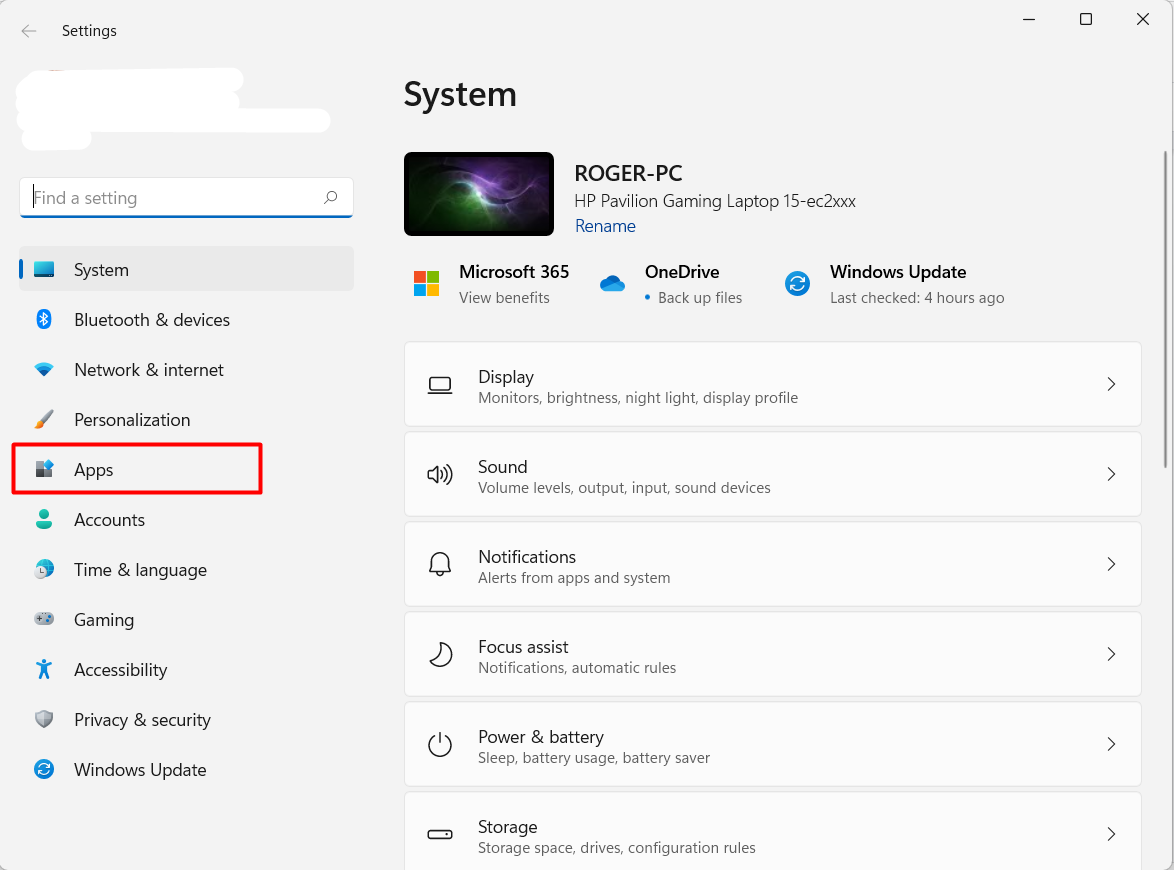
Next, from the Users Local Account System settings will appear on the screen. Select “Apps” from the Settings menu:
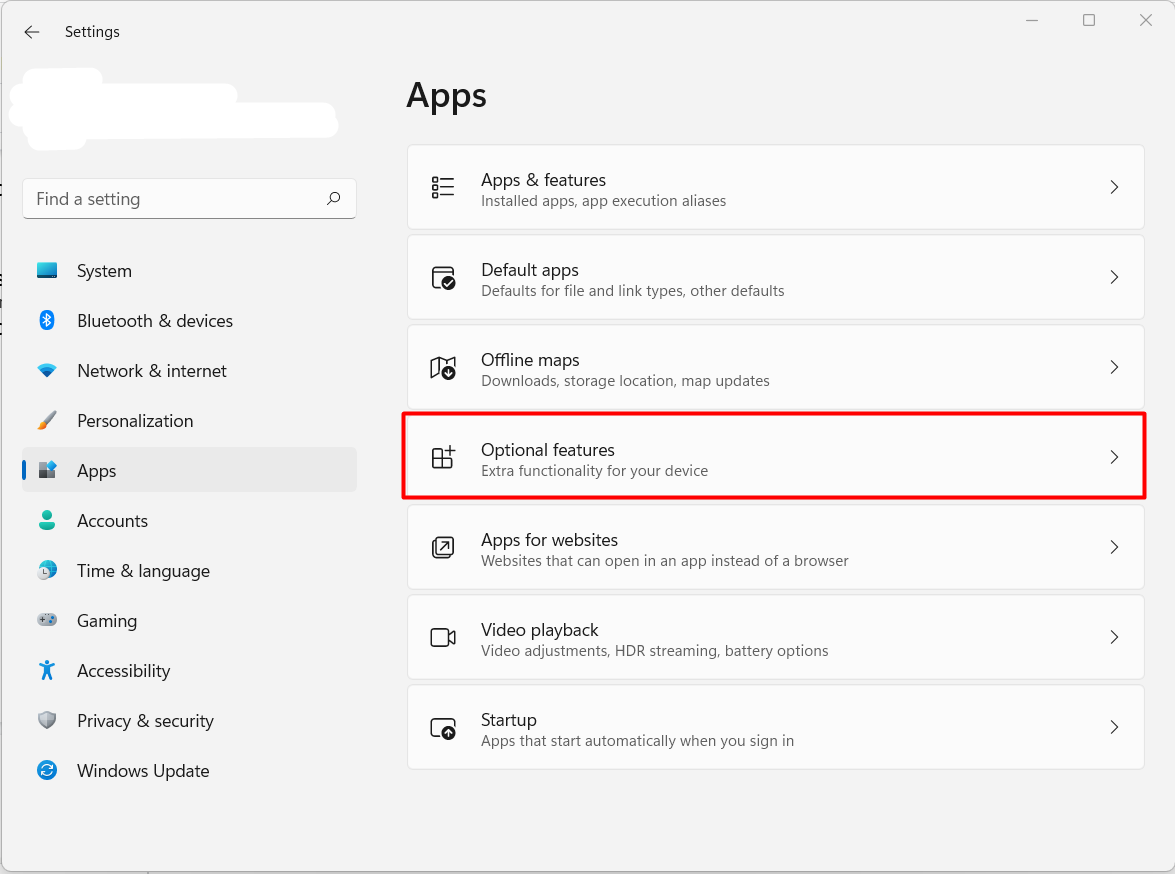
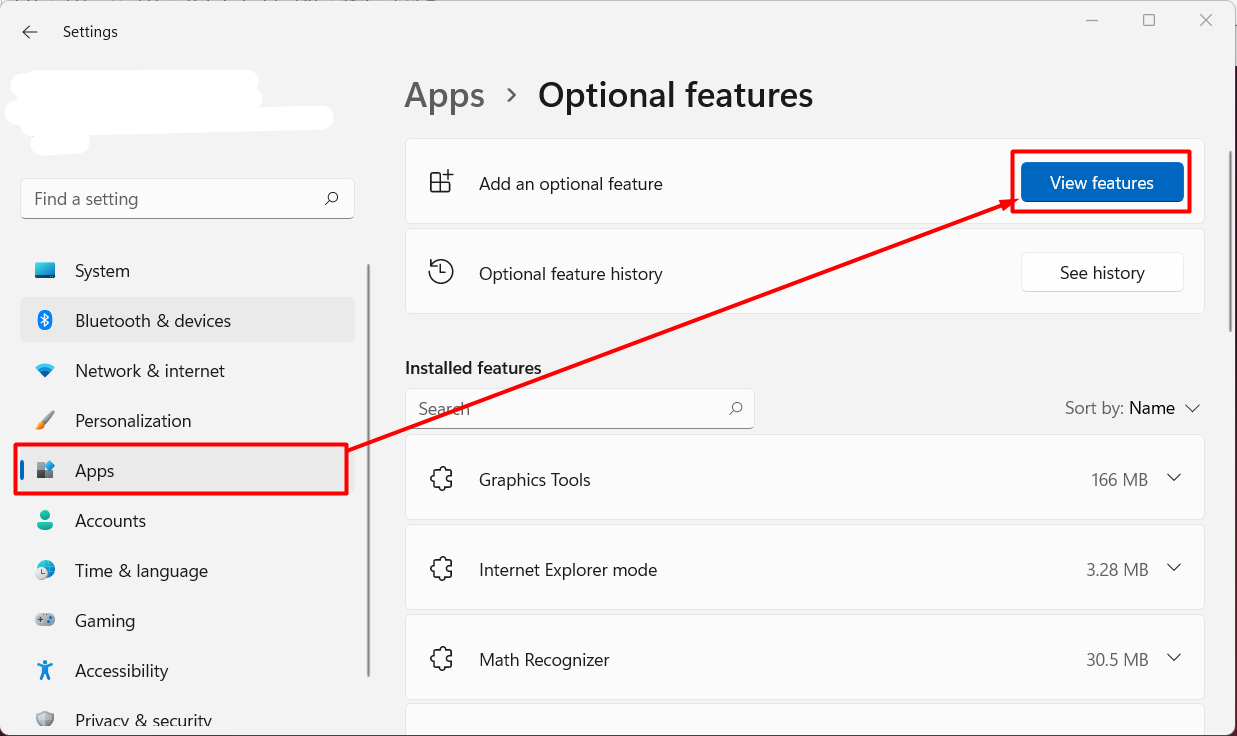
From the “Apps” setting panel, open “Optional features”:
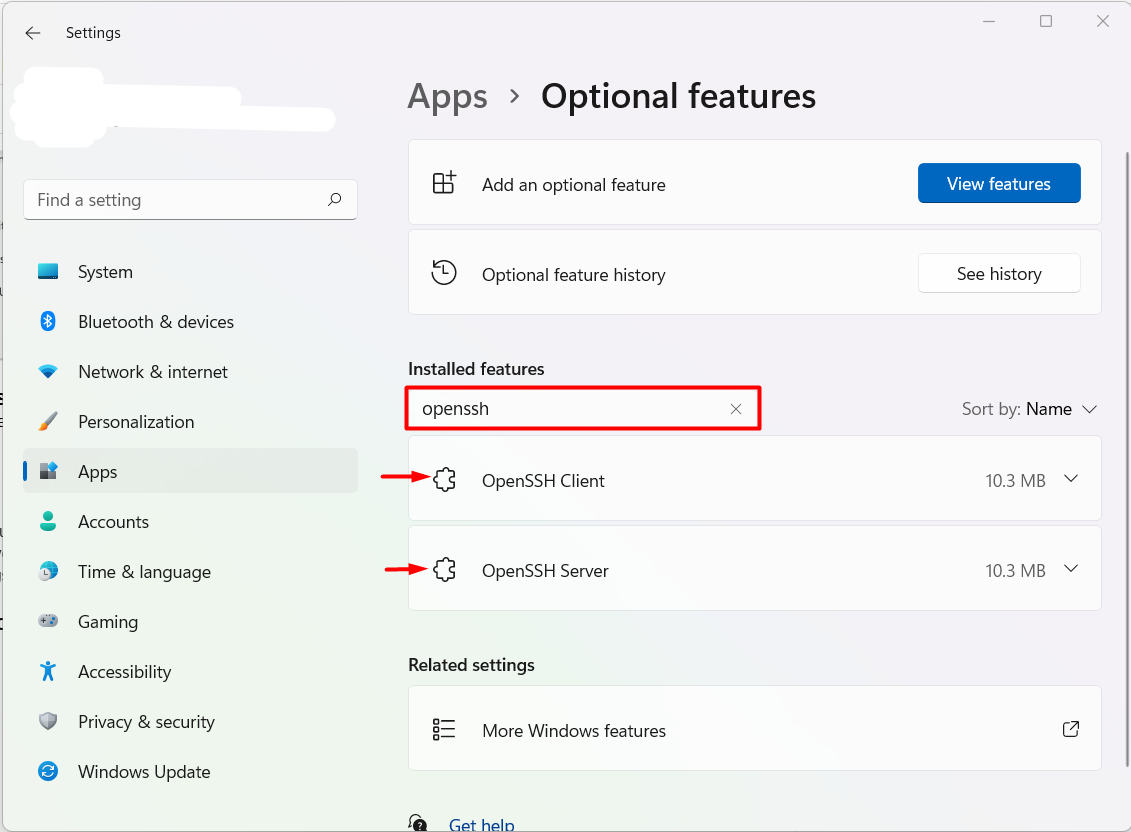
Type “OpenSSH” in the “Installed features” search menu. You can see that the OpenSSH client and server tools are already installed on the system:
By default, the OpenSSH client tool is pre-installed on Windows 11. But in any case, if OpenSSH is not pre-installed then you have to install it first. For this purpose, open the “Add Optional Feature” option from the “Apps” settings as follows:
And then write “OpenSSH” in the search box, if the OpenSSH client and server are not installed they will appear in the search result. As the OpenSSH client and server tools are installed on the system therefore the search result is empty.
Step 2: Open Command Prompt
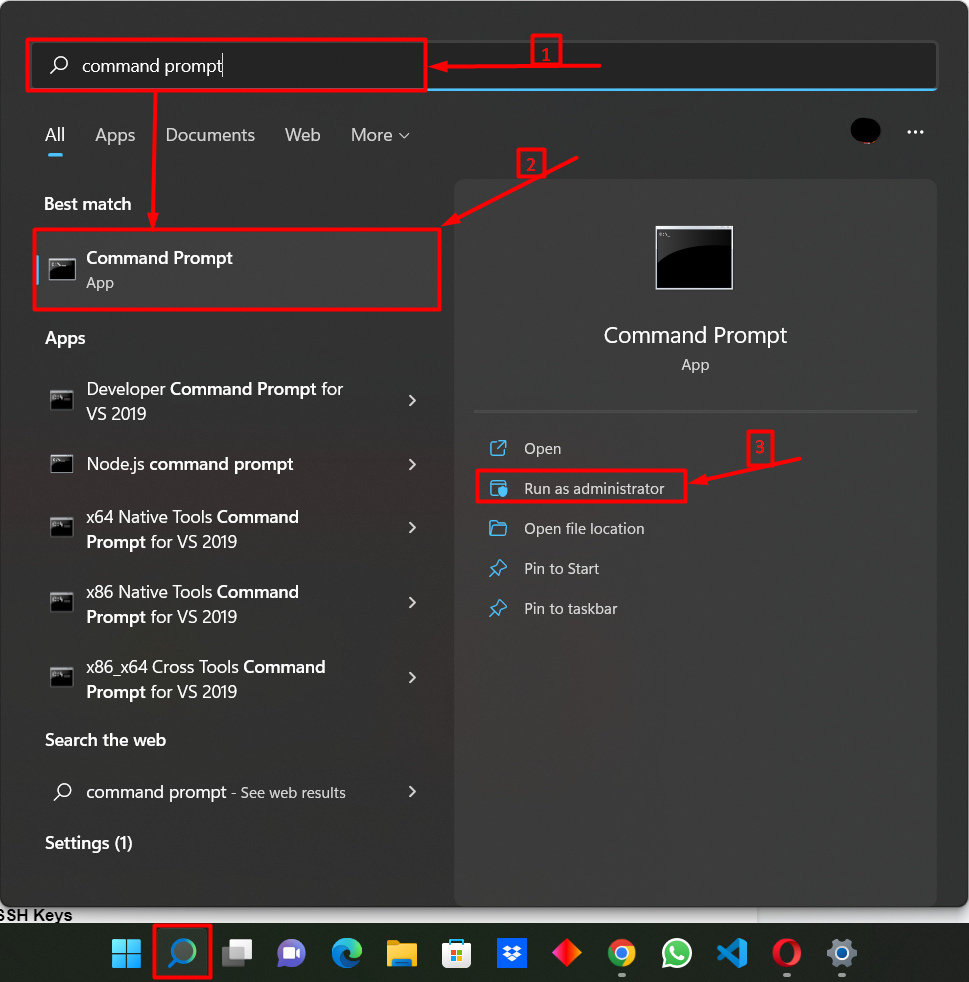
Click the “Search” icon from Windows 11 Desktop Taskbar to open the Windows Command Prompt. Type “command prompt” in the search bar and open Command Prompt as administrator from display results:
Step 3: Generate SSH Keys
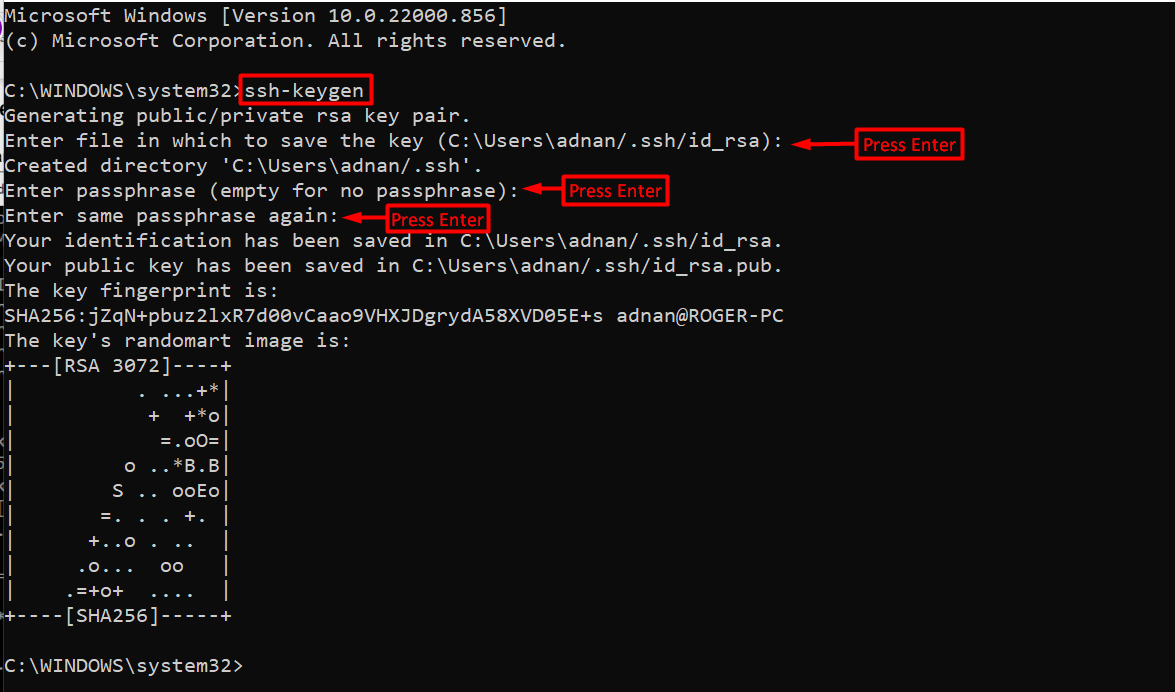
Use the “ssh-keygen” command to create an SSH key. You are required to provide the information below:
- Specify the place where you wish to save your SSH key or press the Enter key to continue with the default location.
- Add a passphrase or password, enter the passphrase and retype again for confirmation.
It is not necessary to enter a passphrase, you can continue without doing so by pressing the Enter key:
You can see that we have successfully created SSH keys in Windows11:
Step 4: Verify Key Creation
By default, SSH keys are stored in the “C:\Users\<username>\.ssh” directory. Visit the directory where you have saved the ssh key. There you will find “id_rsa” and “id_rsa.pub” files:
You can see that the SSH key is generated successfully in the “C:\Users\<username>\.ssh” directory.
We have illustrated the easiest approach to generate SSH keys in Windows11.
Conclusion
The SSH keys are used for security purposes for SSH users. To generate an SSH key in Windows11, your system must contain the OpenSSH client. If it is installed, then open Windows Command Prompt, and utilize the “ssh-keygen” command to create a new SSH key. After generating, the keys can be found in the “C:\Users\<username>\.ssh” directory. Here, this post has demonstrated the method to generate SSH keys on Windows 11.

