So, we have decided to perform some examples to wrap text data in the Latex table. Let’s start with opening the texmaker tool in Ubuntu shell for latex to create files.
Example 01:
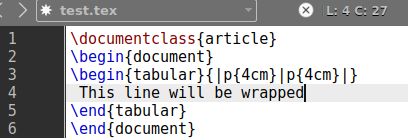
Let’s take an example to wrap table text in a latex document. You have to start the latex code document with the \documentclass command taking the argument {article} in it. The document should begin with the \begin to command and end with \end command taking the argument {document} in it.
As we have to work in the table, we need to use the {tabular} argument within the new \begin command. The tabular is used the same as a table as it results in data in the form of rows and columns.
Therefore, we have been using the p{width} for the width of our columns, i.e., 4cm. We haven’t been using the \table command here; it will not show the exact table format. Thus, we have added text data within the tabular command to wrap it in the 1 column.
After this, the tabular form of the text has been ended using the \end command. The \end{document| command is here to end the document format here. Let’s just save our code for now and execute it. It must be executed with the Latex version and opened in the DVI file format supported by the Latex.
\begin{document}
\begin{tabular}{|p{4cm}|p{4cm}|}
This line will be wrapped
\end{tabular}
\end{document}
The output for the above latex code shows the result as something like below. The text is written in the {tabular} format command is wrapped between two “|” lines of 4 cm each.
Example 02:
Let’s take a look at another example to wrap data in a table. To create a table, we need rows and columns in the code. It will be a little different from the above examples so as to its output. The old latex command will get updated again.
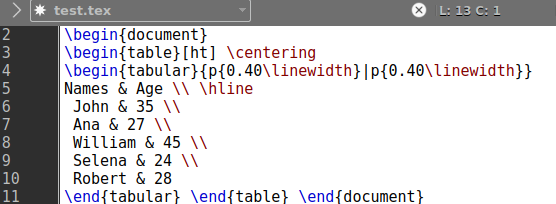
We have to use the \begin{table} command to give our data a look at a table. This command has been taking root value [ht] to add the table at the top of the page, and the \centering tag will be used to add it to the center of the page. The next comes to the \begin{tabular} command to break our table into columns.
We have been using two columns. Each horizontal line for a column is of “0.40” pt separated by the vertical line “|” using the “hline”. At the very next line on the text area, we have specified the column names as “Names” and “Age” while the “hline” command is here to put the vertical line between both to make them separate columns.
On the next 5 lines, we have been using names and ages of people as data to both columns separated by &. The \\ sign is here to add the line break after each row record. After that, the table has been ended with the \end{table} command. Our document is now completed and ready to be executed. Run it with the arrow of the taskbar.
\begin{document}
\begin{table}[ht] \centering
\begin{tabular}{|p{0.40\linewidth}|p{0.40\linewidth}}
Name & Age \\\hline
John & 35 \\
Ana & 27 \\
William & 45 \\
Selena & 24 \\
Robert & 28
\end{tabular} \end{table}
\end{document}
It gives us the output shown below in the image. We have two separate columns for this table, i.e., Names and Age. Both the columns contain 5 different values for 5 people.
If you don’t want to add the width of lines for the columns, you can avoid them as well. Instead, os using p{width}, we can make use of {l|r|c} within the tabular argument of \begin command. The “l” means left-justified column, “r” means right-justified column, and the “c” means centered columns. So, we are using “l” and “c” for the time being to see what happens.
\begin{document}
\begin{tabular}{l|c}
Name & Age \\\hline
John & 35 \\
Ana & 27 \\
William & 45 \\
Selena & 24 \\
Robert & 28
\end{tabular} \end{document}
The output for this command has been showing a little justified tabular form of the data, i.e., table in the DVI file format.
Example 03:
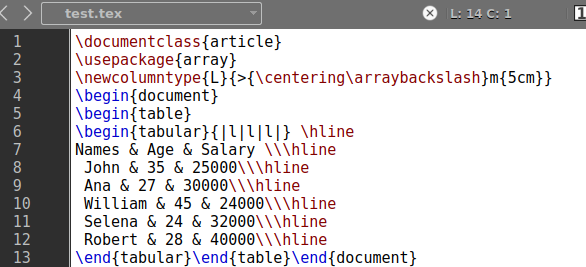
Let’s take a look at our last example for this article. We have been using the \usepackage{array} to make our tables look more like an array, i.e., appealing. We have been using the \newcolumntype command to add a new column of 5cm width of its line placed at the center of a page. The document was started after that.
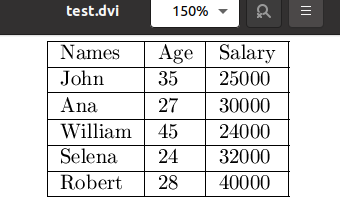
The \begin{table} and \begin{tabular} command have been used to start the table. All three columns will be left-justified as per the {|l|l|l|} specification. The line break will be given by \hline command at the end of each row. Three columns, Names, Age, and Salary, will be generated, taking 5 records within.
As we have used the “|” sign at the start and end tabular command specifications i.e. {|l|l|l|}, it will convert the whole table from 4 sides. Let’s simply execute our latex code first and run it after that.
\usepackage{array}
\newcolumntype{L}{>{\centering\arraybackslash}m{5cm}}
\begin{document}
\begin{table}
\begin{tabular}{|l|l|l|}
Name & Age $ Salary \\\hline
John & 35 & 25000 \\\hline
Ana & 27 & 30000\\\hline
William & 45 & 24000 \\\hline
Selena & 24 & 32000 \\\hline
Robert & 28 & 40000 \\\hline
\end{tabular} \end{table} \end{document}
This code displays the full-formatted table on our DVI latex file format.
Conclusion:
Latex is all about manipulating documents using different commands in its texmaker editor. We have tried our best to give you the best examples in this article to make you understand how the data in a table can be wrapped using latex. We have used the \begin{table} and \begin{tabular} commands for this purpose.


