TeamViewer is used to remotely access your desktop, laptop, and other devices from anywhere around the world. TeamViewer can also be used to screen share your computer with other people, transfer files, and many more.
In this article, I will show you how to install TeamViewer on Raspberry Pi 4 running the Raspberry Pi OS. I will also show you how to configure TeamViewer for remotely accessing the Raspberry Pi 4 over the internet. So, let’s get started.
Table of Contents:
- Downloading TeamViewer
- Installing TeamViewer on Raspberry Pi OS
- Starting TeamViewer
- Remotely Access Raspberry Pi 4 via TeamViewer
- Allow Others to Remotely Access the Raspberry Pi 4 via TeamViewer
- Conclusion
- References
Downloading TeamViewer:
You can download the TeamViewer installer package for Raspberry Pi from the official website of TeamViewer.
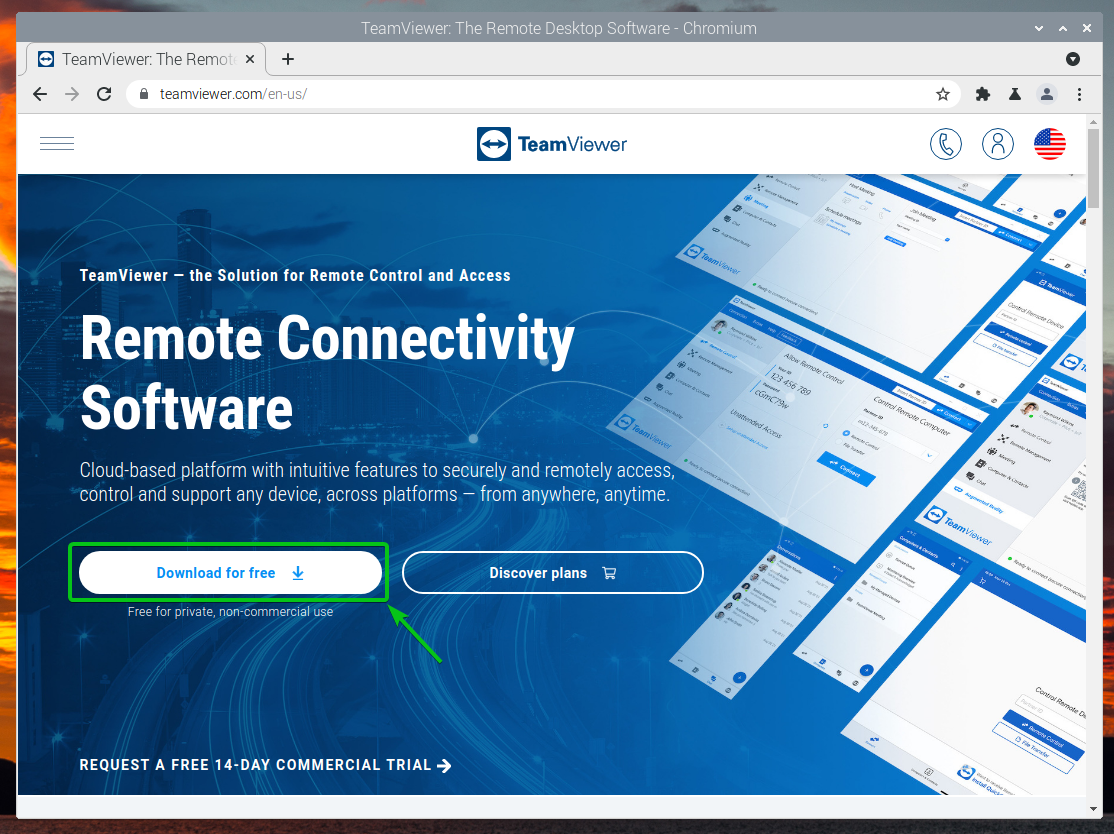
First, navigate to the official website of TeamViewer from your favorite web browser.
Once the page loads, click on Download for free, as marked in the screenshot below.
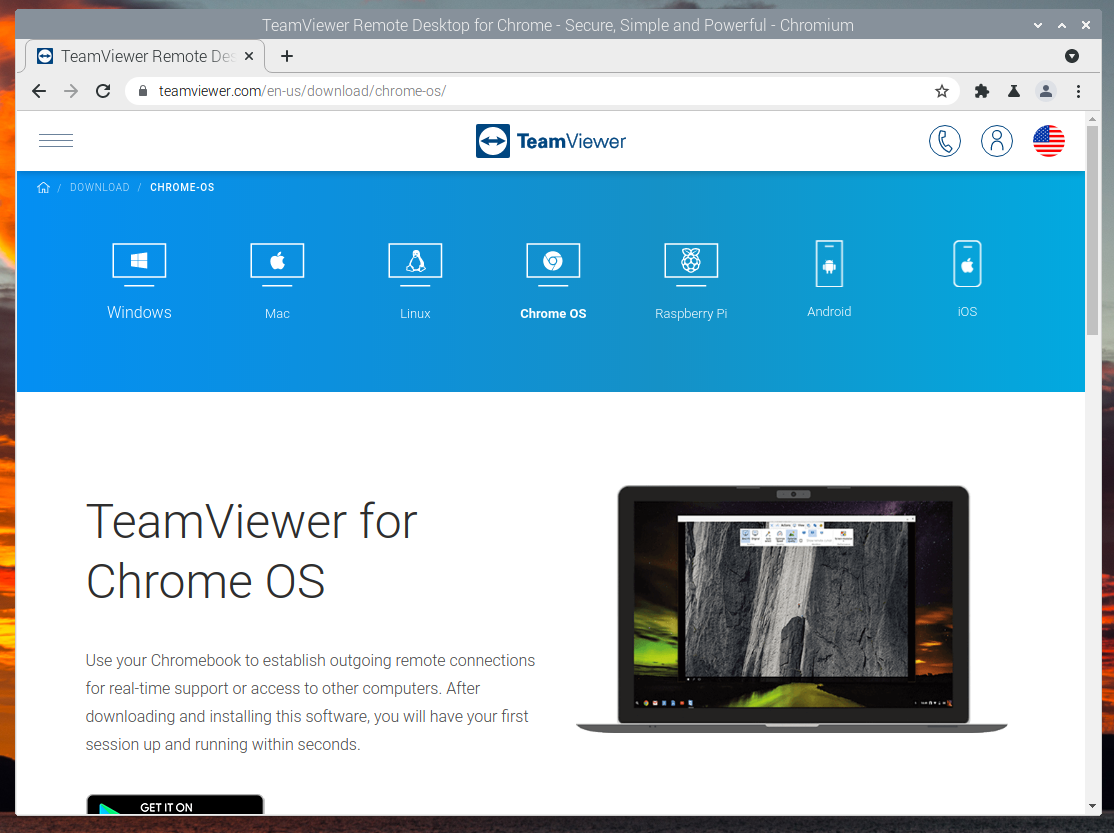
TeamViewer will redirect you to the following page.
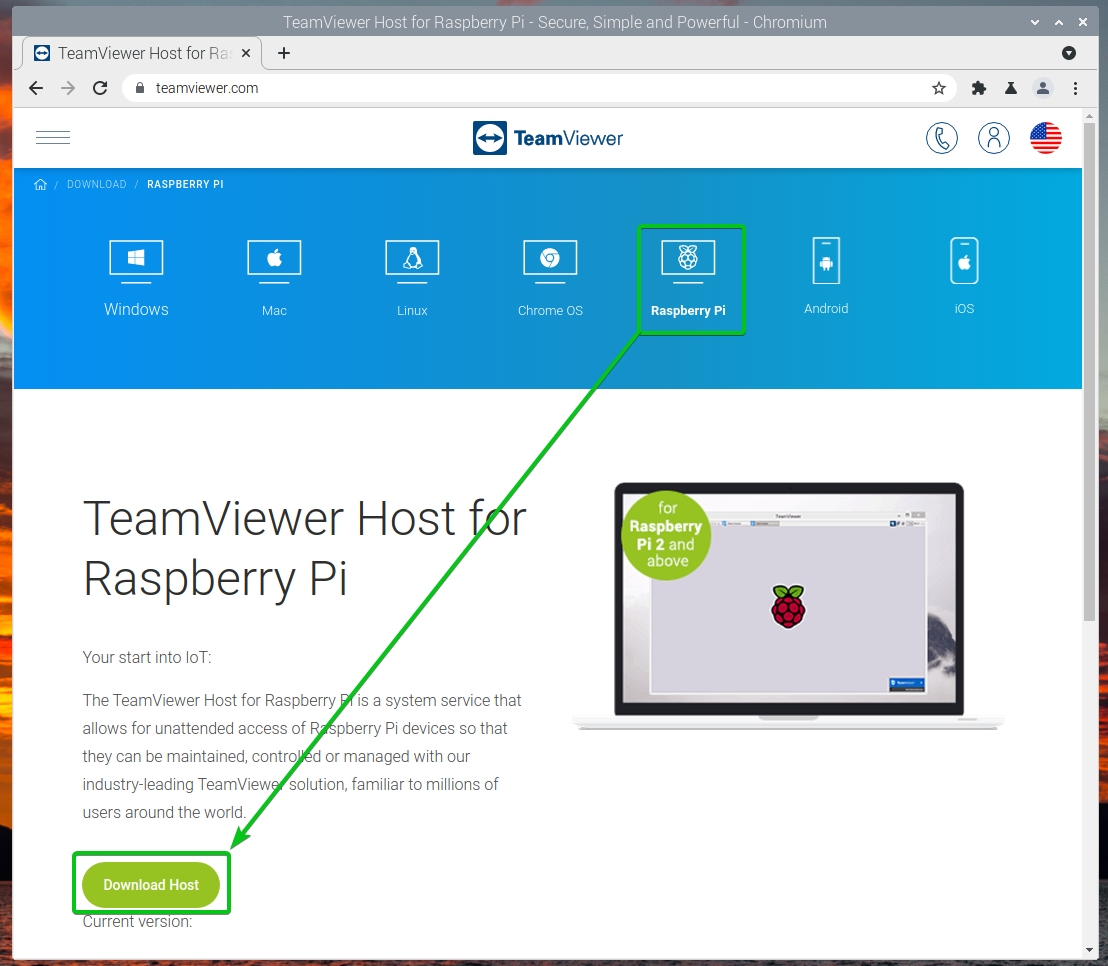
Select Raspberry Pi as the operating system and click on Download Host as marked in the screenshot below.
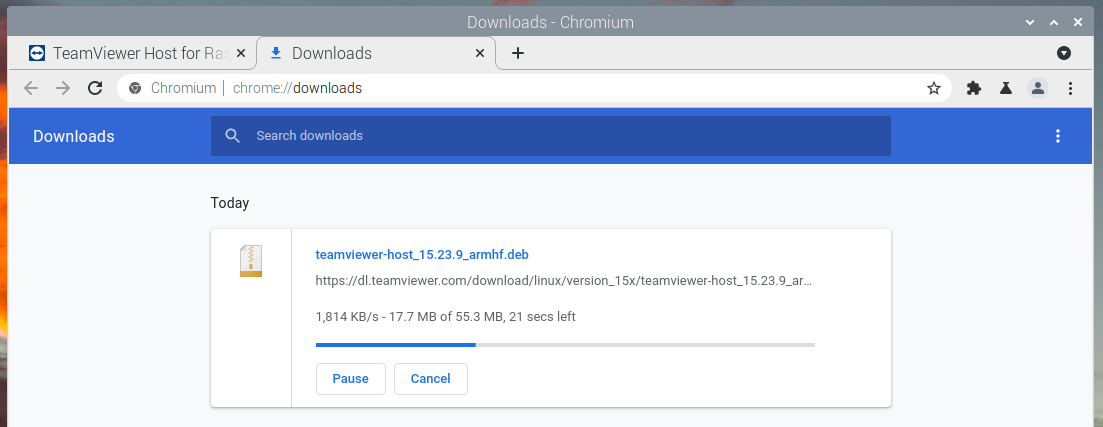
Your browser should start downloading the TeamViewer installer package. It may take a few seconds to complete.
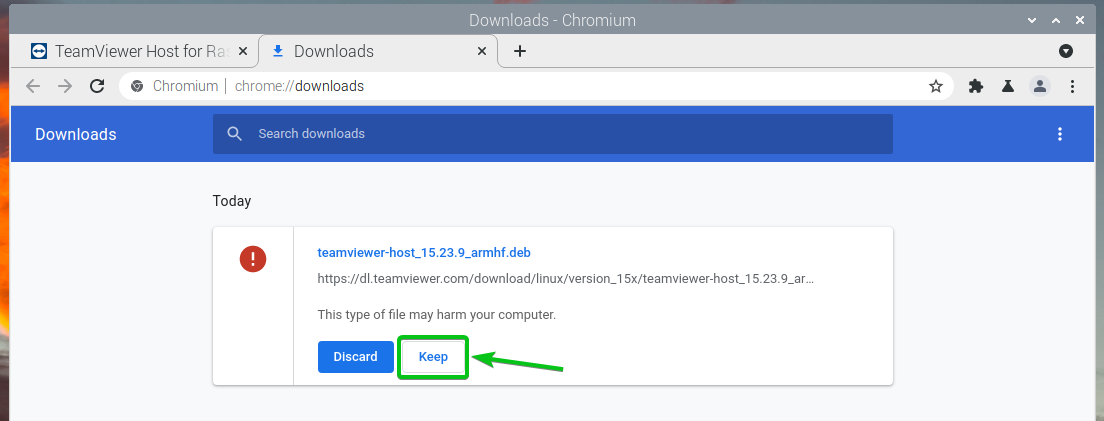
Once the TeamViewer installer is downloaded, click on Keep.
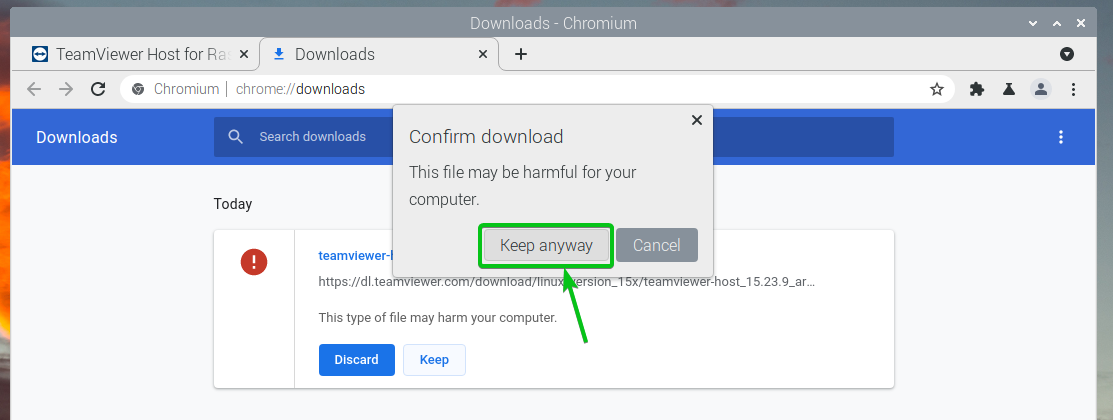
Click on Keep anyway.
The TeamViewer installer package should be ready to use.
Installing TeamViewer on Raspberry Pi OS:
In this section, I will show you how to install TeamViewer on Raspberry Pi OS using the TeamViewer installer package that you’ve just downloaded from the official website of TeamViewer.
Navigate to the ~/Downloads directory as follows:
The TeamViewer installer package should be in the ~/Downloads directory.
Before installing the TeamViewer installer package, update the APT package repository cache with the following command:
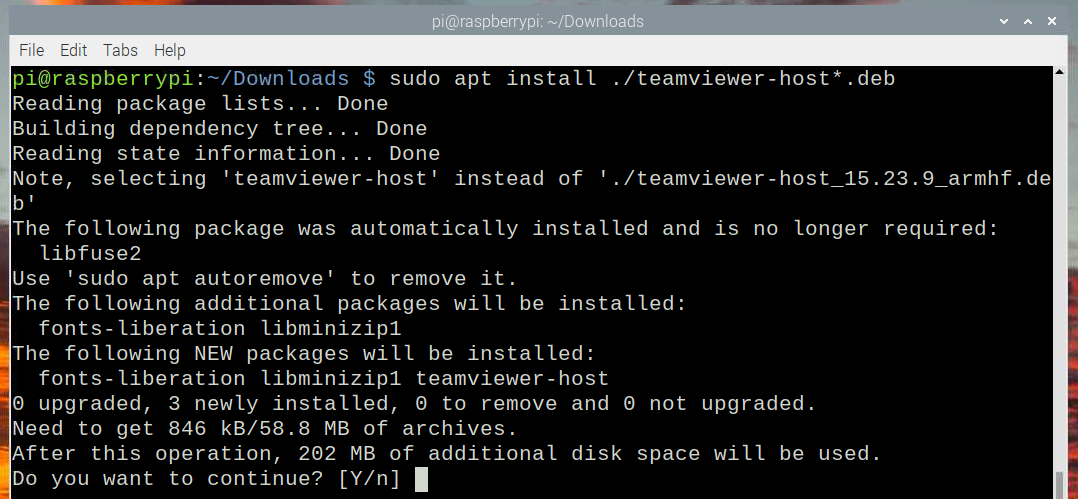
Now, install the TeamViewer installer package with the following command:
To confirm the installation, press Y and then press <Enter>.
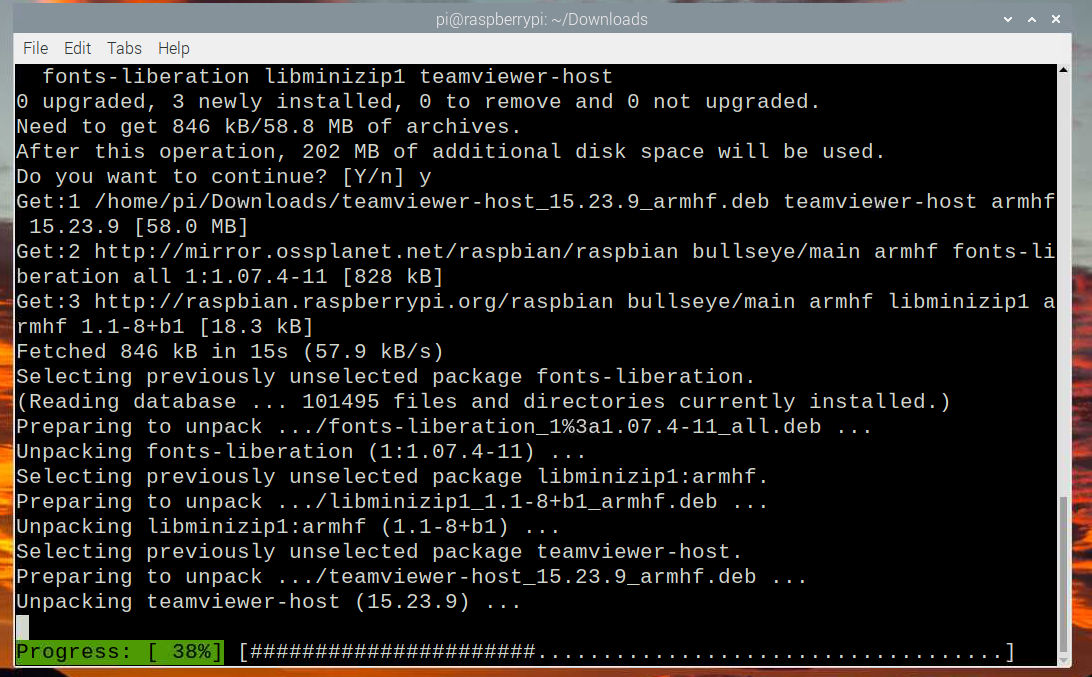
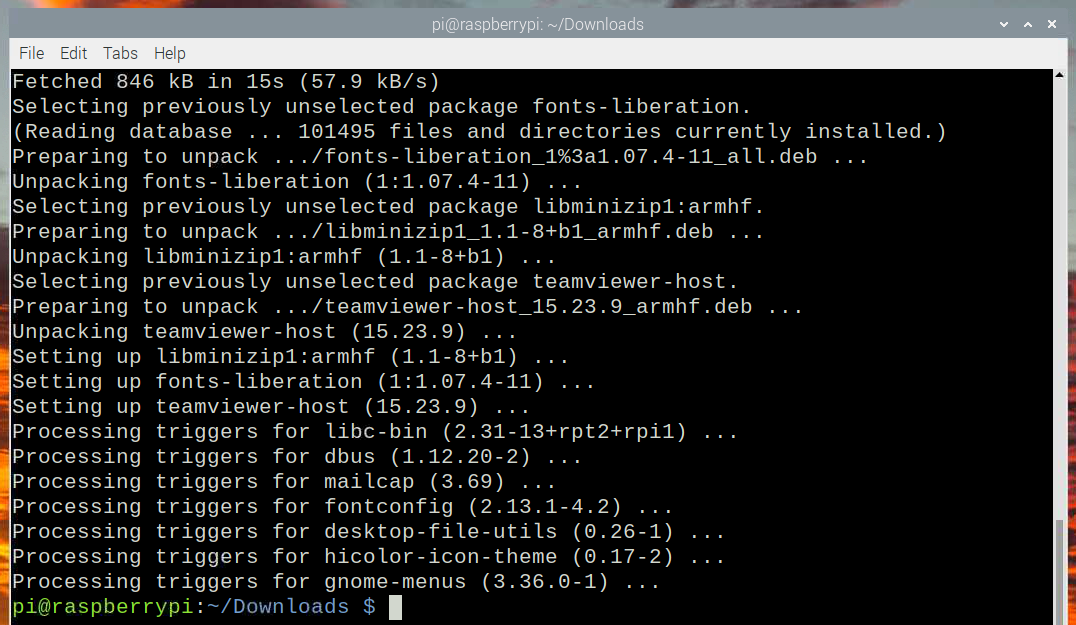
TeamViewer is being installed. It may take a while to complete.
At this point, TeamViewer should be installed.
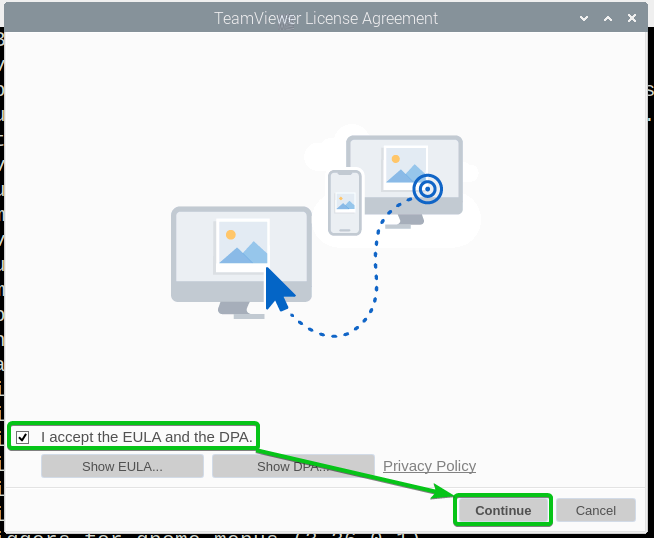
Once TeamViewer is installed, you will be asked to accept the TeamViewer license.
To accept the TeamViewer license agreement, check the I accept the EULA and the DPA checkbox and click on Continue as marked in the screenshot below.
Starting TeamViewer:
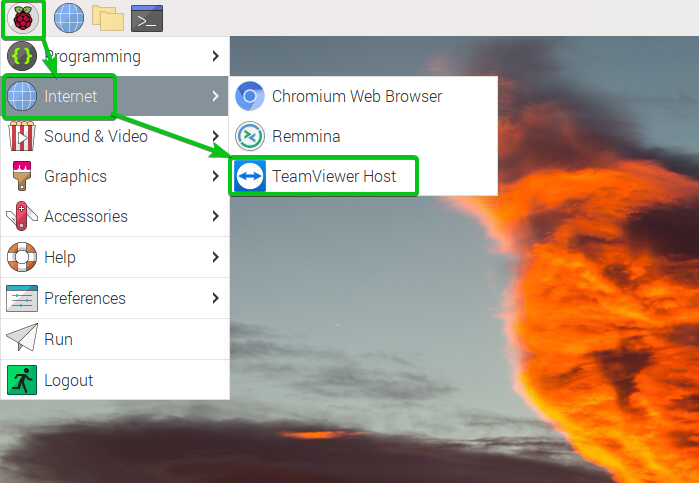
Once TeamViewer is installed, you can start it from the Application Menu > Internet > TeamViewer Host, as shown below.
TeamViewer should start.
Click on Grant Easy Access.
Now, you will have to log in to your TeamViewer account.
If you don’t have a TeamViewer account, click on Create account as marked in the screenshot below.
A browser window should open the TeamViewer Sign Up page. You can create your TeamViewer account from here.
Once you have a TeamViewer account, type in the TeamViewer login email and password in the TeamViewer app and click on Assign as marked in the screenshot below.
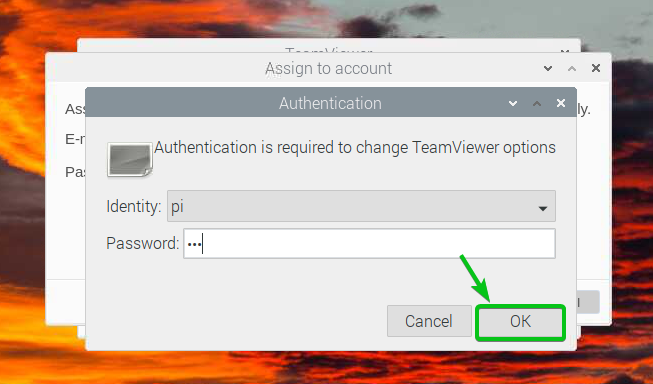
Type in the login password of your Raspberry Pi and click on OK.
TeamViewer should be ready to use.
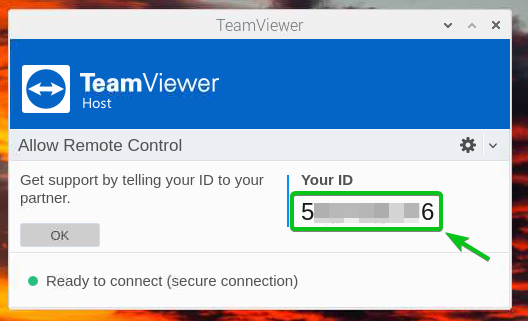
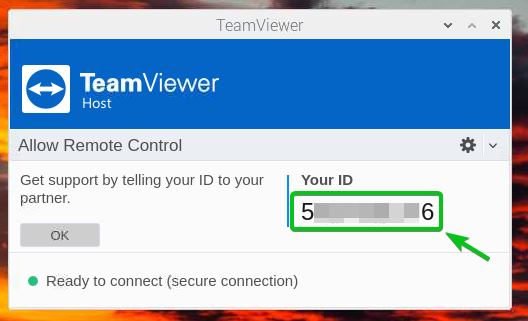
Your TeamViewer ID should also be displayed in the app, as marked in the screenshot below. You can use it to access your Raspberry Pi remotely from anywhere in the world.
Remotely Access Raspberry Pi 4 via TeamViewer:
This section will show you how to access your own Raspberry Pi 4 via TeamViewer remotely.
You can remotely access your Raspberry Pi 4 via TeamViewer from any computer. All you have to do is install TeamViewer on your computer and log in to your TeamViewer account.
Start TeamViewer, click on > Sign in to TeamViewer, and log in to your TeamViewer account from there.
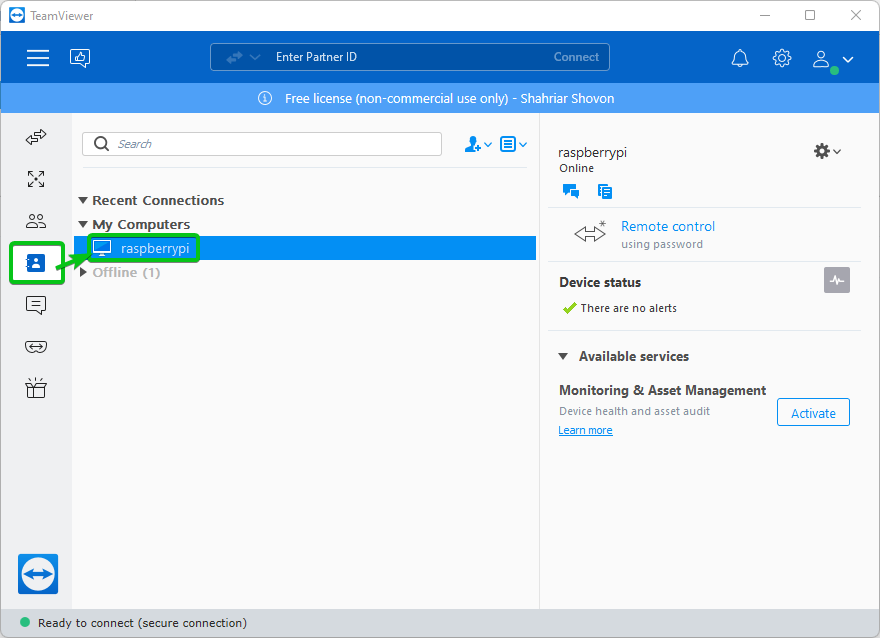
Once you log in to your TeamViewer account, navigate to the tab, and you will find your Raspberry Pi 4 in the My Computers section as marked in the screenshot below.
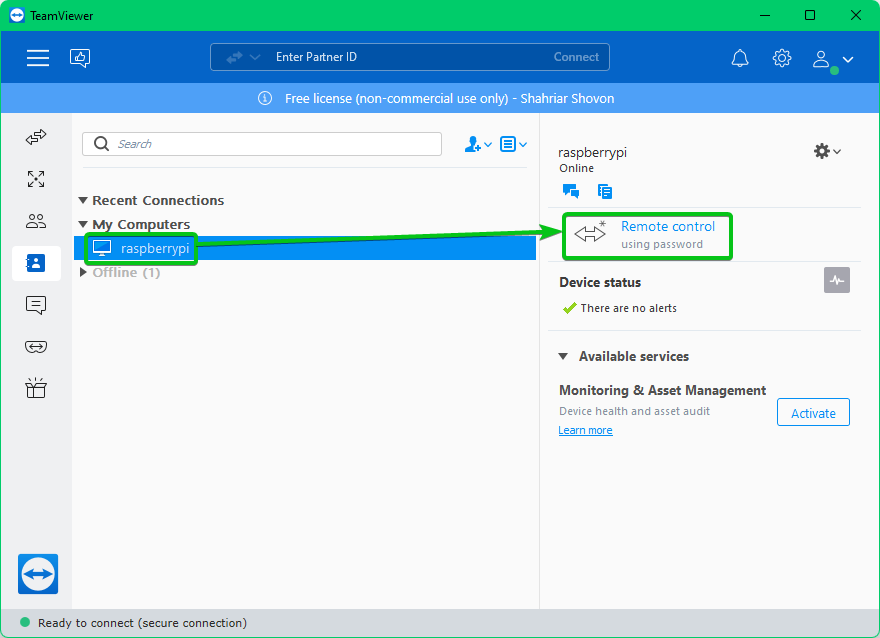
Select it and click on Remote control as marked in the screenshot below.
TeamViewer should connect to your Raspberry Pi 4 remotely, as you can see in the screenshot below. Now, you can use your Raspberry Pi 4 as usual.
Allow Others to Remotely Access the Raspberry Pi 4 via TeamViewer:
In this section, I will show you how to configure TeamViewer on your Raspberry Pi 4 with a password so that you can allow other people to access the Raspberry Pi 4 without needing to log in to your TeamViewer account.
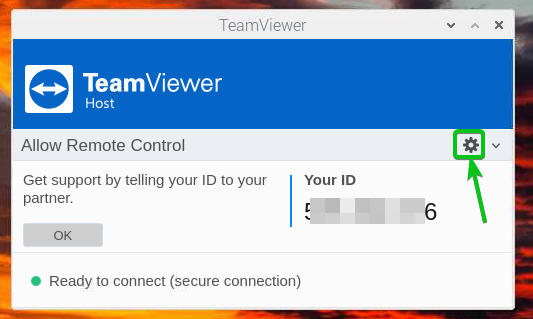
Click on the gear icon () as marked in the screenshot below.
TeamViewer options window will be opened.
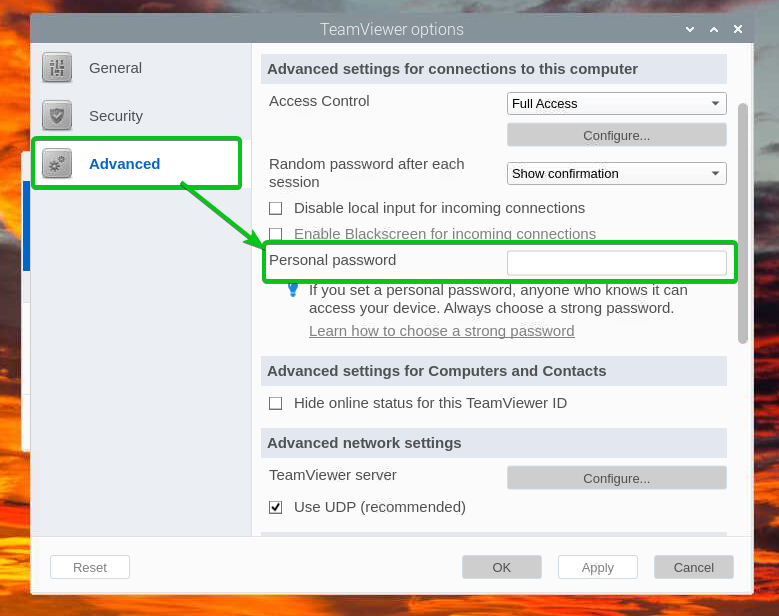
You will find the Personal password section in the Advanced tab.
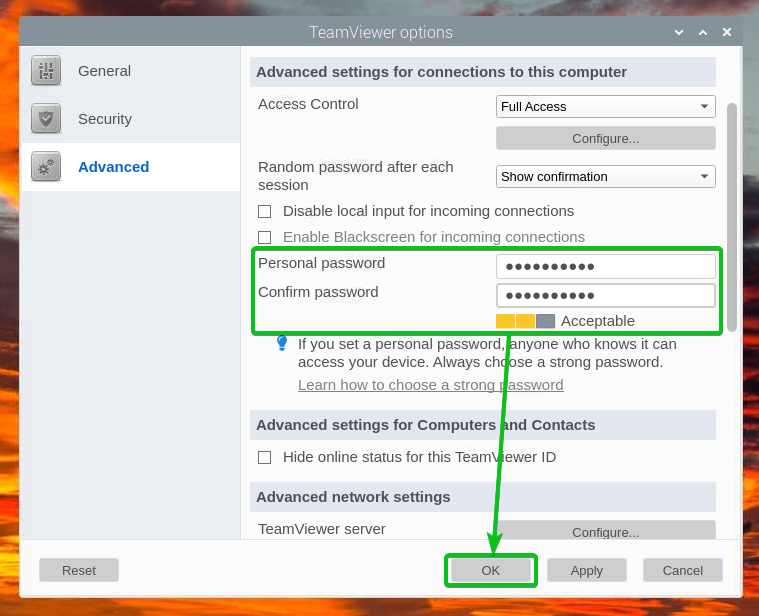
Type in your desired access password there and click on OK.
The TeamViewer access password should be set. Other people will be able to access the Raspberry Pi 4 if you share your TeamViewer ID and access password with them.
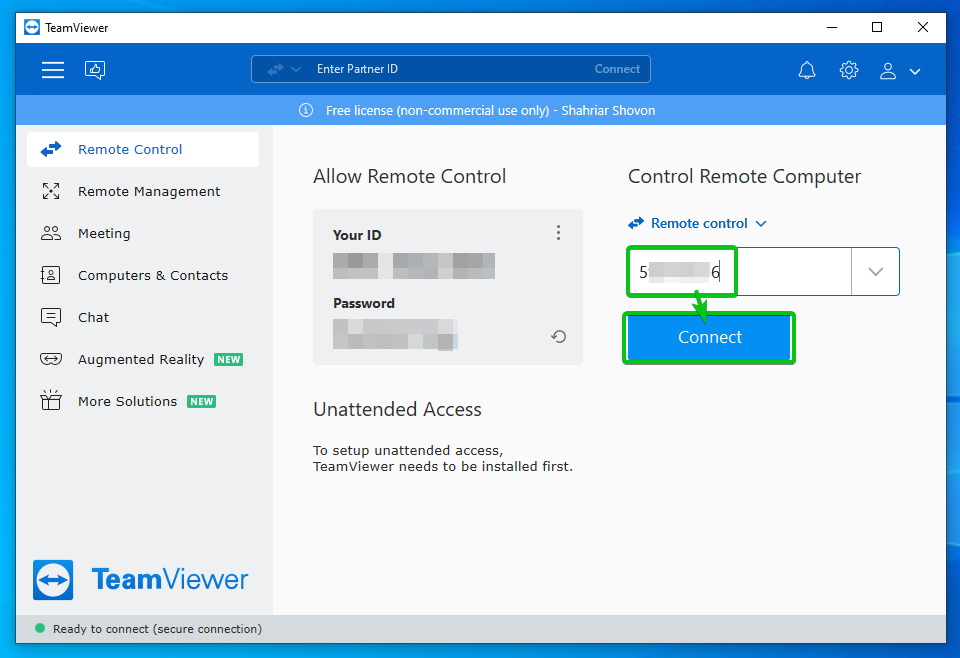
To access the Raspberry Pi 4 using the access password, open TeamViewer on your computer and try to connect to your Raspberry Pi 4 using its TeamViewer ID.
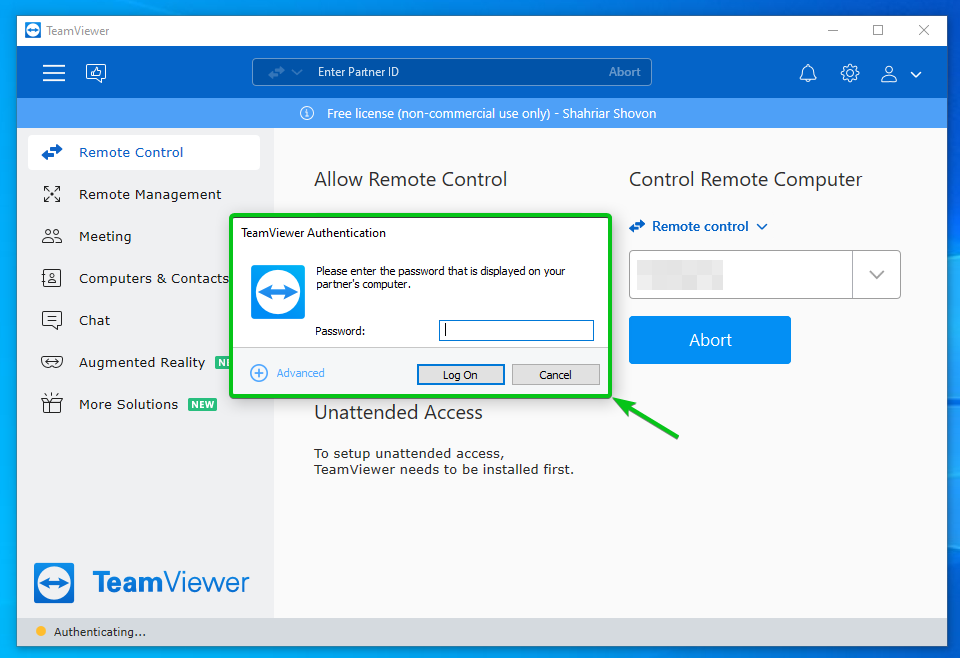
You will be asked to enter the access password of your Raspberry Pi 4.
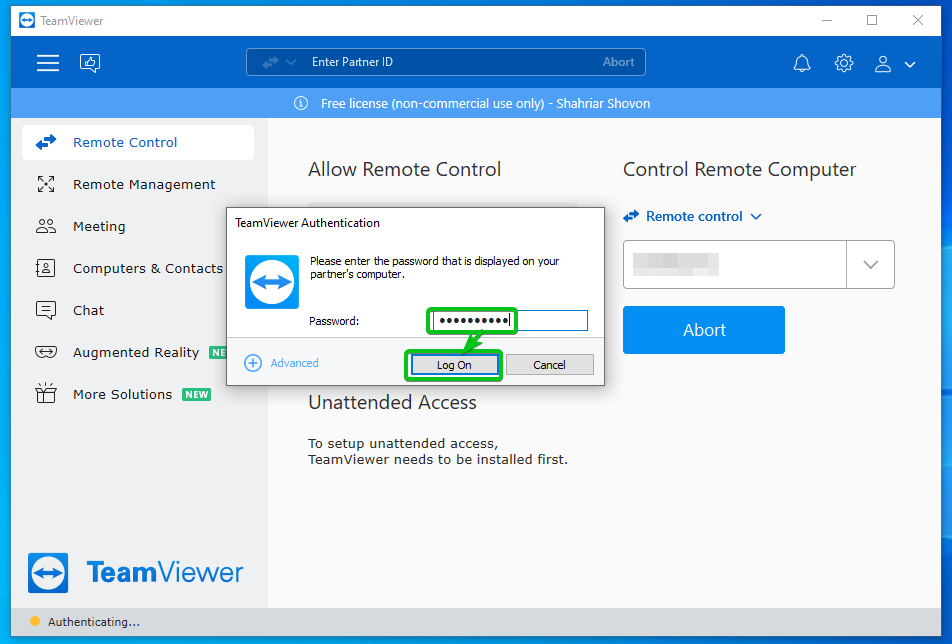
Type in the TeamViewer access password of your Raspberry Pi 4 and click on Log On.
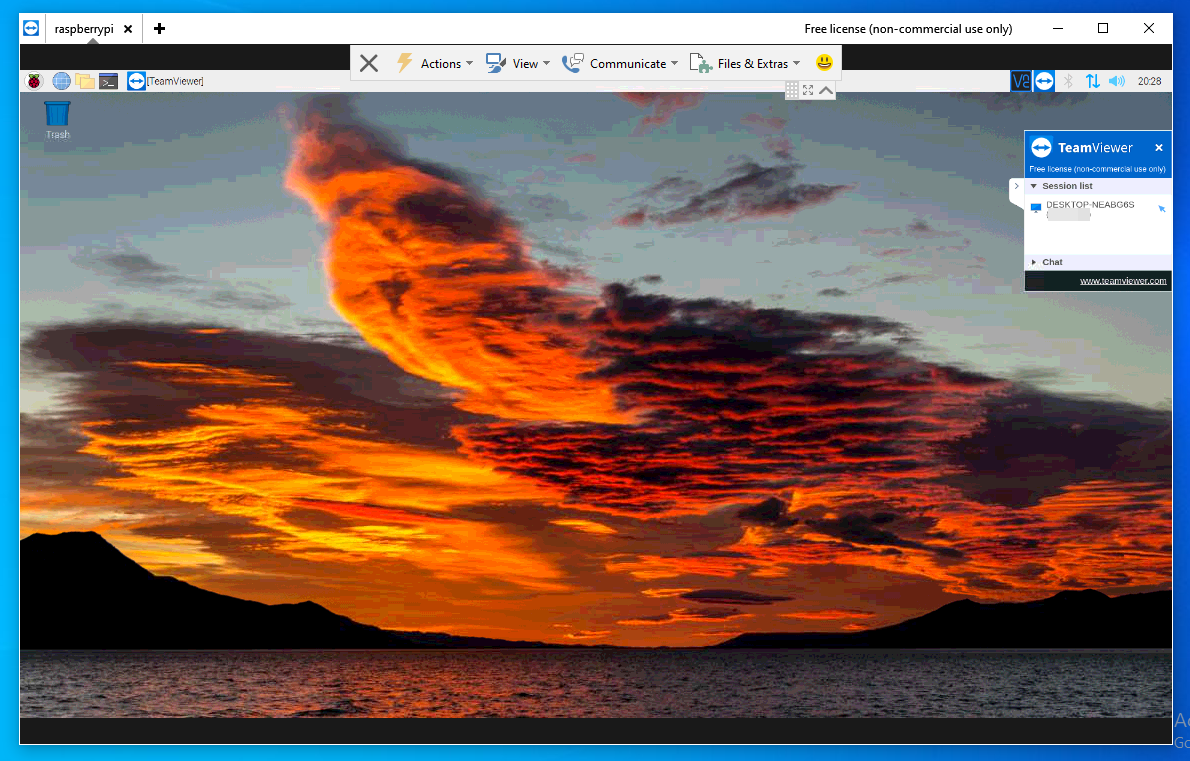
TeamViewer should connect to your Raspberry Pi 4 remotely, as you can see in the screenshot below.
Conclusion:
This article shows you how to download and install TeamViewer on Raspberry Pi 4 running the Raspberry Pi OS. I have also shown you how to configure TeamViewer for remotely accessing the Raspberry Pi 4 over the internet.
References:
[1] TeamViewer – The Remote Control and Access Solution for Anyone

