This blog will demonstrate how to put programs or applications to sleep on Windows.
How to Put Programs to Sleep On Windows 10?
To put the programs to sleep on Windows 10 to enhance the system performance and reduce the load from the processor, utilize the listed methods:
- Method 1: Put System Programs To Sleep On Windows Using Privacy Settings
- Method 2: Put System Programs To Sleep On Windows Using Task Manager
- Method 3: Put System Programs To Sleep On Windows Using Services App
Method 1: Put System Programs to Sleep On Windows 10 Using Privacy Settings
To put the program to sleep, users can visit the “Background apps” settings panel from System “Privacy” Settings. For this purpose, go through the given instructions.
Step 1: Open System Settings
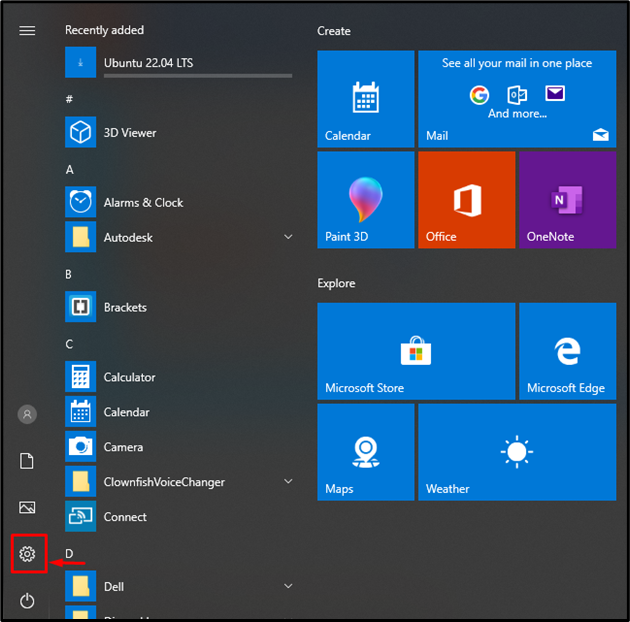
First, launch the System settings from the Start menu by clicking on highlighted “Gear” icon:
Step 2: Navigate the Privacy Settings
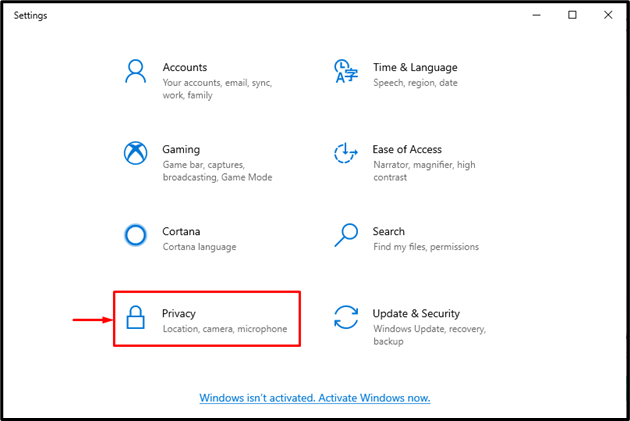
Next, from the “Settings” menu, navigate to the “Privacy” settings:
Step 3: Put All Programs to Sleep
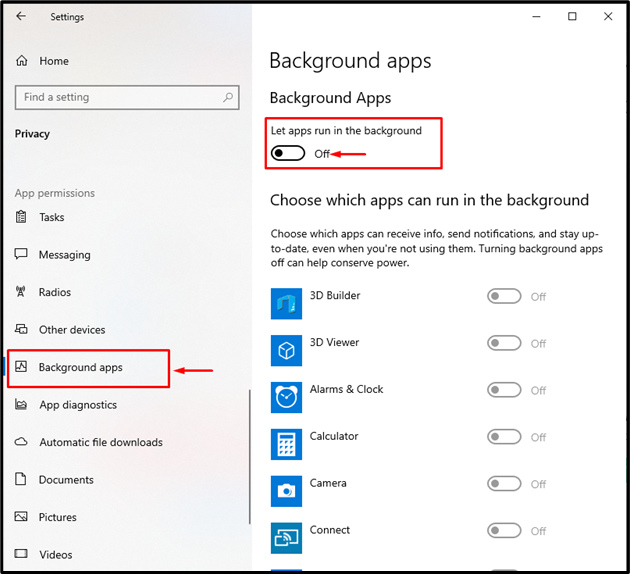
To put all programs to sleep, turn off the “Lets apps run in the background” toggle under the “Background apps” setting panel:
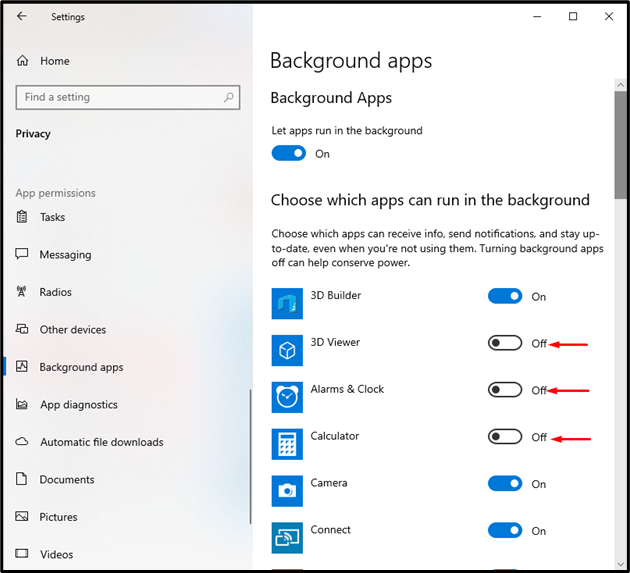
Alternatively, users can put the selective background apps to sleep by turning off their associated toggles:
Method 2: Put System Programs to Sleep On Windows 10 Using Task Manager
Usually, administrative users check and maintain system services through Task manager. To put the backend applications or unused applications to sleep or disable them, utilize the Task manager Windows application.
Look at the provided instructions to put the Windows program to sleep.
Step 1: Open Task Manager
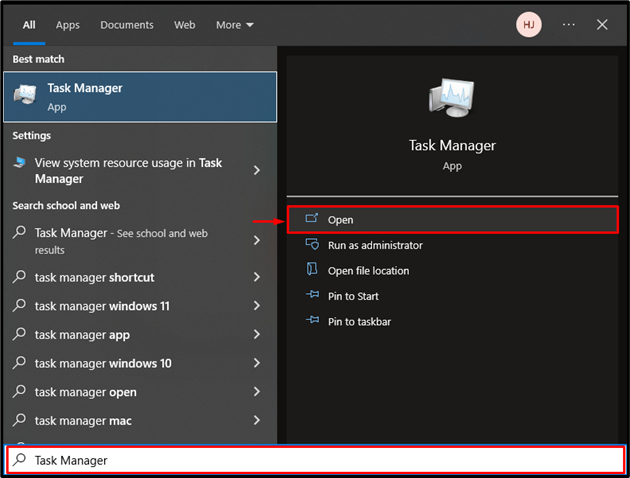
From the “Startup” menu, search for “Task Manager” to launch the Task Manager app:
Step 2: Stop Unused Apps or Services
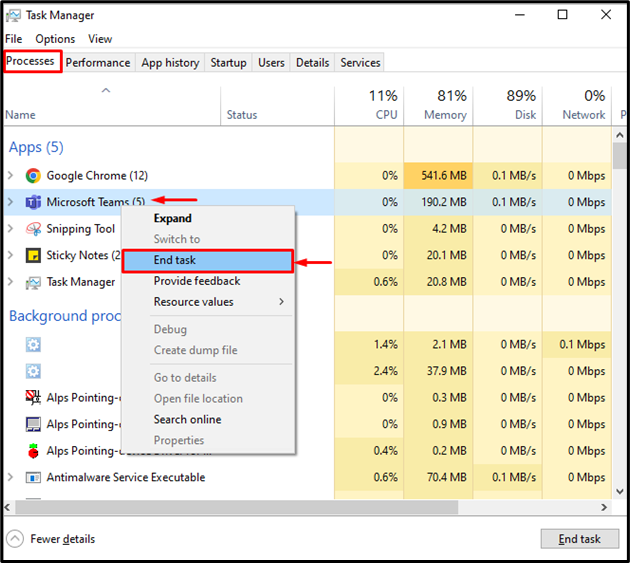
From the “Processes” menu, right-click the process you want to stop, then hit the “End Task” option to sleep the process:
Step 3: Sleep Startup Programs and Applications
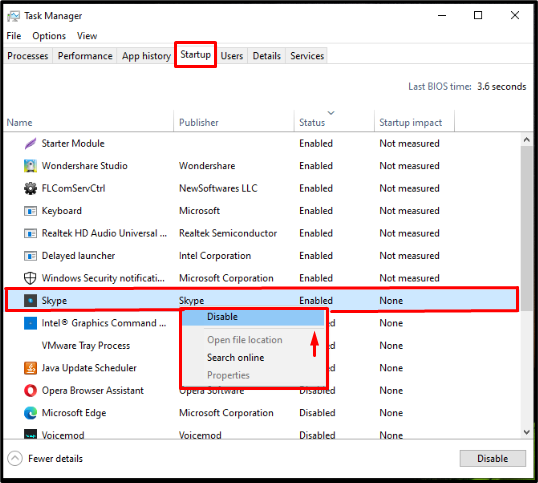
To sleep the Startup programs, navigate to the “Startup” menu. Then, right-click on the application you want to disable and hit the “Disable” option from the displayed context menu:
Method 3: Put System Programs to Sleep On Windows 10 Using Services App
To disable Windows programs that are not required by users, you can also use the “Services” app. To do so, utilize the mentioned steps.
Step 1: Launch Services App
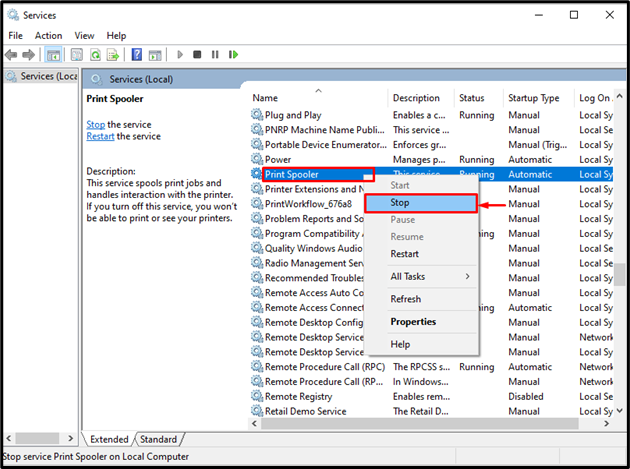
From the Start menu, launch the Services app that is used to manage Windows services:
Step 2: Stop Unused Service
Select and right-click the service that needs to be stopped. Then, press the “Stop” option to stop the service:
Here we go! We have taught you how to put the program to sleep on Windows.
Conclusion
To stop the programs in Windows Operating System, users can use the “Privacy” settings, Task Manager app, or Services app. To stop the background application, first navigate to the “Privacy” settings under the Windows Settings, then from the “Background apps” menu, users can stop all background apps or some selective apps. Task Manager and Services apps are also used to kill processes and disable Startup applications. This write-up has demonstrated the method to sleep or disable the programs on Windows.

