Synology recently released DSM 7 – a new version of the Disk Station Manager software for the Synology NAS devices.
In this article, I am going to show you how to upgrade the DSM software of your Synology NAS from DSM 6 to DSM 7. So, let’s get started.
Table of Contents
- Is Your NAS Compatible with DSM 7?. 1
- Upgrading to DSM 7
- Upgrading to DSM 7 Manually
- Conclusion
- References
Is Your NAS Compatible with DSM 7
Before you try to upgrade the DSM software of your Synology NAS device, you should check whether your NAS is compatible with DSM 7.
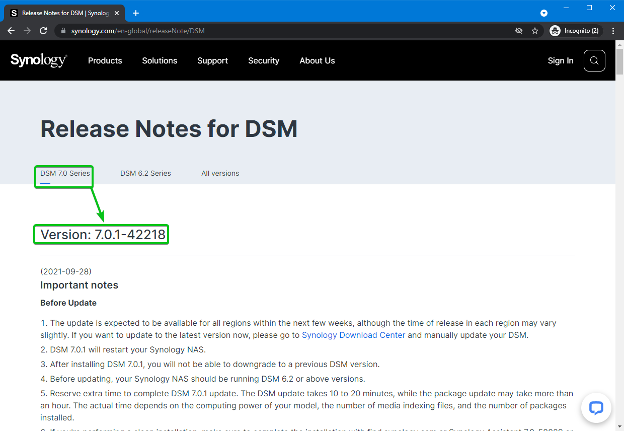
To check whether your NAS device is compatible with DSM 7, visit the webpage Release Notes for DSM | Synology Inc. with your favorite web browser.
Once the page loads, check the release note for the DSM 7.x.y.
Scroll down a little bit. To run DSM 7 on your NAS, it must have at least 1 GB of memory installed.
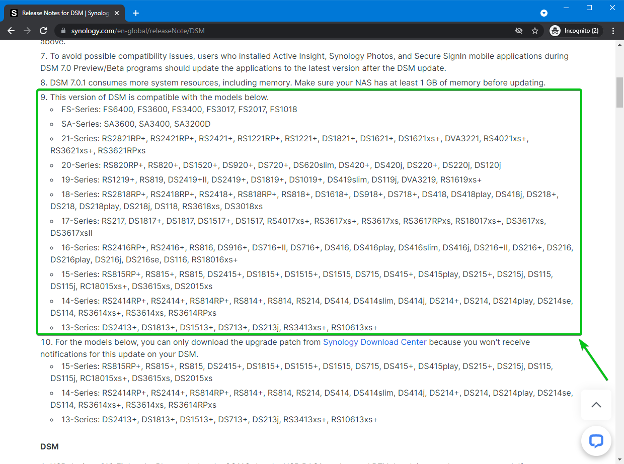
If you scroll down a little bit, you should see a list of DSM 7 compatible NAS models. Make sure that your NAS model is on the compatibility list.
Upgrading to DSM 7
If you have a DSM 7 compatible NAS device, you should be able to update to DSM 7 from the Control Panel app.
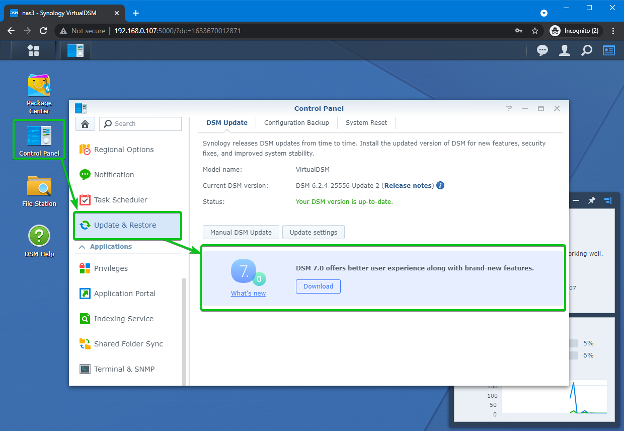
First, open the Control Panel app and navigate to the Update & Restore section.
In the DSM Update tab, you should see a Download button to upgrade the DSM software of your NAS to DSM 7.
Click on the Download button.
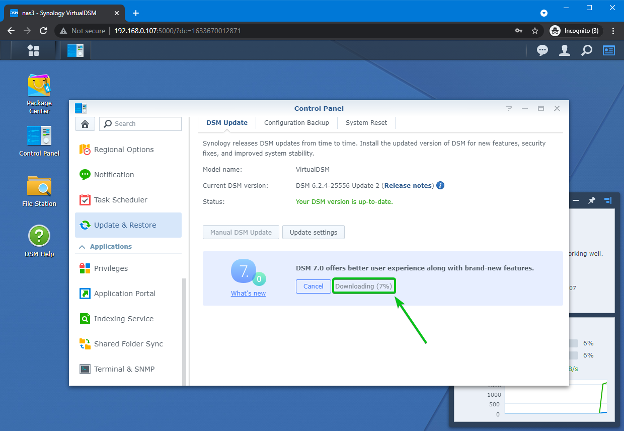
Your NAS should start downloading the required DSM 7 update file. It may take a while to complete.
Once the DSM 7 update file is downloaded, you should see an Upgrade button as marked in the screenshot below. Click on the Upgrade button.
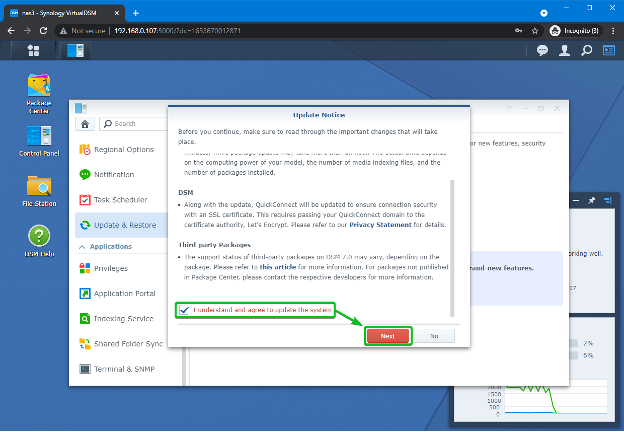
DSM 7 Update Notice should be displayed.
Scroll down, check the I understand and agree to update the system checkbox, and click on the Next button as marked in the screenshot below.
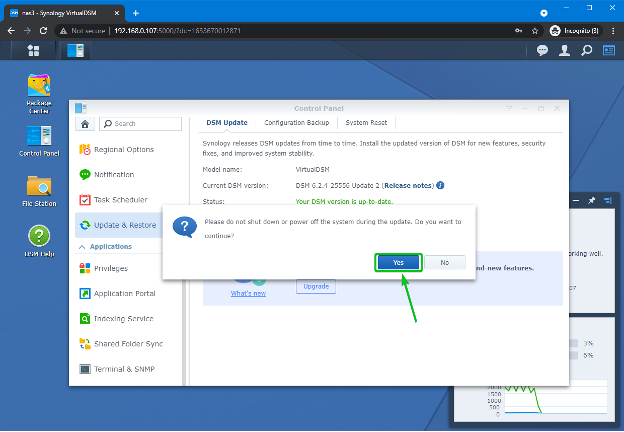
Click on Yes.
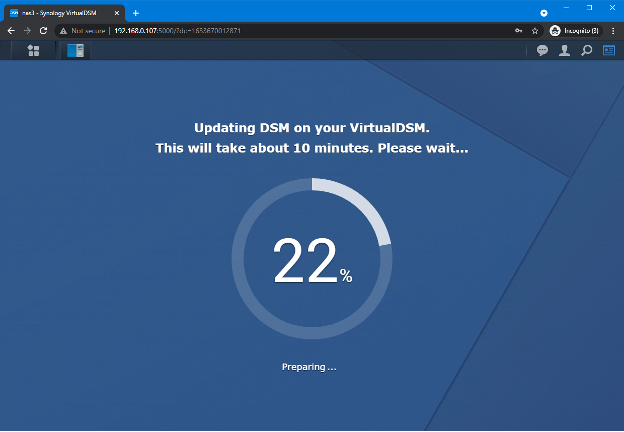
Your NAS should start the DSM software update process. It may take a few minutes to complete.
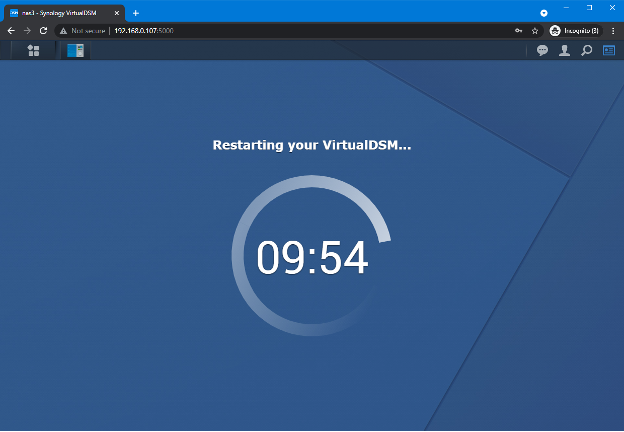
Once the DSM software of your NAS is updated, you should see a timer as marked in the screenshot below. You should wait approximately 10 minutes for the countdown to complete.
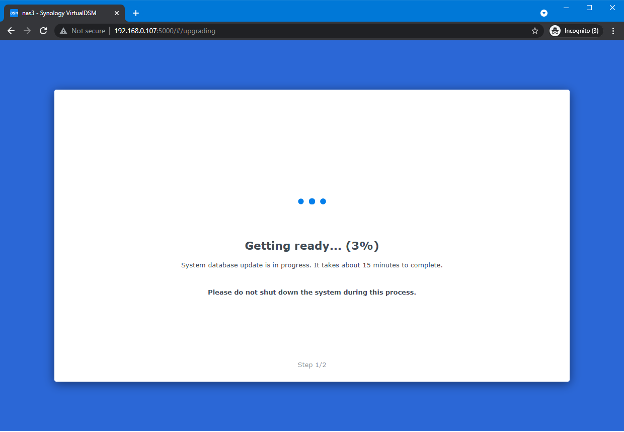
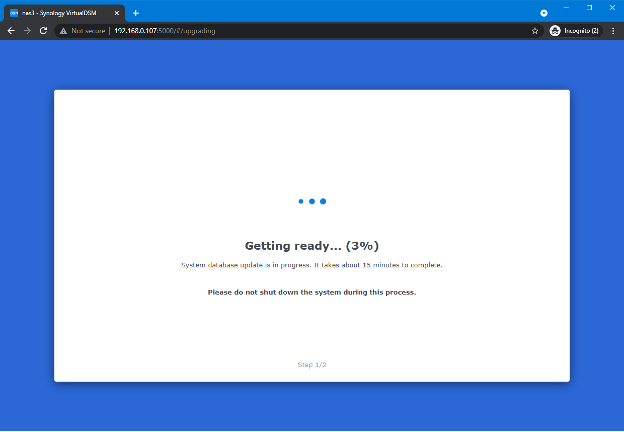
After the countdown, you should see the following page. It may take a few minutes to complete.
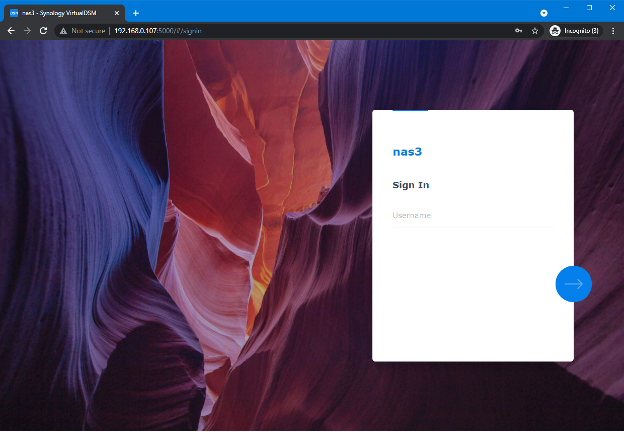
Once your NAS is ready, you should see the DSM 7 login page. You can log in to your NAS with the same username and password as before.
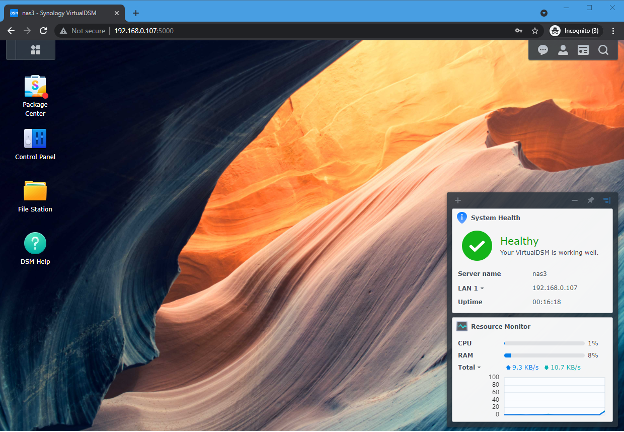
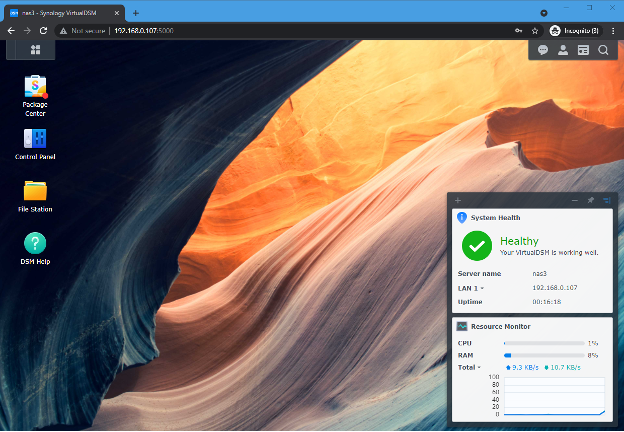
The new DSM 7 interface looks as shown in the screenshot below.
Upgrading to DSM 7 Manually
At times, you may not see an option to download and upgrade to DSM 7 in the Control Panel app. In that case, you will have to download DSM 7 from the official website of Synology and update the DSM software of your Synology NAS manually.
To download the DSM 7 operating system image for your Synology NAS from the official website of Synology, you will need to know the model name of your Synology NAS.
You can find the Model name of your Synology NAS from the Control Panel > Info Center > General section of the DSM software as marked in the screenshot below.
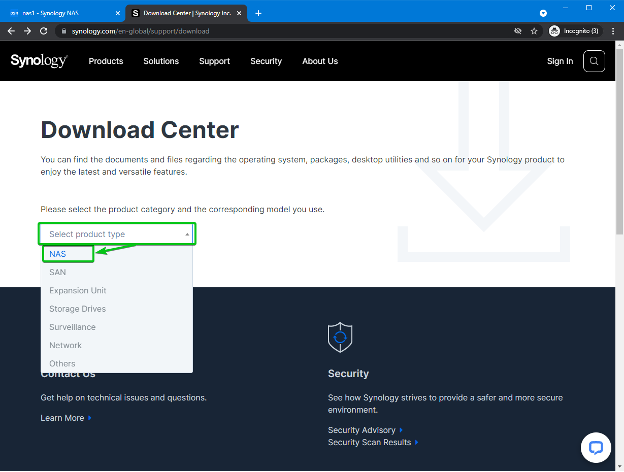
Once you know the model name of your Synology NAS, visit the URL https://synology.com/en-global/support/download with your favorite web browser.
Once the page loads, select NAS from the Select product type dropdown menu as marked in the screenshot below.
Click on the Select your Synology Product dropdown menu, search for your NAS model and click on the model name of your Synology NAS from the Select a product section as marked in the screenshot below.
Now, select DSM 7.0 Series from the OS Version dropdown menu, and click on the DSM 7.x.y (DSM 7.0.1 at the time of this writing) Download button from the Operating System tab as marked in the screenshot below.
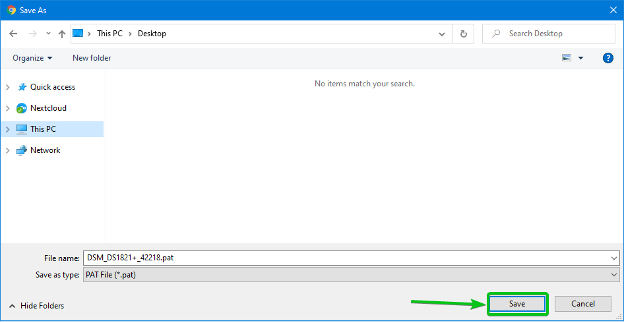
Your browser should prompt you to save the DSM 7 operating system image.
Select a directory/folder to save the DSM 7 OS image and click on Save.
The DSM 7 OS image should be downloaded.
NOTE: I have already updated my NAS to DSM 7. So, I will demonstrate the manual upgrade process using VirtualDSM (DSM on a Synology Virtual Machine).
Once the DSM 7 OS image is downloaded, navigate to the Control Panel > Update & Restore > DSM Update section and click on the Manual DSM Update button as marked in the screenshot below.
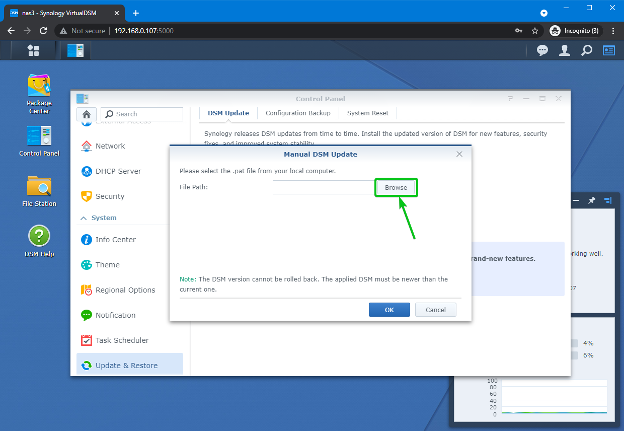
Click on Browse.
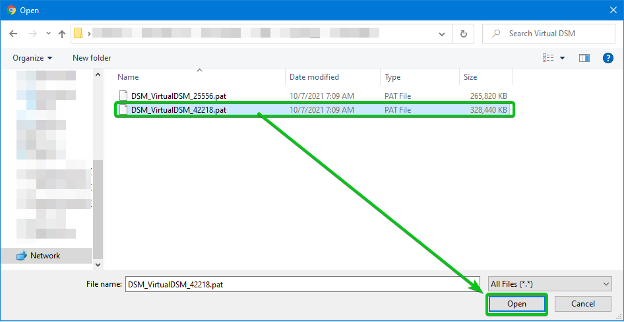
Select the DSM 7 operating system image from the file picker and click on Open.
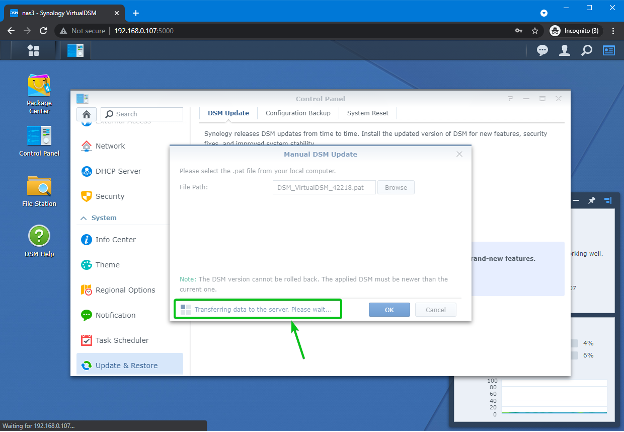
Click on OK.
The DSM 7 operating system image is being uploaded to the NAS. It may take a few seconds to complete.
Once the DSM 7 operating system image is uploaded to the NAS, you should see the Update Notice as marked in the screenshot below.
Scroll down, check the I understand, agree to update the system checkbox, and click Next.
Click on Yes.
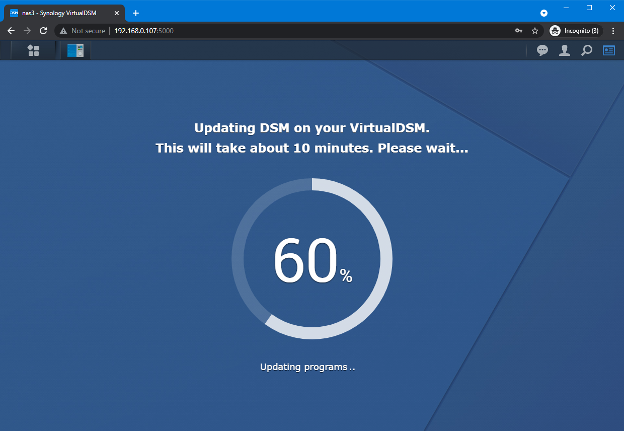
Your NAS should start the DSM software update process. It may take a few minutes to complete.
Once the DSM software of your NAS is updated, you should see a timer as marked in the screenshot below. You should wait approximately 10 minutes for the countdown to complete.
After the countdown, you should see the following page. It may take a few minutes to complete.
Once your NAS is ready, you should see the DSM 7 login page. You can log in to your NAS with the same username and password as before.
The new DSM 7 interface looks as shown in the screenshot below.
Conclusion
In this article, I have shown you how to check whether your Synology NAS model is compatible with DSM 7. I have also shown you how to upgrade the DSM software of your Synology NAS to DSM 7. I have shown you how to download the DSM 7 operating system image manually and use it to upgrade your Synology NAS’s DSM software.

