In this article, I am going to show you how to mount and access the shared folders of your Synology NAS using WebDav on Linux. So, let us get started!
Things You Will Need:
To follow this article, you need to have:
- a Synology NAS device
- a laptop or computer to access the DSM web management interface of your Synology NAS
the IP address of your Synology NAS
The IP address of my Synology NAS is 192.168.0.110. It will be different for you so make sure to replace it with yours from now on.
Installing WebDAV Server on Synology NAS:
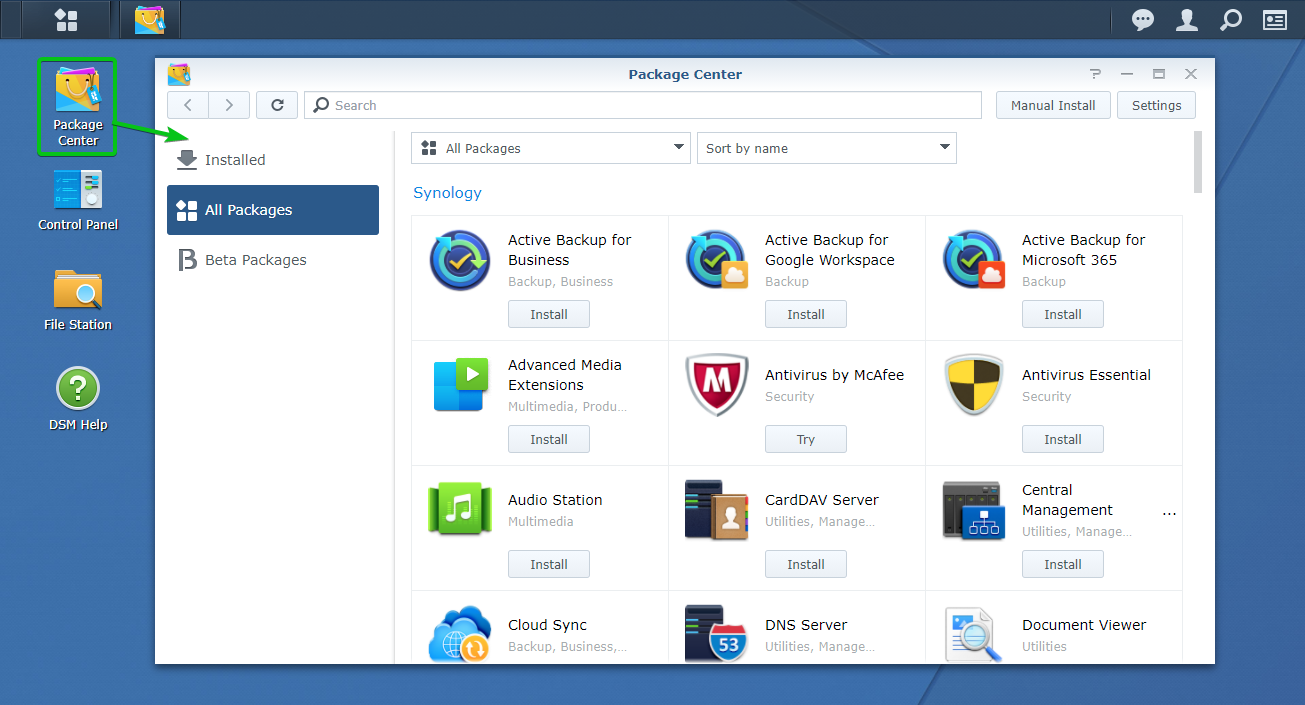
To access the shared folders of your Synology NAS via WebDAV, you need to install the WebDAV Server package on your Synology NAS from the Package Center app.
Open the Package Center app on your Synology NAS, as marked in the screenshot below.
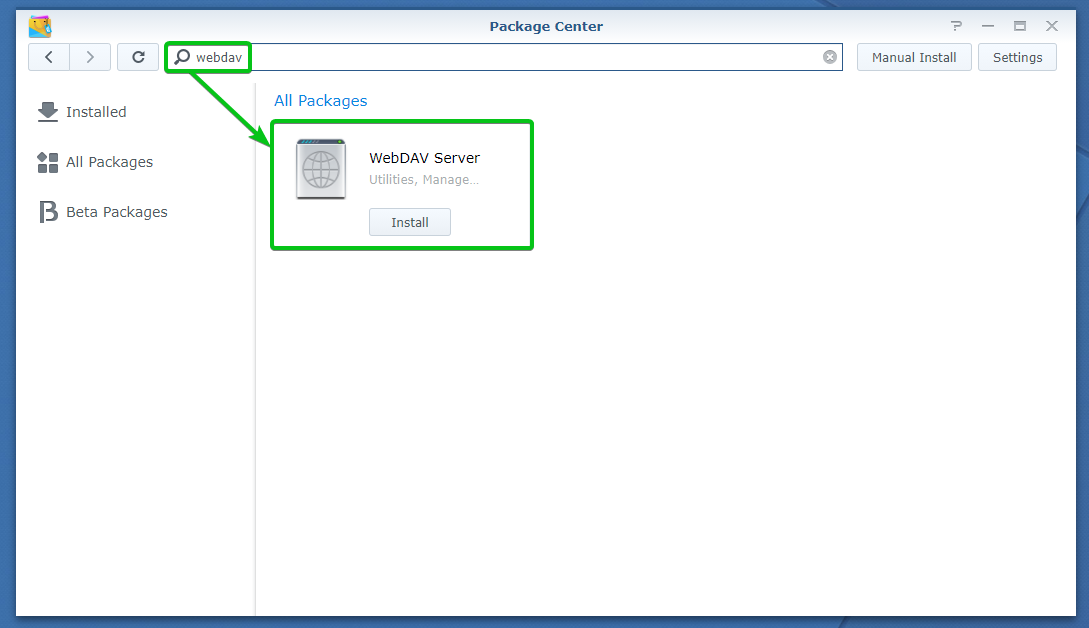
Search for the keyword webdav and the WebDAV Server package should be displayed, as seen in the screenshot below.
Click on Install.
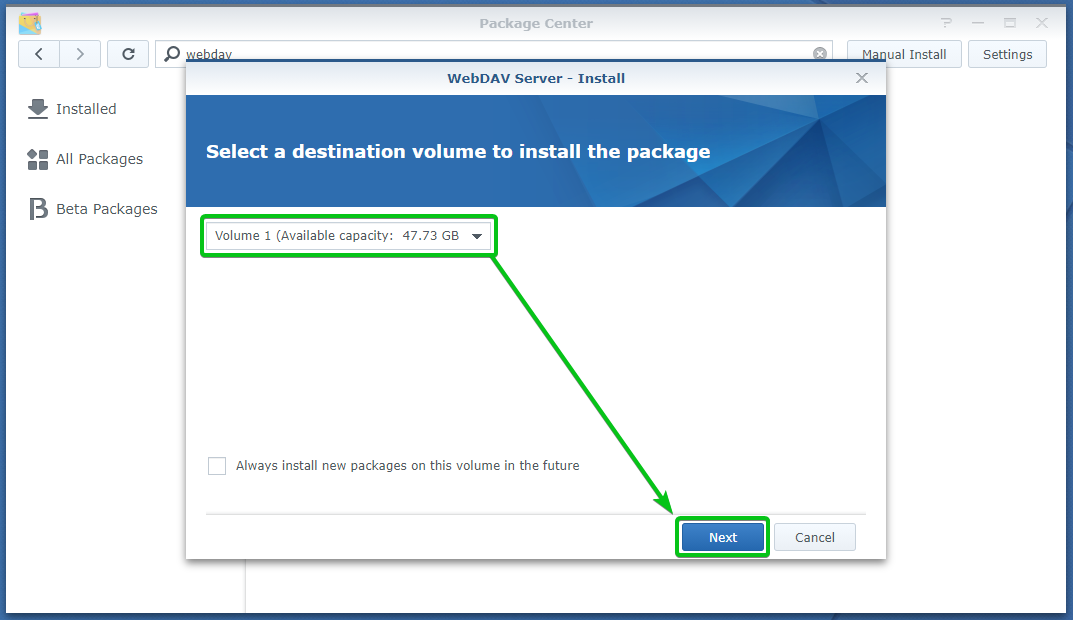
Now, select a volume where you want to install the WebDAV Server package from the dropdown menu and click on Next.
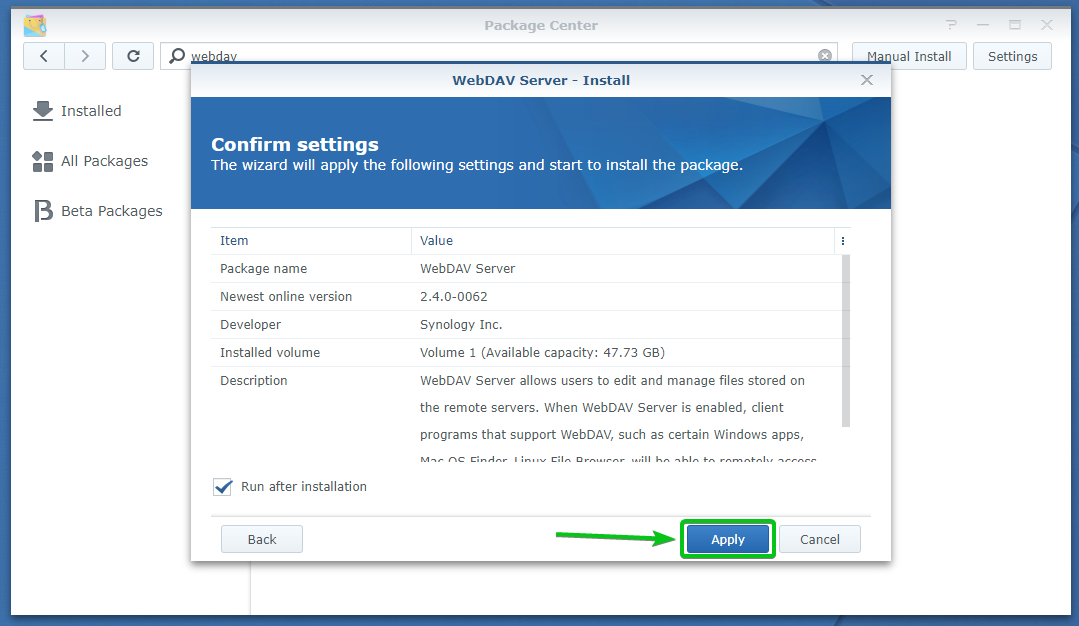
Click on Apply.
The WebDAV Server is being installed. It may take a few seconds to complete.
At this point, the WebDAV Server package should be installed.
Configuring the WebDAV Server:
Once the WebDAV Server package is installed, you can open it from the Application Menu of the web management interface of your Synology NAS.
The WebDAV Server app should be started.
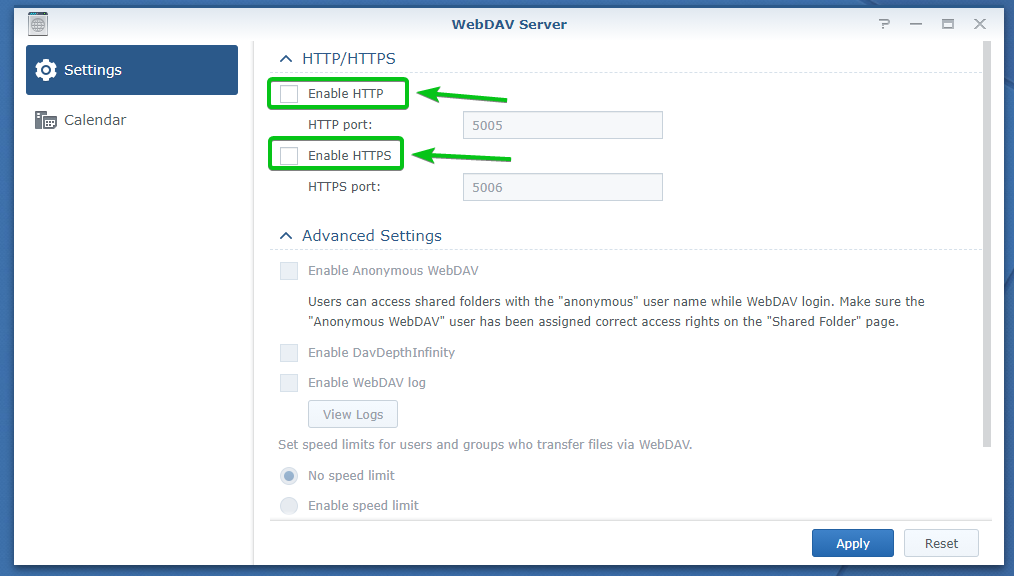
You can enable WebDAV over the HTTP and HTTPS protocol.
To enable WebDAV over the HTTP protocol, tick the Enable HTTP checkbox, as marked in the screenshot below.
To enable WebDAV over the HTTPS protocol, tick the Enable HTTPS checkbox, as well.
, you can see both HTTP port and HTTPS port that serves WebDAV requests.
By default, the WebDAV HTTP port is 5005 and the HTTPS port is 5006. You can change them if you want.
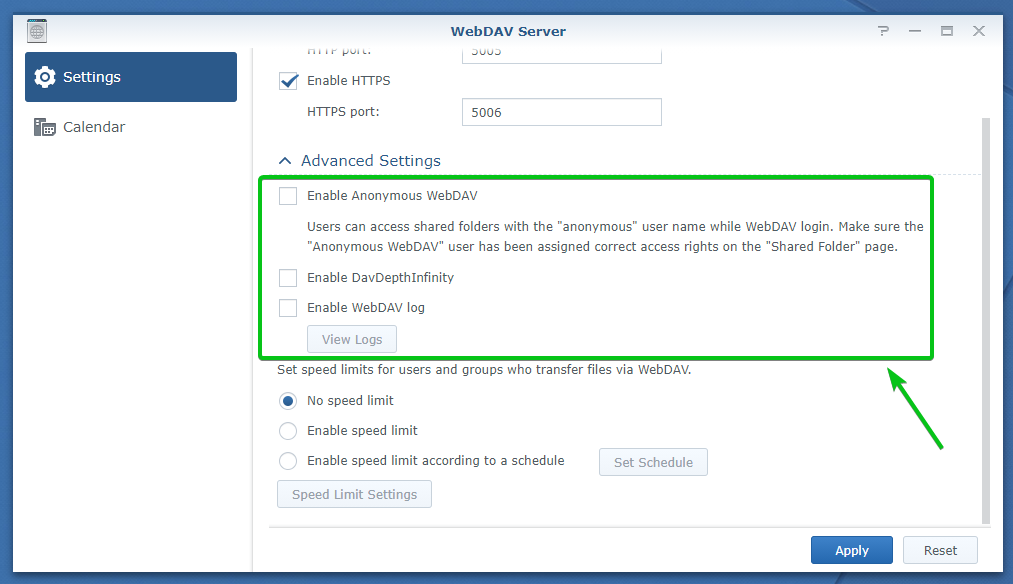
There are some advanced WebDAV settings as well.
Enable Anonymous WebDAV: Enables anonymous access to the shared folders of your Synology NAS. For this to work, the shared folder you want to access anonymously must also have the correct permissions set so that anonymous users can read or write to the shared folder.
Enable DavDepthInfinity: Allows users to access or delete files without file path length restrictions on client devices.
Enable WebDAV log: Your Synology NAS will record all the events related to WebDAV.
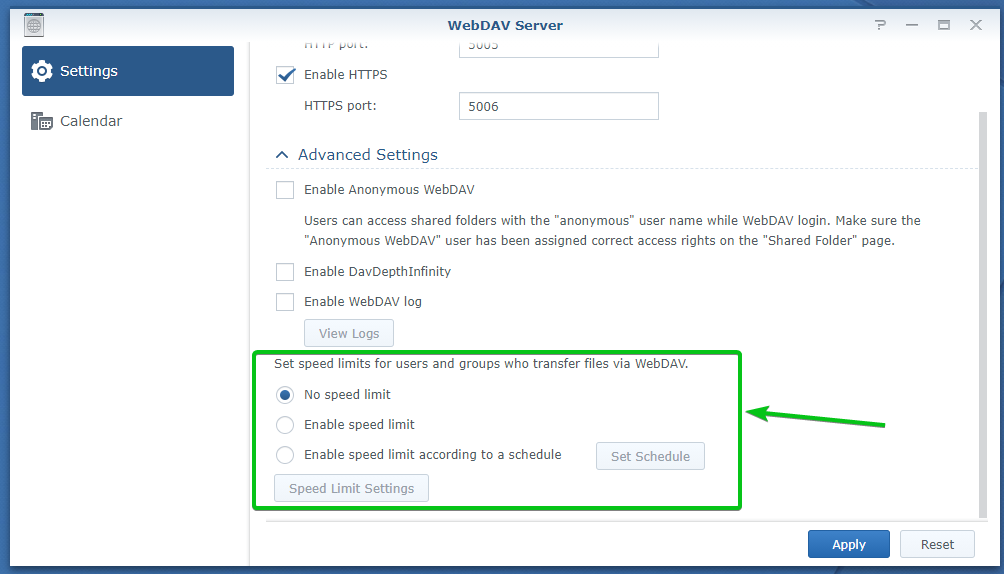
You can also limit the network bandwidth of the WebDAV server if you want.
By default, no speed limit is set.
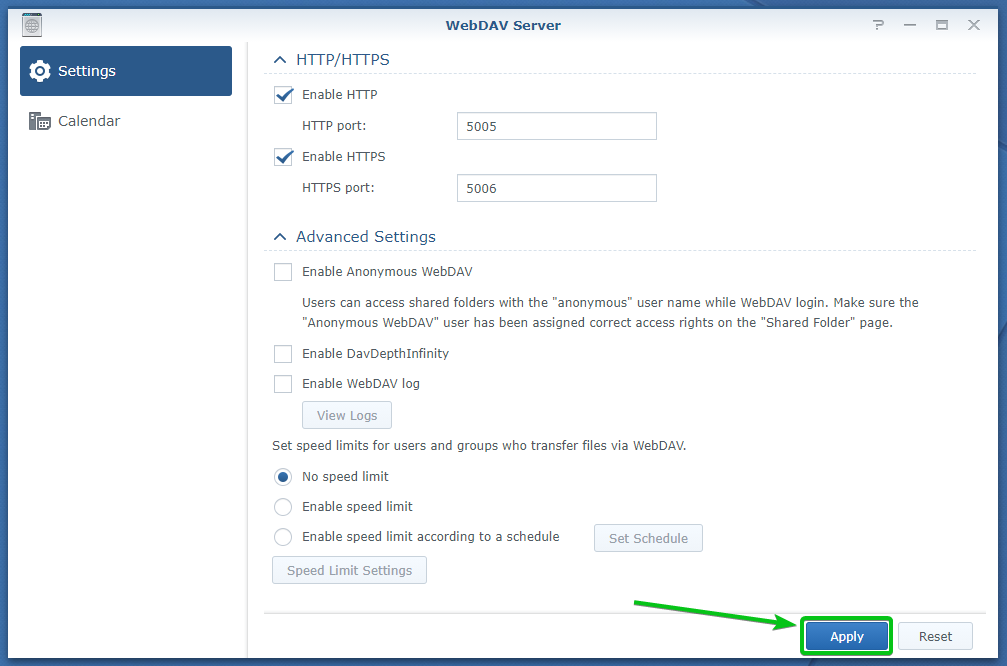
Once you have configured the WebDAV Server, click on Apply.
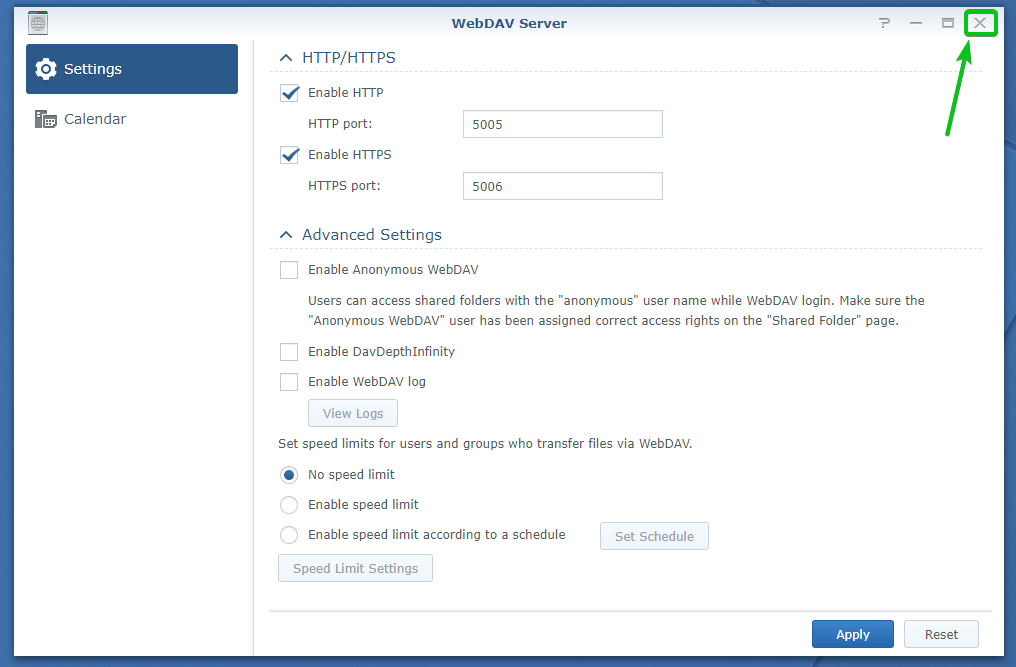
Then, close the WebDAV Server app.
Installing davfs2 on Ubuntu/Debian/Linux Mint:
If you want to mount the shared folders from your Synology NAS to your Ubuntu/Debian/Linux Mint distributions via the WebDAV protocol from the command line, you need to install the davfs2 package on your computer.
NOTE: You can skip this section if you do not want to mount your Synology shared folders via WebDAV from the command line.
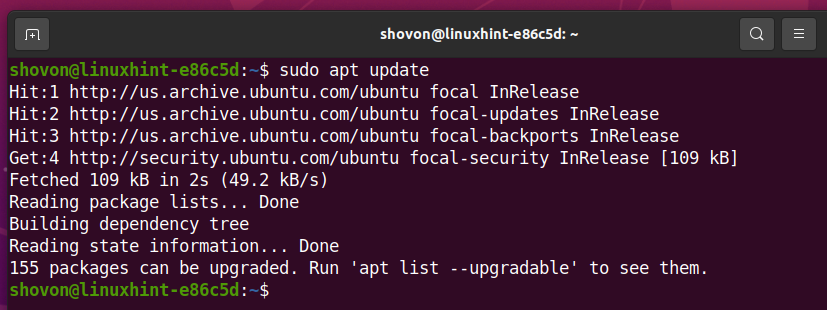
First, update the APT package repository cache with the following command:
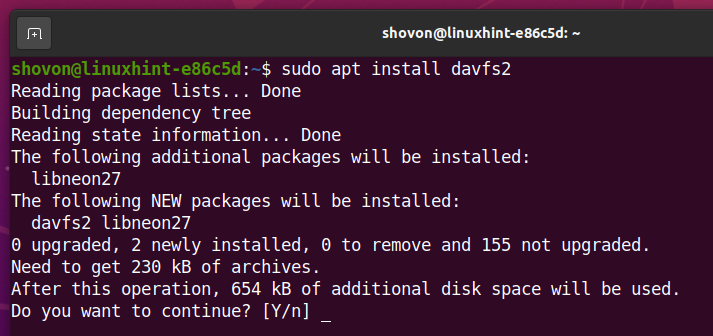
Install the davfs2 package with the following command:
To confirm the installation, press Y and then press <Enter>.
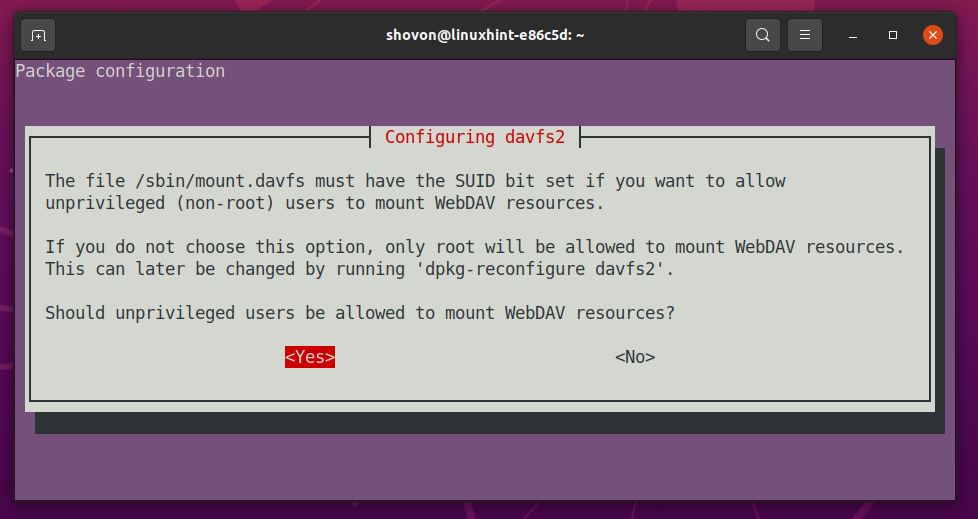
If you want to mount WebDAV resources without superuser privileges, select <Yes> and press <Enter>.
Otherwise, select <No> and press <Enter>.
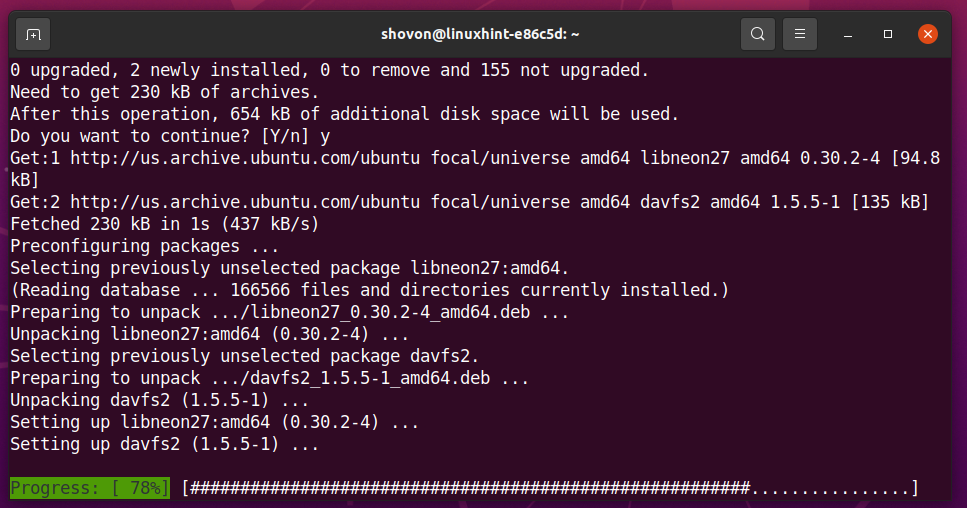
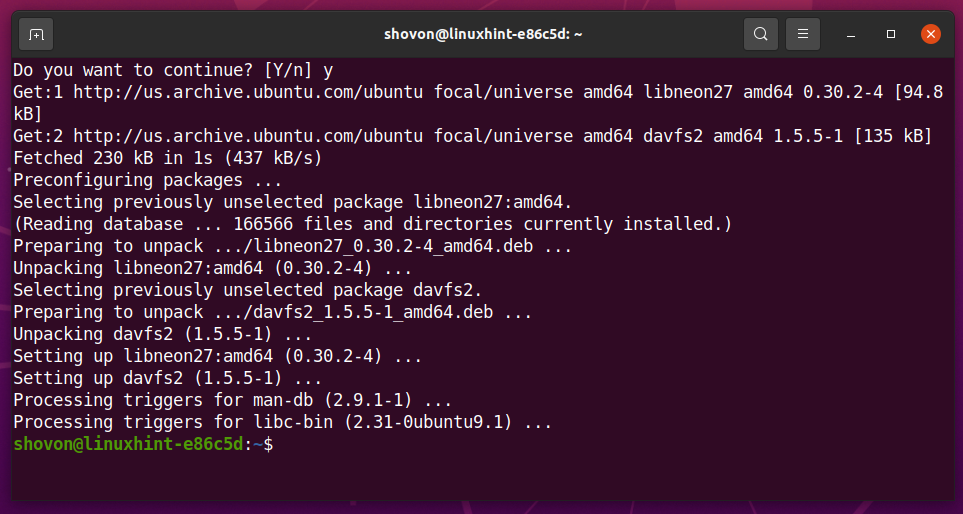
The davfs2 package is being installed. It may take a few seconds to complete.
At this point, the davfs2 package should be installed.
Installing davfs2 on Arch Linux:
If you want to mount the shared folders from your Synology NAS to your Arch Linux distribution via the WebDAV protocol from the command line, you need to install the davfs2 package on your computer.
NOTE: You can skip this section if you do not want to mount your Synology shared folders via WebDAV from the command line.
First, update the Pacman package repository cache with the following command:
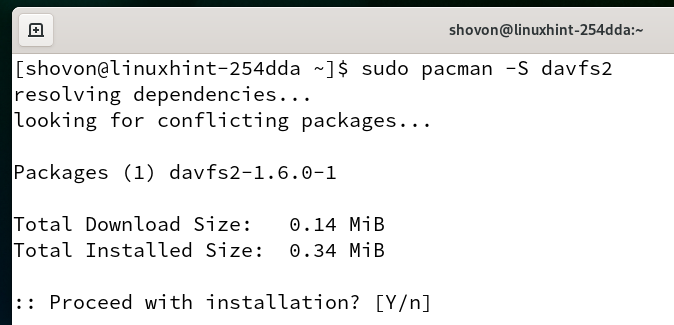
To install the davfs2 package, run the following command:
To confirm the installation, press Y and then press <Enter>.
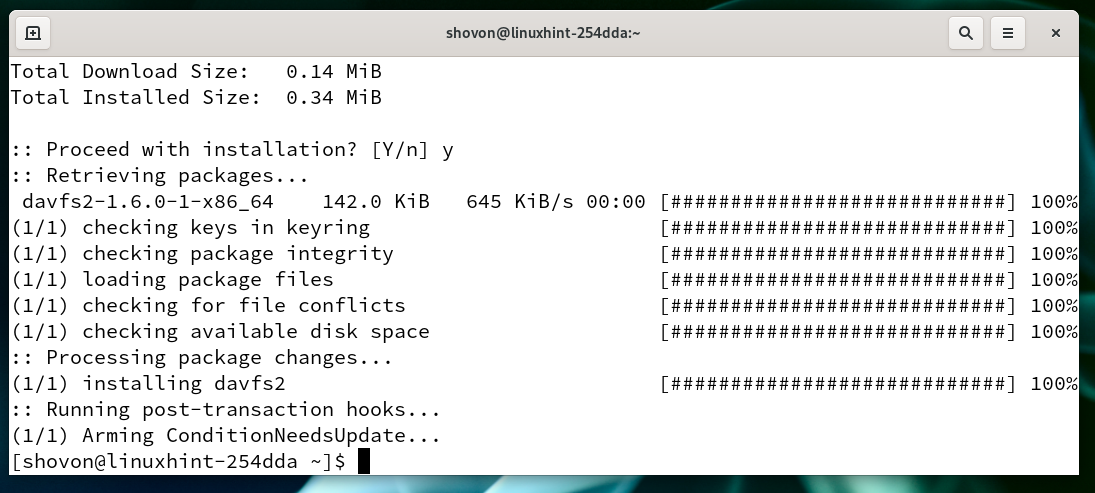
The davfs2 package should be installed.
Installing davfs2 on CentOS 8/RHEL 8:
If you want to mount the shared folders from your Synology NAS to your CentOS 8/RHEL 8 distributions via the WebDAV protocol from the command line, you need to install the davfs2 package on your computer.
NOTE: You can skip this section if you do not want to mount your Synology shared folders via WebDAV from the command line.
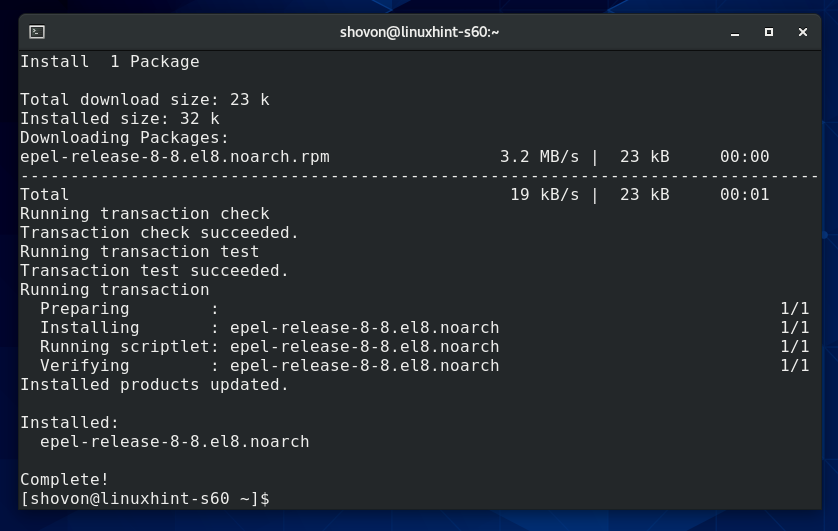
First, enable the EPEL package repository with the following command:
The EPEL package repository should be enabled by then.
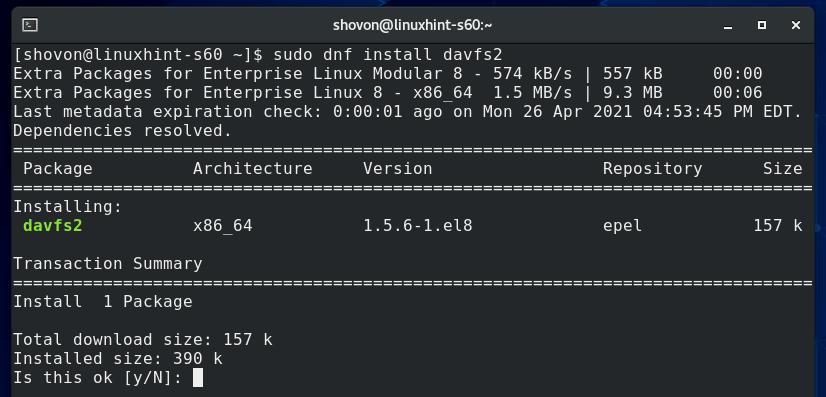
To install the davfs2 package, run the following command:
To confirm the installation, press Y and then press <Enter>.
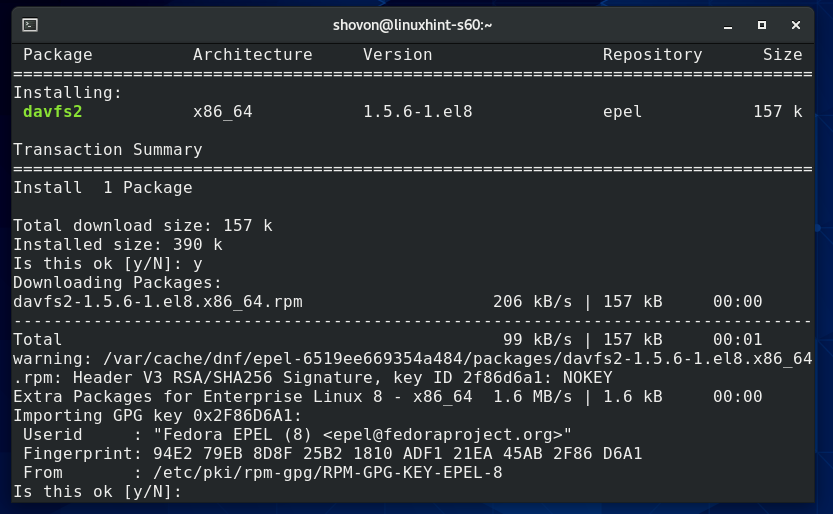
You may have to accept the GPG key of the EPEL package repository. If you are asked for it, press Y and then press <Enter> to accept it.
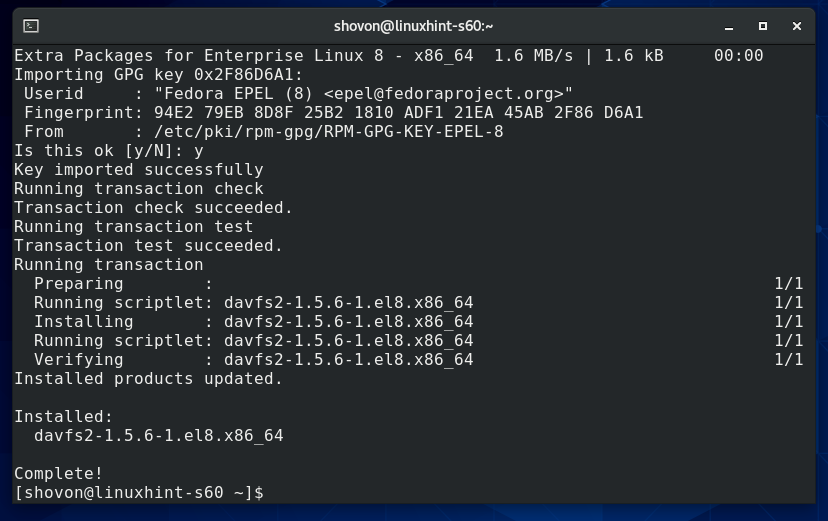
The davfs2 package should be installed.
Mounting Shared Folders via WebDav from the Command Line:
Once you have the davfs2 package installed on your desired Linux distribution, you are ready to mount the Synology shared folders on your computer via WebDAV from the command line.
In this section, I will show you how to mount all the shared folders on your computer via WebDAV. Also, I will include the process of mounting specific shared folders on your computer via WebDAV.
To mount all the shared folders of your Synology NAS on your computer via WebDAV, you need to create a directory where you can mount the shared folders. For demonstration, I will create a directory /synology-nas and mount all the shared folders of my Synology NAS in this directory via WebDAV.
You can create a directory /synology-nas for mounting the shared folders on your computer as follows:
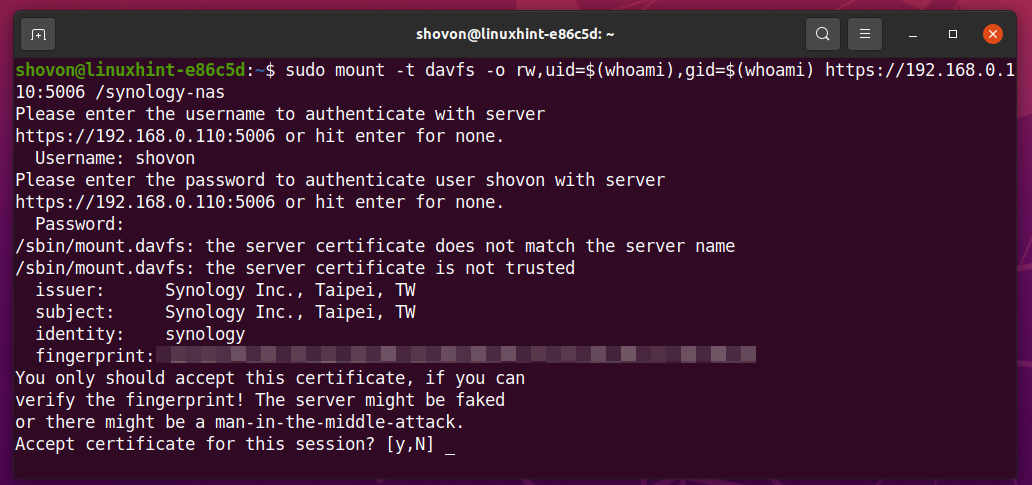
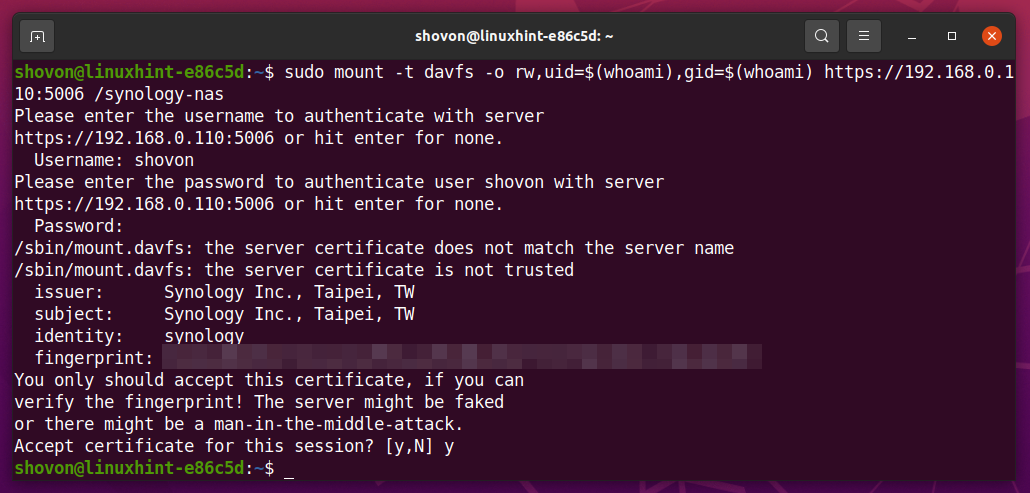
Once the directory /synology-nas is created, you can mount all the shared folders of your Synology NAS in the /synology-nas directory via WebDAV over the HTTPS protocol running on port 5006 as follows:
NOTE: If you want to mount the shared folders in the /synology-nas directory via WebDAV over the HTTP protocol running on port 5005, run the following command instead.
Now, type in the login username of your Synology NAS and press <Enter>.
Type in the login password of your Synology NAS and press <Enter>.
To accept the certificate of the WebDAV server, press y and then press <Enter>.
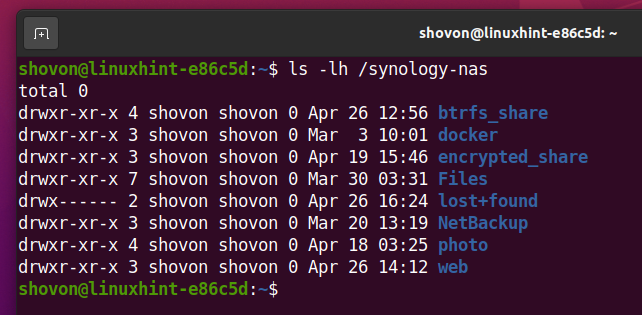
All the shared folders of your Synology NAS that the user you’ve logged in with has access should be mounted in the /synology-nas directory of your computer.
As you can see, all the shared folders of my Synology NAS are mounted in the /synology-nas directory of my computer.
You can also mount a specific shared folder of your Synology NAS on your computer via WebDAV. For demonstration, I will mount the photo shared folder of my Synology NAS in the /synology-sf-photo directory of my computer via WebDAV.
You can create a directory /synology-sf-photo for mounting the shared folder photo from your Synology NAS as follows:
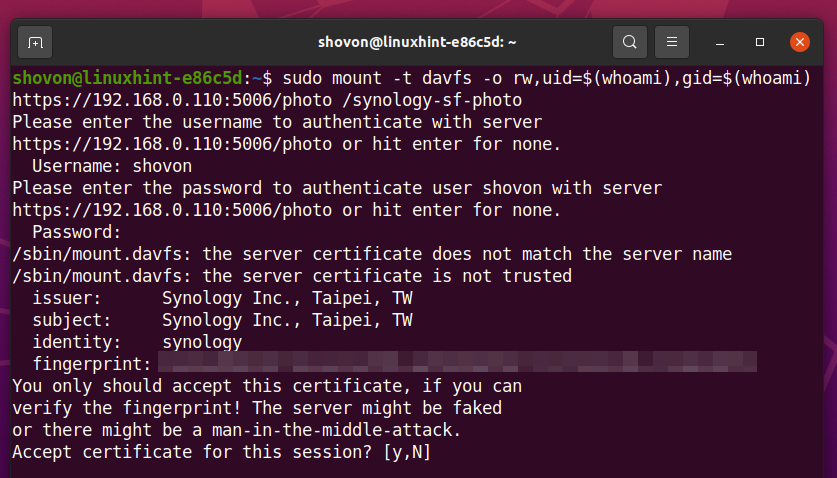
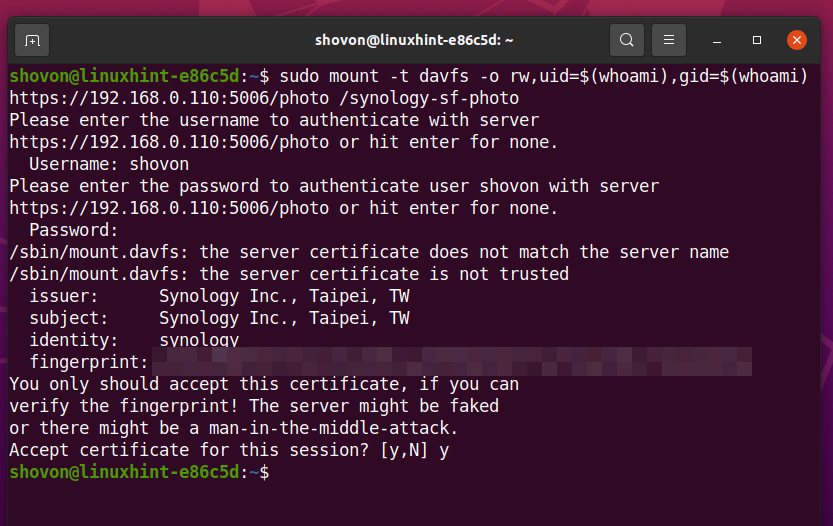
Once the directory /synology-sf-photo is created, you can mount the shared folder photo of your Synology NAS in the /synology-sf-photo directory via WebDAV over the HTTPS protocol running on port 5006 as follows:
NOTE: If you want to mount the shared folder photo in the /synology-sf-photo directory via WebDAV over the HTTP protocol running on port 5005, then run the following command instead:
Now, type in the login username of your Synology NAS and press <Enter>.
Type in the login password of your Synology NAS and press <Enter>.
To accept the certificate of the WebDAV server, press y and then press <Enter>.
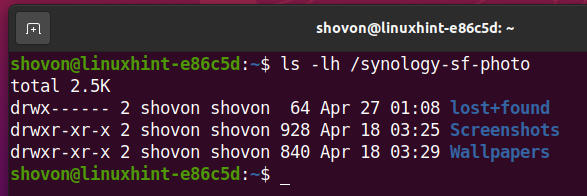
The shared folder photo of your Synology NAS should be mounted in the /synology-sf-photo directory of your computer if the user you have logged in with has access permissions to the shared folder photo.
As you can see, the shared folder photo of my Synology NAS is mounted in the /synology-sf-photo directory of my computer.
Accessing Shared Folders via WebDav with the Nautilus File Manager:
If you are using the GNOME 3 desktop environment or the Nautilus file manager, then you can access your Synology NAS shared folders very easily using the Nautilus file manager – the default file manager of the GNOME 3 desktop environment.
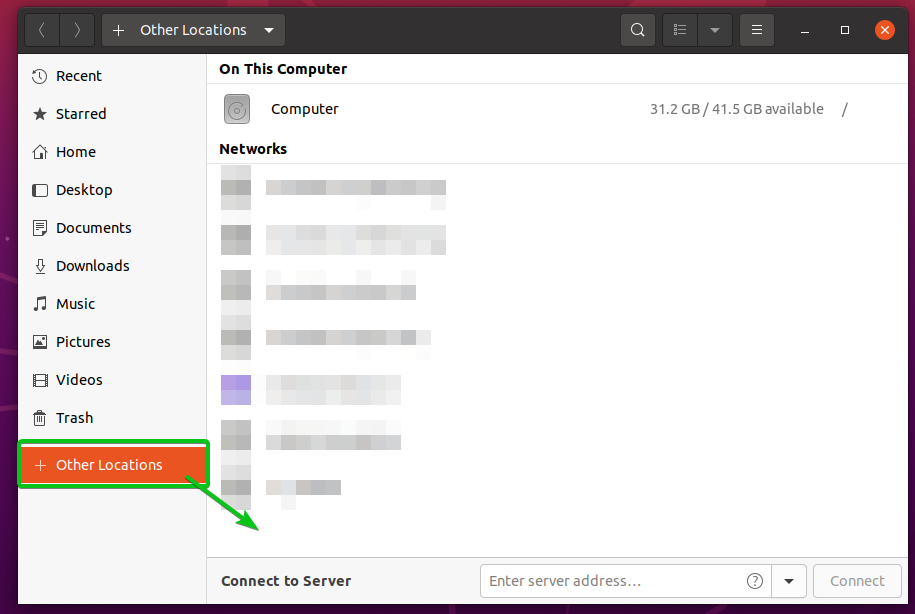
First, open the Nautilus file manager and navigate to the Other Locations section, as marked in the screenshot below.
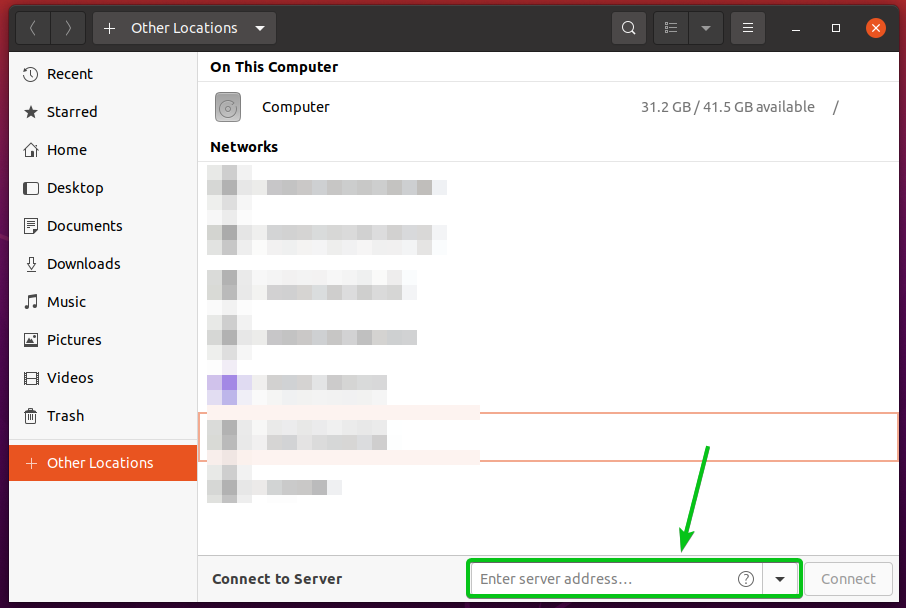
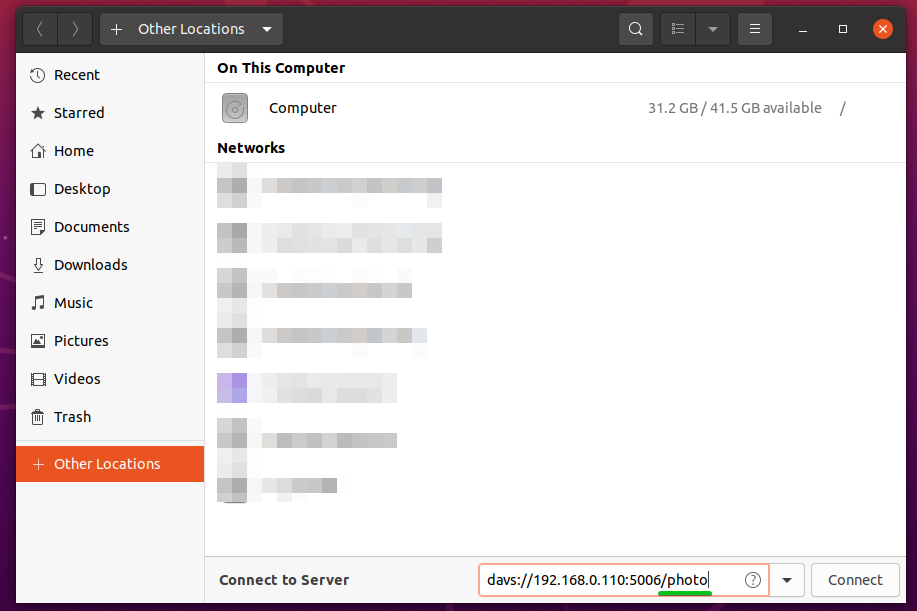
Now, you must type in the WebDAV access URL of your Synology shared folders in the Connect to Server section, as shown in the screenshot below to connect to them.
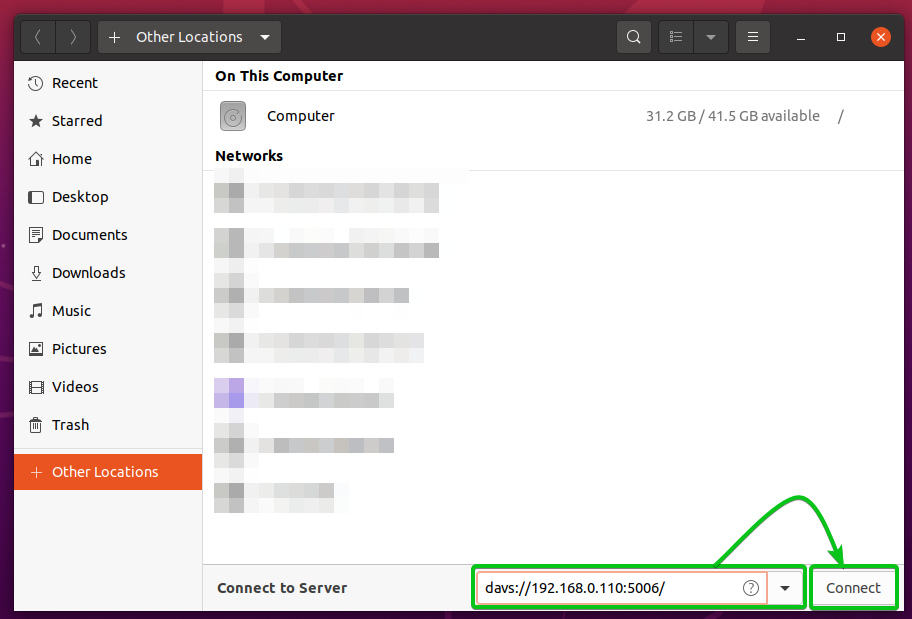
To access all the shared folders of your Synology NAS via WebDAV over the HTTPS protocol running on port 5006, the WebDAV access URL will be davs://192.168.0.110:5006/.
While to access all the shared folders of your Synology NAS via WebDAV over the HTTP protocol running on port 5005, the WebDAV access URL will be dav://192.168.0.110:5005/.
Once you have typed in the WebDAV access URL, click on Connect, as marked in the screenshot below.
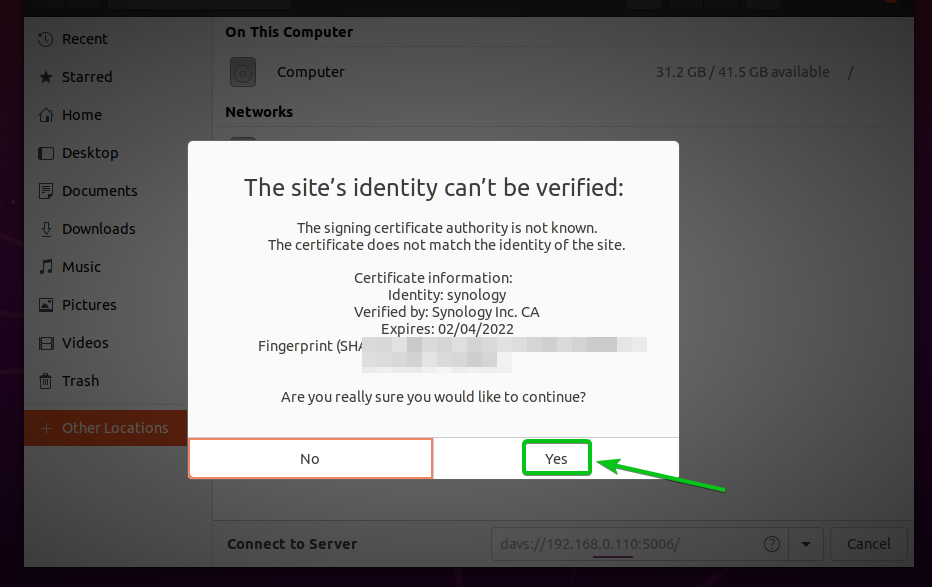
Click on Yes.
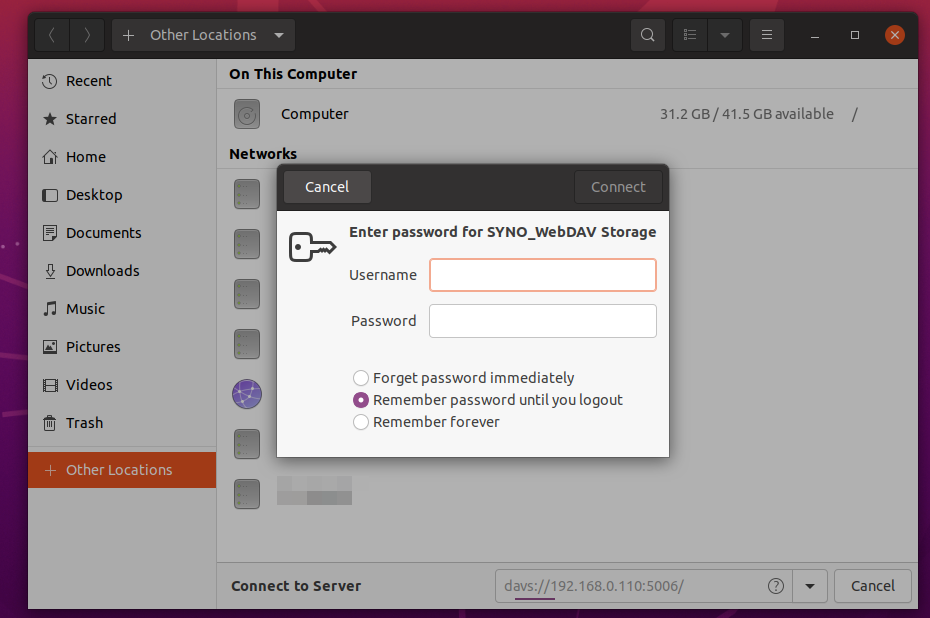
You will be asked to type in the login username and password of your Synology NAS.
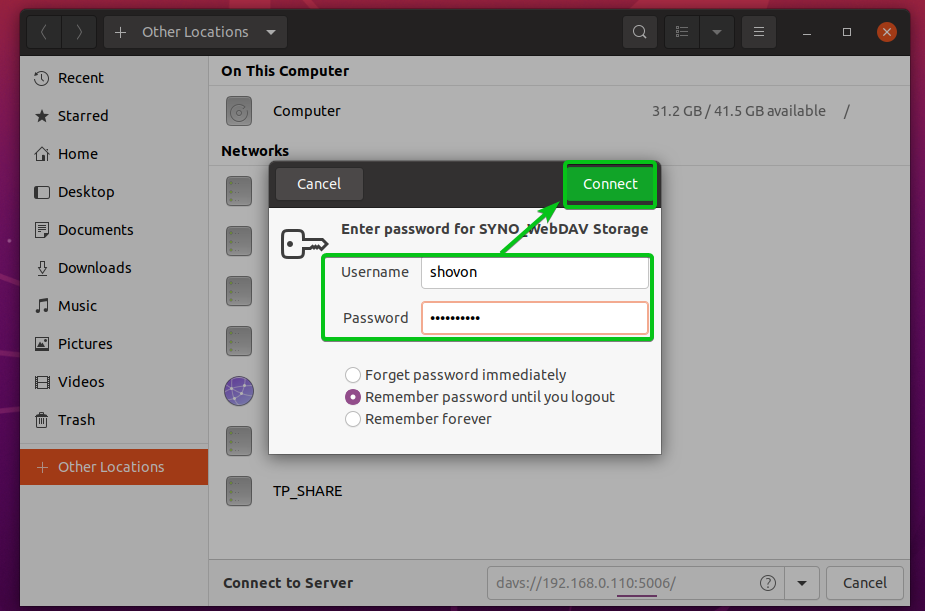
Type in the username and password of your Synology NAS and click on Connect.
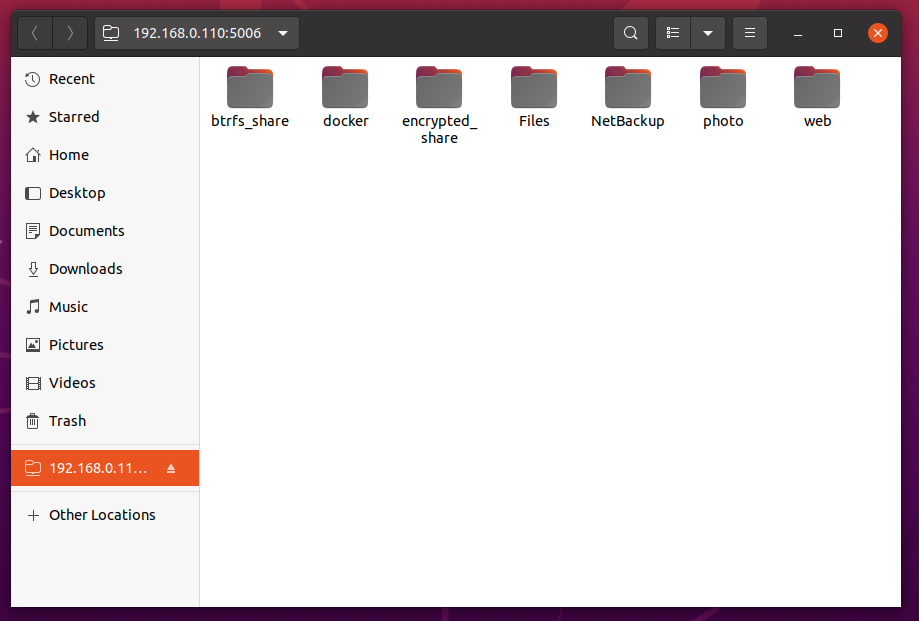
You should be able to access all the shared folders of your Synology NAS that the user you’ve logged in with has access to.
You can also access a single Synology NAS shared folder via WebDAV.
To access a shared folder photo (let’s say) of your Synology NAS via WebDAV over the HTTPS protocol running on port 5006, the WebDAV access URL will be davs://192.168.0.110:5006/photo.
To access a shared folder photo (let’s say) of your Synology NAS via WebDAV over the HTTP protocol running on port 5005, the WebDAV access URL will be dav://192.168.0.110:5005/photo.
Once you have typed in the WebDAV access URL, click Connect, as marked in the screenshot below.
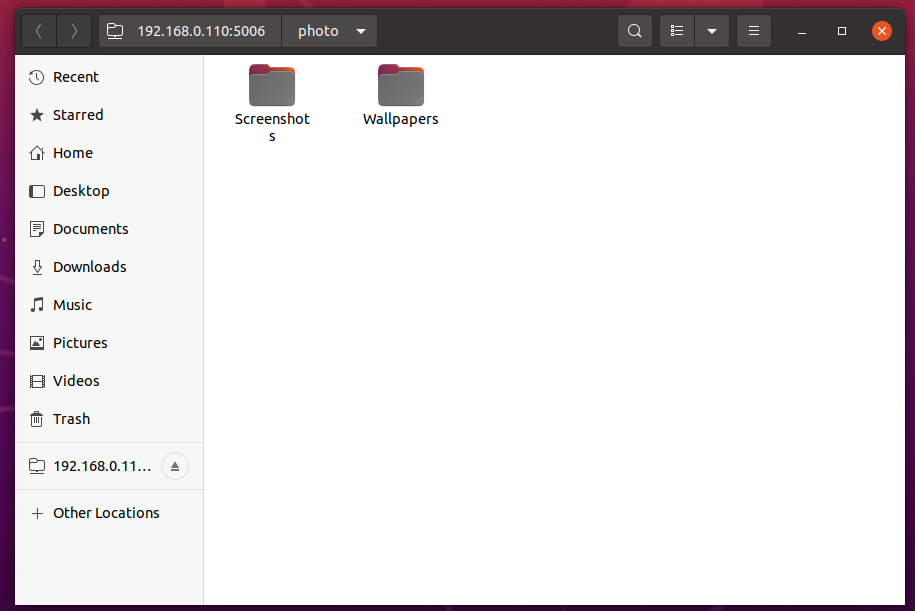
Once you authenticate as before, you should be able to access the photo shared folder of your Synology NAS if the user you have logged in with has the correct access permissions to the shared folder.
Mounting Shared Folders via WebDav with the Dolphin File Manager:
If you are using the KDE desktop environment or the Dolphin file manager, then you can access your Synology NAS shared folders very easily using the Dolphin file manager – the default file manager of the KDE desktop environment.
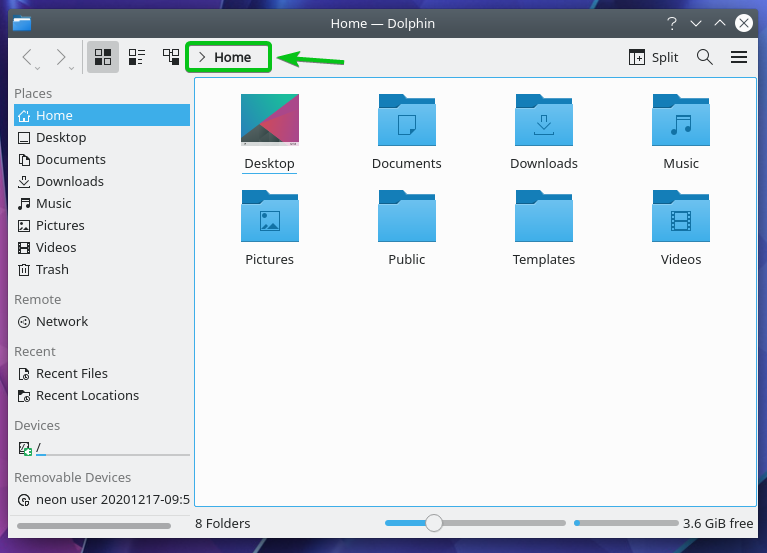
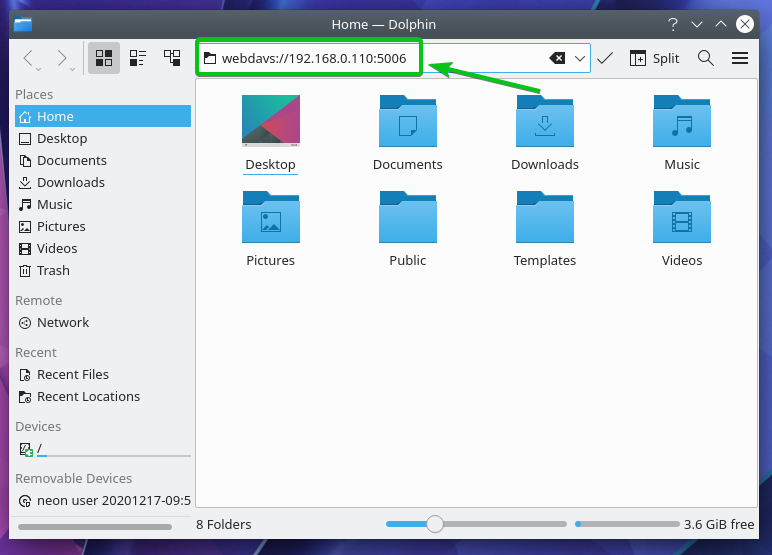
First, open the Dolphin file manager and double-click on the directory path, as marked in the screenshot below.
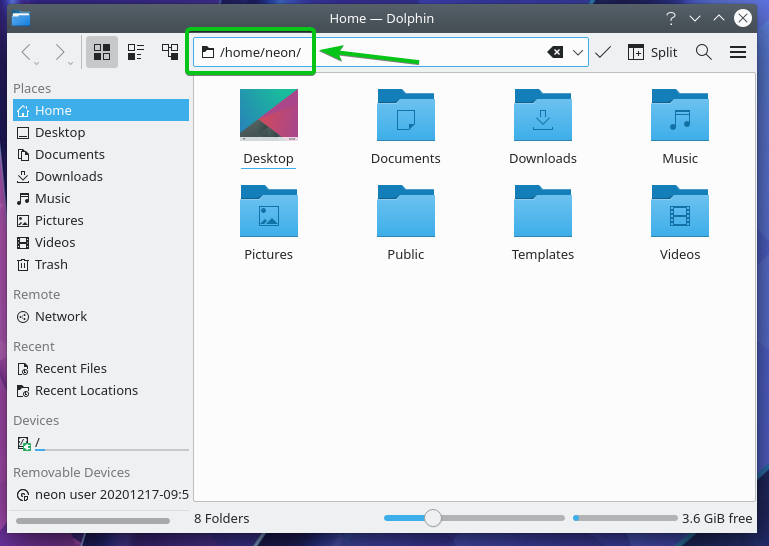
The directory path should be editable, as you can see in the screenshot below.
You must type in the WebDAV access URL of the shared folders of your Synology NAS here.
To access all the shared folders of your Synology NAS via WebDAV over the HTTPS protocol running on port 5006, the WebDAV access URL will be webdavs://192.168.0.110:5006/.
To access all the shared folders of your Synology NAS via WebDAV over the HTTP protocol running on port 5005, the WebDAV access URL will be webdav://192.168.0.110:5005/.
Once you have typed in the WebDAV access URL, press <Enter> to access the shared folders of your Synology NAS.
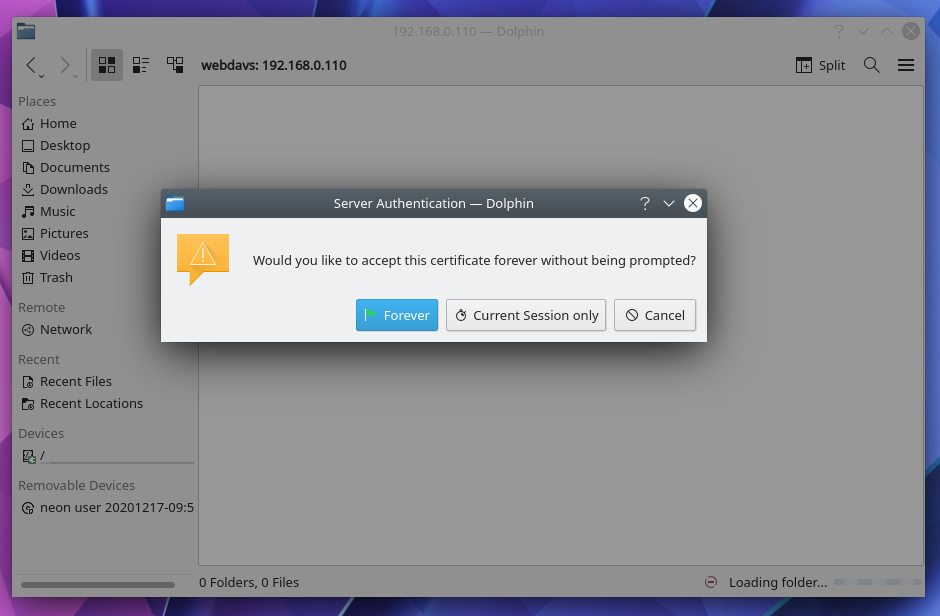
Click on Continue.
If you want to accept the SSL certificate of the WebDAV server permanently, then click on Forever.
If you want to accept the SSL certificate of the WebDAV server for the current desktop session only, then click on Current Session Only.
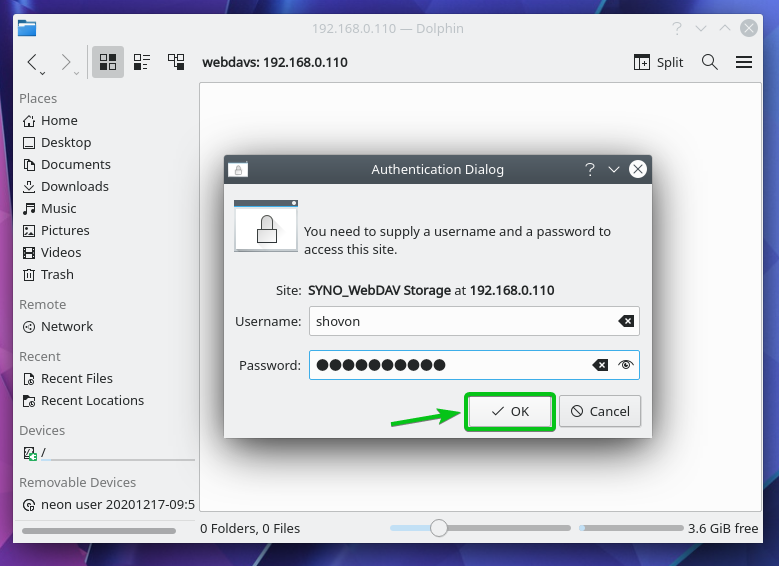
You will be asked to type in the login username and password of your Synology NAS.
Type in the username and password of your Synology NAS and click on OK.
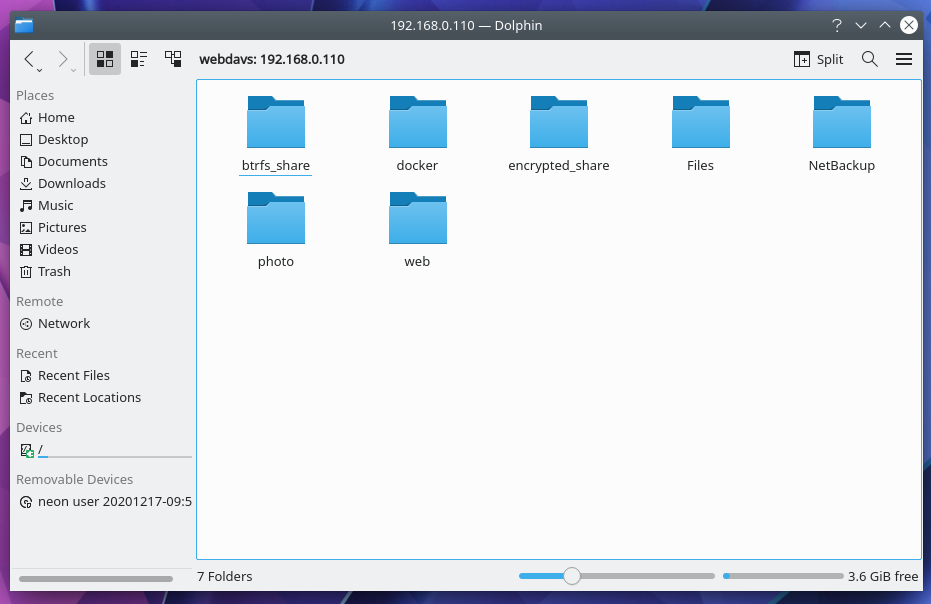
You should be able to access all the shared folders of your Synology NAS that the user you’ve logged in with has access to.
You can also access a single Synology NAS shared folder via WebDAV.
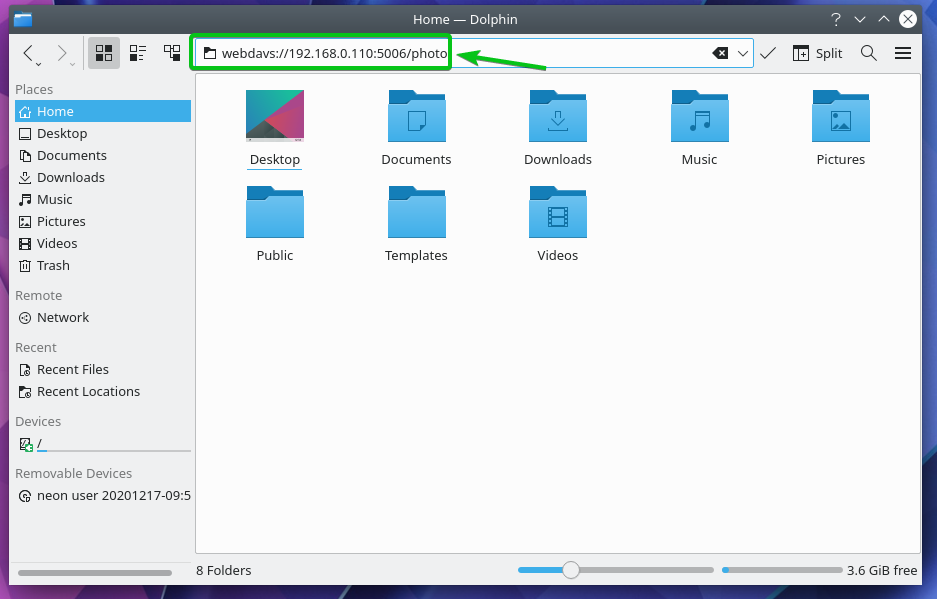
To access a shared folder photo (let’s say) of your Synology NAS via WebDAV over the HTTPS protocol running on port 5006, the WebDAV access URL will be webdavs://192.168.0.110:5006/photo.
To access a shared folder photo (let’s say) of your Synology NAS via WebDAV over the HTTP protocol running on port 5005, the WebDAV access URL will be webdav://192.168.0.110:5005/photo.
Once you have typed in the WebDAV access URL, press <Enter> to access the shared folder of your Synology NAS.
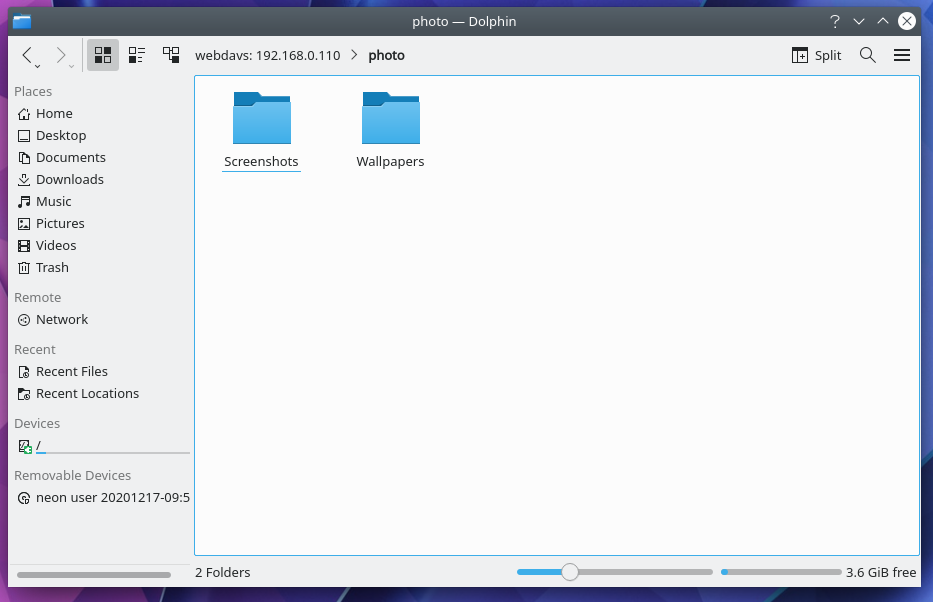
Once you authenticate as before, you should be able to access the photo shared folder of your Synology NAS if the user you have logged in with has the correct access permissions to the shared folder.
Conclusion:
In this article, I have shown you how to mount all the shared folders of your Synology NAS as well as a single shared folder on Linux. On the other hand, I have shown you the command line method and the graphical method of mounting Synology NAS shared folders via WebDAV.
References:
[1] WebDAV Server | Synology Inc.
[2] Ubuntu Manpage: mount.davfs – Mount a WebDAV resource in a directory

