However, we will walk through about ingress controller in this guide. The Kubernetes Ingress API allows you to reveal your Kubernetes cluster’s apps to the internet by combining routing guidelines into a single source. To use Ingress, you must set up an Ingress controller in your cluster, which is in-charge of processing ingress resource information and enabling traffic based on ingress rules. Let’s quickly examine what a Kubernetes Ingress is and what an Ingress controller offers before digging into the numerous Ingress controllers.
Kubernetes offers three service forms to expose certain framework features:
ClusterIP: The standard Kubernetes service is ClusterIP. This functionality is created within a cluster and is only accessible through pods within that cluster. So, whenever we want to disclose a service to other pods in the very same cluster, we use this sort of service. The Kubernetes proxy is used to manage this service.
NodePort: Each node in your cluster has an open port called a NodePort. Even if your program is installed on a different node, Kubernetes straightforwardly routes traffic coming on the NodePort to the application.
LoadBalancer: In Kubernetes, the far more basic form of load balancing is load distribution which is straightforward to fix at the dispatcher stage. Kubernetes has two load distribution channels, both of which are regulated by a function called Kube-proxy which handles the virtual IP addresses used by applications.
Even though Kubernetes was first issued in June 2014, the Kubernetes Ingress API is still in beta as of Kubernetes version 1.18. The Ingress API has concentrated on adaptability and remained relatively compact since its launch to beta status in 2016 (Kubernetes v1.2).
Kubernetes Ingress is a Kubernetes API entity that offers routing rules for managing outside users’ accessibility to Kubernetes cluster services usually via HTTPS/HTTP. You can easily create guidelines for traffic propagation with Ingress without having to create a series of Load Balancers or expose each operation on the node. As a result, it is the right option for use in production settings.
In this guide, we will elaborate a method in which you can easily enable the Ingress controller using minikube.
Pre-requisites
To enable the Ingress controller in your system, you must have installed minikube cluster. Also, you must have sudo rights to access your system.
Note: We are working on Ubuntu 20.04 LTS while writing this guide. You can use your favorite operating system for implementation.
Create a Minikube Cluster
Initially, you have to create a minikube cluster to enable the Ingress controller in Kubernetes. For this particular purpose, we have to launch the command line terminal in Ubuntu 20.04 LTS.
You can launch the terminal window with the help of two simple methods. One of them is to open it using the Application bar of your operating system. The other option is to use the easiest shortcut key of “Ctrl+Alt+T”.
As soon as you follow either of these methods, the command line terminal shall open. First of all, you have to start the already installed minikube cluster in your Ubuntu 20.04 LTS operating system. To start minikube, write down the below-mentioned command in the command-line shell.

During the execution of this command, you have to wait for a few moments to get started with minikube. Upon the successful execution of the command, you can check out the minikube version displayed as well. After performing this step, you can check the minikube status by executing the cited command in the terminal.
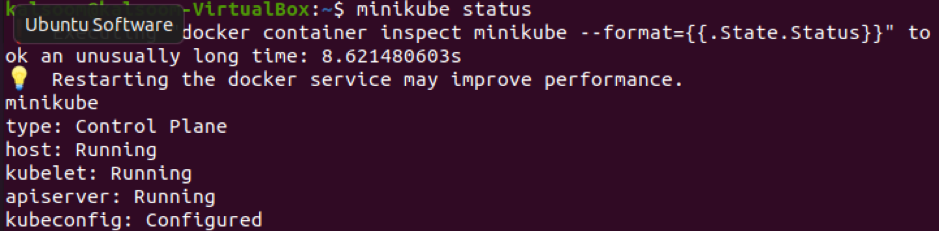
From the above-displayed image, you can check that the host, kubelet, and apiserver are all running.
Enable the Ingress Controller Using Minikube
As soon as you start the minikube, you are ready to enable the Ingress controller. If you want to check the addon list of the minikube, you have to run the following command in the terminal:

After the execution of this command, you will see the status against every addon of minikube. Some of them are enabled and some are disabled. Now, this is the right time to enable the Ingress controller using minikube. So for this specific purpose, you have to write the below-written command in your terminal window.
As this command has the keyword “enable”, so it will enable the Ingress controller in Kubernetes.

After the execution of this command, you can now view that the “The ingress addon is enabled”. If you want to verify this, you can execute the below-mentioned command in the terminal with the –n flag.

You can view that now the status is running.
Conclusion
Looking further into it, the Ingress controller is a Kubernetes program that adjusts an HTTP load balancer based on Ingress resources. Multiple load balancers necessarily require various applications of the Ingress controller. In the aforementioned article, we have explained the concept of Ingress controller in Kubernetes. Also, we have elaborated the steps on how to enable Ingress using minikube. I believe that after reading this article, you will not have any doubt left regarding the Ingress controller in Kubernetes.