Released in September of 2008, Google Chrome continues to be one of the most used browsers out there, dominating not only the desktop market but the mobile marketplace as well. With its advanced privacy protection, easy-to-access GUI, and a wide variety of add-ons, no doubt that Google Chrome is the go-to browser for most desktop and mobile users.
Google Chrome provides options to save and manage your personal information. This includes account login credentials and passwords and can even save your credit card information if needed.
While it is a useful feature, knowing exactly what is saved on your device would be beneficial, especially if your system is shared among multiple users.
By knowing which of your cards are saved by Chrome, you can manage/remove them and prevent any unwanted or malicious purchases.
This guide is meant to help you learn how you can view saved credit cards in Google Chrome. By the end of this guide, you’ll have an idea of how to view your stored credit cards and how to edit/remove them from Google Chrome.
That being said, let’s begin.”
Viewing Credit Cards in Chrome
Chrome’s advanced, user-friendly GUI makes it easy for the user to view and manage most of the information that has been stored by the browser. Its ease of access when it comes to editing/removing information makes it one of the best available options in the marketplace.
If you follow these steps correctly, then viewing your credit card information on Chrome should be a walk in the park.
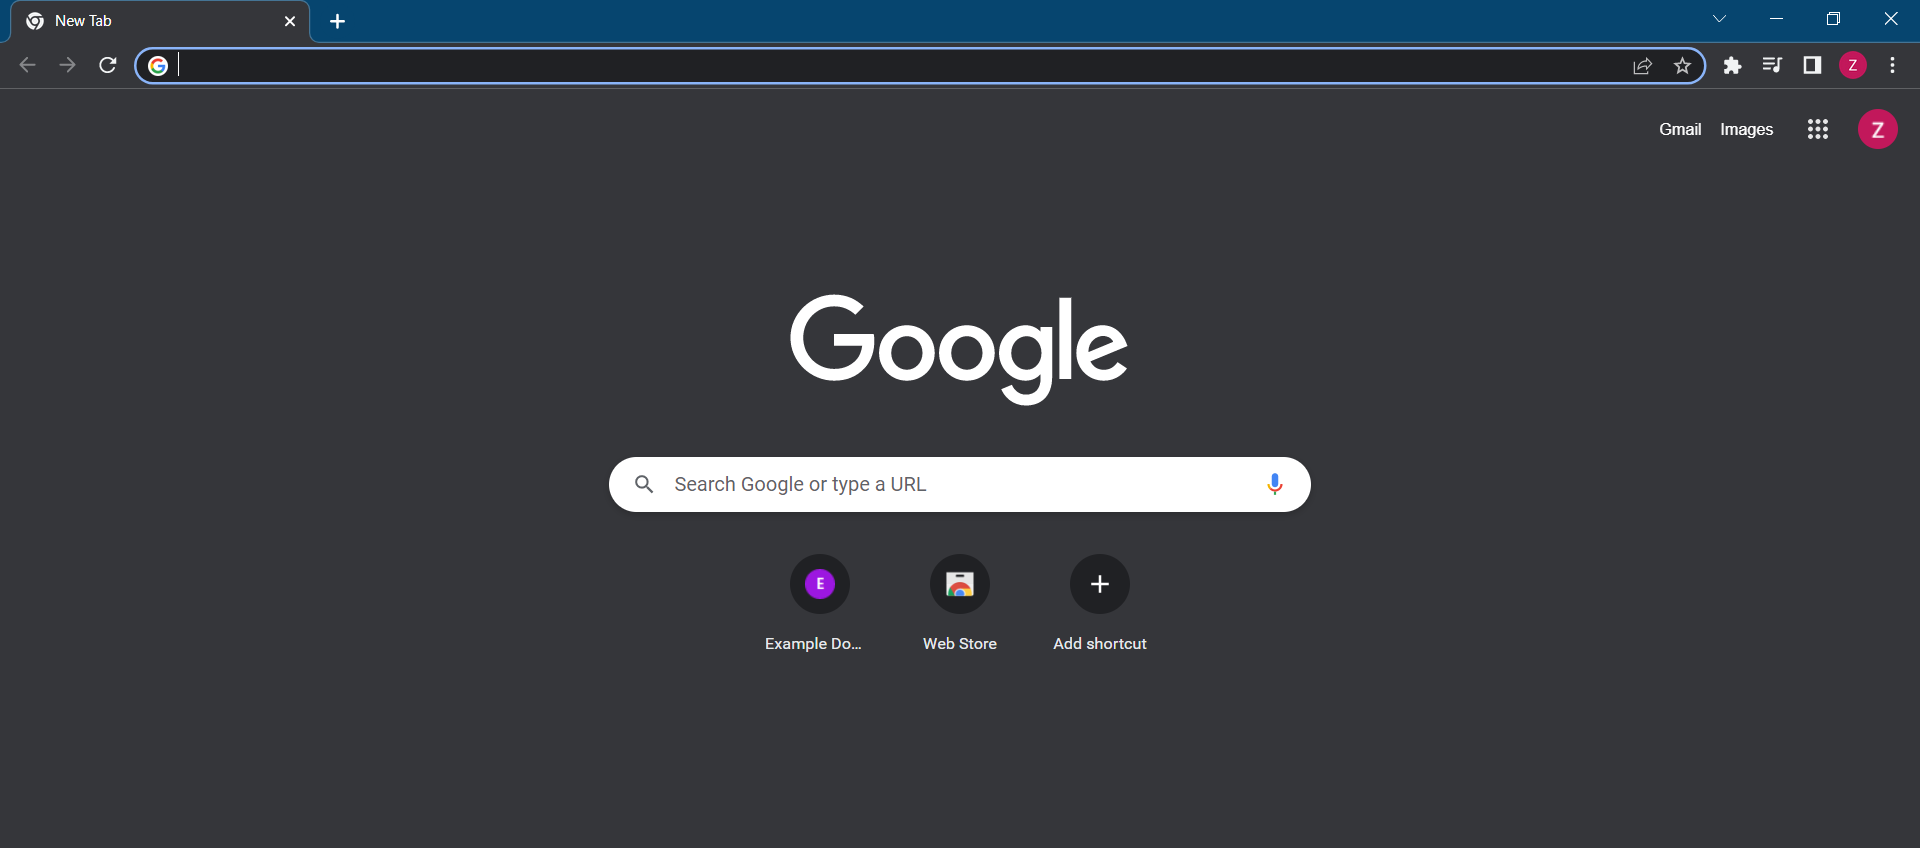
Start by opening up Google chrome. You should see the default window pop up as follow.
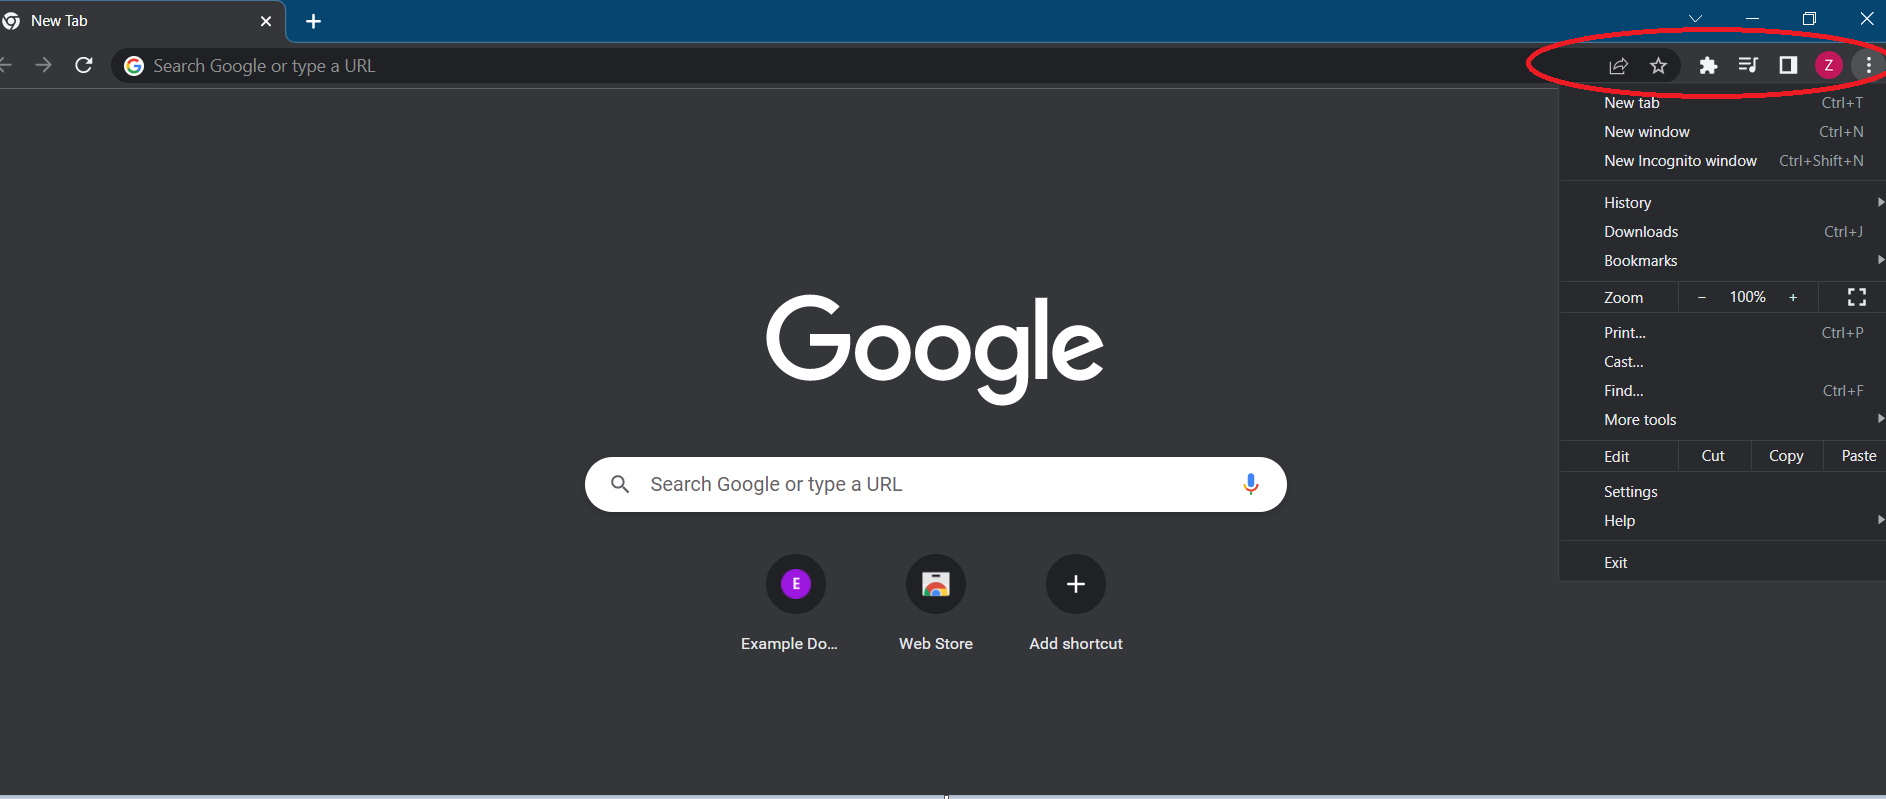
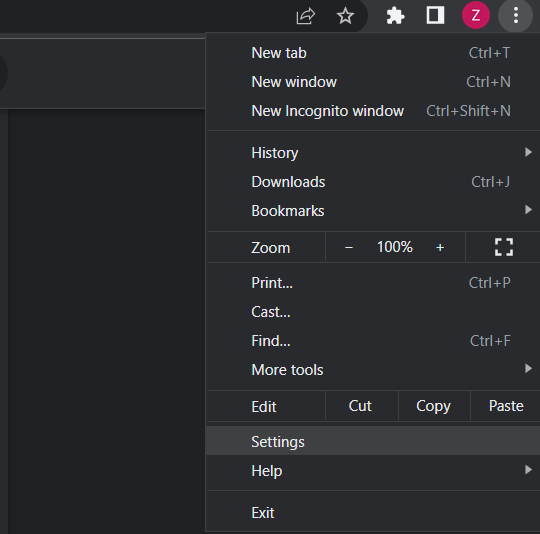
Once the window opens up, click on the 3 vertical dots in the top right corner of the screen. This should open up Google Chrome’s customization menu. Your screen should look similar to the image below.
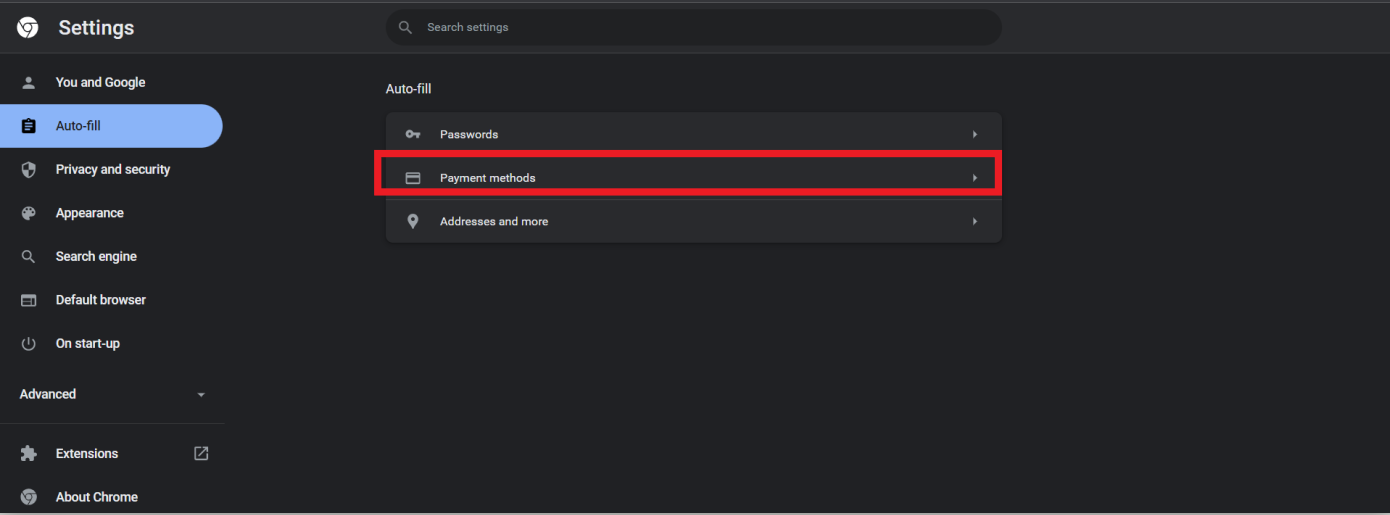
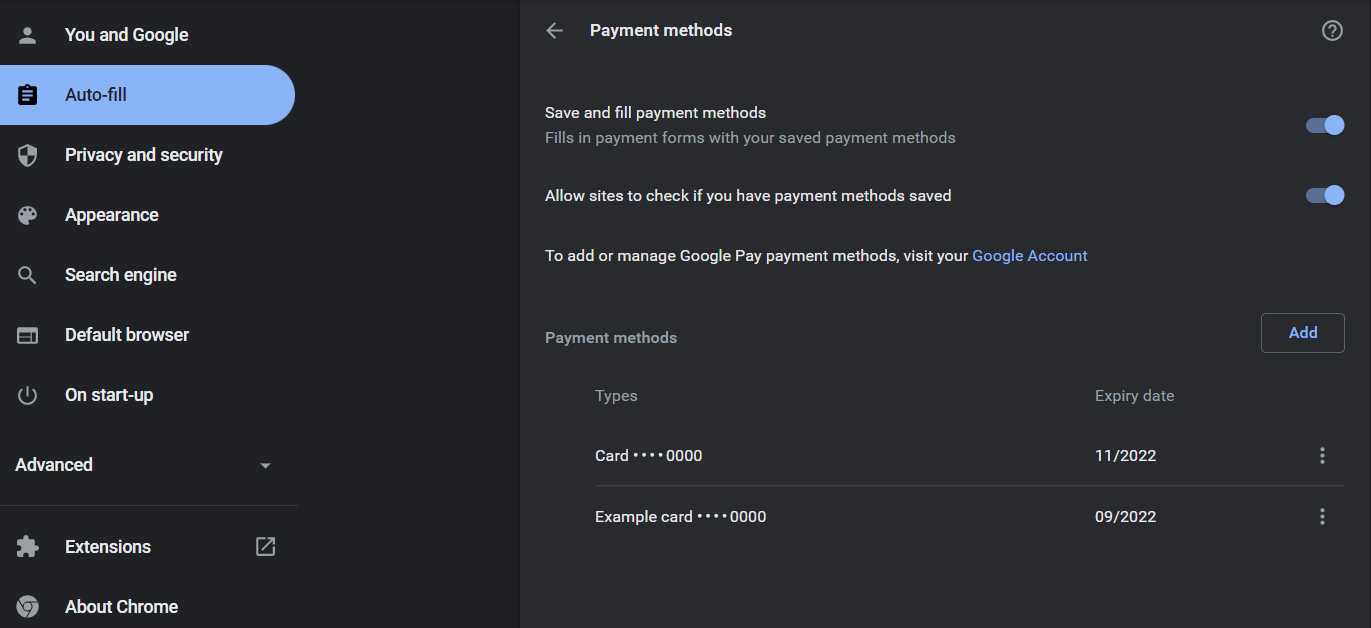
At the bottom of the menu, click on “Settings”. This should open up the Settings window. Once you’re there, navigate to the “Auto-fill” menu located on the left side of your Settings window. You should see an option titled “Payment methods”.
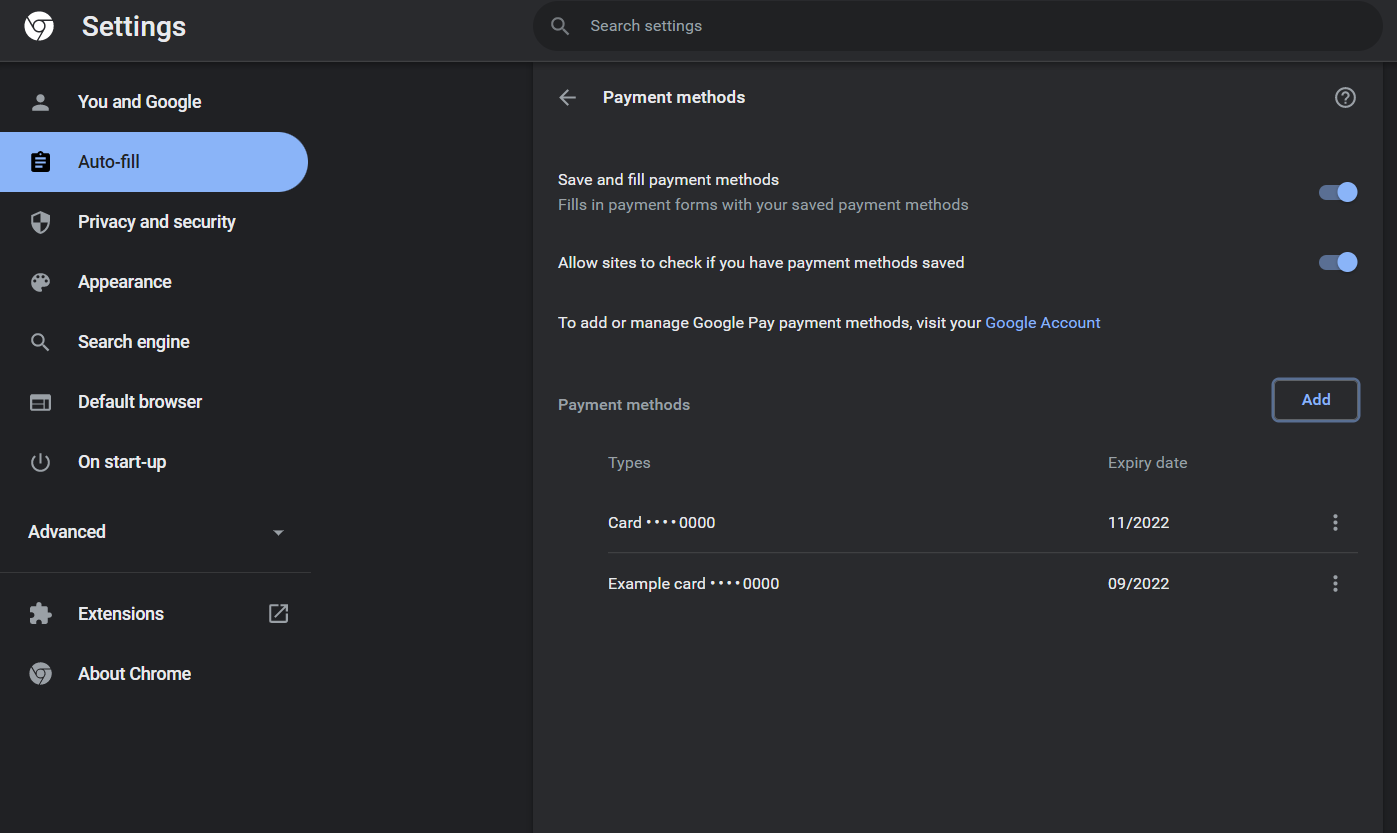
On clicking Payment methods, you should see a list of options. Your saved payment methods will be shown at the end.
With this, you have learned how you can view your saved credit cards in Google Chrome. The next section of the guide will show how you can manage your cards.
Editing Your Credit Card Information in Chrome
This section will cover how you can edit your saved credit card information. Chrome makes editing your credentials simple. Just follow these steps to edit your credit card information.
Start by opening up Google Chrome on your device. Click on the three dots located in the top right corner of the window.
From the menu, click on “Settings”.
This should open the Settings menu in Google Chrome.
In Settings, navigate to Auto-fill 🡪 Payment methods. You should see a window similar to the image below.
You should see a list of your saved credit cards. Click on the three vertical dots next to the credit card you wish to edit and select Edit.
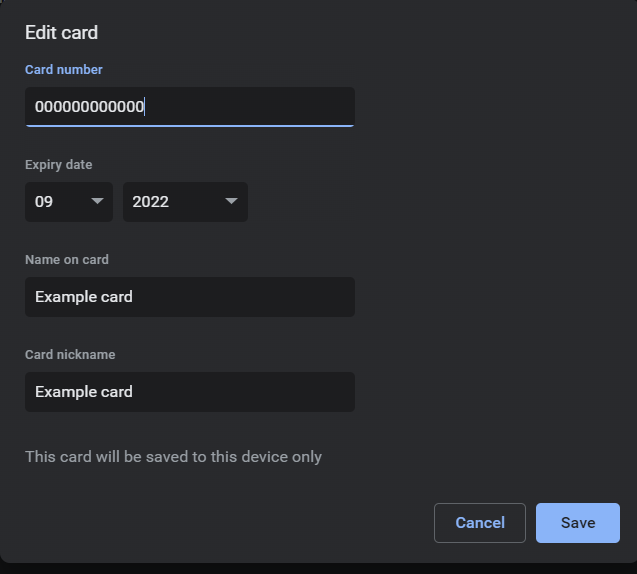
You should see a popup window with details about your saved credit card. Make any changes as required and click Save.
With this, you have learned how you can edit your saved credit card information in Chrome.
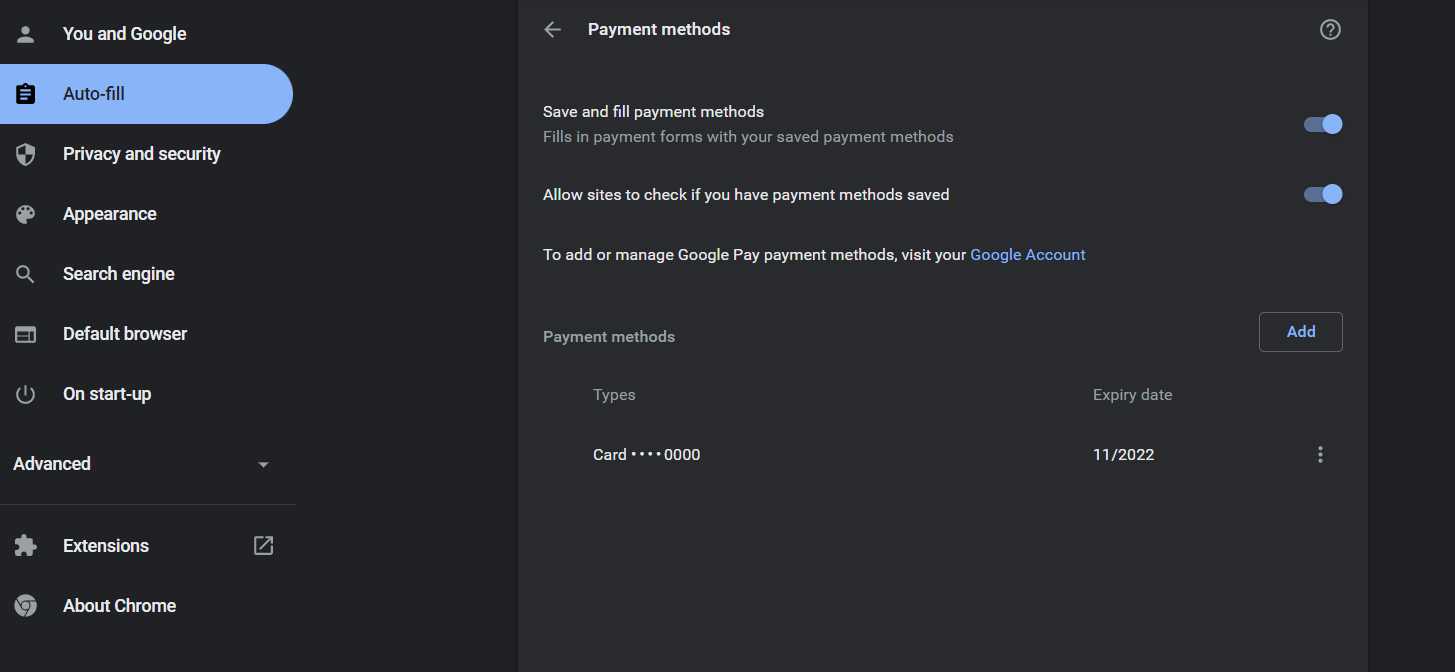
Chrome also allows you to remove any saved credit cards on your device. The process is similar to that of editing your credit card information. The only difference is that you select Remove in place of Edit in the Payment methods window.
Doing so should remove the card, and it won’t be visible in the Payment methods menu.
Additional Options in Payment Methods Menu
You may have noticed that aside from the option to Add, Edit, and Remove credit cards, the Payment Methods menu also has two more options. A detailed description of these options is given below.
- Save and fill payment methods: By having this option enabled, any credit card information that you’ve saved will automatically be entered whenever you need to make an online purchase. While it may be a useful feature, it isn’t recommended if you’re using a system that doesn’t belong to you or is shared among people.
- Allow sites to check if you have payment methods saved: This will allow websites to scan and check whether you’ve saved any credit cards in your browser. It auto-fills the information as soon as you reach the checkout page on a website.
While auto-filling may be a useful feature, it can be a double-edged sword if you’re on a website that isn’t secure since it automatically hands over your credit card information to the website before you can do anything. We recommend using these features only when you’re aware that no one else has access to your device.
Conclusion
This concludes our guide on how you can view your saved credit card information on Google Chrome. We covered the method to view your credit cards, along with how you can remove or edit them. With this, we hope that you have a safe shopping experience when browsing the internet on Google Chrome.

