Views in PostgreSQL are graphical tables that display data from the corresponding tables. Common views can also be modified. PostgreSQL takes the concept of views to the next stage by allowing views to store information materially, referred to as materialized views. A materialized view preserves the output of a time-consuming, complicated query, allowing you to query the results quickly at any time. Materialized viewpoints are frequently used in data warehouses and business intelligence applications because they are helpful in situations that require fast access to data.
Why Use Materialized Views?
If the view command is too sluggish for you, you may prefer to use a materialized view. Materialized views have a lot of versatility by enabling you to retain a representation materially in the database with shorter access times. Suppose that you are required to create a database query to join a few tables, remove rows from the unioned collection, and sort the tables in various ways. This could be a complicated and time-consuming query, and without materialized views, you will end up using a materialized view to tackle this dilemma. This article teaches you how to use materialized views in PostgreSQL.
Syntax
The explanation for this general view is as follows:
- View_name: The title of the view to be created with the CREATE MATERIALIZED VIEW statement.
- Query: The query that obtains the data from the corresponding tables.
- WITH [NO] DATA: choose the WITH DATA option to incorporate information data into the materialized view at the time of development; otherwise, choose WITH NO DATA. The view is marked as incomprehensible if you use the WITH [NO] DATA option, which implies you will not be able to search for information from the view unless you have loaded data into it first.
How to Use Materialized Views
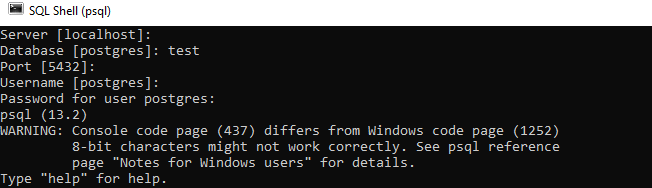
Start your PostgreSQL command-line shell to begin working on materialized views.
Provide the server name, database you want to work on, port number, and username to start using the command shell. Leave these spaces empty if you want to use the default system.
Example 1: Simple View
To understand the materialized view, you first need to understand simple views. So, create the new table, ‘Student,’ using the CREATE TABLE command, as appended.
![]()
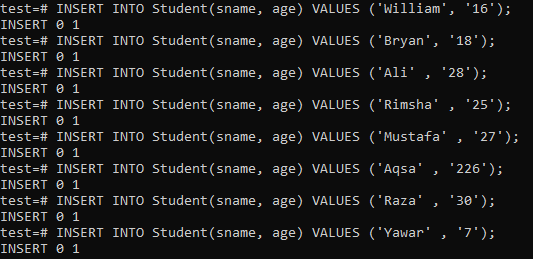
After that, insert data into it using the INSERT query.
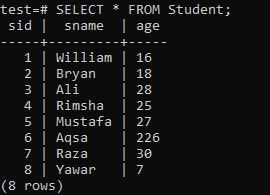
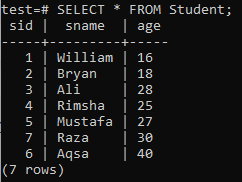
Fetch the records of the ‘Student’ table using the SELECT statement for the simple view.
Example 2: Simple Materialized View
Now, it is time to cover the materialized view. We will use the ‘Student’ table to create a materialized view. We will create a materialized view named ‘std_view’ using the ‘CREATE MATERIALIZED VIEW’ command. In this view, we will fetch the student name field ‘sname’ from the ‘Student’ table, grouped and sorted in ascending order in the ‘sname’ column.
![]()
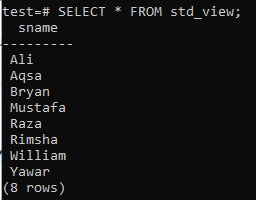
Now, using the SELECT query to execute the view, we will return the names of students in the ‘sname’ column of the ‘Student’ table.
Example 3: Materialized View Using WHERE Clause
Now, we will create a materialized view using the WHERE clause. Consider the following ‘Student’ table with some changes to its values.
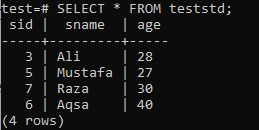
Then, we will create a materialized view named ‘teststd’ using the ‘CREATE MATERIALIZED VIEW’ query. We will select the records of the ‘Student’ table where the value of the ‘age’ column is greater than ‘25’ using the WHERE clause. The query works properly, as seen in the picture.

Finally, we will execute the materialized view that we just created using the SELECT command, as below. You will see that it will return all the records from the ‘Student’ table in which the ‘age’ column has a value of greater than ‘25.’
Example 4: Refresh Materialized View Using WITH NO DATA Clause
In this example, we will create a materialized view, in which we will use the WITH NO DATA clause to refresh the view. Assume that the following ‘Student’ table with some alterations in its values.
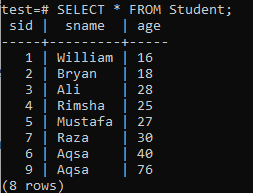
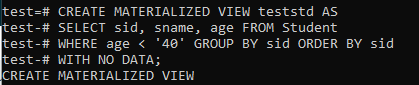
We will now create the materialized ‘teststd’ view. This view will select the records from the ‘student’ table in which the age of the students is less than ‘40.’ The fetched records will be grouped and sorted according to ascending order in the ‘sid’ column. At the end of the query, we will use the WITH NO DATA clause to indicate that the query will not save any information in a materialized view. The view shown below should successfully perform these actions.
When you add the ‘WITH NO DATA’ clause to a materialized view, this creates a blank one. This materialized view is not queryable. As you can see in the following image, it is not fetching the records in the newly created view.

The REFRESH MATERIALIZED VIEW statement is used to import the data into a materialized view. Fill in the materialized view by running the following REFRESH MATERIALIZED VIEW query in the shell. As you can see, this query has worked effectively.
![]()
Again, fetch the records of the materialized view ‘teststd’ using the SELECT statement in the shell. This time, the SELECT query works properly because the ‘REFRESH’ statement has loaded contents into the materialized view.

Example 5: Drop Materialized View
The following command will delete a materialized view.
![]()
Conclusion
This article showed you how to use materialized views via the WHERE clause and REFRESH queries in the command-line shell.