This post covers the PostgreSQL partitioning. We will discuss the different partitioning options that you can use and give examples on how to use them for better understanding.
How to Create the PostgreSQL Partitions
Any database could contain numerous tables with multiple entries. For easy management, you should partition the tables which is a great and recommended data warehouse routine for database optimization and to aid in reliability. You can create different partitions including the list, range, and hash. Let’s discuss each in detail.
1. List Partitioning
Before considering any partitioning, we must create the table that we will use for the partitions. When creating the table, follow the given syntax for all partitions:
The “table_name” is the name for your table alongside the different columns that the table will have and their data types. For the “partition_key”, it is the column by which the partitioning will occur. For instance, the following image shows that we created the “courses” table with three columns. Moreover, our partitioning type is LIST, and we select the faculty column as our partitioning key:

Once the table is created, we must create the different partitions that we need. For that, proceed with the following syntax:
For instance, the first example in the following image shows that we created a partition table named “Fset” which holds all values in the “faculty” column that we selected as our partition key whose value is “FSET”. We used a similar logic for the other two partitions that we created.

Once you have the partitions, you can insert the values into the main table that we created. Each value that you insert is matched with the respective partitioning based on the values in the partition key that you selected.
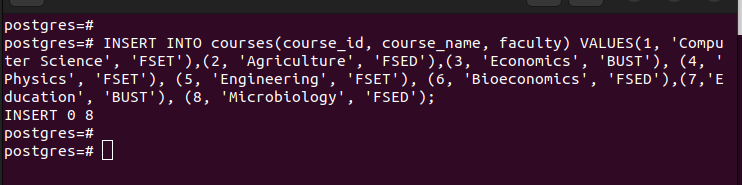
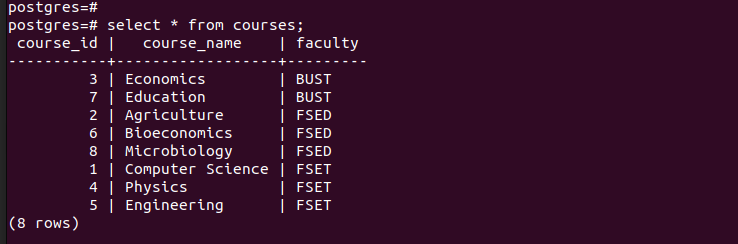
If we list all the entries in the main table, we can see that it has all the entries that we inserted.
To verify that we successfully created the partitions, let’s check the records in each of the created partitions.
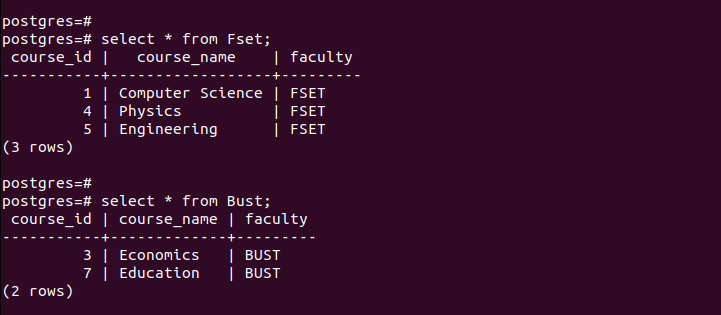
Notice how each partitioned table only holds the entries that match the criteria that are defined when partitioning. That’s how partitioning by list works.
2. Range Partitioning
Another criterion for creating partitions is using the RANGE option. For this, we must specify the start and end values to use for the range. Using this method is ideal when working with dates.
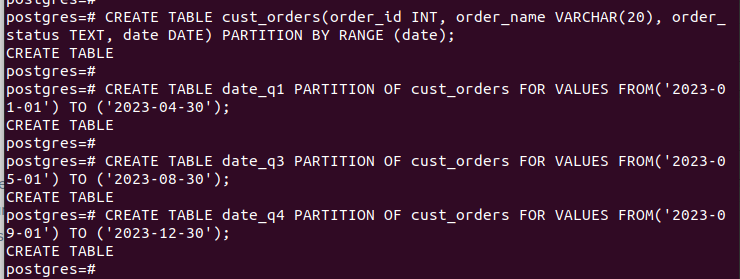
Its syntax for creating the main table is as follows:
We created the “cust_orders” table and specified it to use the date as our “partition_key”.

To create the partitions, use the following syntax:
We defined our partitions to work quarterly using the “date” column.
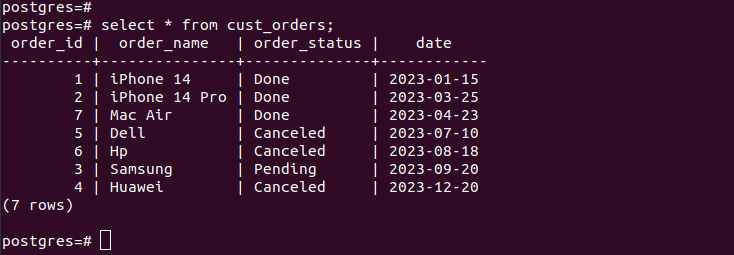
After creating all the partitions and inserting the data, this is how our table looks:
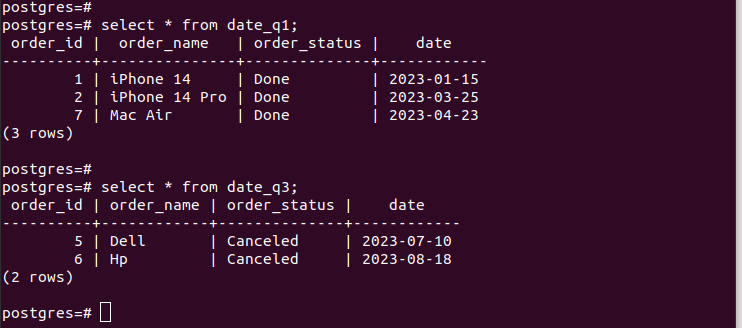
If we check the entries in the created partitions, we verify that our partitioning works and we only have the appropriate records per the partitioning criteria that we specified. For all the new entries that you add to your table, they get added to the respective partition automatically.
3. Hash Partitioning
The last partitioning criterion that we will discuss is using hash. Let’s quickly create the main table using the following syntax:

When partitioning with hash, you must supply the modulus and remainder, the rows to be divided by the hash value of your specified “partition_key”. For our case, we use a modulus of 4.
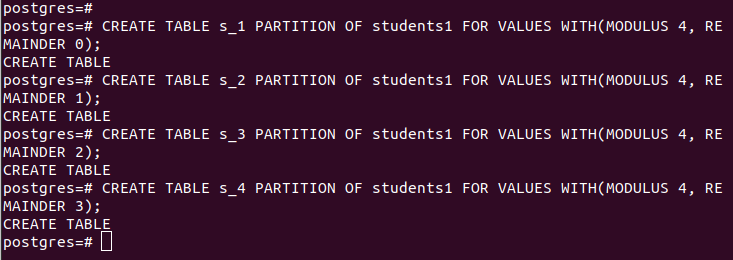
Our syntax is as follows:
Our partitions are as follows:
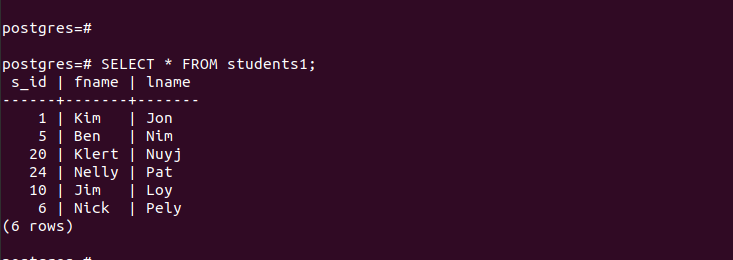
For the “main_table”, it contains the entries that are shown in the following:
For the created partitions, we can access their entries quickly and verify that our partitioning works.

Conclusion
PostgreSQL partitions are a handy way of optimizing the database to save time and enhance the reliability. We discussed the partitioning in detail including the different options available. Moreover, we provided examples on how to implement the partitions. Try them out!