
Ansible is a process automation server with a strong applicability in core technologies such as DevOps processes. Ansible is one of the automation tools that can perform operations on multiple machines simultaneously. Ansible runs/installs the scripts/playbooks on the remote servers and also manages them.
When managing the servers, some commands or tasks take time, for which the administrator cannot be sitting bound. For instance, the update and upgrade commands are the primary commands when managing the servers and need to be run daily. So, in such scenarios, Ansible is one of the primary choices of administrators to automate their tasks.
This post illustrates the complete usage of Ansible to automate servers.
- Basic Workflow of Ansible
- How to Use Ansible for Automated Server Setup
- Step 1: Install Ansible | Control Node Side
- Step 2: Create an Inventory File | Control Node Side
- Step 3: Configure SSH | Host Side
- Step 4: Create a New User and Establish a No-Password Login on a Specific Username | Host Side
- Step 5: Verification | Test the Ansible Connection With the Hosts
- Step 6: Create an Ansible Playbook for Automated Server Setup
- Conclusion
Note: Before heading to the main section, let’s have a quick recap of how Ansible works. Please click here if you want to jump ahead to the installation and configuration section.
Basic Workflow of Ansible
Ansible environment consists of a Control Node, Managed Node(s), Inventory File, and Configuration File.
The Control Node has Ansible installed on it, and the Control Node interacts with the Managed Nodes via SSH.
Let’s have a look at the following picture that illustrates the components of Ansible and their logical integration.

Control Node
The system on which Ansible is installed. Since all the Ansible-related configurations are done on the Control Side, the Control Node is the main component of the Ansible environment.
Managed Nodes (Hosts)
The systems/machines to which we want to connect via Ansible. There could be multiple Hosts being managed by the Control Node. The hosts can be grouped into multiple categories or one main category.
Inventory File
The inventory file, also referred to as the hosts file, contains the IP addresses and groups of the host machines (Managed Nodes).
Configuration File
The config file contains an alternative to the defaults. For instance, the default location of the inventory file is inside “/etc/ansible/”. If we create an inventory file other than the default location, then we have to put the path in the config file. Similarly, the default username can be written inside the configuration file.
Ansible Playbook
The Ansible Playbook is a YAML-formatted file (YAML Ain’t Markup Language). It is created on the control node side and contains the instructions/commands that the control node will run on the managed nodes.
Now, let’s understand how Ansible contributes to automating the tasks within an organization.
How to Use Ansible for Automated Server Setup
To make Ansible functional, we need to configure and successfully deploy the Ansible prerequisites. First, we will start with the “Control Node setup”:
Step 1: Install Ansible | Control Node Side
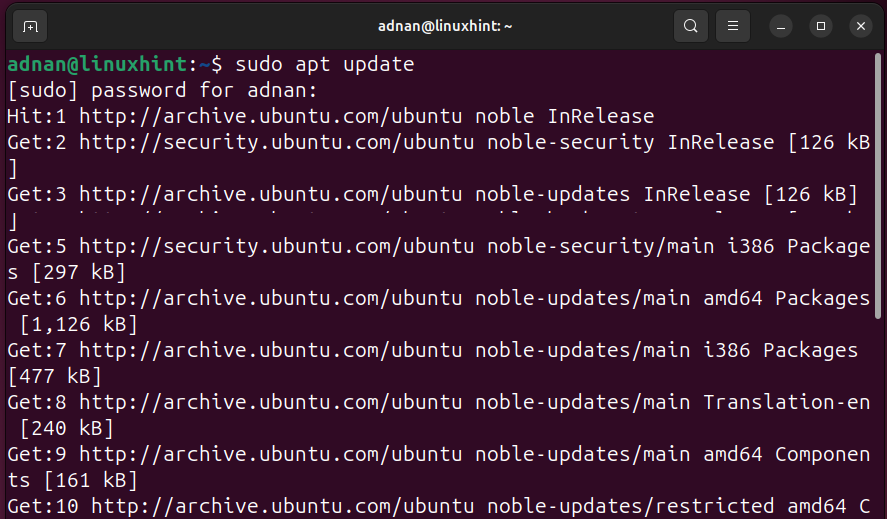
Let’s update the Ubuntu system repositories:
sudo pacman -Syu
sudo dnf update
sudo zypper update
The “Ansible” is available on the default repositories of most of the Linux distros and thus can be installed using the command:
sudo dnf install ansible
sudo zypper install ansible
sudo pacman -S ansible

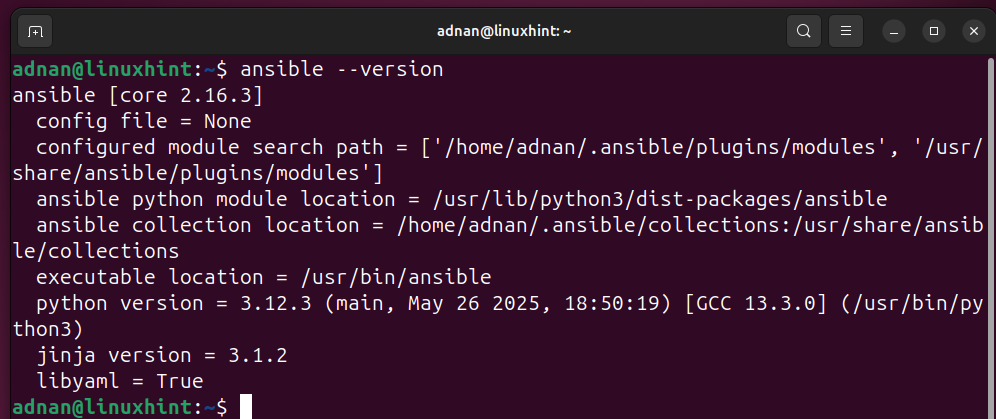
Verify the installation using the command:
Step 2: Create an Inventory File | Control Node Side
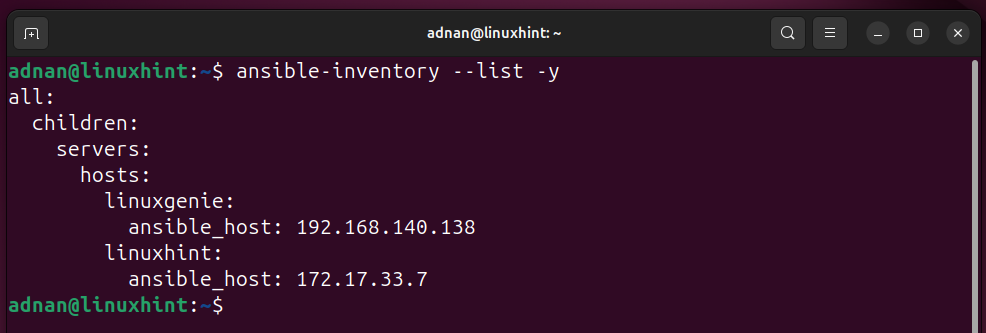
The default location of the inventory/hosts file is “/etc/ansible/hosts”. It may not be available when we install Ansible from the default repositories, so we need to create it anywhere in the filesystem, preferably in the default location. If we create the inventory file other than the default, we need to provide the path of the inventory file in the configuration file.
Note: IP/Server Grouping in the Inventory File
We are keeping both the hosts in one group “[servers]”. We can put them into separate categories. It depends on the requirements (Like, if one IP refers to webservers, we put them in one group. Similarly, if the other IP refers to the database, then we can put it into a different category.)

Let’s verify the inventory listing using the ansible-inventory command:
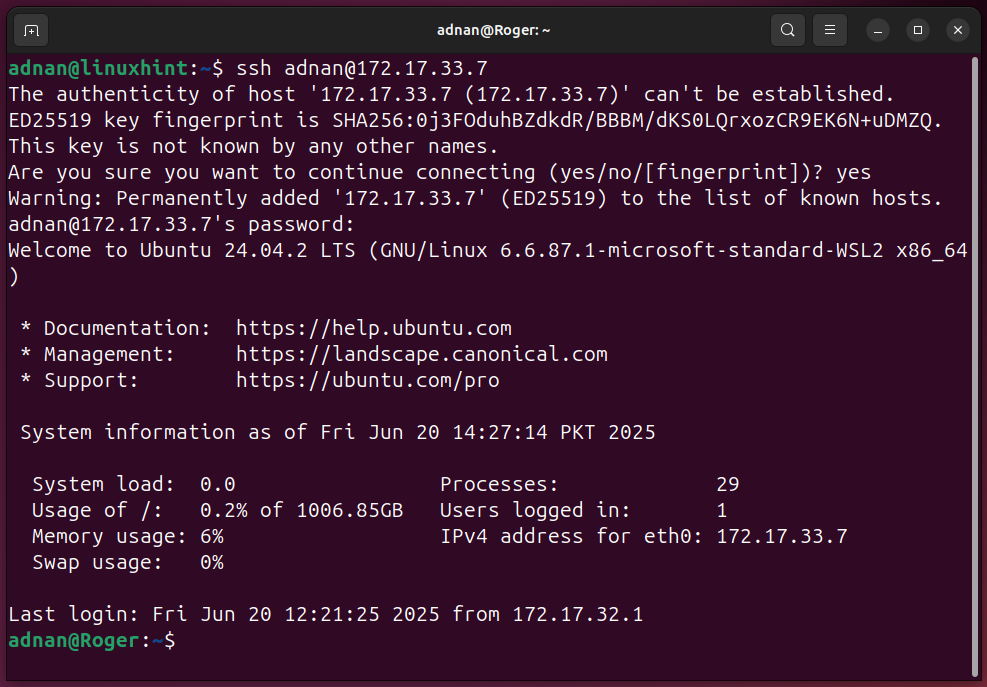
Step 3: Configure SSH | Host Side
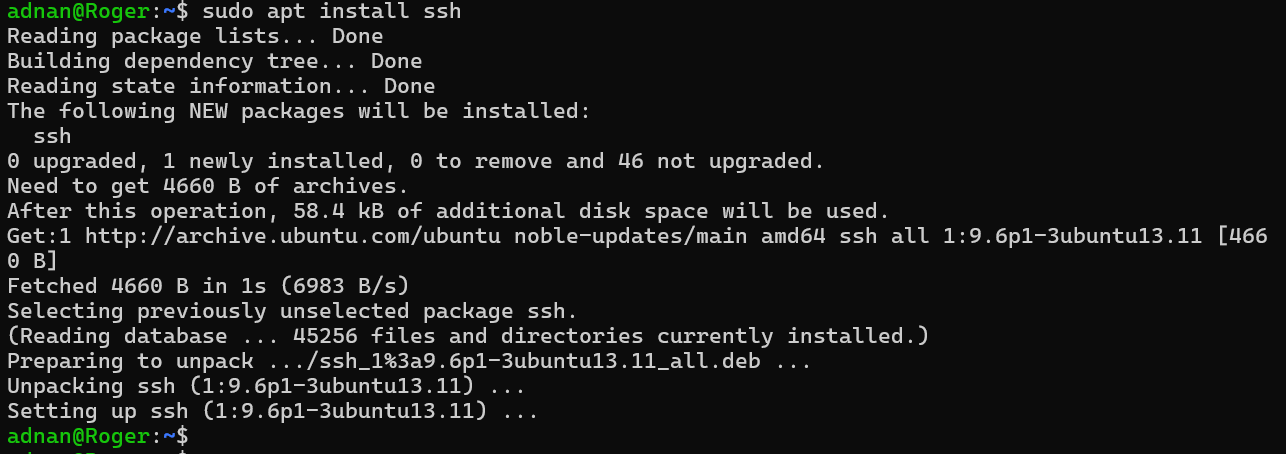
SSH is the key connection medium between the Control Node and Hosts. SSH is to be installed and configured on all the remote hosts that are in the inventory/hosts file:
Let’s install SSH on one host node first:
sudo zypper install ssh
sudo dnf install ssh
sudo pacman -S ssh
Allow port 22 through the firewall on the host side:

Let’s check the status of the firewall:

Note: These commands refer to installing and the overall configuration of SSH.
Step 4: Create a New User and Establish a No-Password Login on a Specific Username | Host Side
First, let’s create a dedicated user for the Ansible “control node” to “hosts” operations.

Adding the Ansible user to the sudo group:

Enable passwordless logins for that user to ensure there are no interruptions while connecting automatically.
Open the sudoers file, write the following phrase with the correct username and the key values ass provided:

Testing SSH Connection | From Ansible Control Node to one Ansible Host:
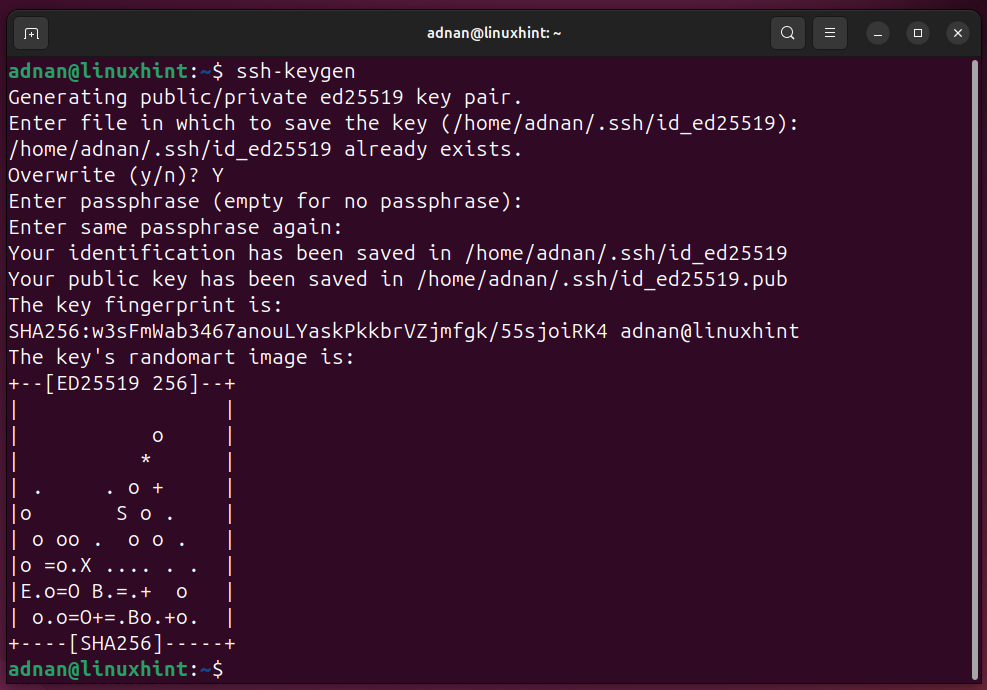
- Set up SSH Keys
Since we need to have a passwordless login thus we set up SSH keys here. First, generate an SSH key using the command:
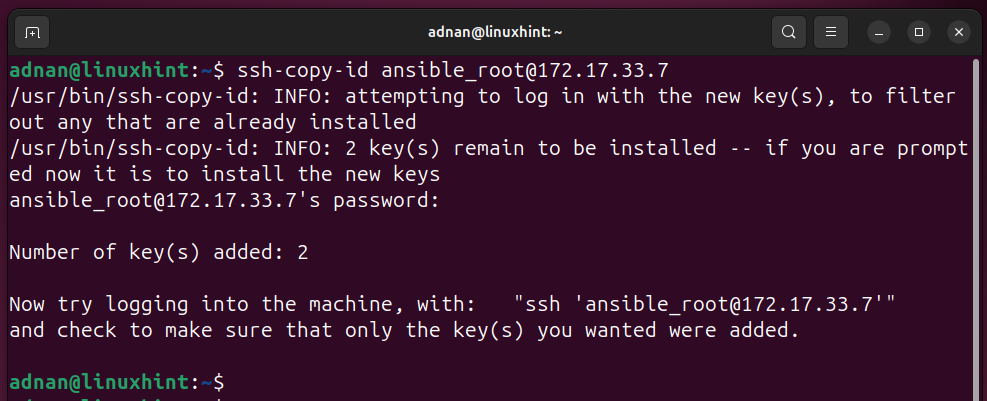
SSH key generation and copying the public key to the remote host:
Note: Copy the public key to the user that you will be using to control the hosts on various machines.
Copying the SSH key to one of the host(s):
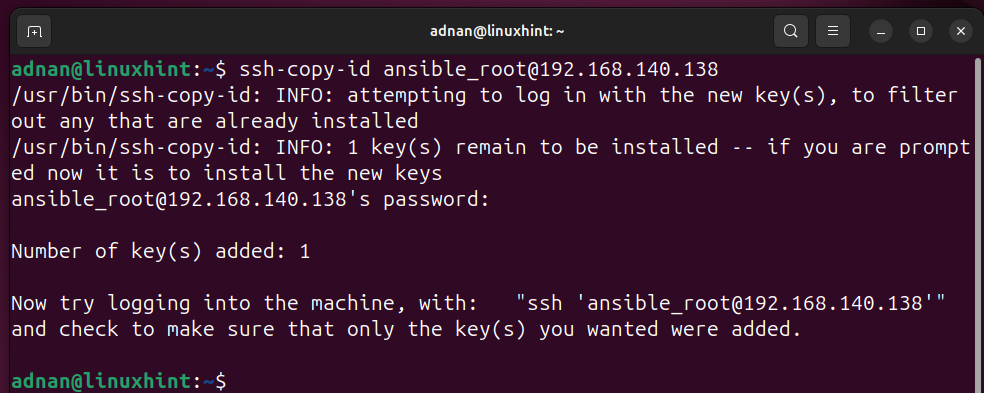
Copying the SSH key to the remaining host(s):
Step 5: Verification | Test the Ansible Connection With the Hosts
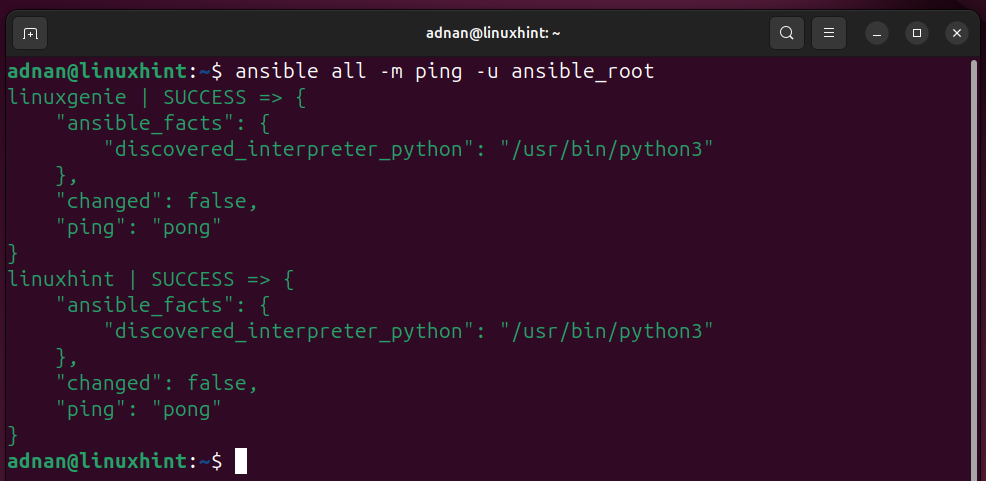
Testing the Ansible Connection to the Ansible host (remember to use the username who is trusted at the host or has a passwordless login). We have the user “ansible_root” as the trusted user in the Ansible user list.
The “all” refers to scanning and checking all the hosts in the inventory file.
We can refer to only a single node or a group of nodes as well.
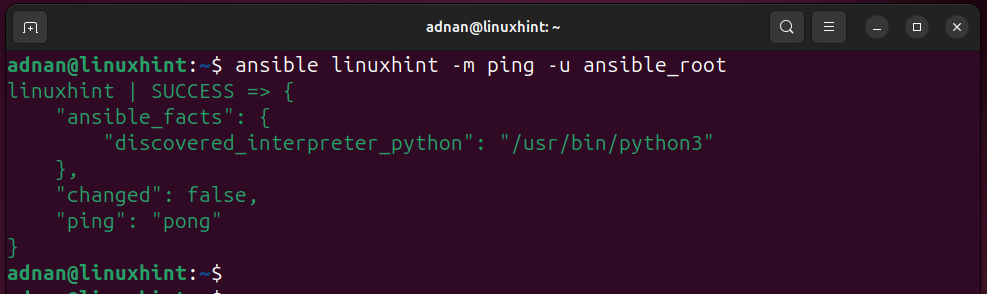
- Pinging a Single Managed Node:
The command below tests the connection from the control node to one managed node named “linuxhint”:
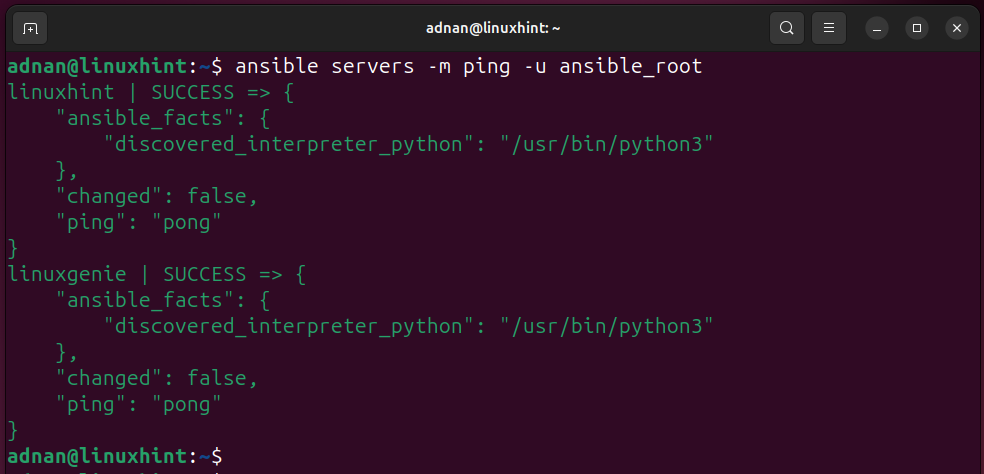
- Pinging a Group of Servers:
Similarly, a group of servers can be tested separately. For instance, we have a group name “servers” in our hosts/inventory file, so we are pinging that group only:
Step 6: Create an Ansible Playbook for Automated Server Setup
This is the final step towards automating a server setup using Ansible. Here, we write an Ansible Playbook, which is a structured script written in YAML (YAML Ain’t Markup Language) to automate server configuration, package installation, network configuration, or any other task.
Step 6.1: Create a Directory for the Ansible Project
We can directly create a”.yaml” or “.yml” file. However, for a more structured and understandable manner, let’s create a dedicated directory to keep Ansible stuff separate:

Step 6.2 Create a Playbook
Ansible Playbook follows a specific YAML-inspired structure to create an automated script. We need to be cautious while writing a “YAML” because one missing space or any extra space results in the failure of the Playbook.
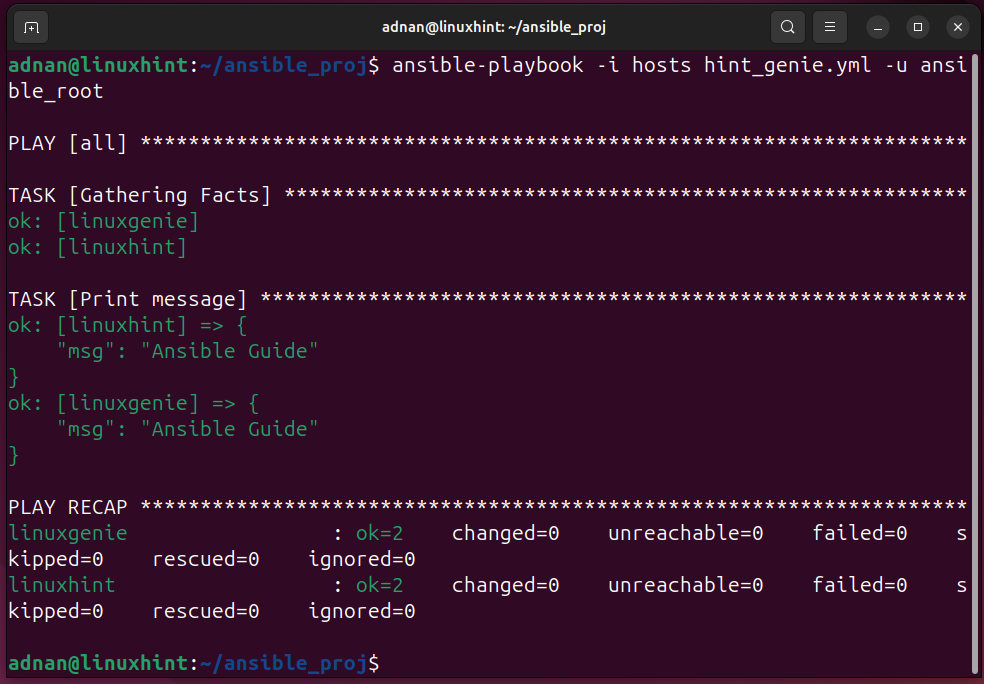
Here’s the first Playbook script:
Code:
- hosts: all
tasks:
- name: Print message
debug:
msg: Ansible Guide
In the Playbook:
- hosts: all → Shows that this Playbook can be run on all the nodes at first.
- tasks → This phrase denotes the initiation of listing tasks in the Playbook.
- – name: Print message → Name of the task.
- – debug → Purpose of the task.
- Msg: Ansible Guide → This is the debug message.
- Install a Package Using Ansible Playbook
Let’s say we want to install a package through the Ansible Playbook. Here’s a simple Playbook to install a package on the connected hosts:
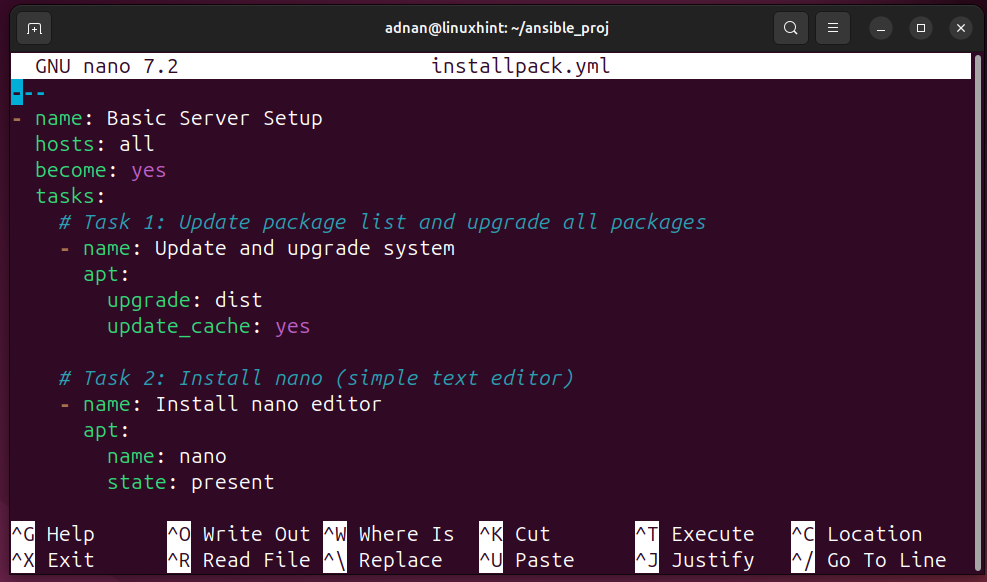
Code:
- name: Basic Server Setup
hosts: all
become: yes
tasks:
# Task 1: Update package list and upgrade all packages
- name: Update and upgrade system
apt:
upgrade: dist
update_cache: yes
# Task 2: Install nano (simple text editor)
- name: Install nano editor
apt:
name: nano
state: present
- The header of the Playbook is initialized, which includes the name, hosts, and privileges.
- There are only 2 tasks in this playbook. Task 1 updates and upgrades the system, whereas Task 2 installs the Nano, a simplified text editor in Linux.
- What is this apt in the Playbook? The “apt” is an Ansible Module to fetch apt-based packages. These kinds of Ansible modules can be changed as per our requirements. For instance, the “dnf” module can be used when dealing with Fedora-based managed nodes.
Let’s run the Playbook:
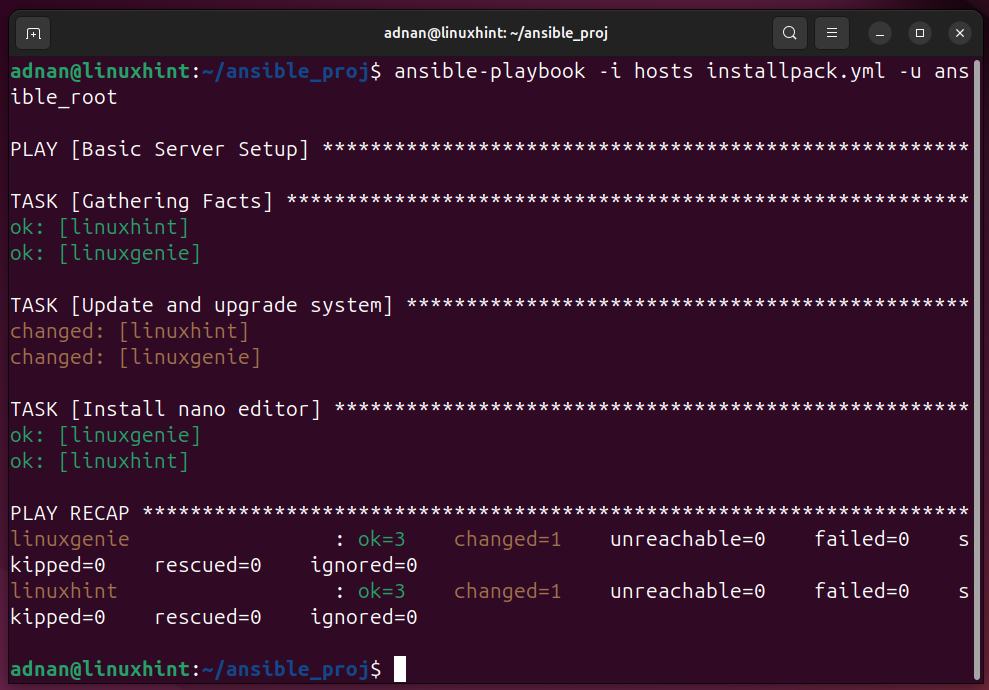
Note: Output of the Ansible Playbook → The “ok” and “changed” are the two words seen in the Ansible playbook’s output.
- “ok”: The operation has been performed on the requested host but hasn’t changed anything on the managed node. Usually, the “nano” editor is installed on most of the Linux distros, thus there was no changes to be made.
- “changed”: This action has been performed and has made changes to the system. For instance, the “update” and “upgrade” tasks have made changes to the systems
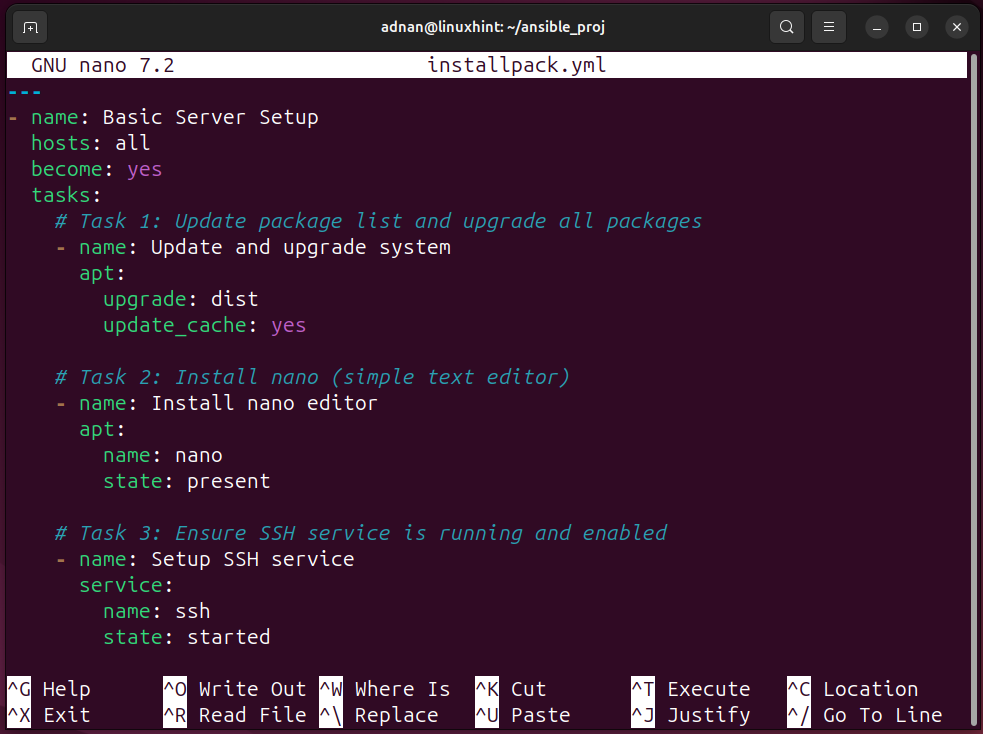
- Add Another Task in the Existing Playbook:
Likewise, we can append different Ansible tasks to this Playbook. Let’s add a simple SSH setup instructions in the do it by adding SSH to the previously used Ansible playbook:
Code:
- name: Setup SSH service
service:
name: ssh
state: started
enabled: yes
Here’s the Playbook after amendment:
Let’s run the Playbook again:
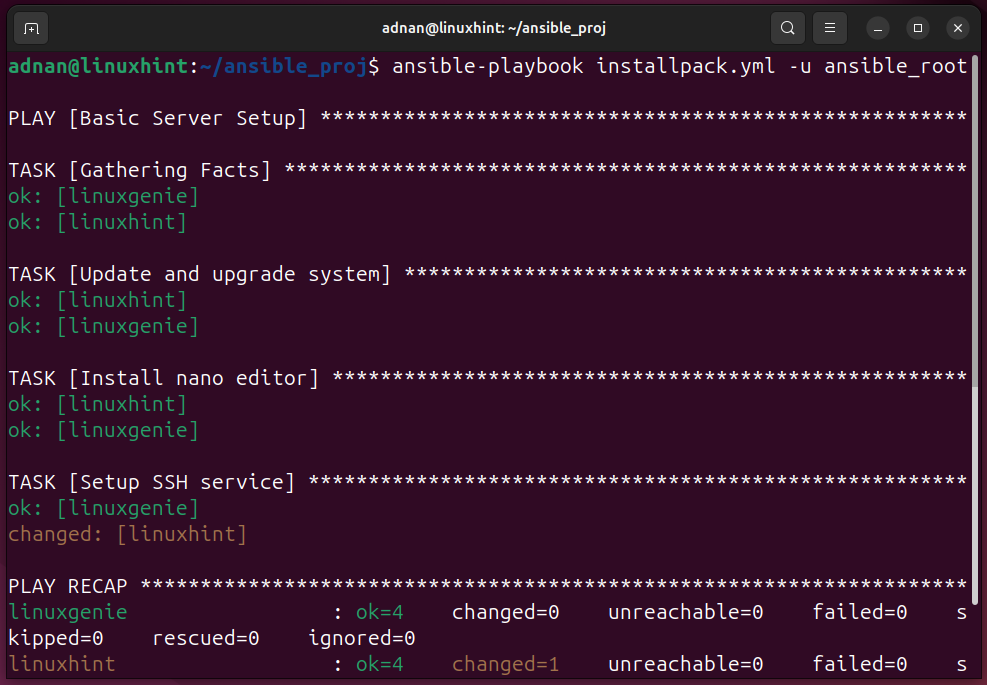
Now, look at the output. Only the SSH service has been set up on the Linuxhint. The rest all the tasks are already performed and had no impact (as per the output) due to their availability.
That’s all from this post.
Conclusion
To use Ansible for automated server, first, we have to install Ansible on the Control Node. Then, install and configure SSH on the Managed Nodes (hosts). The third step is to create a dedicated user, enable the passwordless login for this user, and generate SSH keys for further connections. Then, create an Ansible Playbook, and that’s all to use Ansible for an Automated Server.
This post has elaborated on the steps to use Ansible for automated Server Setup.
FAQs
Q 1: What is Ansible Used for
Ansible is used for automating different tasks within an IT organization. For instance, server configuration management, server automation, and orchestration (automatic coordination of complex IT tasks).
Q 2: How to Use Ansible for Automation
First, set up the Control Node and Hosts. Ensure that SSH is also established between the Control Node and the Hosts. After that, create an inventory file (where the IPs of the hosts to be written). There might be a need to create a configuration file as well to put the Hosts file address if you have created it somewhere outside the default directory (/etc/ansible).
Q 3: Can Ansible be Used for Network Automation
Yes, Ansible can be used for network automation. The administrator can create multiple Plays inside a playbook to automate the overall network settings.
Q 4: Can Ansible be Used for Server Configuration
Yes, Ansible can assist in configuring the server. For instance, if there is a need to configure Apache on the Managed Nodes, then we write a Playbook and run it across all (or selected) hosts.
Q 5: How to Manage Remote Servers Using Ansible
Ansible hosts multiple machines remotely and can install/remove packages from the hosts. If you are a regular user and just need to get the list of updated packages regularly. The administrator will write a playbook for you to get the updates regularly as per the set schedule. Similarly, Ansible maintains the package management, servers, and network through Ansible Playbooks (Plays).