Fortunately, with FreeBSD, updating the system isn’t that much of a hassle when compared to other operating systems, which mess up. You can run the FreeBSD update with a simple command:
This tutorial will help you with exactly that: follow the instructions below to upgrade your system working on FreeBSD v10.2v operating system.
Before you begin:
Make sure you’re logged in with the root command or using an account enabled to issue the sudo command. In this tutorial, the default FreeBSD user account, the FreeBSD droplet, will run the update.
Step 1: Identify any potential issues and install the latest patches
Before we upgrade the FreeBSD OS, we must acquire the patches and supporting packages for the latest FreeBSD version. Log in with the following command:
Now, we’d need some info on the latest FreeBSD version before we can make further changes. To find these details, issue the freebsd-update command with the –r option to highlight exactly which version we’re updating the server to. I have already upgraded my FreeBSD version
The output should report with adequate information. Now pinpoint which changes may cause any issues later.
Hit the y key to confirm and press enter. Upon confirmation, the system will automatically start updating the server. There are some things. However, that need we’ll need to configure ourselves after the update.
Step 2: Fix the post-upgrade issues
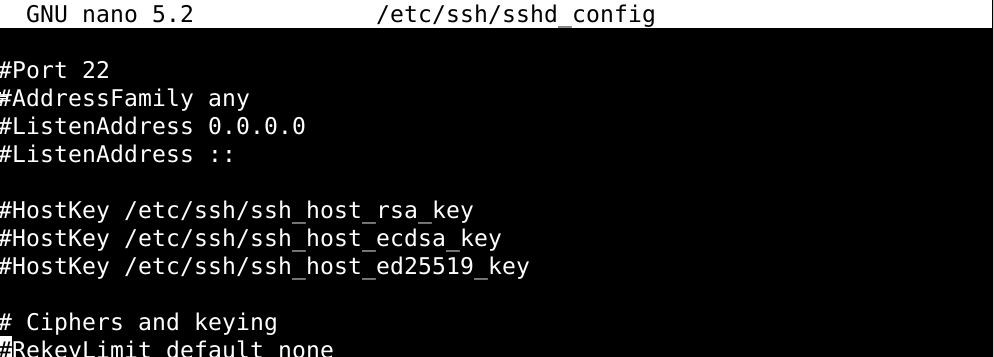
Once you’ve installed the latest packages, you’ll most likely see two error messages. Don’t worry; all you need to do is to make changes to two different configuration files in the /etc/ssh/sshd_config and /etc/rc.subr directories, respectively.
Press enter, and you’ll be automatically redirected to the /etc/rc.subr configuration file, and it’ll be launched in the nano text editor.
Delete any lines that appear related to the “latest” FreeBSD version, which isn’t actually associated with the version that we’ve just installed. See, the configuration file still recognizes FreeBSD 12.1 as the latest, while we’ve installed v12.2.
Save and exit the file when you’re done editing it, and a notification will pop up, confirming that the configuration file has been successfully integrated with the upgrade.
The second line is the error message, which will go away as soon as you fix the /etc/ssh/sshd_config configuration file. Hit the enter button to open this configuration file and start editing the file the same way you did the first one. You only have to remove the lines related to the 12.1 installs of FreeBSD, then save and exit the file.
You’ll then be shown the changes you’ve just made, and then you’ll be asked for permission to apply the changes. Just type y each time you’re asked the question.
Upon confirming your modifications, you’ll be displayed several pages long catalog of the binary files to which the system has made its modifications. This list should be identical to the screenshot below:
If you want to see the contents here, keep pressing the spacebar to make your way through each page or just hit the q key to skip the review process.
With all that taken care of, we can finally move on and upgrade to FreeBSD 12.2.
Step 3: Upgrade FreeBSD 12.1 to FreeBSD 12.2
Type in the command below to begin the installation:
The screenshot below illustrates what you’ll see once you issue this command:
You’ll need to reboot the system once the upgrade finishes. Type this command and hit enter to restart your system:
The SSH session will terminate, and the system will take a few minutes to reboot.
When the system boots back up again, log in to the same user account to continue.
To verify the install, check the current version installed on your system. Use the command below to log in to your server:
Then issue the following command:
If things have been going smoothly so far, you should see the output similar to the screenshot below:
One last thing before we wrap up: there’re probably some smaller updates released since the upgrade was made available to download.
You can fetch these updates by running the freebsd_update install command:
If you’re still being displayed the errors, don’t worry. Install the packages to update these files.
A safety measure is to upgrade all the third-party packages when FreeBSD is upgraded. Enter the command below:
The results of the above issue should resemble the following:
Press y and hit enter to proceed to receive the following output:
Again, press y and hit enter to upgrade the packages.
Use the rehash command to make sure your user account has full permission to use the installed packages.
With that, we’ve got the latest version of FreeBSD installed and ready to go.
In case your install is refusing to work,
The instructions in this article should properly work on your system too. Still, for the readers who couldn’t upgrade FreeBSD by following this tutorial, this section will help you roll back all the installs you’ve just made. Just use the command below:
The command above should undo all the work you’ve done to upgrade FreeBSD.
In summary
Hopefully, you’ve upgraded your FreeBSD 12.1 server to the latest v12.2 by following the commands in this tutorial. Upgrading FreeBSD isn’t nearly as much of a frustrating experience as upgrading some of the more mainstream operating systems *cough* windows *cough*.


