Outline:
- Resistor mode in a Multimeter
- Capacitor mode in a Multimeter
- Voltage mode in a Multimeter
- Time-Constant Method
- Continuity mode in a Multimeter
- Visual Appearance
- with an Analog Meter (AVO)
How long does an AC Capacitor last?
Conclusion
How to Test a Capacitor
While building a circuit, it is necessary to check every electrical component before and after placing in the circuit to verify if it is working perfectly and has the desired voltage and current ratings. This practice can help avoid any component failure while the circuit is up and running. Capacitors as mentioned above play an important role in electrical circuits because of their wide range of applications and are found in nearly every electrical circuit.
So, if you are either building a circuit that requires a capacitor and want to test it before connecting it in the circuit or if you have any suspicions that a capacitor in any circuit is not working properly, then here are some ways to test a capacitor:
- Testing a Capacitor with Resistor Mode in a Multimeter
- Testing a Capacitor with Capacitor Mode in a Multimeter
- Testing a Capacitor with Voltage Mode in a Multimeter
- Testing a Capacitor using Time-Constant
- Testing a Capacitor with Continuity Mode in a Multimeter
- Testing a Capacitor with a Visual Appearance
- Testing a Capacitor using the Traditional Method
- Testing a Capacitor with an Analog Meter(AVO)
Method 1: Testing a Capacitor with Resistor mode in a Multimeter
To monitor the circuit, it is necessary to have live data for values like voltage, current, power, and more. For that, there are a number of measuring devices like digital multimeters which is the best option while troubleshooting any issue in the circuits. Likewise, we can use it for testing different components of the circuit so to test a capacitor using a multimeter resistor mode here are some steps:
Step 1: Discharge the Capacitor
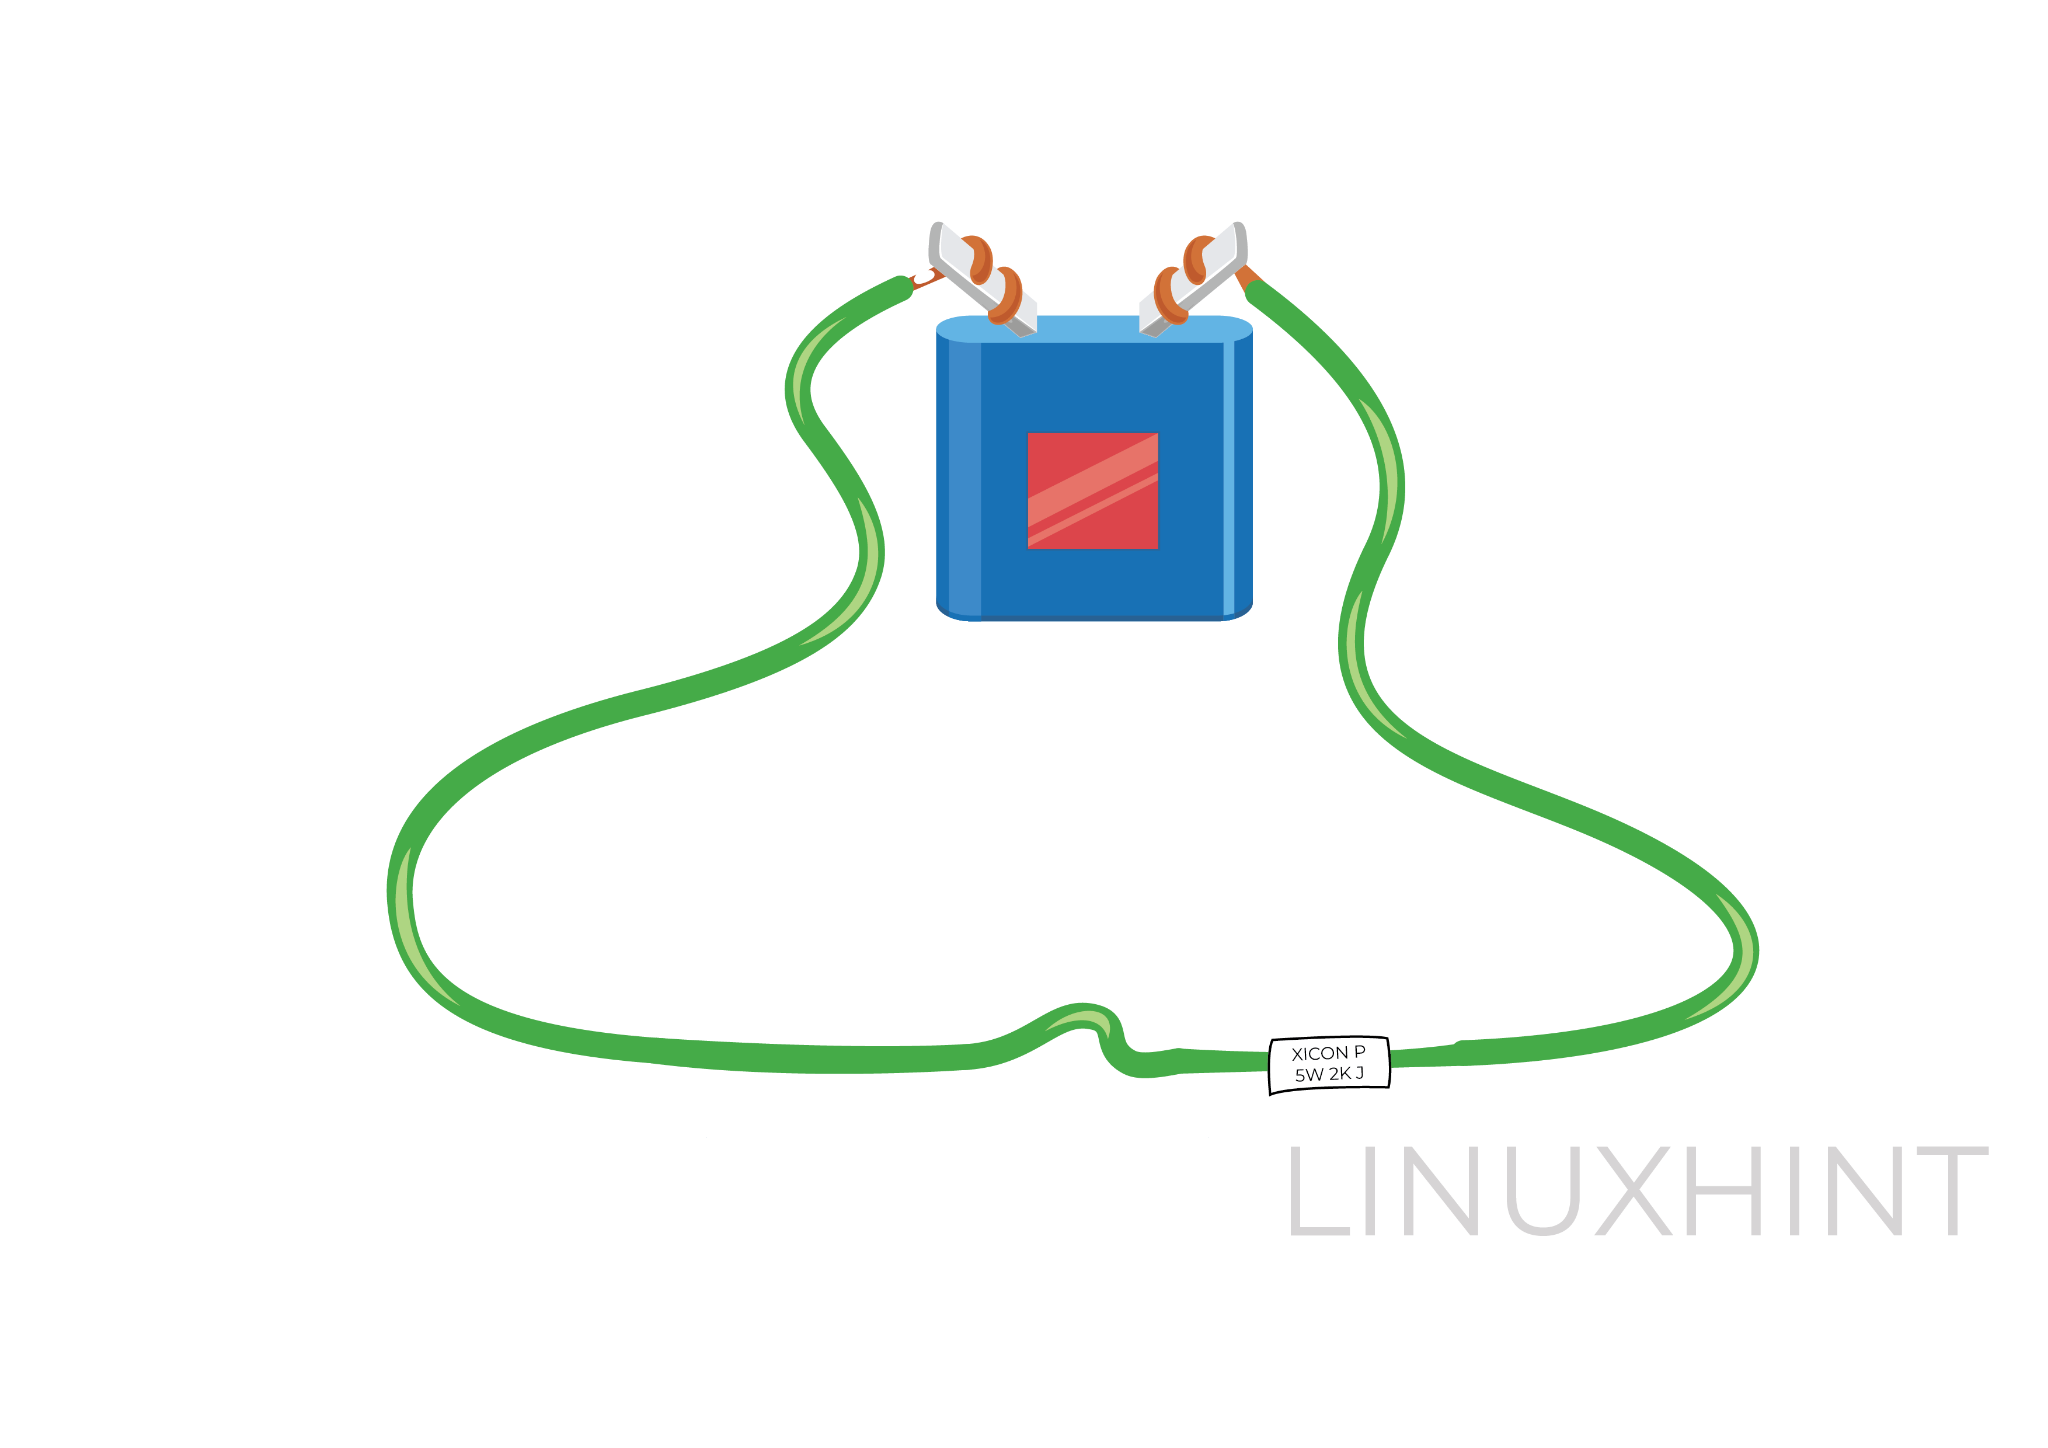
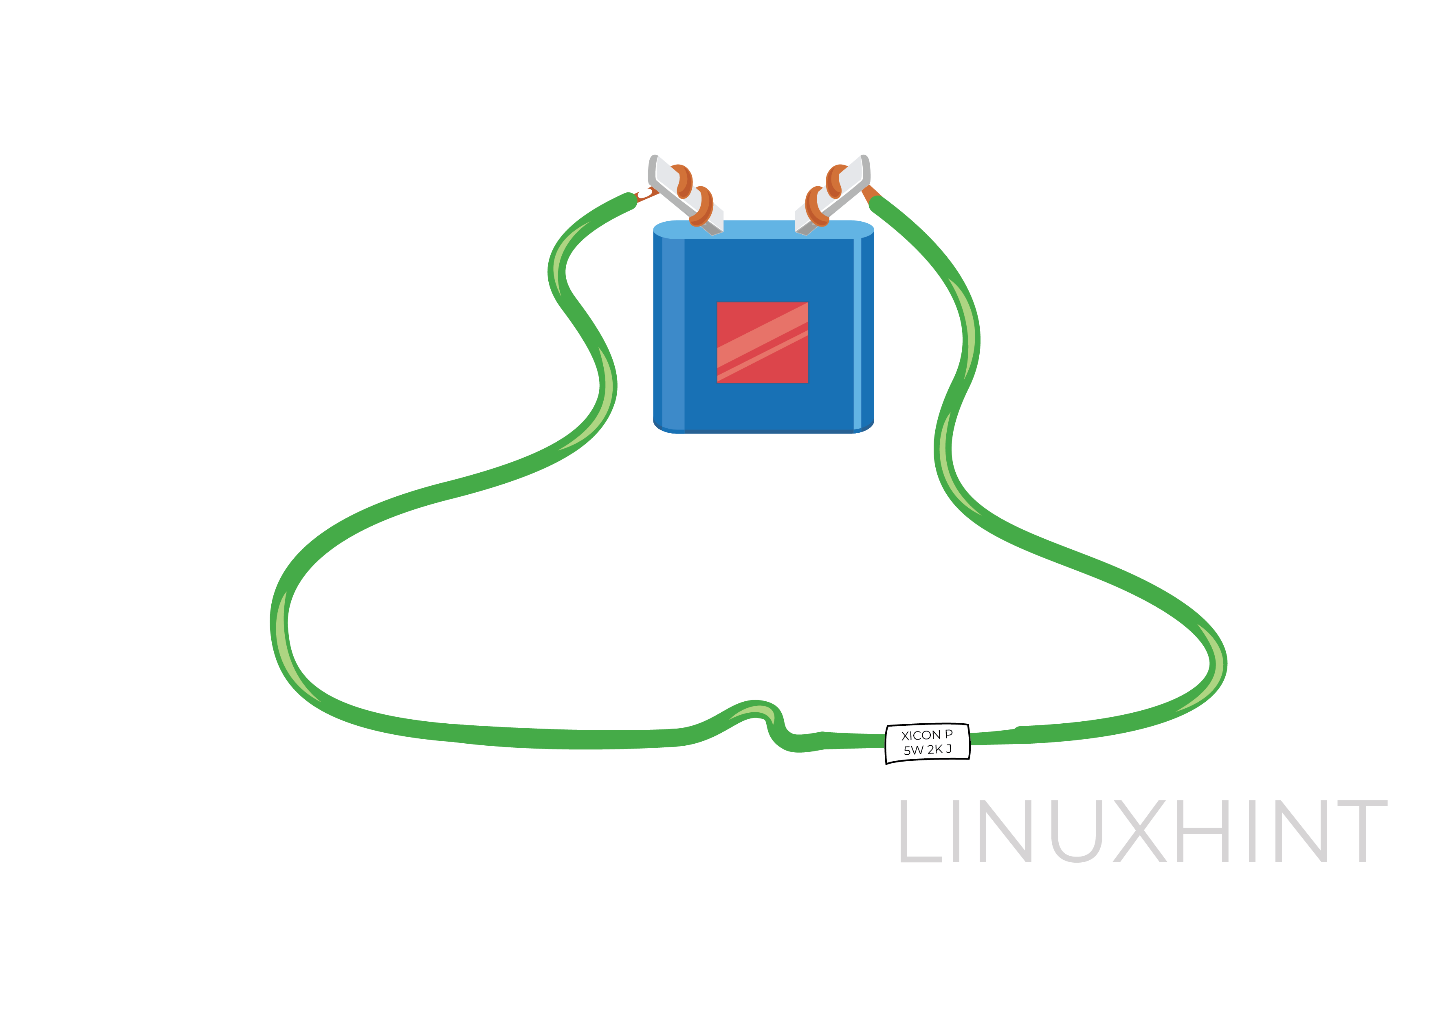
The value of the resistance for the capacitor can be measured only when it is fully discharged so to discharge the capacitor just connect it to a resistor. For that, simply pluck out the capacitor from the circuit and connect the probes of the capacitor with the terminals of the resistor.
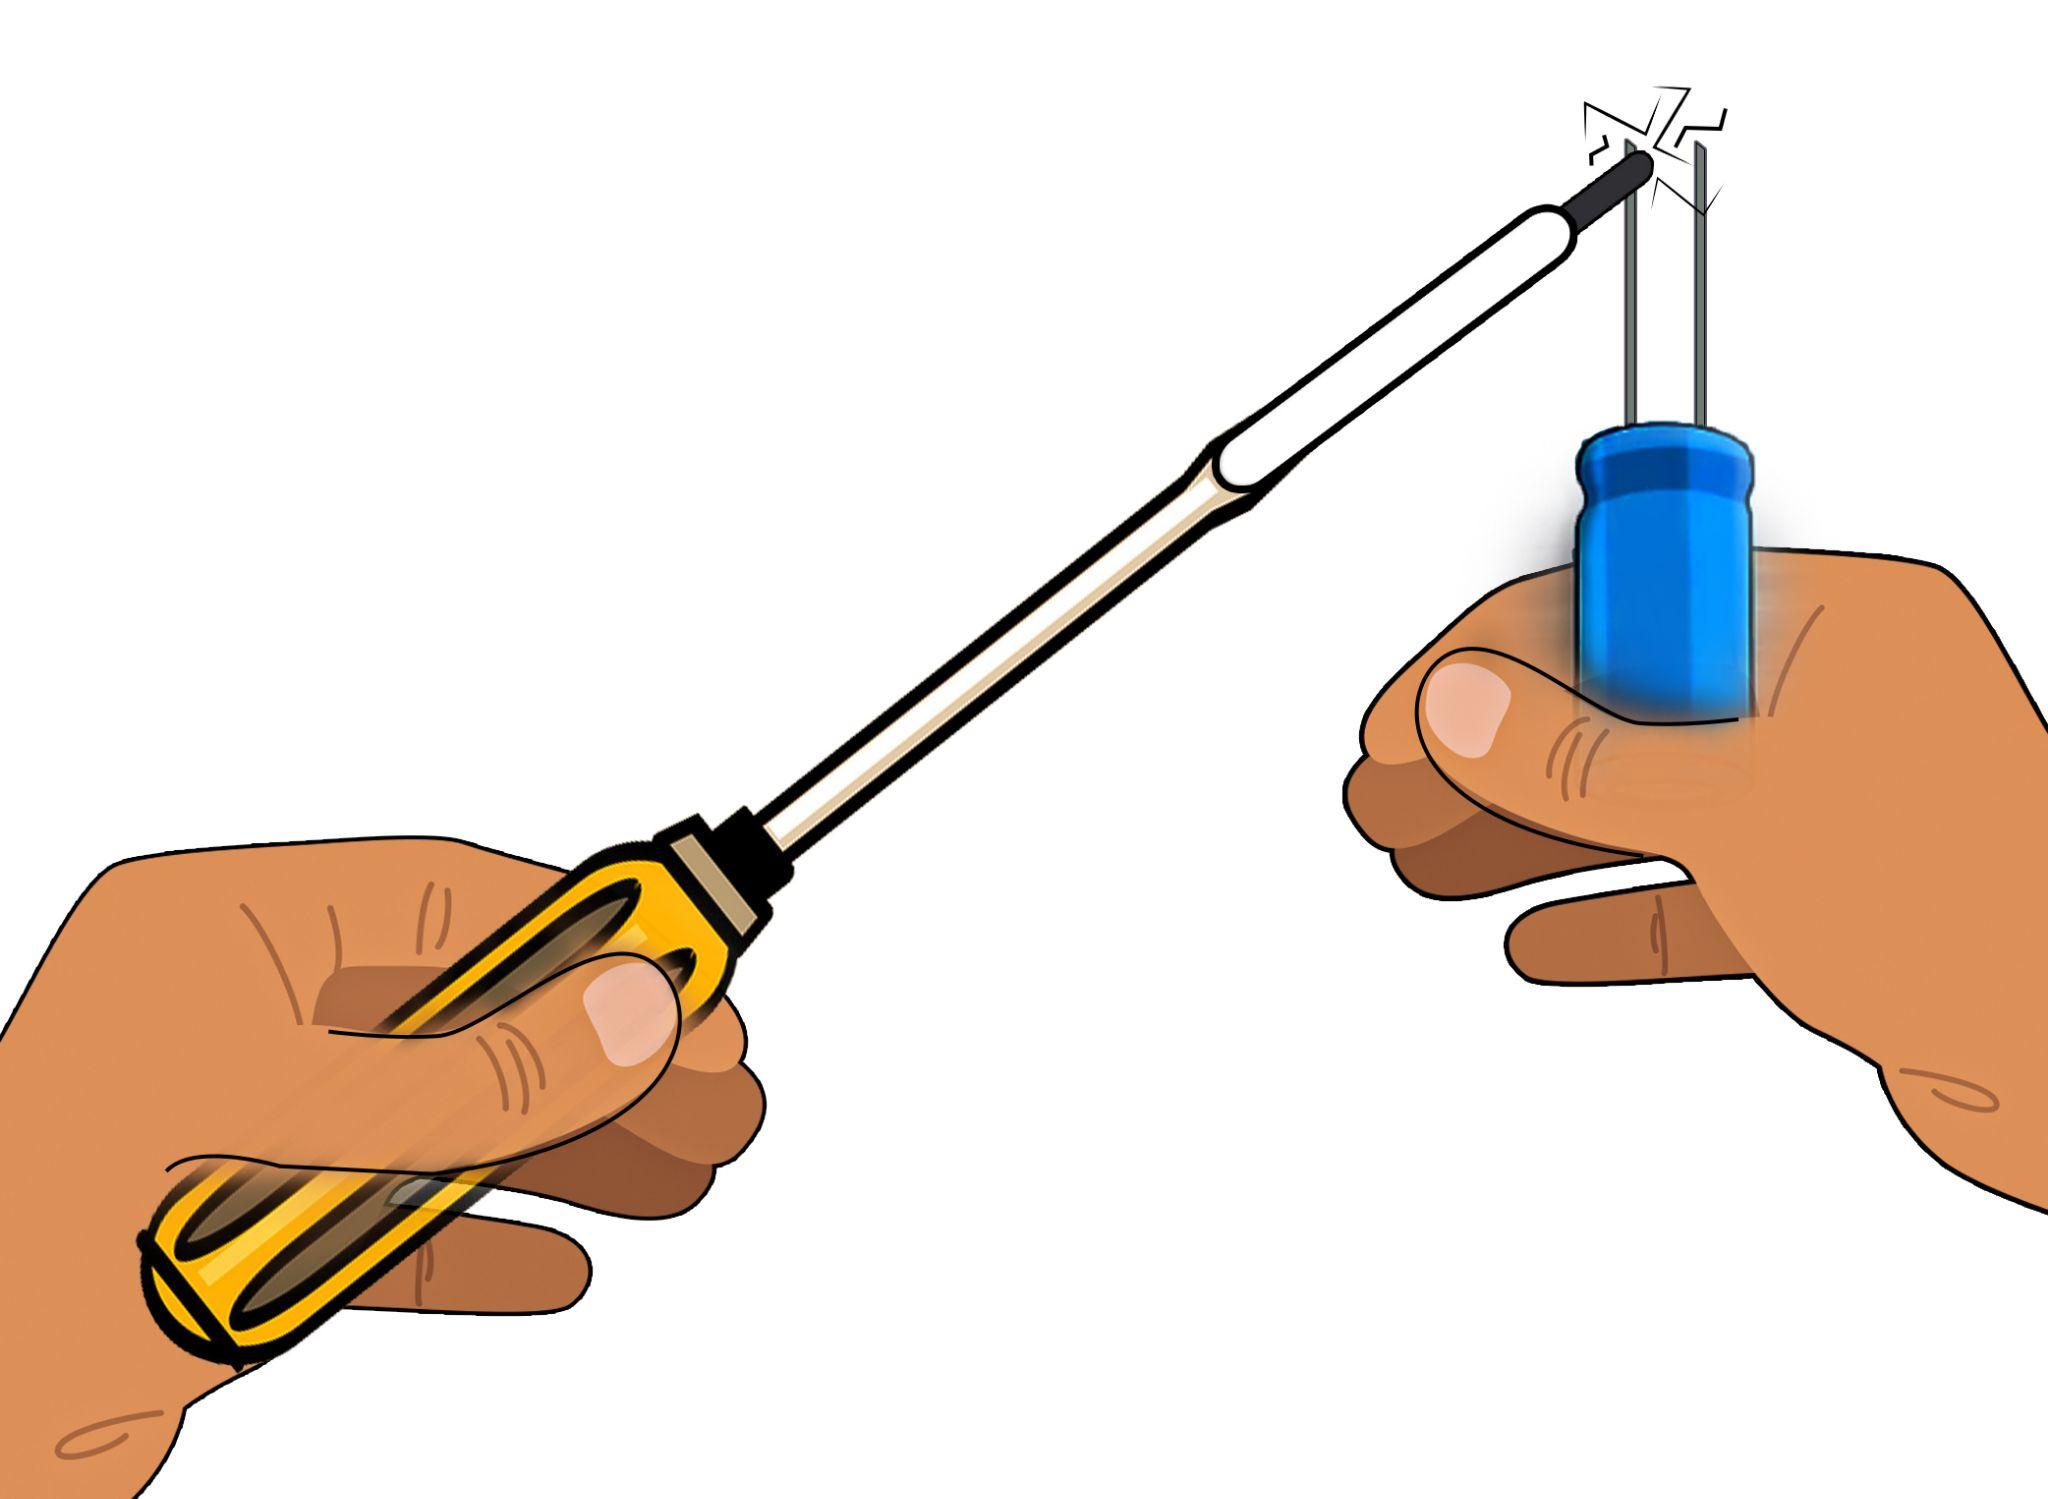
Another way to discharge the capacitor is by placing a screwdriver between the terminals of the capacitor but make sure that the screwdriver hand grip is properly insulated, and the user must wear safety goggles to prevent any injury.
Step 2: Set the Digital multimeter to Ohmmeter
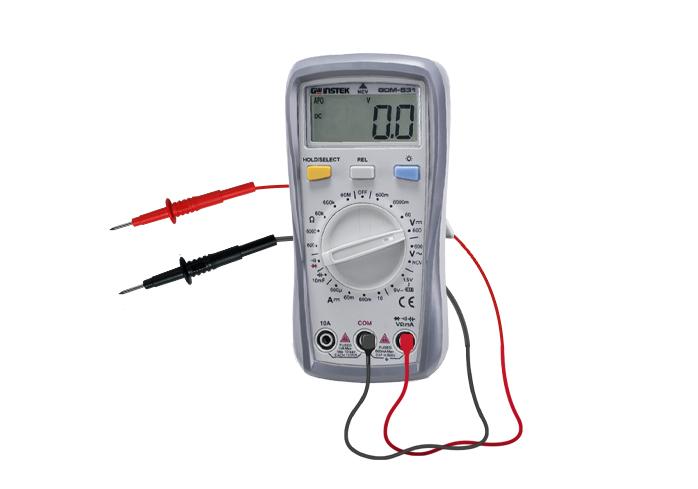
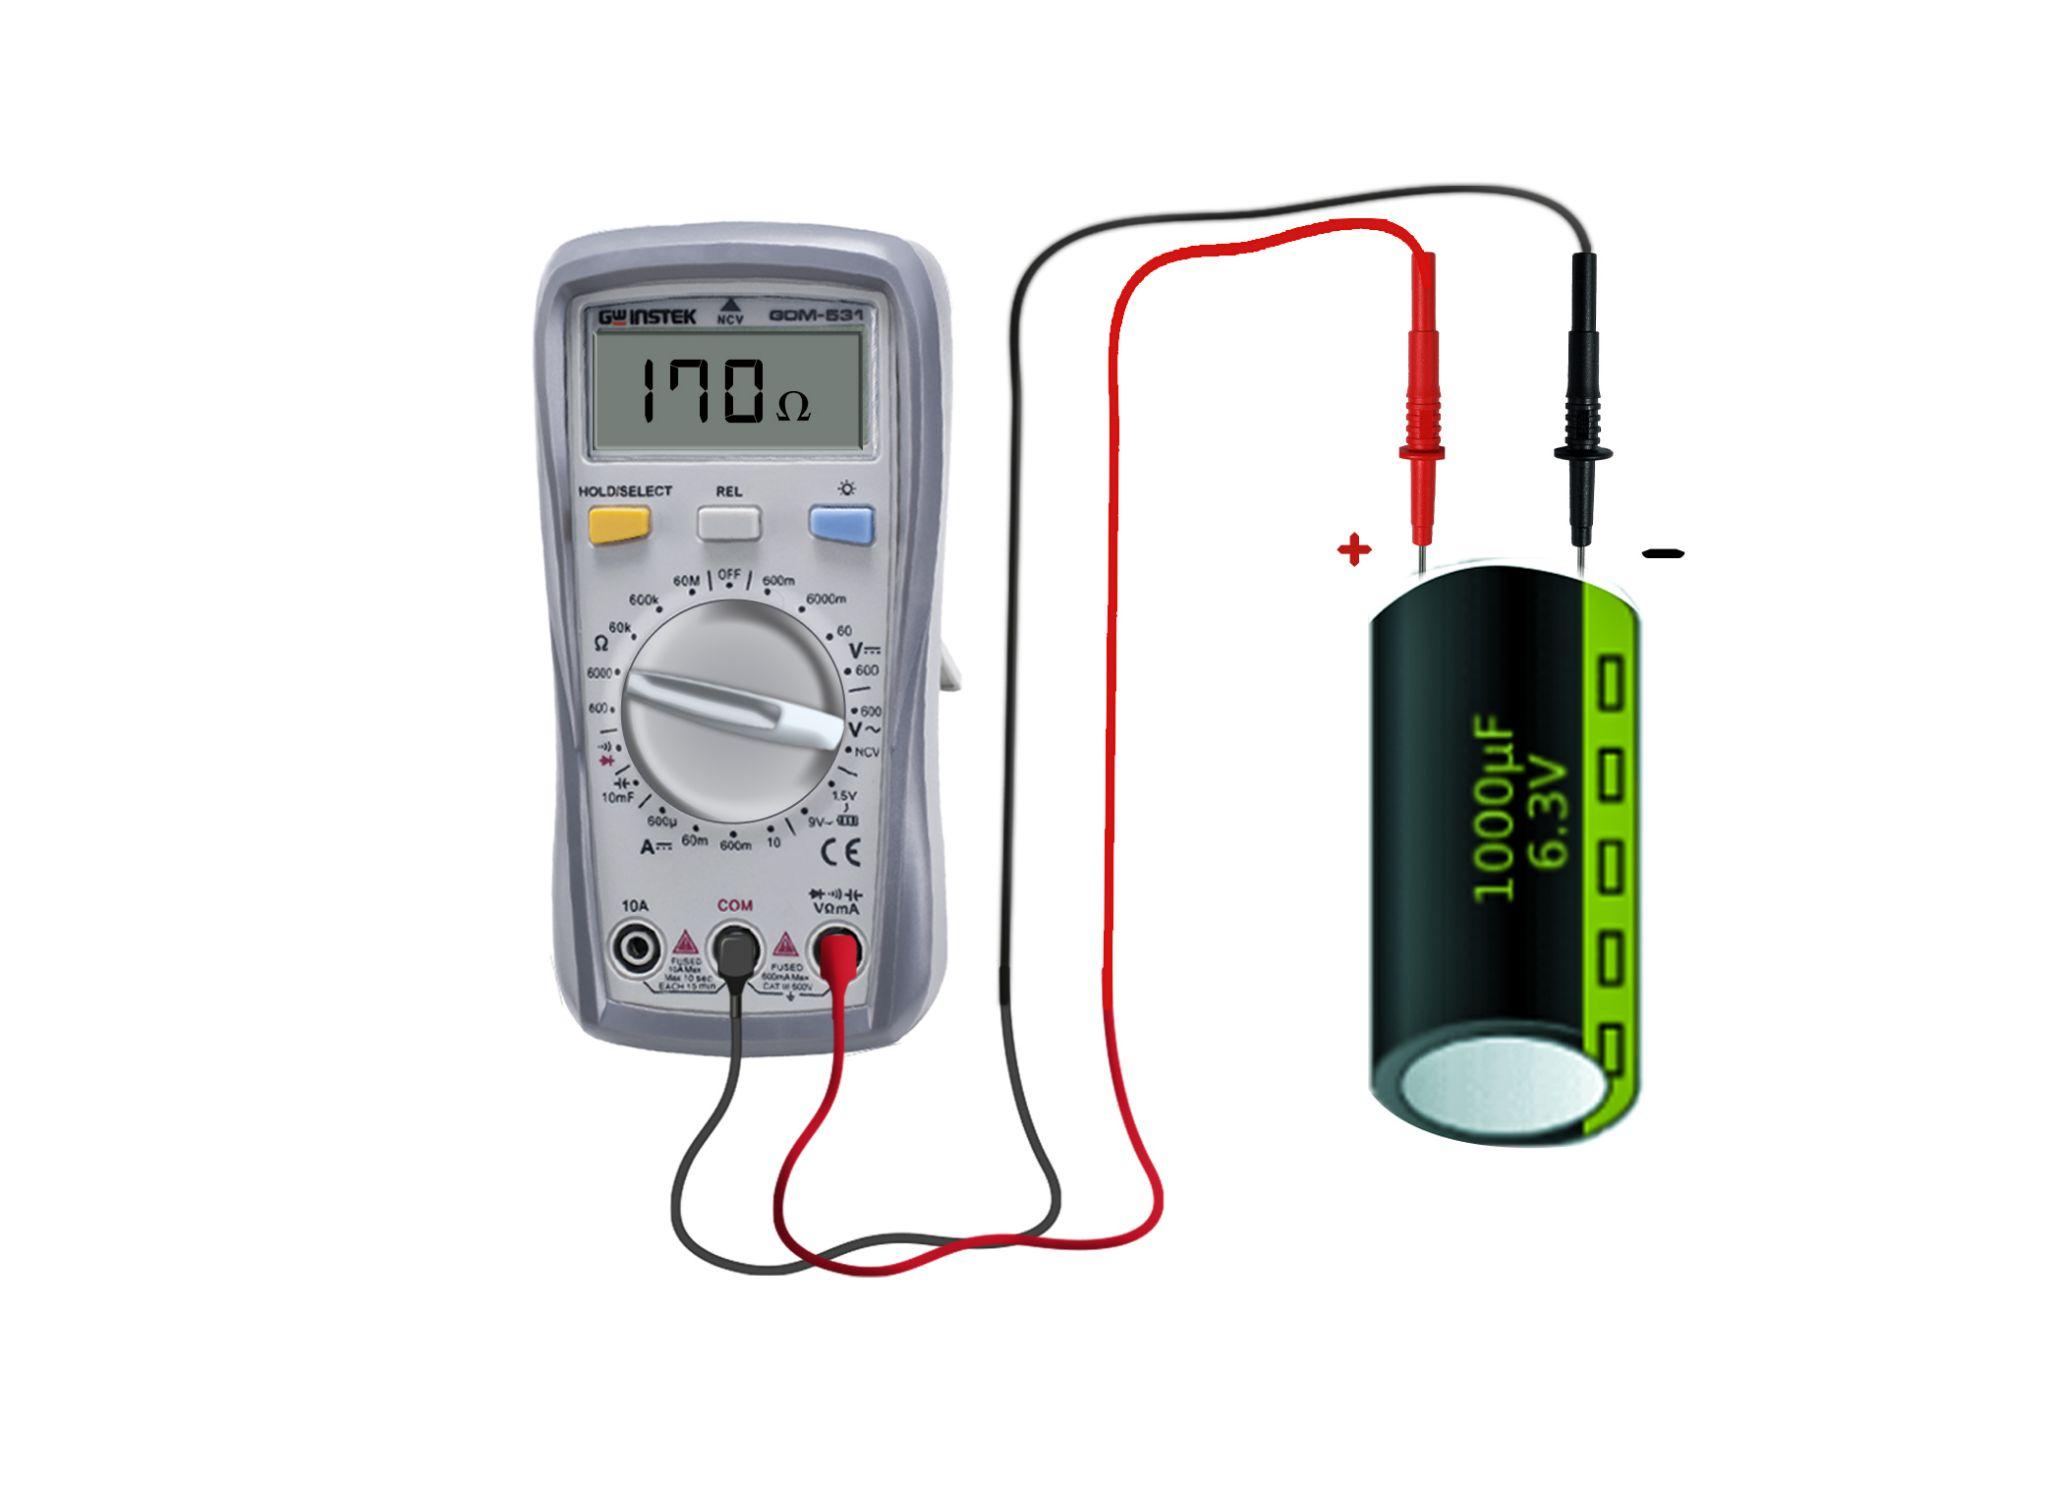
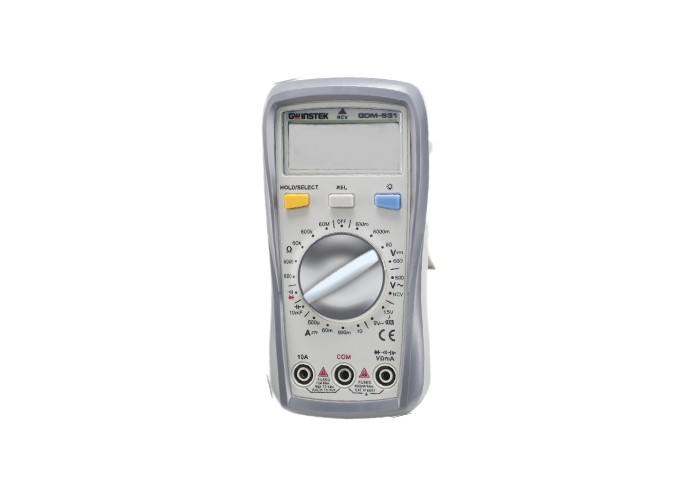
Now rotate the dial and set it to ohm, set it to the minimum value of 1KΩ. Afterward, they connect the black probe with the common port of the multimeter and the read one with the voltage/ohm port of the multimeter:
Step 3: Connect the multimeter with Capacitor
Now connect the probes of the multimeter with the terminals of the capacitor see the resistance value appearing on the multimeter screen and note down that reading.
Now repeat this step several times and observe the readings. If there is no change at all in the reading then it shows that the capacitor is dead which means it is faulty. Remember that this method can be performed for AC capacitors as well.
Method 2: Testing a Capacitor with Capacitor Mode in a Multimeter
Another way to test the capacitor is by finding the actual capacitance value of the capacitor. Usually, the rated value and the actual value have a slight difference. To check the capacitance of the capacitor, here are some steps to be followed:
Step 1: Set the Multimeter Dial to Capacitance
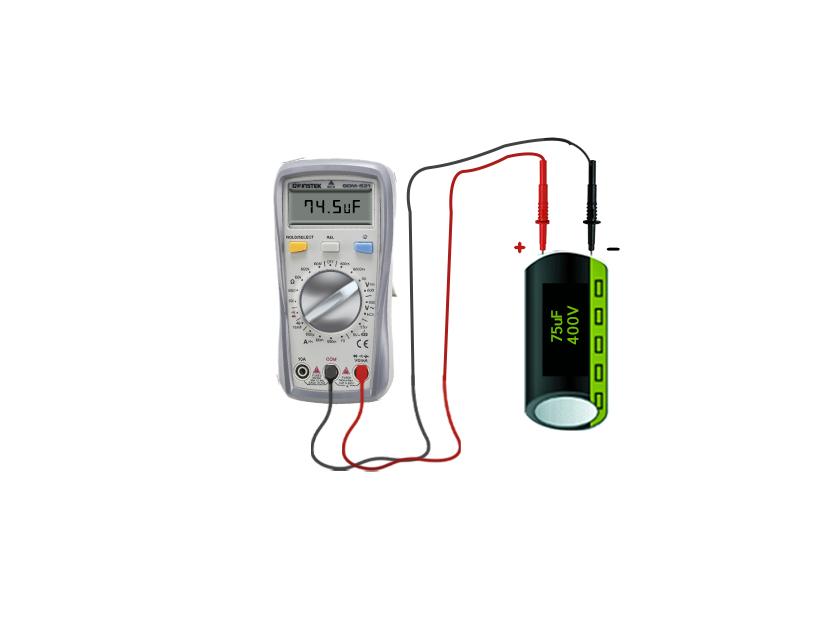
First, rotate the dial of the multimeter to the capacitor symbol and keep the red wire connected to the voltage/ ohms port of the multimeter:
Step 2: Connect the Capacitor with Multimeter
Now connect the probes of the multimeter with the terminals of the capacitor and once connected the multimeter will start to display the readings on its screen. Now note down the reading and compare it with the value of capacitance written on the capacitor:
If the actual reading and the given reading have a big difference, then it means that the capacitor is worn out and needs to be replaced.
Method 3: Testing a Capacitor with Voltage Mode in a Multimeter
The capacitor can be tested by checking its voltage when it is fully charged, but for this method, the voltage rating for the capacitor should be known. So that it can be compared with the actual reading given by the multimeter, here are some steps to test the capacitor by checking its output voltage:
Step 1: Charge the Capacitor
To measure the output voltage the capacitor needs to be charged fully, so first we have to charge the capacitor. This process should be done with care because the capacitor could get damaged if the voltage applied is greater than its rating, or it is applied for a longer period.
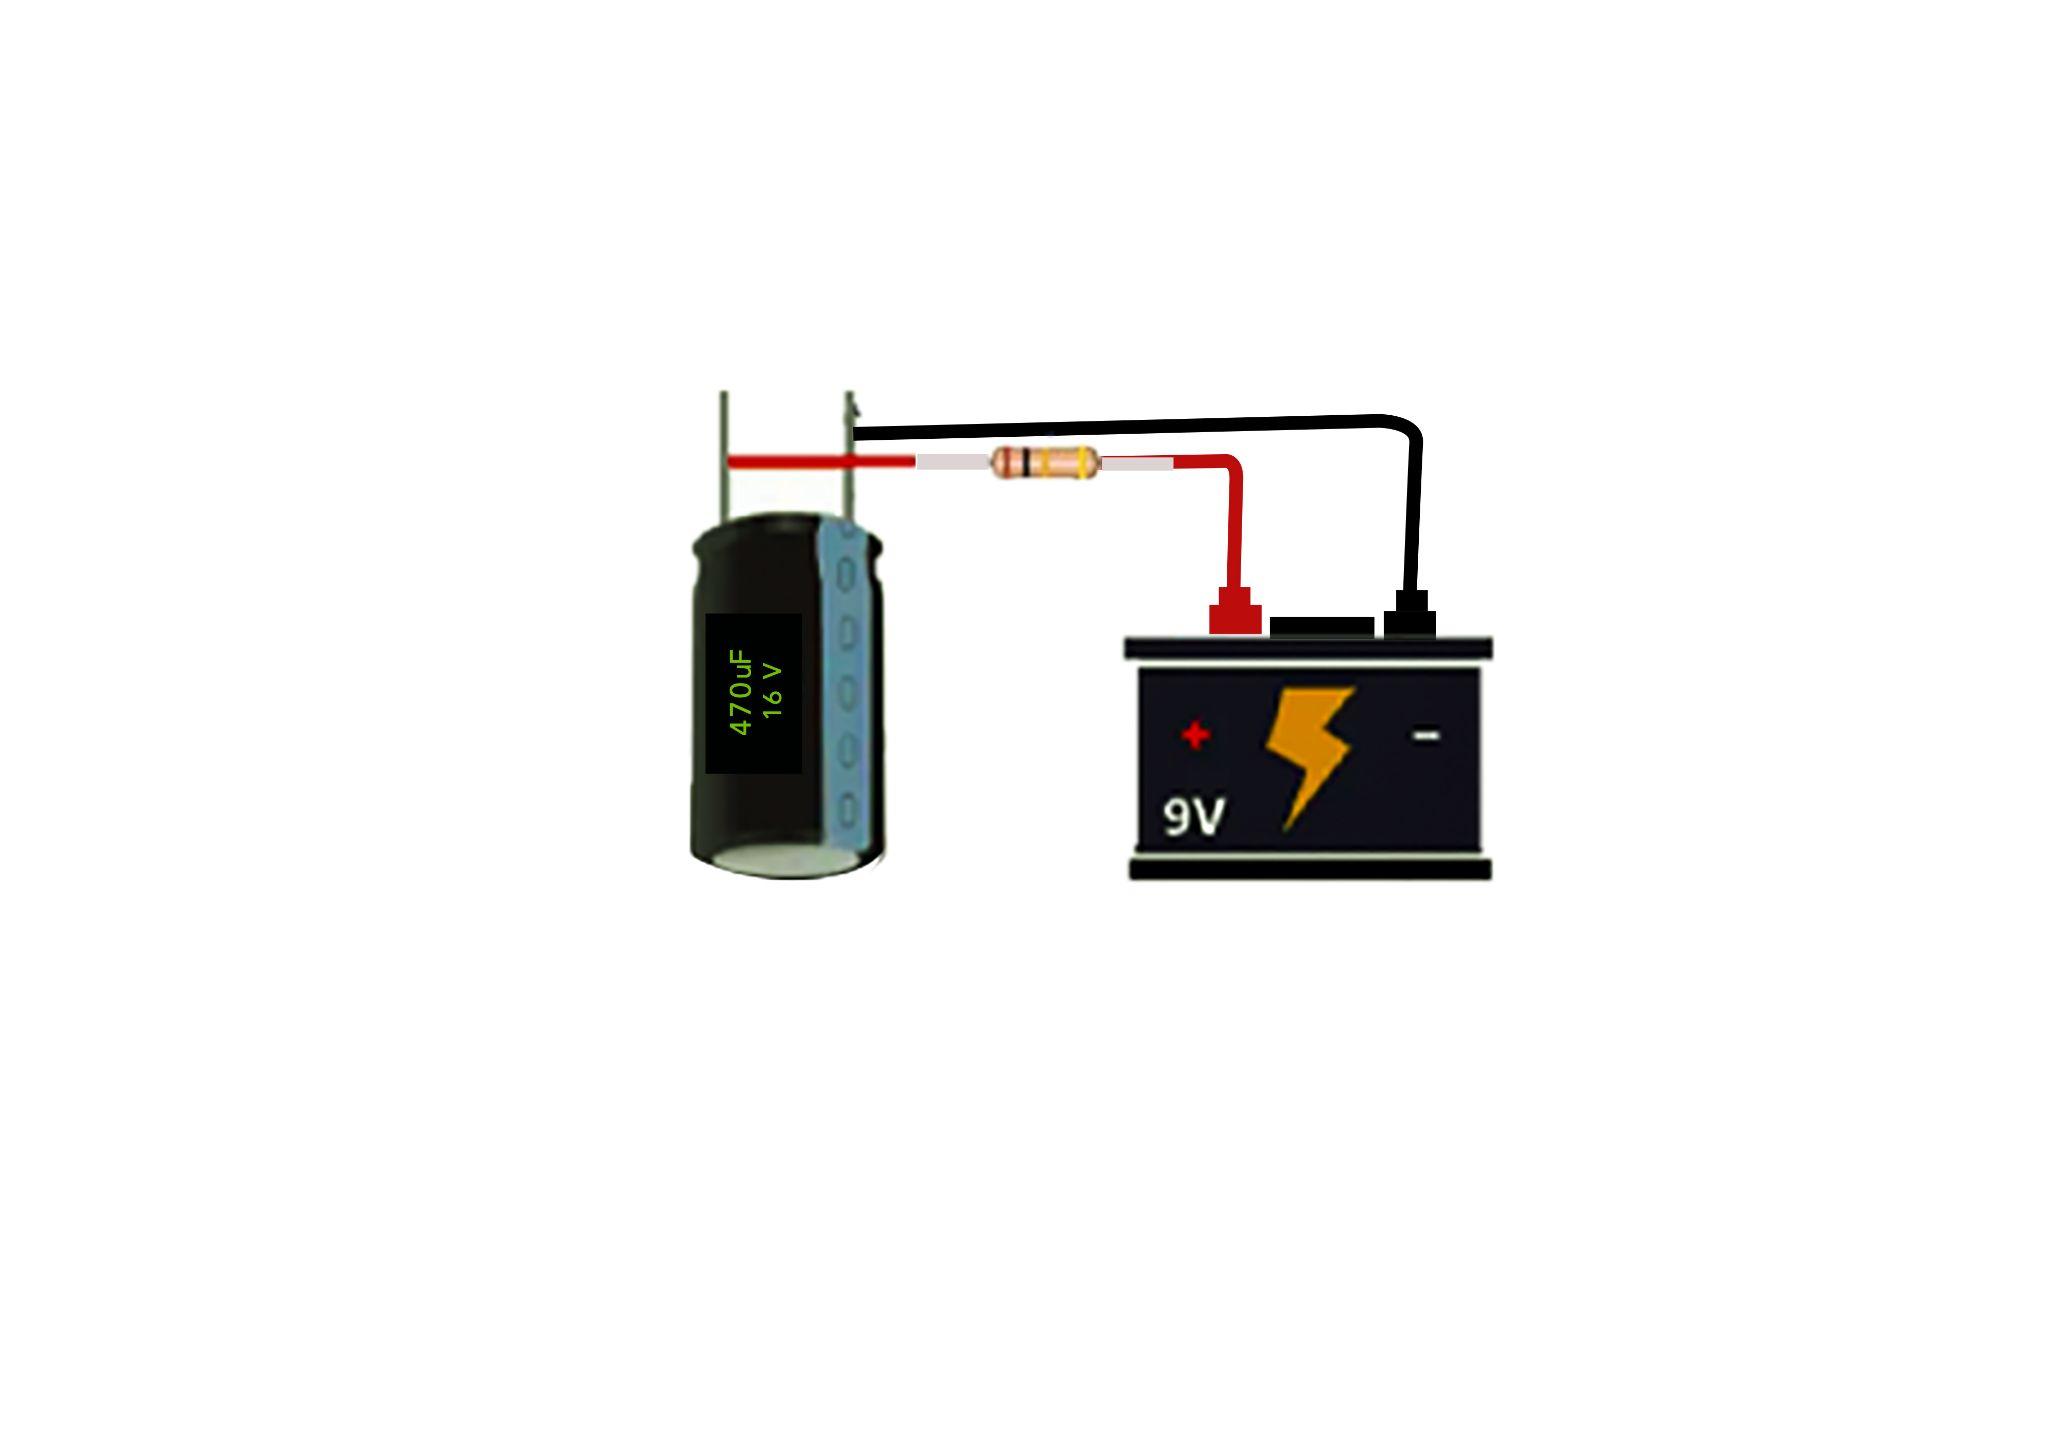
For instance, if the capacitor has a voltage rating of a capacitor is 15 volts, then it can be charged with a 9-volt battery. Moreover, while charging the capacitor also take care while connecting the battery terminals as wrong connections can also damage the capacitor.
Simply connect the battery’s positive terminal with the positive terminal of the capacitor (short leg) and the negative terminal of the capacitor (Long leg) and wait for 1 to 2 seconds.
Step 2: Set the Multimeter to Volts
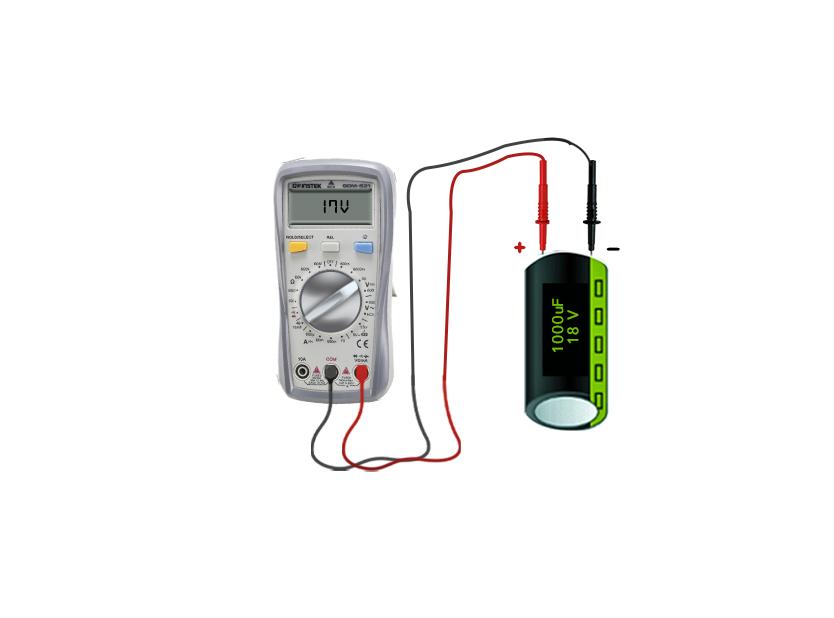
Once the capacitor is charged rotate the dial of the multimeter, set it to voltage, and keep the range that matches the rated voltage of the capacitor:
Step 3: Connect the Capacitor to Multimeter
Now connect the capacitor’s positive terminal with the positive probe of the multimeter and vice versa. After that, you will see a voltage value shown up on the screen of the meter, now compare that value with the rated value.
If the difference between the values is less, then it means that the capacitor is in good condition and if the difference is considerably high then the capacitor needs to be replaced. Also, remember that the voltage value will be shown for a very short time, as the capacitor will discharge it voltage into the multimeter as soon as it is connected.
Method 4: Testing a Capacitor Using Time-Constant
The time constant is the time that the capacitor takes to either charge or discharge, 63.2% of the maximum voltage. Further, to find out the time constant of the capacitor the product of its capacitance value and resistance is calculated:
To check if the capacitor is in bad or in good condition, the time constant equation can be used. To further simplify, we can say that using the time constant equation, we can calculate the capacitance of the capacitor and then compare it with the value printed on it. So, to find out the capacitance of the capacitor using the time constant, adhere to the following steps:
Step 1: Discharge the Capacitor Completely
The value of the resistance for the capacitor can be measured only when it is fully discharged so to discharge the capacitor just connect it to a resistor. For that, simply pluck out the capacitor from the circuit and connect the probes of the capacitor with the terminals of the resistor.
Step 2: Connect a Resistor and Supply to Capacitor
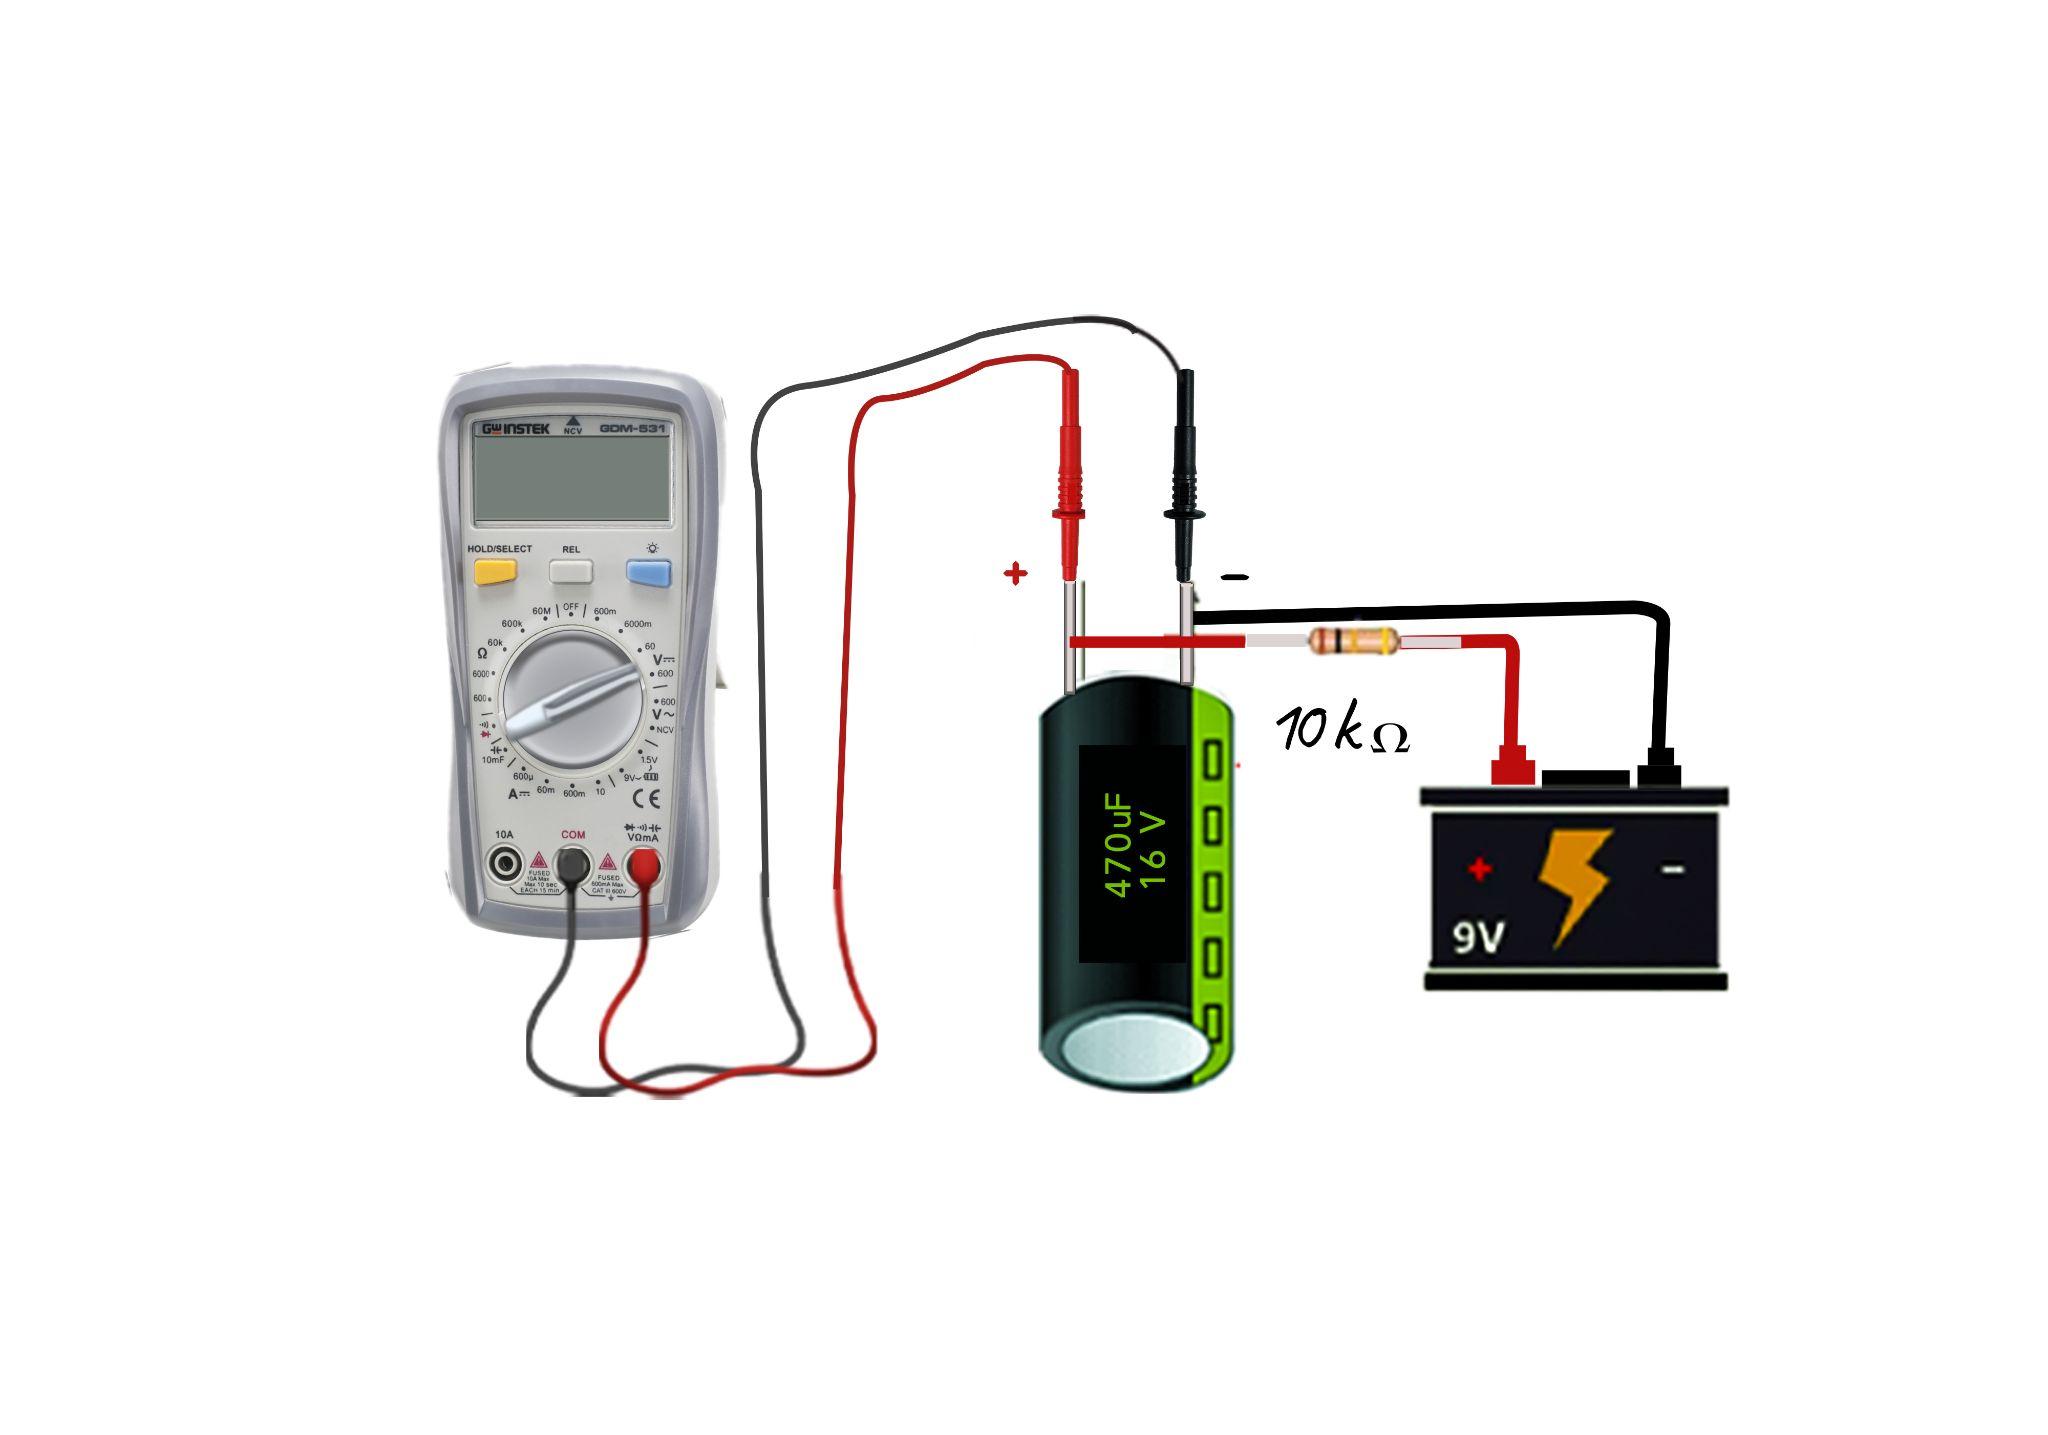
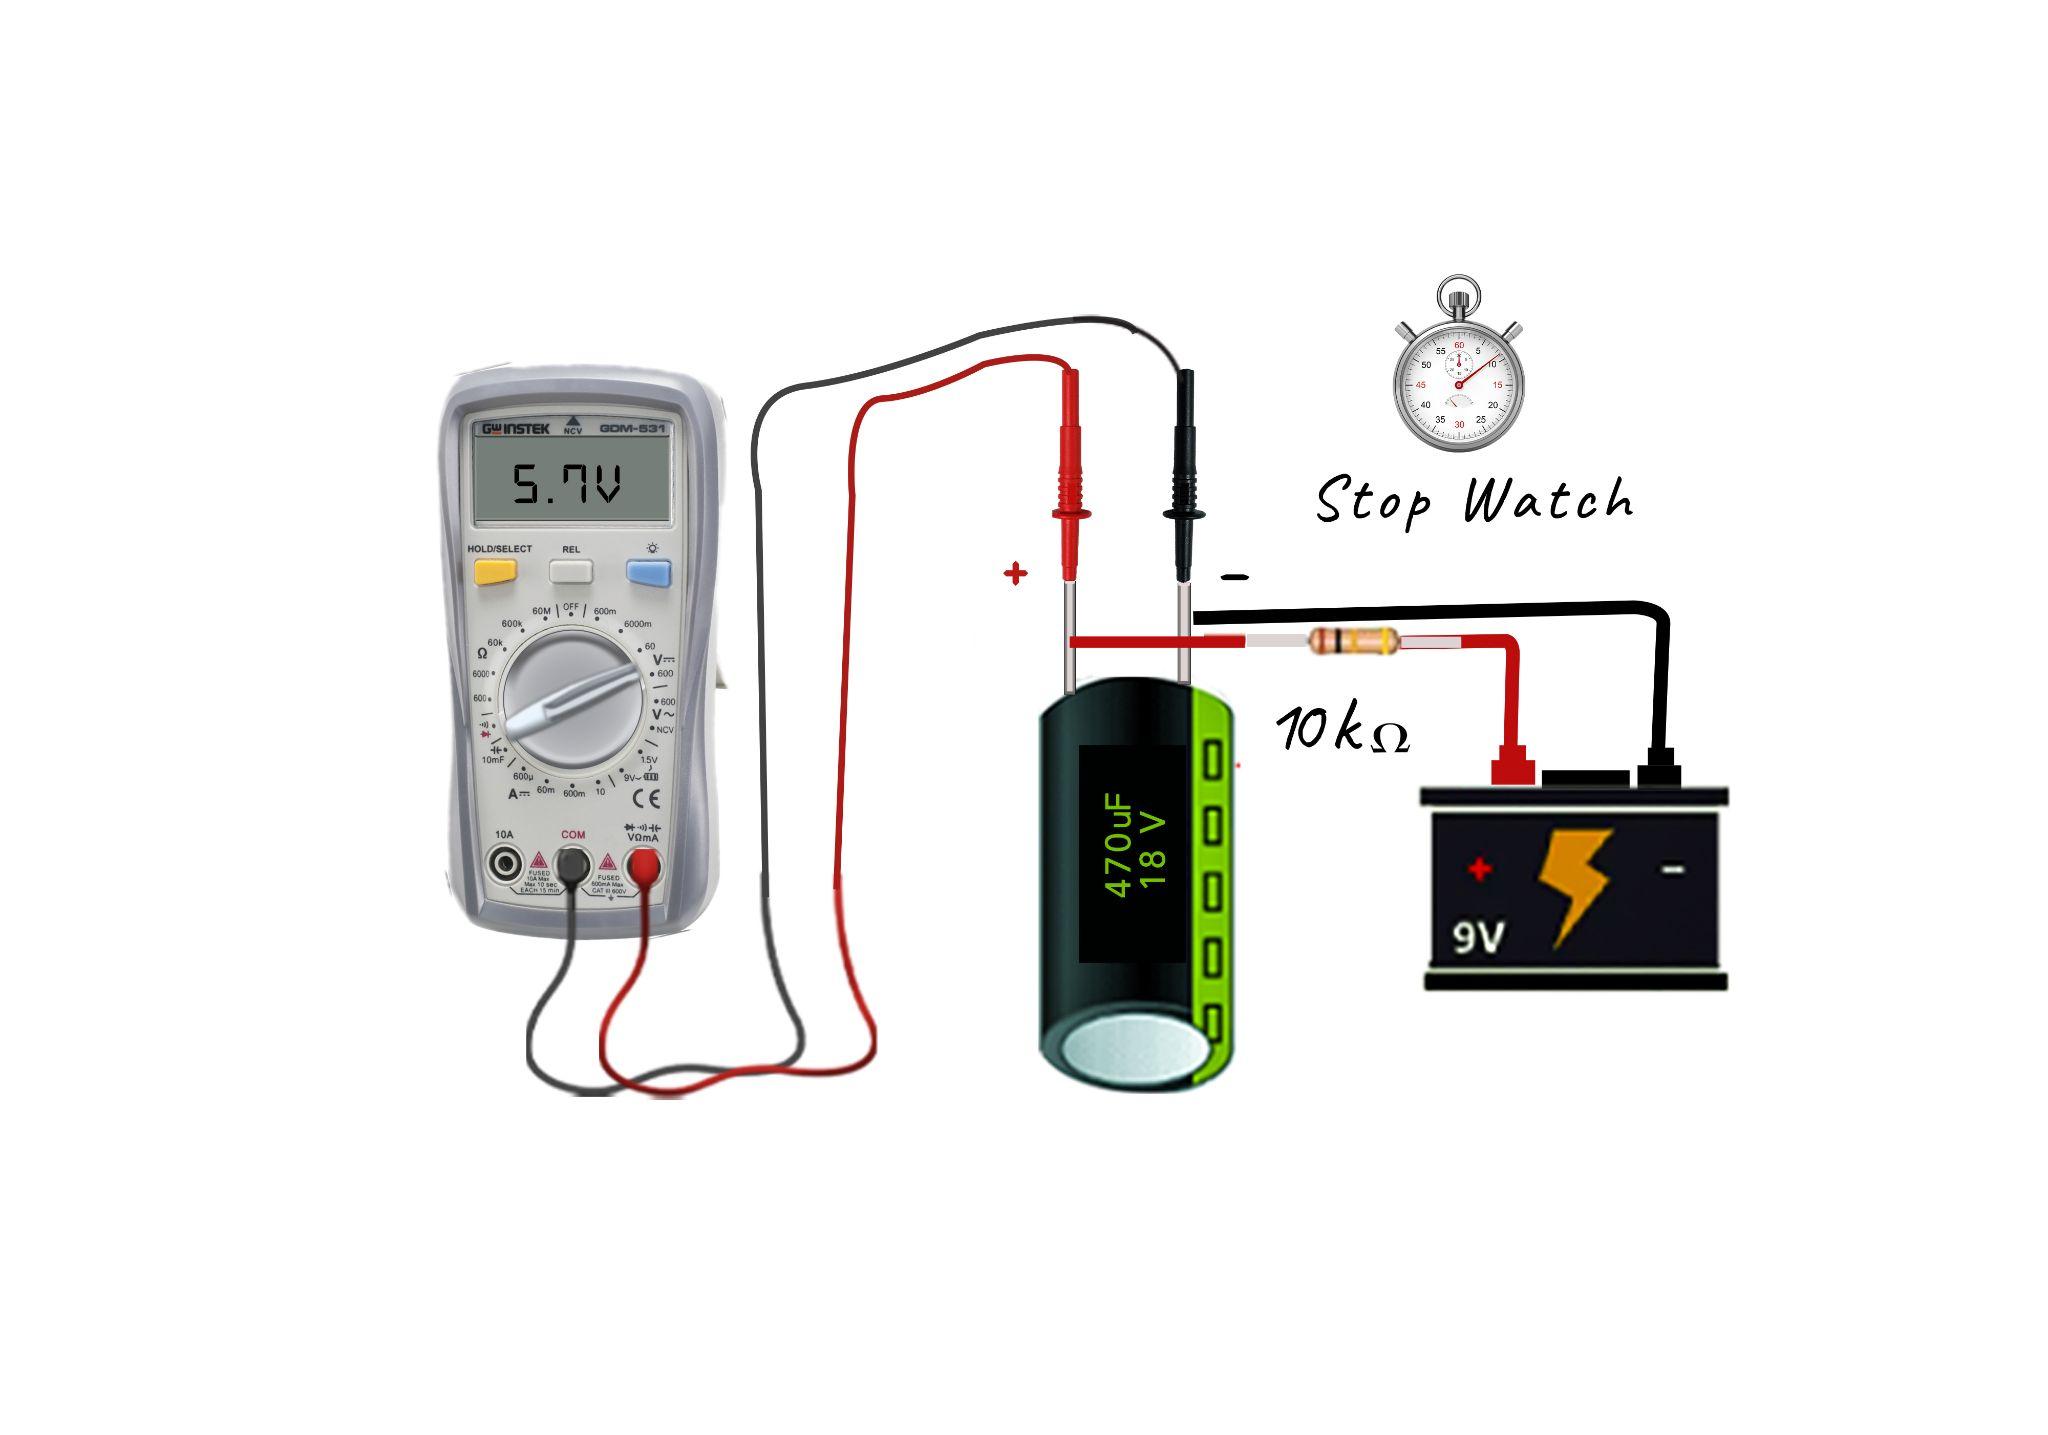
Now connect a resistor with the capacitor in series, having a resistance value ranging between 5 and 10 K ohms. Now connect the supply source with the capacitor, and it should be less than the maximum voltage capacity of the capacitor and keep the supply voltage off:
Step 3: Connect the Multimeter to the Capacitor
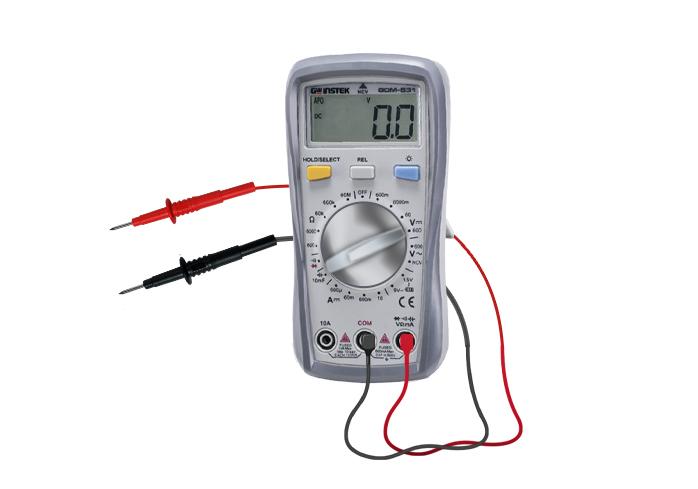
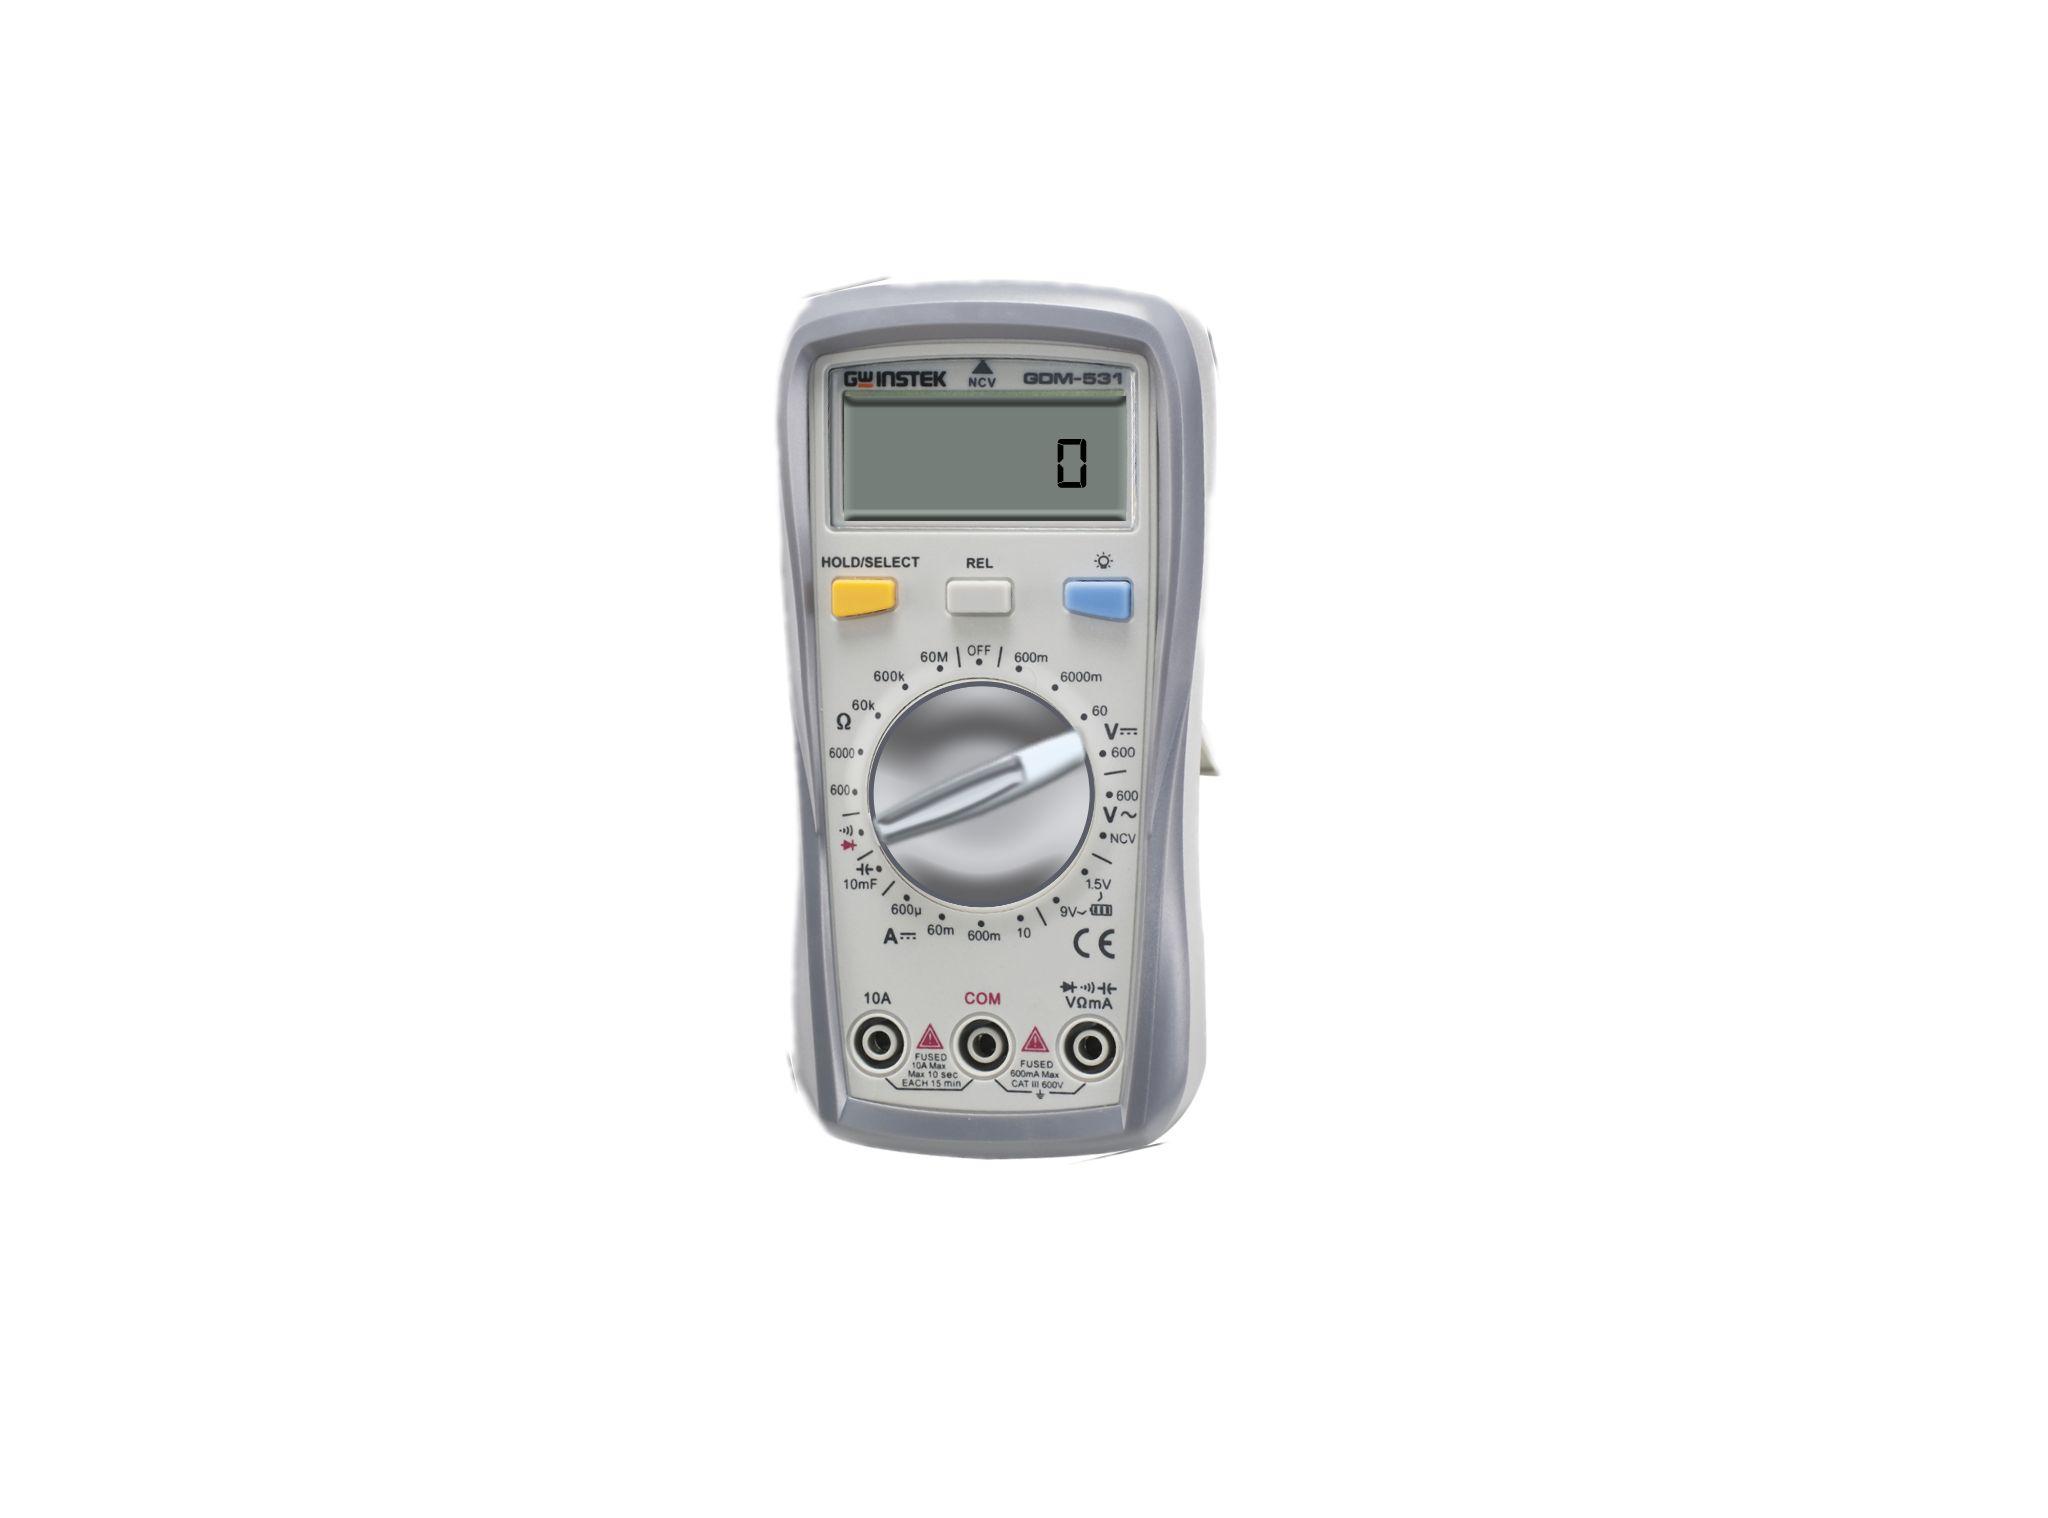
Now place the multimeter probes on the terminals of the capacitor and rotate its dial towards the voltage measurements. Since the capacitor is discharged, it will show zero voltage:
Step 4: Measure the time for charging the capacitor to 63.2%
Now turn on the supply and start the stopwatch, wait till the capacitor accumulates 63.2% of the applied voltage. For instance, if the voltage applied across the capacitor is 9V then its 63.2% will be around 5.7 Volts, so in this case when the voltage reaches 5.7 Volts stop the stopwatch.
Step 5: Now Find the Capacitance Value
Once you have noted the time taken by the capacitor to charge up to 63.2% of the applied voltage, then find the capacitance of the capacitor and compare it with the reading of capacitance engraved on it. If the difference between the rated and calculated value is large, then it means the capacitor is bad, and vice versa.
So, for example, if the rated capacitance of a capacitor is 470 µF and has a voltage rating of 16 volts. In actuality, the taken to charge up the capacitor to 63.2% is around 4.7 seconds and the resistance is around 10 KΩ then the capacitance will be when the applied voltage is 9V:
So now here the actual capacitance and the given value of capacitance are equal, so it means the capacitor is in good condition. The values might differ can the range for the difference in values lie between ± 10 to ± 20.
Method 5: Testing a Capacitor with Continuity Mode in a Multimeter
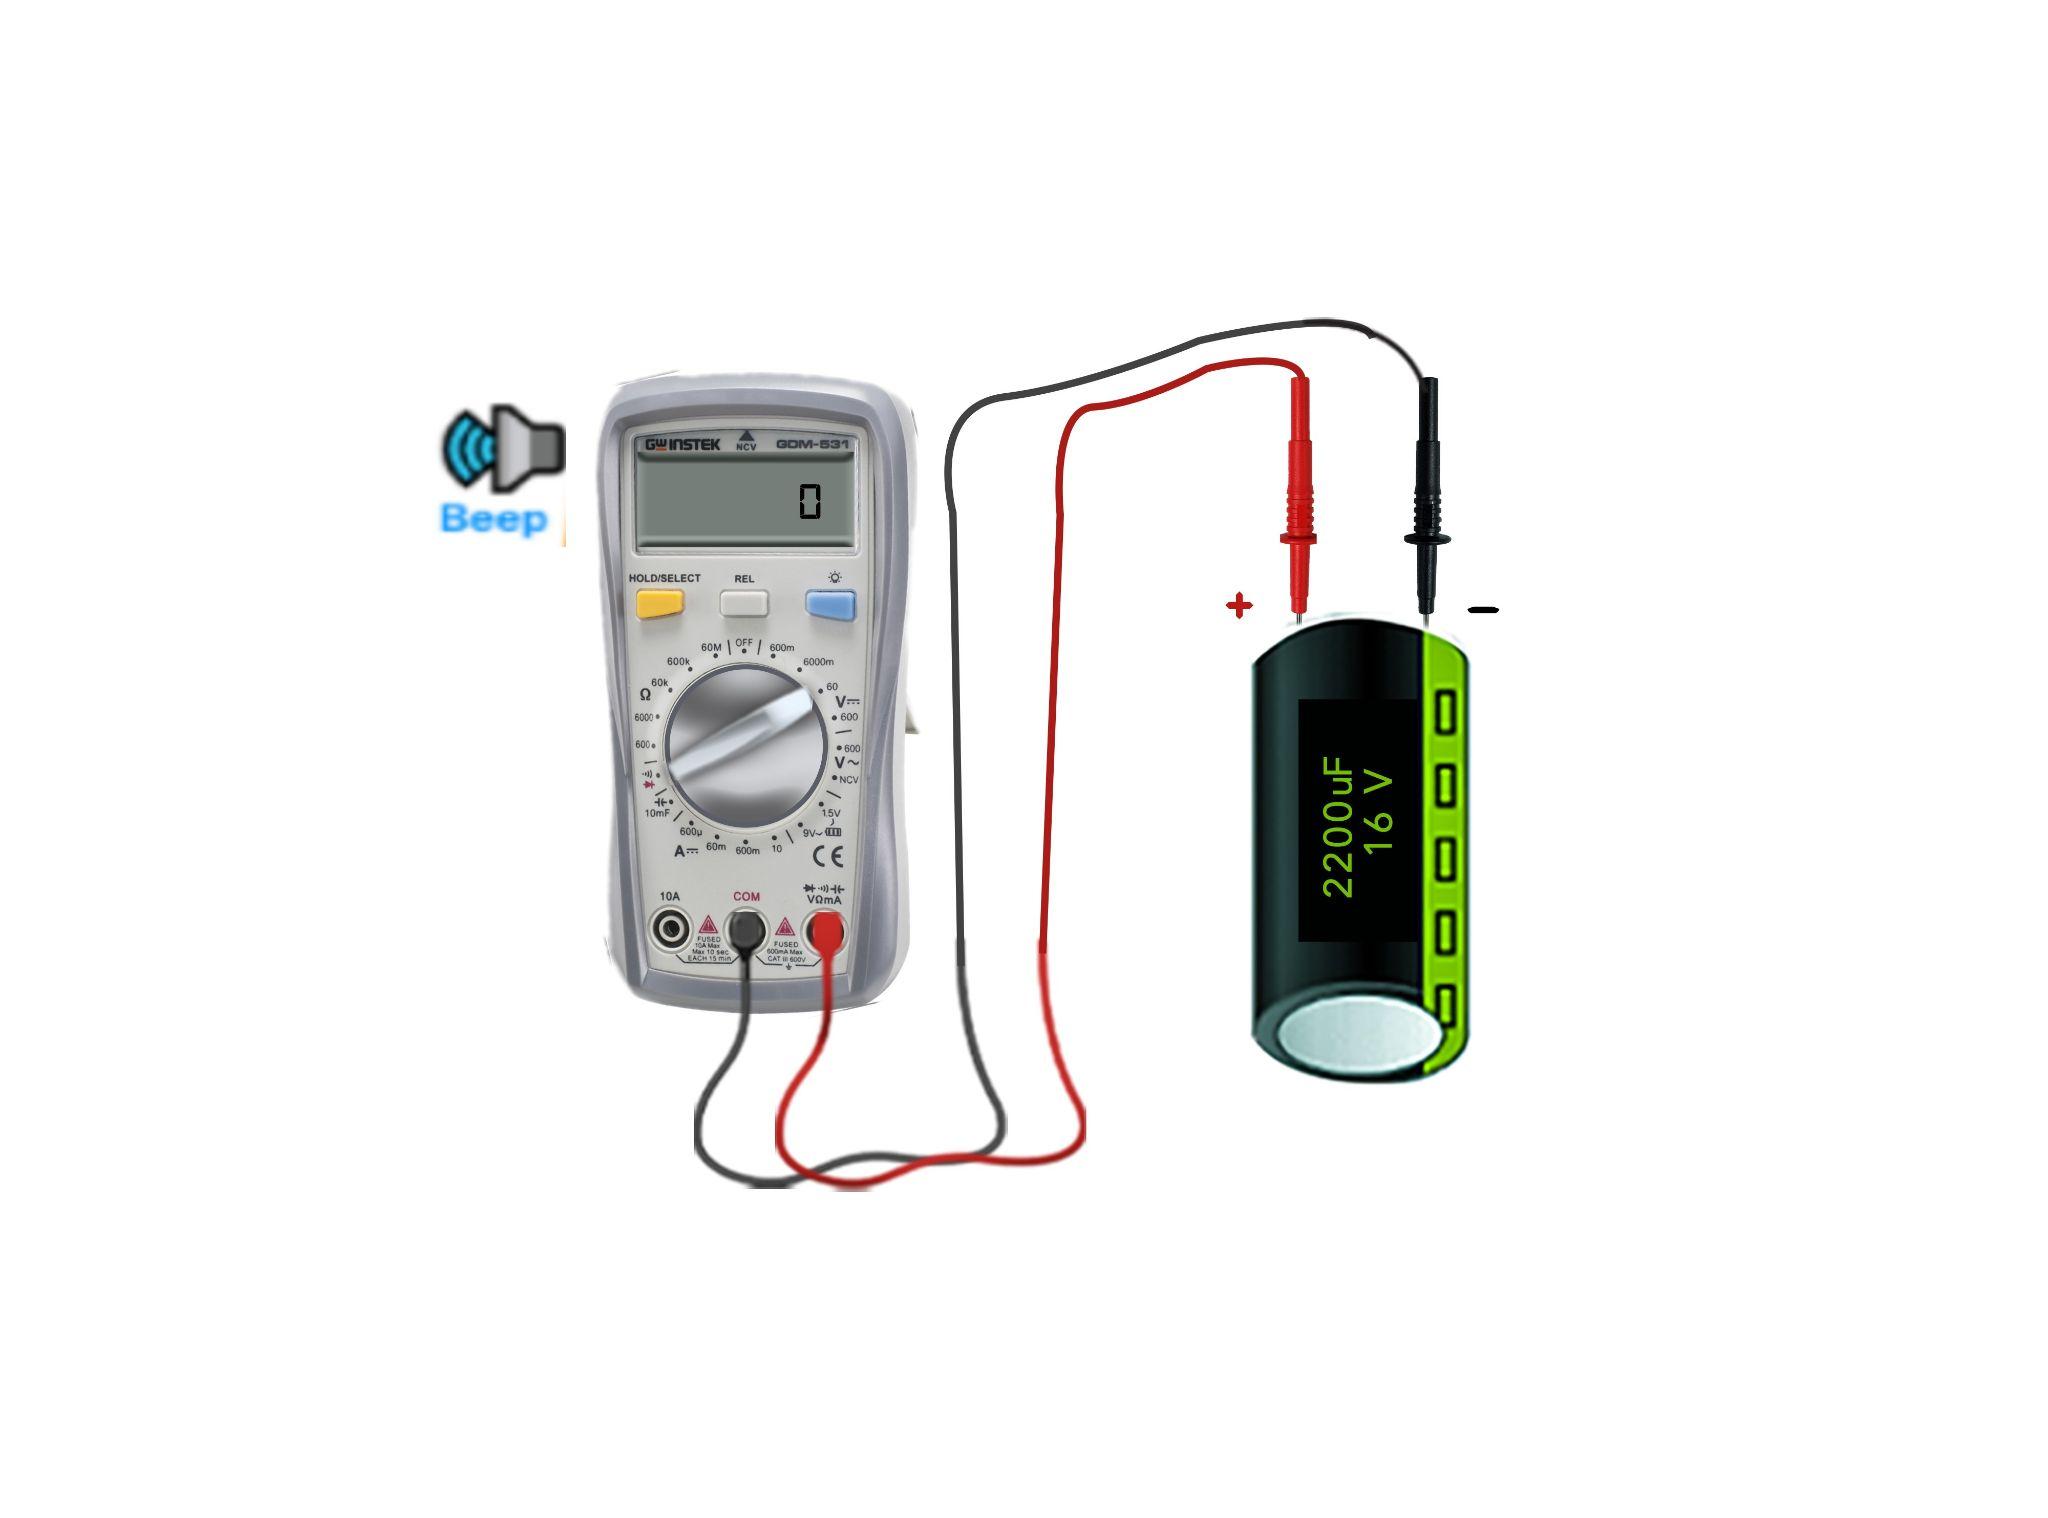
The continuity check is one quickest way to test the capacitor if it is working or not as this creates short circuits and if the capacitor is working then the multimeter will start to beep. Checking the continuity of a capacitor is a two-step process:
Step 1: Set the Multimeter to Continuity
On the multimeter, there is an option for checking the continuity which can be used to check the condition of circuit devices. So, to test whether the capacitor is in good condition or in bad condition, move the dial of the multimeter to the continuity option:
Step 2: Check the Continuity of the Capacitor
Now place the positive probe of the multimeter on the positive terminal of the capacitor and the negative terminal on the common probe of the multimeter:
Upon connection, the multimeter will start beeping, and then the multimeter displays the sign of open-line, which means that the capacitor is in good condition. Whereas on the other hand if the multimeter doesn’t beep then it means that the capacitor needs to be replaced. Moreover, if the beep sound is continuously coming even after some time, then it means that the capacitor is short-circuited and needs to be replaced.
Note: Do not forget to completely discharge the capacitor before performing this method, as you won’t be able to get an accurate result.
Method 6: Testing a Capacitor with a Visual Appearance
Sometimes, if the capacitor is not working correctly, it may have been damaged due to the unstable variation in the voltage and current. Sometimes from the visual appearance capacitor can be tested if it is in good condition or not, this case is when the capacitor has suffered excessive damage.
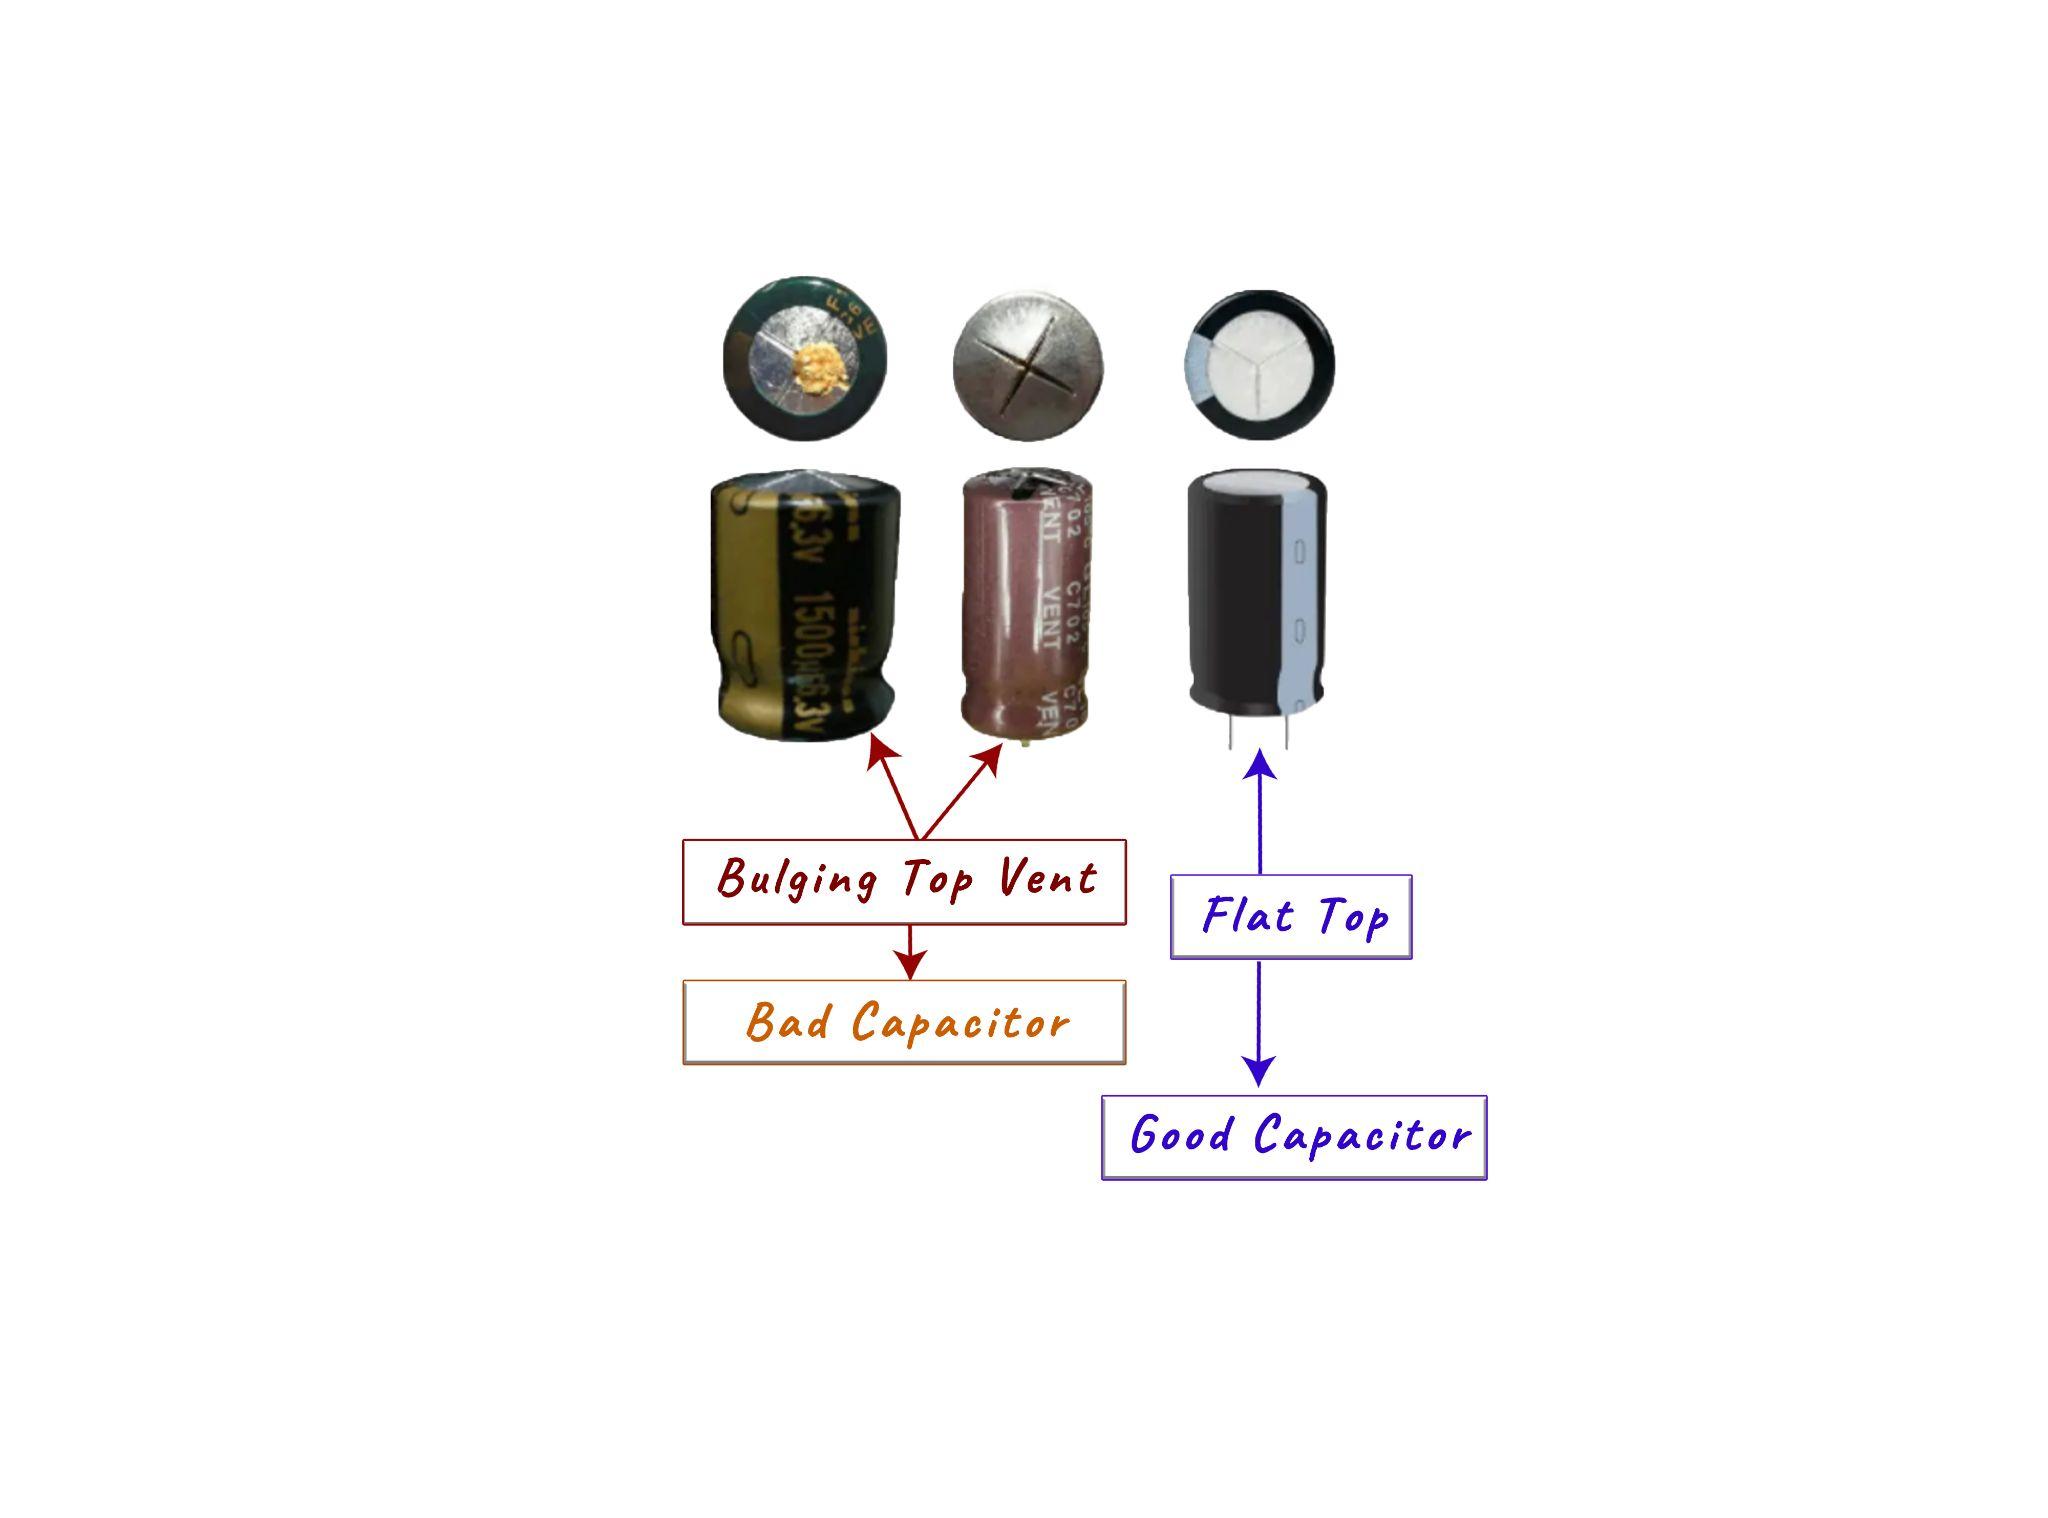
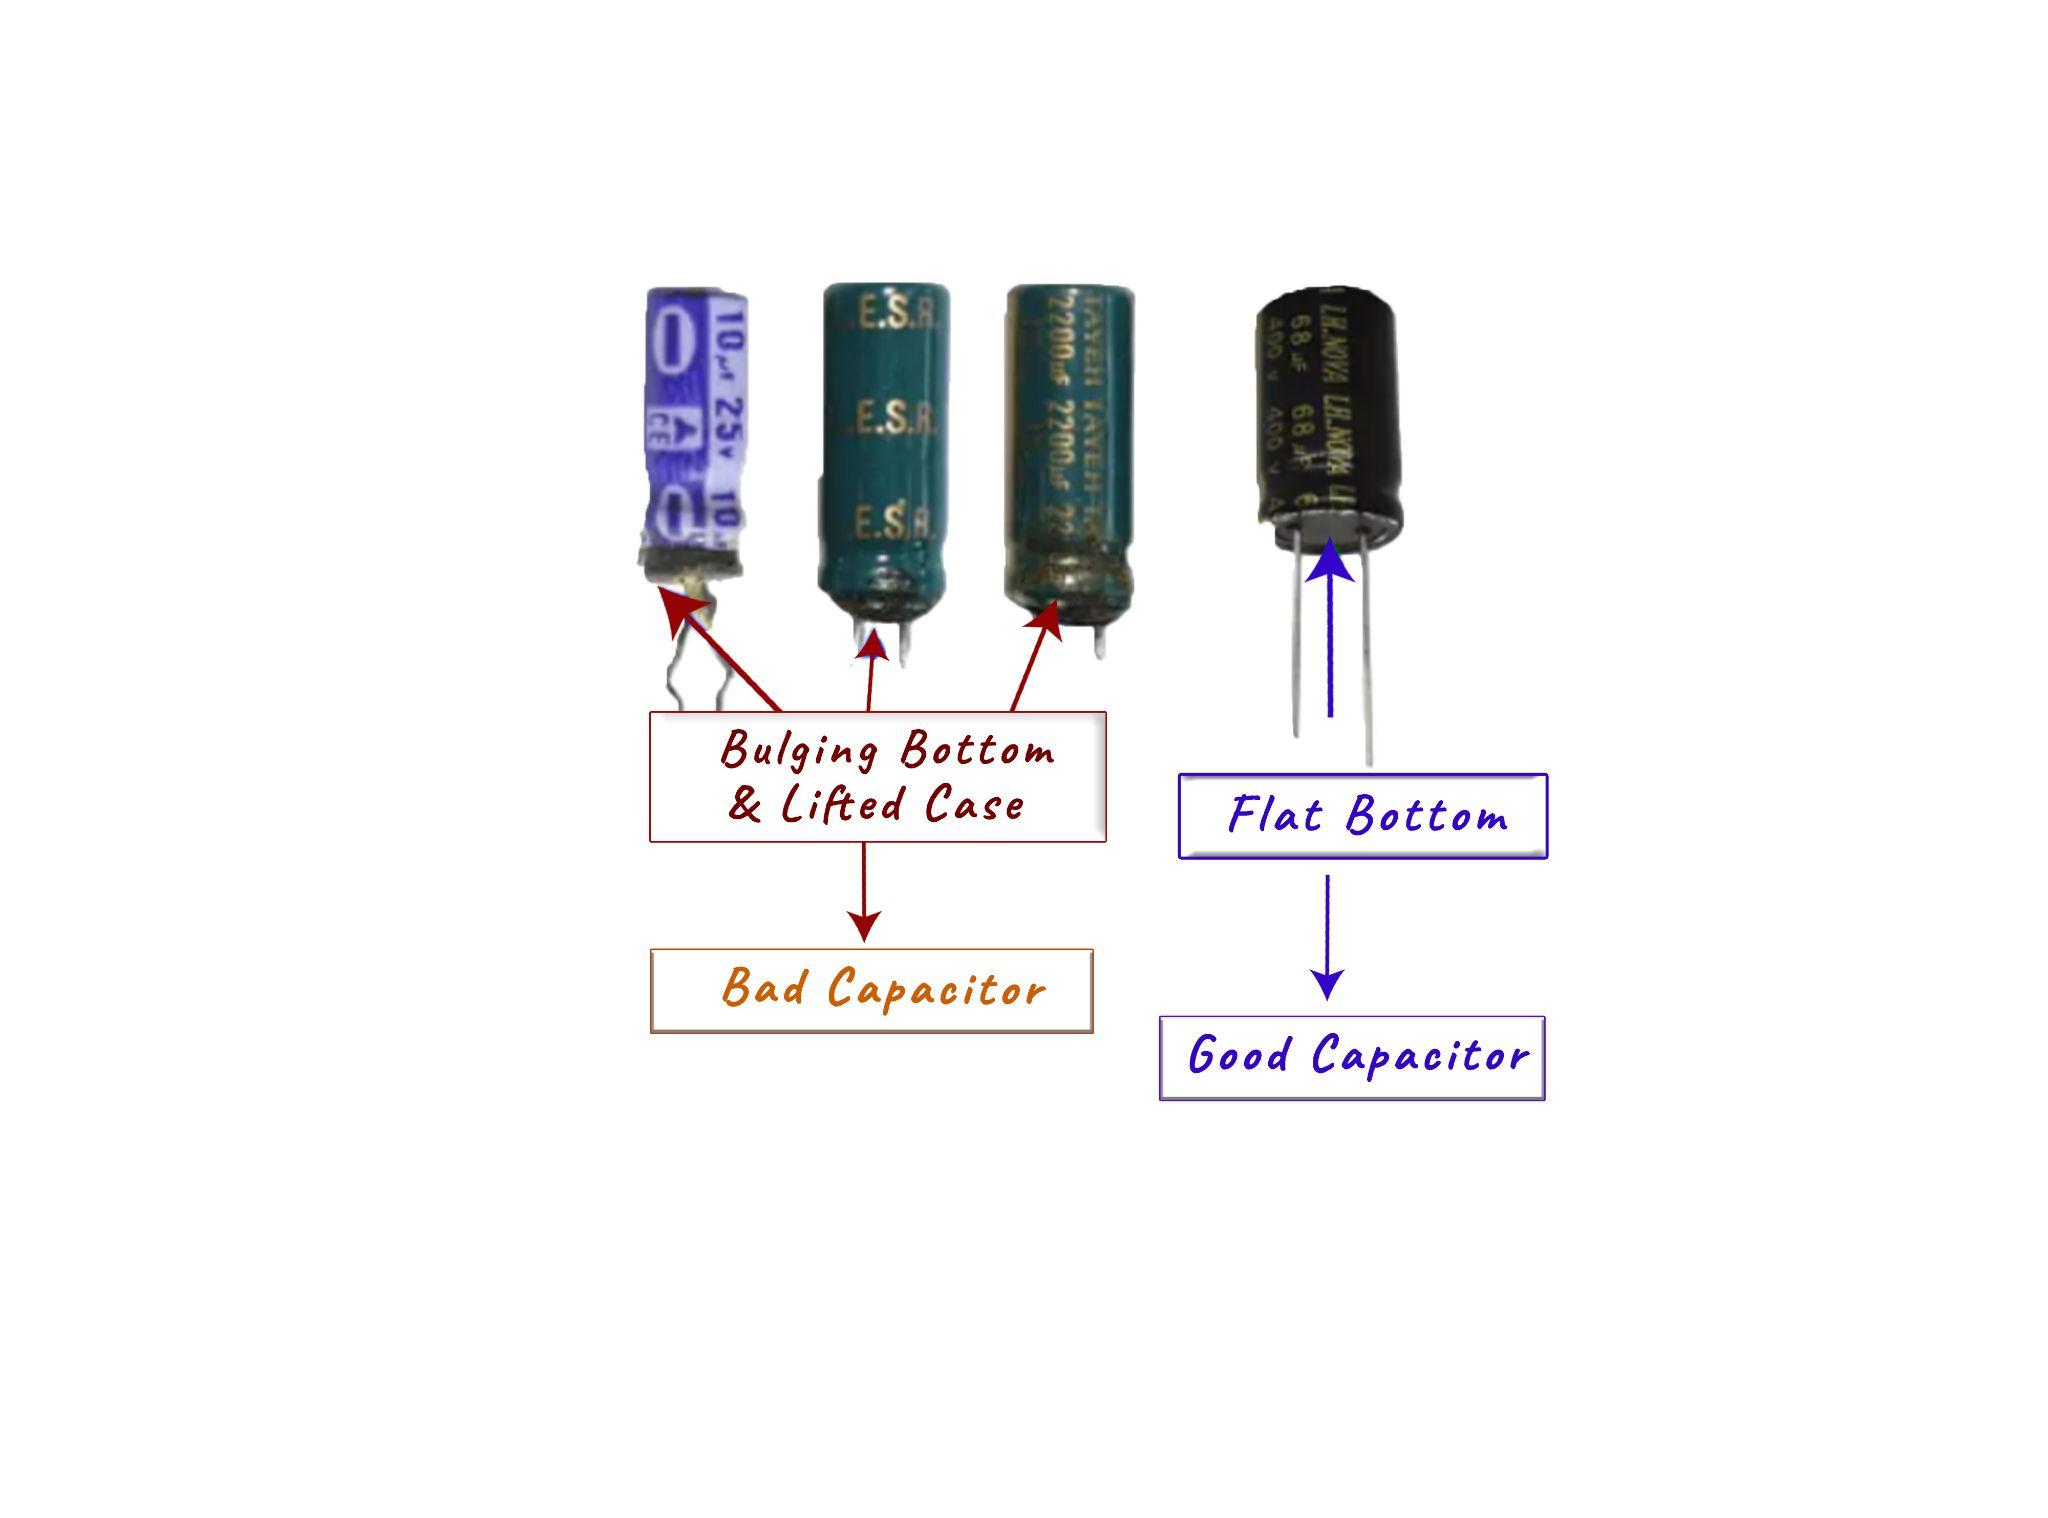
So, to look for any damage on the capacitors first check the upper side of the capacitor and if the cross marks are embossed outwards then it is a sign that the capacitor is bad. If the upper side the properly flattened, then it means that the capacitor is fine:
Moreover, if the capacitor has a bulging bottom that is it’s not uniform and is swollen irregularly then it means that the capacitor is in bad condition or damaged. This normally happens when the gas in the capacitor formed due to the breakdown is unable to leave the vents on the upper side. However, if the bottom is also flat and is perfectly rounded, then it means that the capacitor is in good condition.
Other types of damage can be observed on the capacitors like burn marks, cracks, or damaged terminals. These signs show that the capacitor is damaged and this type of damage can be mainly observed in ceramic capacitors.
Method 7: Testing a Capacitor using the Traditional Method
When a battery or any other storage device has sufficient charge stored in it then if both of its terminals are connected with each other then it generates a spark which shows that the respective device is in good condition.
The same is true in the case of capacitors if both the terminals of the capacitor are short-circuited then in that case a spark for a very short time is observed. This means that the capacitor is in working condition, but to do that the capacitor should be fully charged. Here are some steps in detail that are to be performed to test a capacitor:
Step 1: Charge the Capacitor
There are various ways to charge a capacitor and since the capacitors for AC and DC circuits are different their methods for charging also differ. The primary difference is that for DC capacitor it is connected to the DC source, it could be a battery or any function generator.
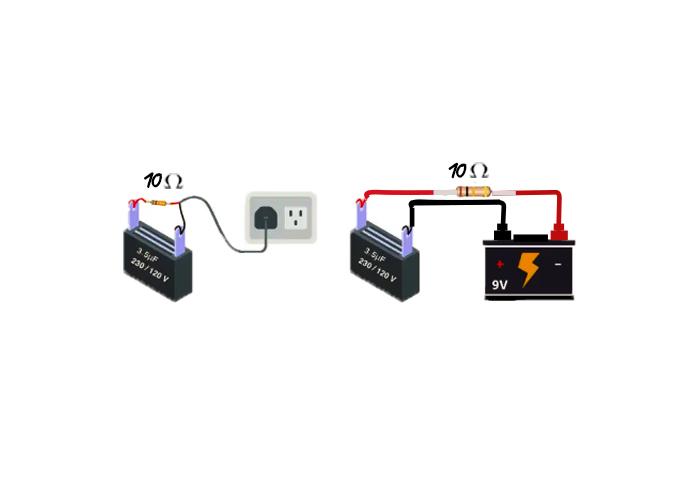
Moreover, for AC capacitor is connected to an AC supply however for both a high-value resistor is connected to reduce the risk of damaging the capacitor by slowing the charging rate. So, in both cases connect a resistor in series and then connect to a power source, afterward wait for almost 2 to 3 seconds and disconnect the power source:
To safely charge the capacitor, specifically in the case of a DC capacitor choose the voltage level correctly as excessive voltage can damage the capacitor. It is always recommended that the voltage source have a lower maximum voltage than the rated voltage capacity of the capacitor.
Step 2: Short the Capacitor Terminals
Now connect both terminals of the capacitor with each other and if the intensity of the spark is high then it means that the capacitor is quite good at holding the charge. On the other hand, if the spark is relatively feeble then it means the capacitor’s ability to hold the electric charge is low, thus it needs to be replaced.
Note: To try this method, use proper safety goggles and wear gloves to prevent any injury, moreover this method is only recommended for experienced professionals.
Method 8: Testing a capacitor with an Analog Meter (AVO)
The use of analog meters has decreased due to the digital multimeter as it gives more accurate readings. However, for testing different electrical devices the analog meter can be a reasonable choice as it is more sensitive to small changes in the electrical quantities. So, to test a capacitor, the analog multimeter with Ohm mode can be used, and here are some steps that ought to be followed in this regard:
Step 1: Discharge the Capacitor
To find out the resistance of the capacitor using the analog multimeter is an effective way to test a capacitor. So, to achieve that the capacitor needs to be properly discharged first as it might affect the reading shown on the analog multimeter. To discharge the capacitor, there are multiple ways, but the easiest one is by connecting a resistor between the terminals of the capacitors:
Keep the resistor connected between the terminals for 3 to 4 seconds to completely discharge the capacitor.
Step 2: Connect the Capacitor with Analog Multimeter
Now rotate the knob of the multimeter and set it to the highest resistance value, afterward connect the meter probes with the capacitor that is a positive probe with the positive terminal and vice versa. Now, if the meter shows very low resistance, then it means that the capacitor is short-circuited and is not in good condition.
Moreover, if there is no deflection on the meter at all then it means the capacitor is open circuited which shows, that a good capacitor is one that initially shows low resistance, but it gradually increases and becomes infinite:
How long Does an AC Capacitor last?
There is no actual life span of AC capacitors as it depends massively on working conditions like voltage, current power surge protection, and working temperature. However, AC capacitors on average may work perfectly for up to 10 to 20 years, but again it’s not too certain. So, to make the capacitor last a longer time, carry on the routine check-ups on the circuits.
Conclusion
Capacitors, in electrical circuits, work by storing electric charge between their plates, and over time the capacitor starts to lose its efficiency, and it can be caused by multiple reasons. These include overheating, fluctuations in voltage and current values, and other similar reasons.
So, to test a capacitor whether it is an AC or DC there are a number of ways by which it can be done. One of the easiest ways to test whether a capacitor is working or not is by checking its resistance when it is fully discharged. Moreover, find out the actual value of its capacitance using the time constant method to see if the capacitor is in good condition.

