Prerequisites
To try out the examples in this article, you must have KVM installed on your computer. If you do not have KVM installed on your computer, you can read the following articles at LinuxHint.com for assistance on installing KVM on your desired Linux distribution.
– Install KVM on Ubuntu 20.04
– Install KVM on CentOS 8
Creating a CentOS 8 KVM Virtual Machine
This section shows you how to create a CentOS 8 KVM virtual machine for testing SSH connectivity.
First, download the CentOS 8 ISO installation image. To keep all the virtual machine files/data organized, it is a good idea to store the ISO image in the /kvm/iso/ directory.
Navigate to the /kvm/iso/ directory with the following command:
You can find the link to the CentOS 8 ISO installation image on the official ISO website of CentOS.
Once the page loads, click on your nearest CentOS 8 mirror.
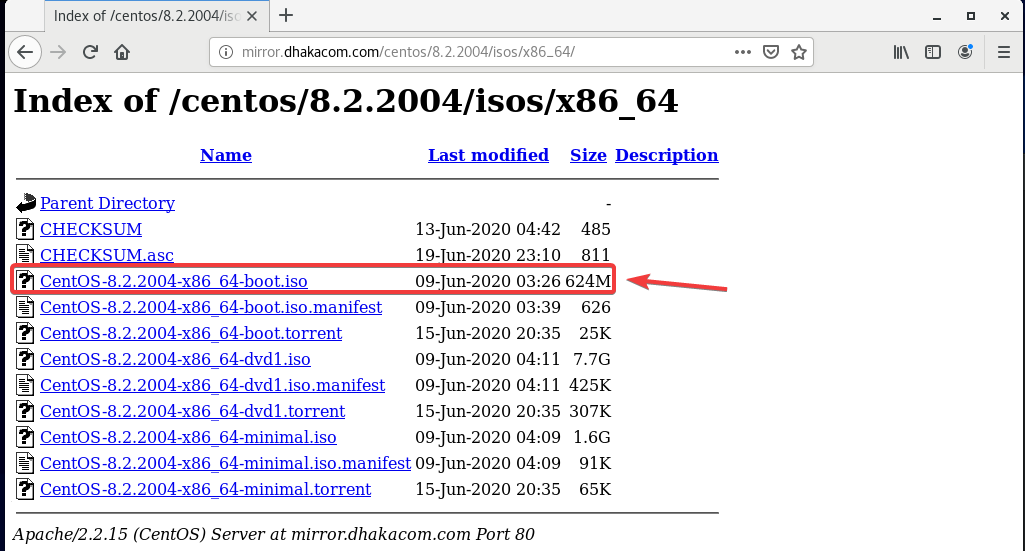
All the available CentOS 8 ISO installation images should be listed.
I will download the NetBoot ISO installation image of CentOS 8 for this article. To install CentOS 8 on a KVM virtual machine using the NetBoot ISO installation image, the virtual machine requires internet connectivity.
If you do not want to configure the network while installing CentOS 8 on the virtual machine, select either the minimal or the dvd ISO installation image of CentOS 8.
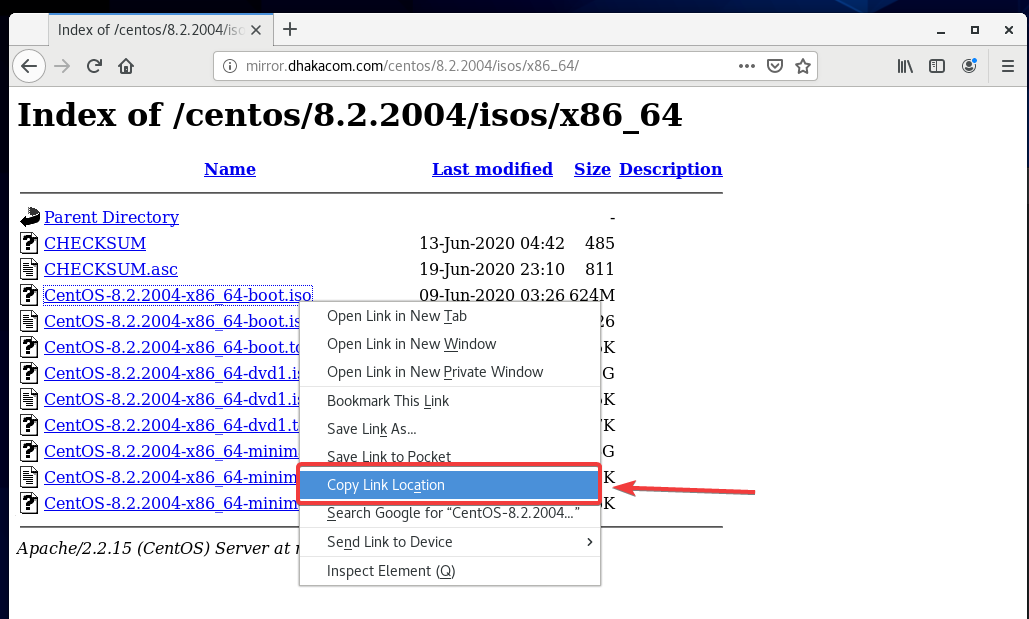
Right-click (RMB) on the ISO file to download and copy the link of the ISO file.
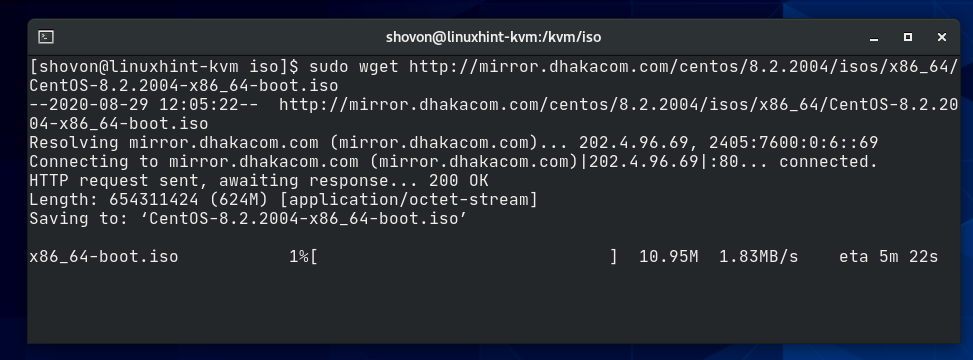
Download the CentOS 8 ISO installation image using wget, as follows:
8.2.2004/isos/x86_64/CentOS-8.2.2004-x86_64-boot.iso
wget should start downloading the CentOS 8 ISO image. It will take a while to complete.
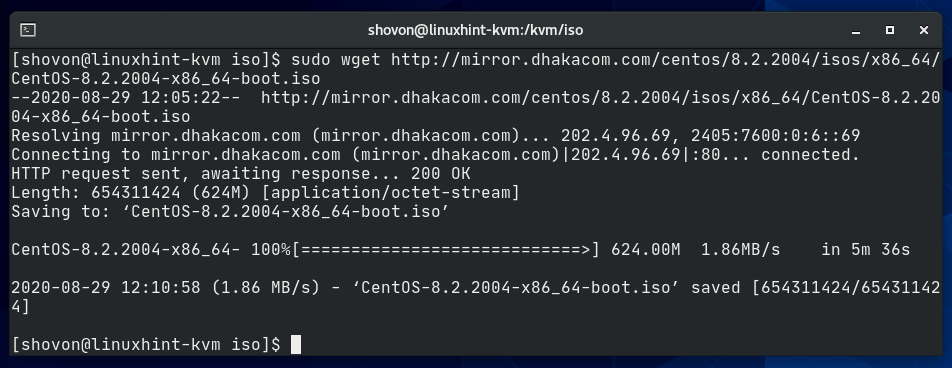
At this point, the CentOS 8 ISO image should be downloaded.
The CentOS 8 ISO image is available in the /kvm/iso/ directory, as you can see in the screenshot below.
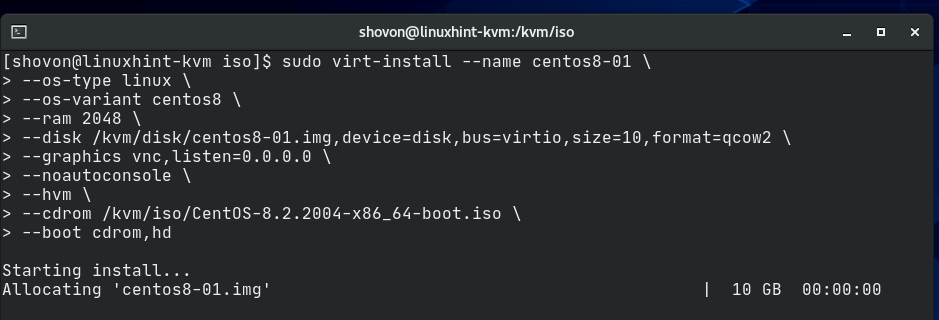
Once the CentOS ISO image is downloaded, create a KVM virtual machine with the following command:
--os-type linux \
--os-variant centos8 \
--ram 2048 \
--disk /kvm/disk/centos8-01.img,device=disk,bus=virtio,size=10,format=qcow2 \
--graphics vnc,listen=0.0.0.0 \
--noautoconsole \
--hvm \
--cdrom /kvm/iso/CentOS-8.2.2004-x86_64-boot.iso \
--boot cdrom,hd
The name of the virtual machine will be centos8-01.
The operating system type is linux and the variant is centos8.
The RAM (Random Access Memory) of the VM will be 2048 MB or 2 GB.
The virtual disk of the VM will be saved in the /kvm/disk/centos8-01.img file. The virtual disk is about 10 GB in size and the format is QCOW2 (QEMU Copy-On-Write v2).
The virtual machine will be accessible via VNC (Virtual Network Computing) remote desktop protocol, and the VNC server will be listening on all available network interfaces configured on your KVM host.
The KVM host will not automatically try to connect to the virtual machine once the virtual machine is created. The virtual machine will keep running in the background.
Use full virtualization for the virtual machine. This will make virtual machines perform better.
Use the CentOS 8 ISO image previously downloaded as the virtual CD/DVD ROM of the virtual machine. This is used for installing CentOS 8 on the virtual machine.
Sets the boot order of the virtual machine. The first boot entry is the virtual CD/DVD ROM, and then the virtual hard drive. So, the virtual machine will be able to boot from the CentOS 8 ISO image and install CentOS 8 on the hard drive.
That is all the options you need to create a KVM virtual machine.
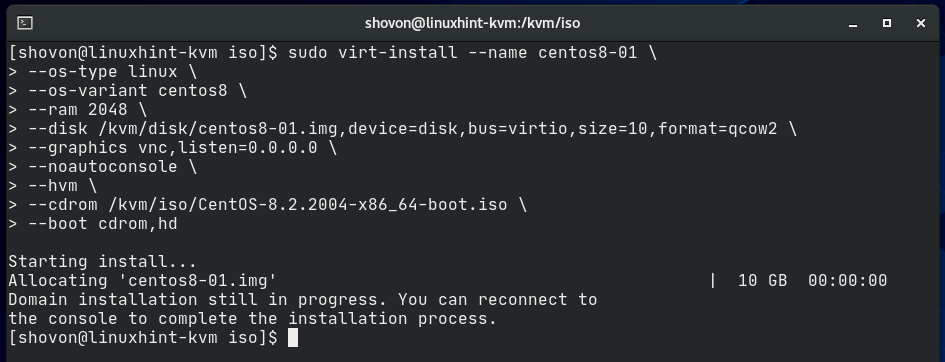
Once you run the virt-install command, KVM should start creating the virtual machine. This may take a while, depending on your virtual machine configuration.
At this point, the KVM virtual machine should be created.
As you can see, the newly-created virtual machine centos8-01 is running.
Now, you can connect to the virtual machine using any VNC client program and install CentOS 8 on it. To connect to the virtual machine via VNC, you need to know the VNC port number of the virtual machine.
To find the VNC port number of the KVM virtual machine centos8-01, run the following command:
As you can see, the VNC port number of the centos8-01 virtual machine is 1.
Here, port 0 means port 5900. In the same way, port 1 means port 5901, and so on.
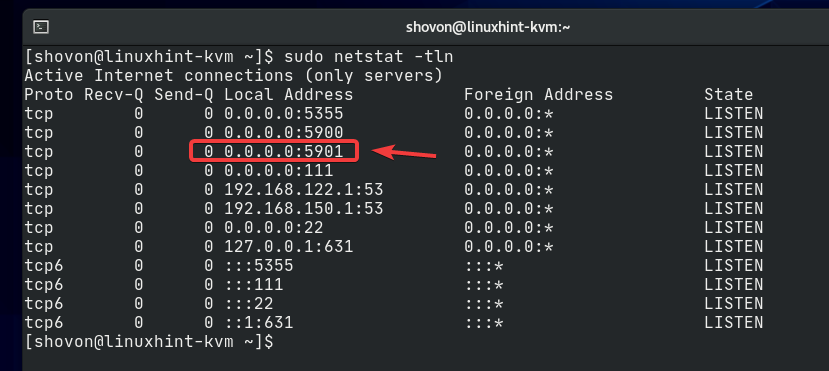
As you can see, the KVM virtual machine centos8-01 is running on port 5901 (:1).
If your KVM host is running the CentOS 8 operating system, you can allow access to port 5901 with the following command:
For the firewall changes to take effect, run the following command:
If your KVM host is running the Ubuntu 20.04 LTS operating system, you can allow access to port 5901 with the following command:
For the firewall changes to take effect, run the following command:
Find the IP address of your KVM host with the following command:
My home network is using the network subnet 192.168.20.0/24. So, the IP address of my KVM host is 192.168.20.131. The other IP addresses are private network bridges of the KVM host.
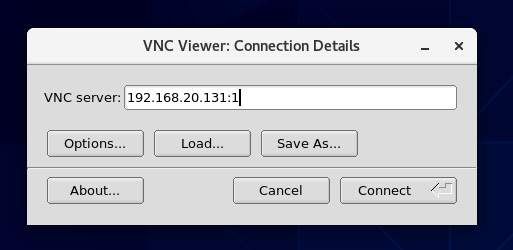
Open any VNC client program and connect to the address 192.168.20.131:1.
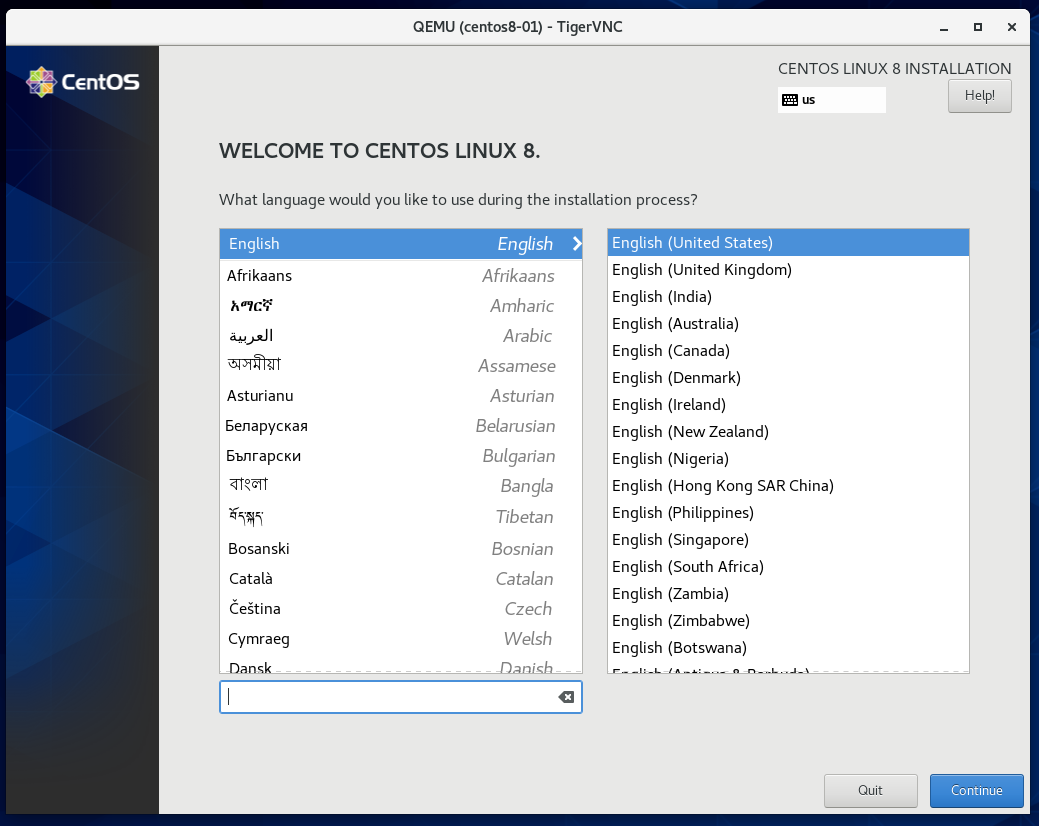
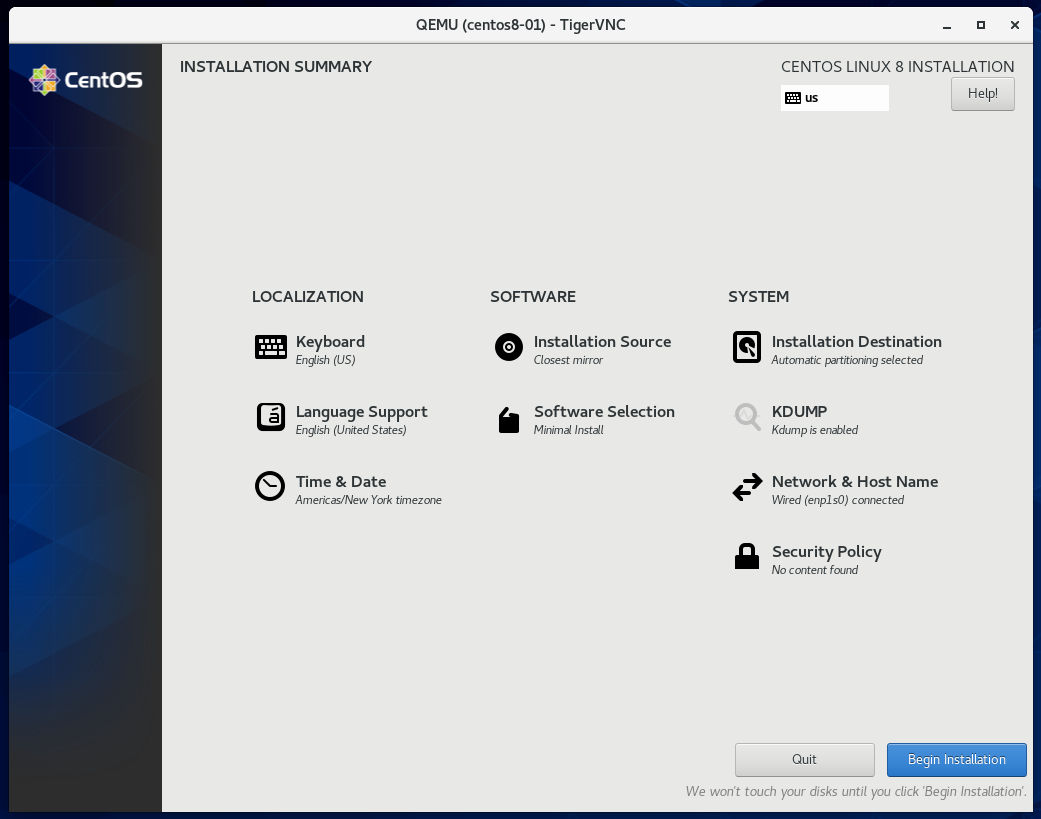
You should see the CentOS 8 installation window, as shown in the screenshot below. You can install CentOS 8 on the KVM virtual machine as you would normally.
I am installing the minimal server version of CentOS 8 for the demonstration in this article.
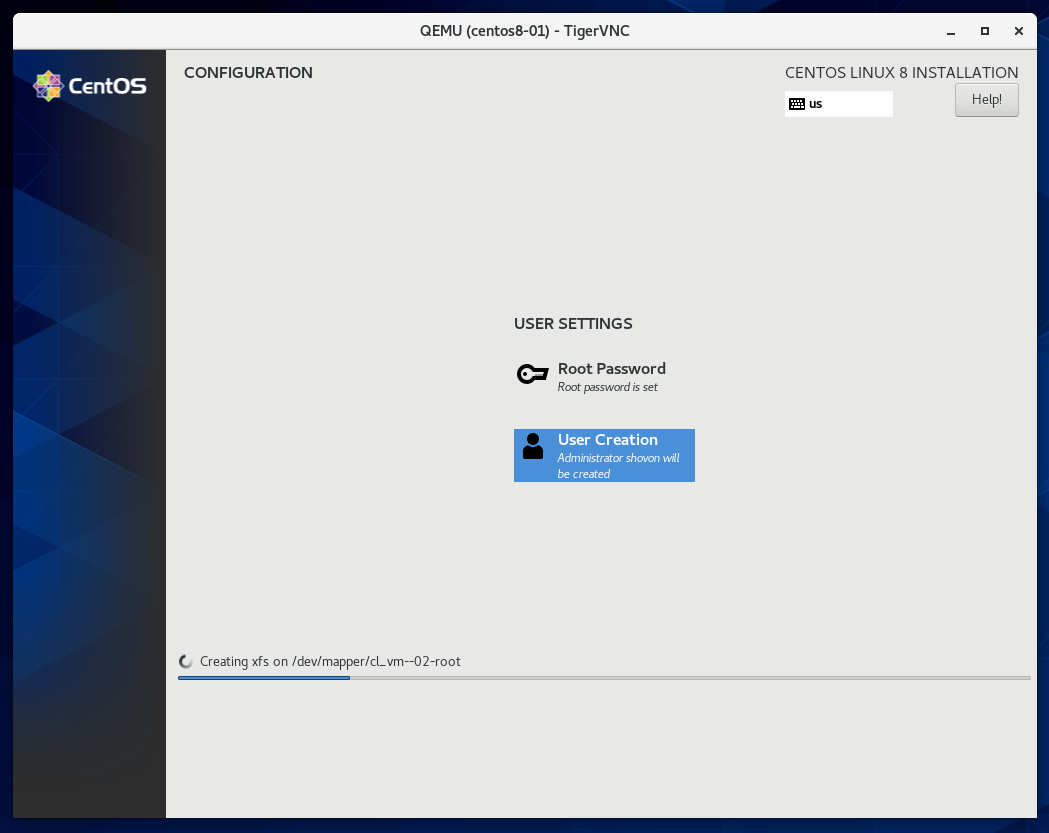
CentOS 8 is being installed in the KVM virtual machine centos8-01, as you can see in the screenshot below. This may take awhile to complete.
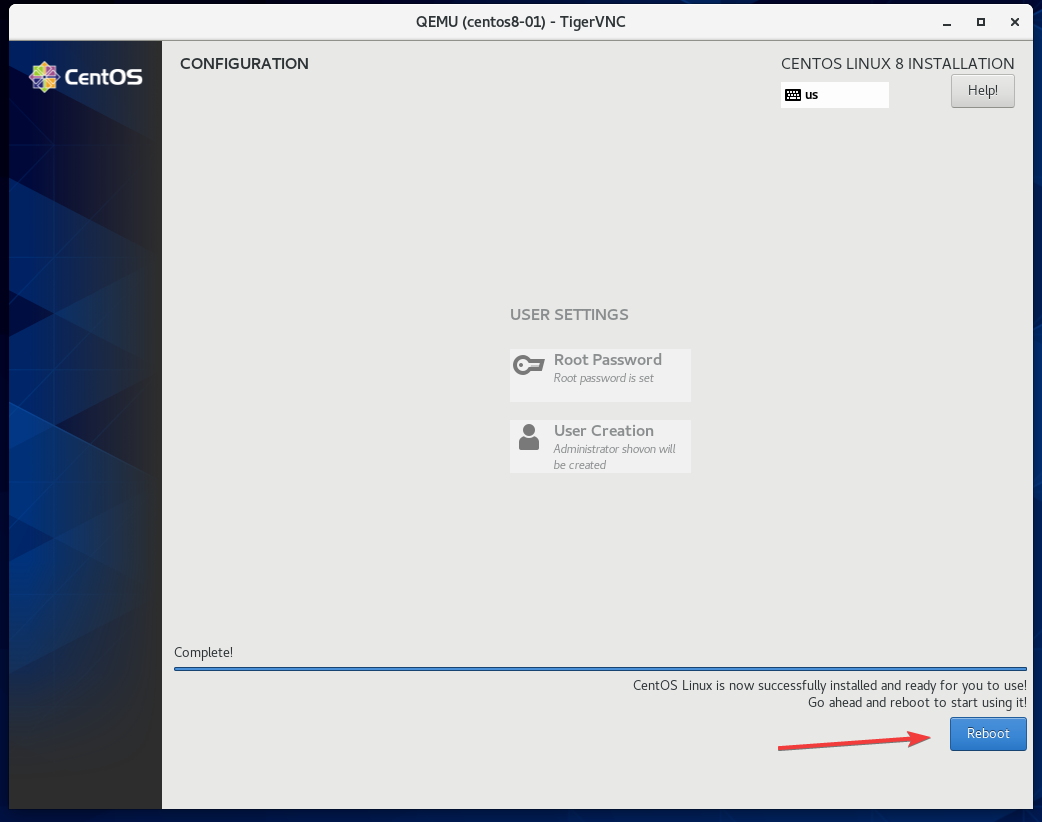
Once CentOS 8 is installed on the virtual machine, click Reboot.
The KVM virtual machine centos8-01 should be powered off automatically, as you can see in the screenshot below.
Start the centos8-01 KVM virtual machine with the following command:
Now, you can connect to the centos8-01 virtual machine from a VNC client, as before. As you can see, the CentOS 8 minimal server is running just fine in the KVM virtual machine.
Installing SSH Server on the CentOS 8 Virtual Machine
The main goal of this article is to connect to a CentOS 8 KVM virtual machine via SSH. You must have an SSH server installed on your CentOS 8 KVM virtual machine to be able to connect to it via SSH.
Install the OpenSSH server on your CentOS 8 KVM virtual machine with the following command:
The OpenSSH server should now be installed. In my case, it is already installed.
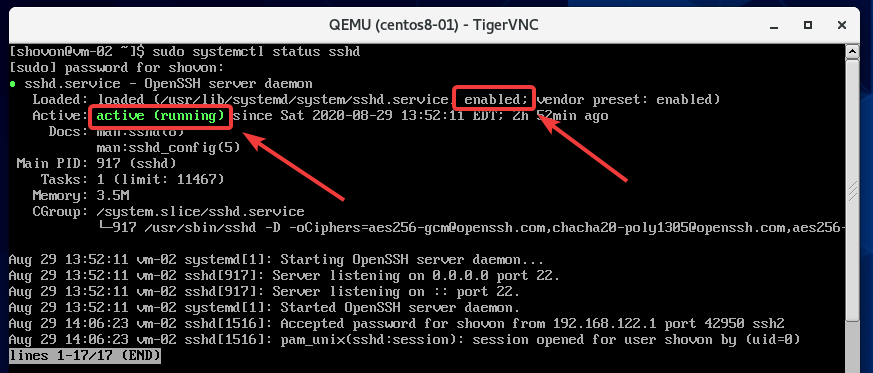
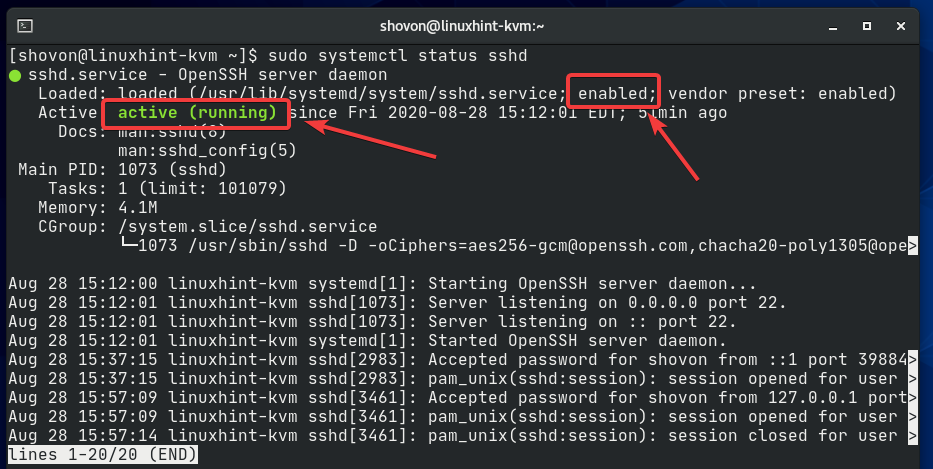
Confirm that the sshd service is running and enabled with the following command:
If the sshd service is not running, you can start it with the following command:
If the sshd service is disabled, you can enable it with the following command:
Configuring the Firewall of the CentOS 8 Virtual Machine
You must configure the firewall of the virtual machine to allow access to the SSH port. Otherwise, you will not be able to connect to the virtual machine via SSH, even if all the configurations are okay.
To allow SSH access to the KVM virtual machine centos8-01, run the following command:
For the firewall changes to take effect, run the following command:
Method 1: Accessing Virtual Machines via SSH Tunneling
By default, KVM uses the private network bridge default for networking the virtual machines. The IP address subnet of the KVM private network bridge default is not accessible from a home network. It is only accessible from a KVM host. So, to SSH into your CentOS 8 KVM virtual machine from another computer (in your home network), you must bypass the connection through a KVM host. This is called SSH tunneling and works similar to a VPN.
For SSH tunneling to work, your KVM host must have an SSH server installed, and you must have SSH access to the KVM host.
If your KVM host is running CentOS 8, then you can install the OpenSSH server on your KVM host with the following command:
If your KVM host is running Ubuntu 20.04 LTS, then you can install the OpenSSH server on your KVM host with the following command:
Confirm that the sshd service is running and enabled with the following command:
If the sshd service is not running, you can start it with the following command:
If the sshd service is disabled, you can enable it with the following command:
You may have to configure the firewall of your KVM host to allow SSH access to it.
If your KVM host uses the CentOS 8 operating system, run the following command to configure the firewall:
For the changes to take effect, run the following command:
If your KVM host uses the Ubuntu 20.04 LTS operating system, run the following command to configure the firewall:
For the changes to take effect, run the following command:
Your CentOS 8 KVM virtual machine centos8-01 may be powered off.
If that is the case, you can start the virtual machine with the following command:
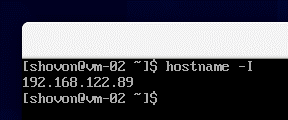
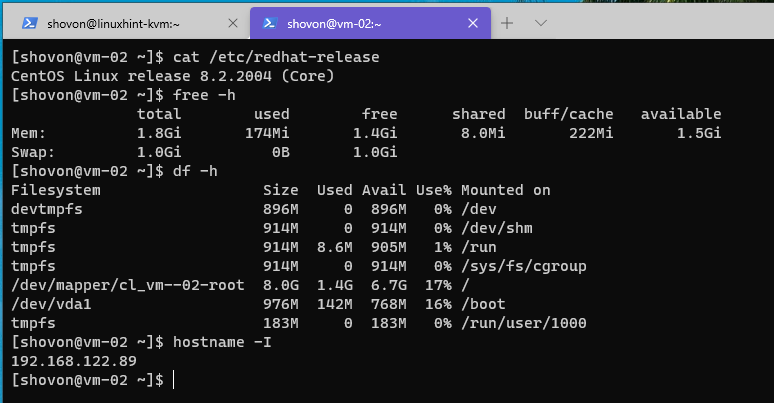
Connect to your CentOS 8 virtual machine with a VNC client and run the following command on the virtual machine to find its private IP address:
In my case, the private IP address of my CentOS 8 KVM virtual machine is 192.168.122.89. This may be different for you.
Find the IP address of your KVM host with the following command:
In my case, the IP address is 192.168.20.131. I know this because my home network is using the subnet 192.168.20.0/24.
To make a tunnel to the CentOS 8 KVM virtual machine via the KVM host, run the following command from your computer:
Here, the -L option is used to tell the SSH to perform local port forwarding.
This will forward all the requests coming from the localhost port 2200 to port 22 of the CentOS 8 KVM virtual machine, which has the private IP address 192.168.122.89.
Since the computer does not have direct access to the network subnet of the CentOS 8 KVM virtual machine 192.168.122.0/24, it tunnels the request through the KVM host, which has direct access to that network subnet.
Here, 192.168.20.131 is the IP address of the KVM host and shovon is the SSH login username of the KVM host.
Once you run the command, you may be asked the following question. Type yes and press <Enter>.
Type in the password of the login user of your KVM host and press <Enter>.
You should now be connected to the KVM host via SSH.
Now, you can SSH into your CentOS 8 KVM virtual machine on the localhost port 2200 as follows:
Here, shovon is the login username of the CentOS 8 KVM virtual machine.
Once you run the command, you may be asked the following question. Type yes and press <Enter>.
Type in the password of the login user of your CentOS 8 KVM virtual machine and press <Enter>.
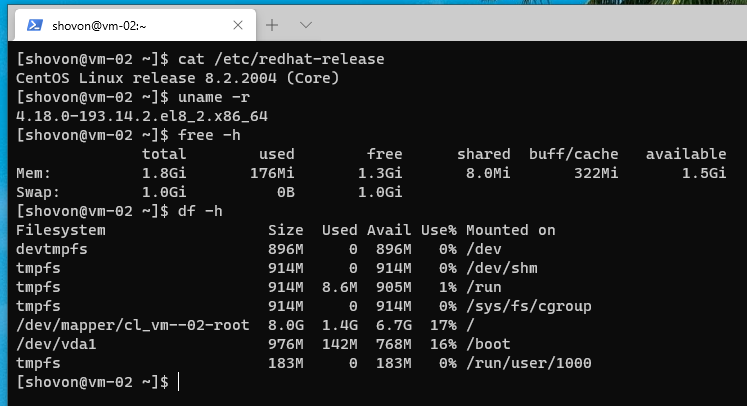
You should now be connected to the CentOS 8 KVM virtual machine running on your KVM host via SSH, as you can see in the screenshot below.
You can run any command you want on here, as well.
Method 2: Accessing Virtual Machines via KVM Public Network Bridge
If you want full access to your CentOS 8 KVM virtual machine, then you can configure a public KVM network bridge. A public KVM network bridge acts as a network switch. Your CentOS 8 KVM virtual machine will get an IP address from the same DHCP server as your home network and, in the same network, subnet as your home network. So, it will be accessible from every device connected to your home network.
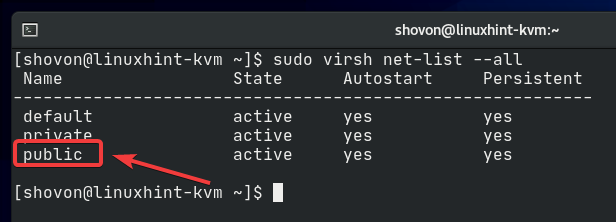
I have already created a KVM public network bridge public and configured my CentOS 8 KVM virtual machine to use the bridge. I explain the process of creating the KVM public network bridge in my article How to Create a CentOS 8 KVM Networked Bridge Interface. Be sure to check it out.
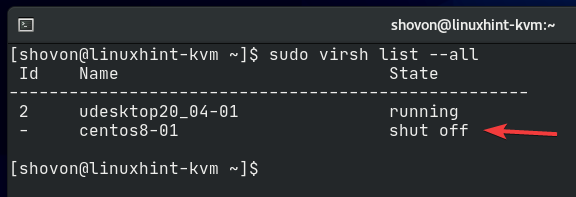
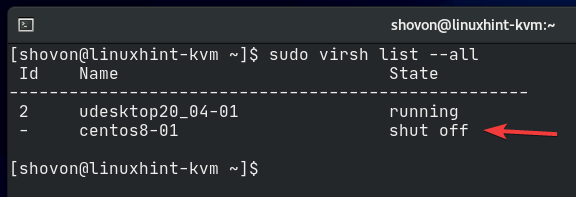
Once you have created a KVM public network bridge, you must configure your CentOS 8 virtual machine to use the bridge. Before configuring your CentOS 8 virtual machine centos8-01, check whether the CentOS 8 KVM virtual machine is running with the following command:
As you can see, the CentOS 8 KVM virtual machine centos8-01 is running. We should stop it before configuring it.
You can power off your CentOS 8 KVM virtual machine centos8-01 with the following command:
As you can see, the CentOS 8 KVM virtual machine is powered off.
By default, the CentOS 8 KVM virtual machine uses the default private network bridge. I will configure it to use the public network bridge I have already created.
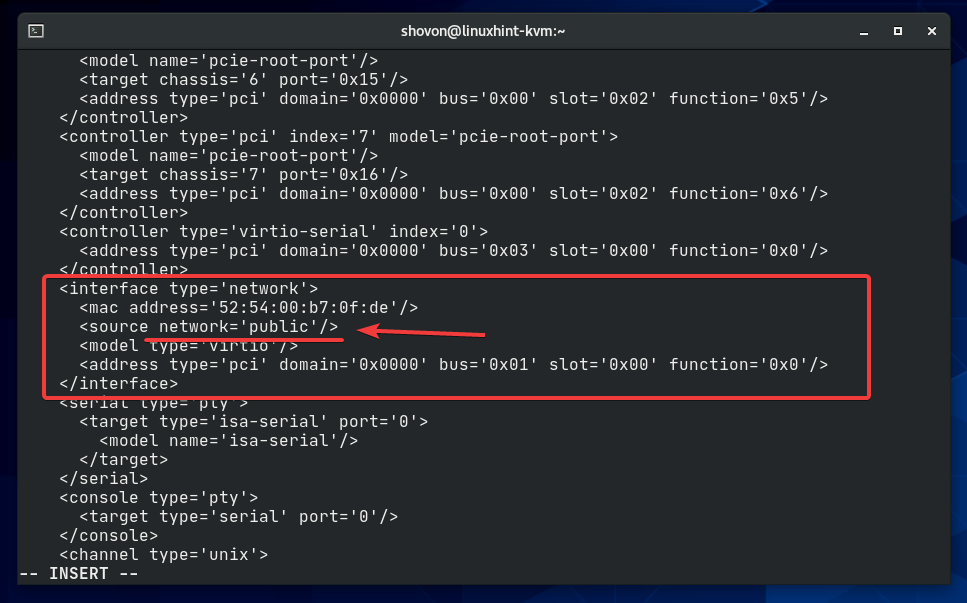
To edit the configuration of the CentOS 8 KVM virtual machine, run the following command:
Find the interface section, as marked in the screenshot below. Change the source network from default to public.
NOTE: The configuration file opens with the Vi text editor by default. To edit the configuration file in Vi, press i to go to INSERT mode. To save the configuration file, press <Esc>, type in :wq!, and then press <Enter>.
The virtual machine configuration should now be changed.
Start the CentOS 8 KVM virtual machine with the following command:
Now, connect to your CentOS 8 KVM virtual machine using a VNC client. Check the IP address of the virtual machine with the following command:
As you can see, the IP address is 192.168.20.133. This IP address was supplied by the DHCP server of my home network. This is an IP address of the network subnet 192.168.20.0/24, which is the subnet of my home network.
Now, you can connect to the CentOS 8 KVM virtual machine from any computer connected to your home network, as follows:
Here, shovon is the login username of the CentOS 8 KVM virtual machine.
Once you run the command, you may be asked the following question. Type yes and press <Enter>.
Type in the password of the login user of your CentOS 8 KVM virtual machine and press <Enter>.
You should now be connected to the CentOS 8 KVM virtual machine running on your KVM host via SSH, as you can see in the screenshot below.
You can run any command you want on here, as well.
Conclusion
This article showed you how to create a KVM CentOS 8 virtual machine and connect to the virtual machine via SSH. When the CentOS 8 KVM virtual machine is not accessible from the home network (it uses a private network bridge), you must use SSH tunneling to connect to the KVM virtual machine using SSH. When you want full access to the CentOS 8 KVM virtual machine, you can set up a public network bridge and configure the virtual machine to use the bridge. This way, your KVM virtual machine can be accessible from your entire home network.


