“CentOS is a great Linux distribution for Linux system administration. It is a stable and manageable version of RHEL and has community support. If you don’t have CentOS already running on your system, we will cover how you can install it on Virtual Box.”
Getting Started
We need to download its ISO image from the website to install CentOS. Click here to visit the website and download the CentOS 7 ISO image. The file is large and will take time to complete.
Installing Virtual Box
Virtual Box is available on the Ubuntu repositories, and you can install it using the command below.
1 | $ sudo apt-get install virtualbox |
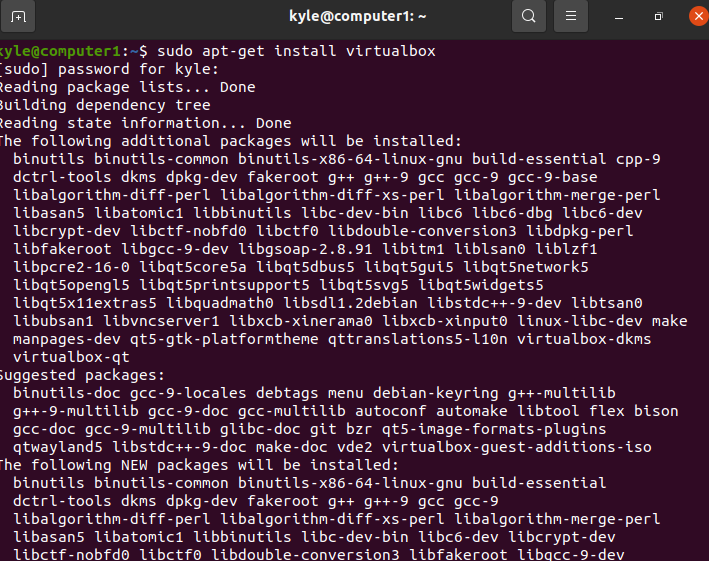
Also, install the Virtual Box extension pack:
1 | $ sudo apt-get install virtualbox-ext-pack |
Installing CentOS on Virtual Box
Open Virtual Box from your applications and click the blue New button at the top.
A screen will pop up asking you to enter the name of your new virtual machine. In our case, it’s CentOS 7. Also, under the Type and Version, choose the appropriate one.

Click the Next button. The next thing is to allocate the memory size to be used by CentOS 7. The selection you make depends on the size of your memory.
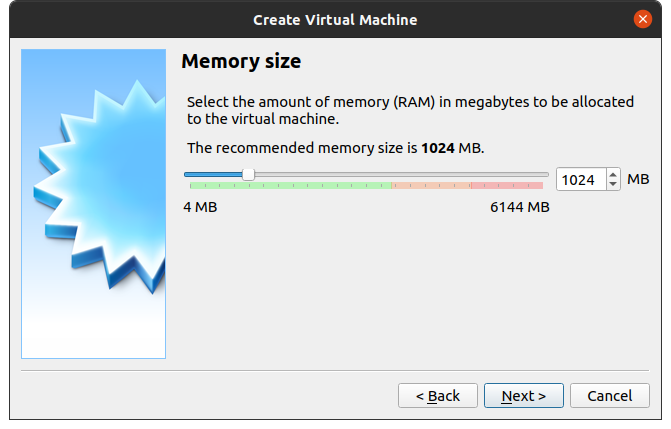
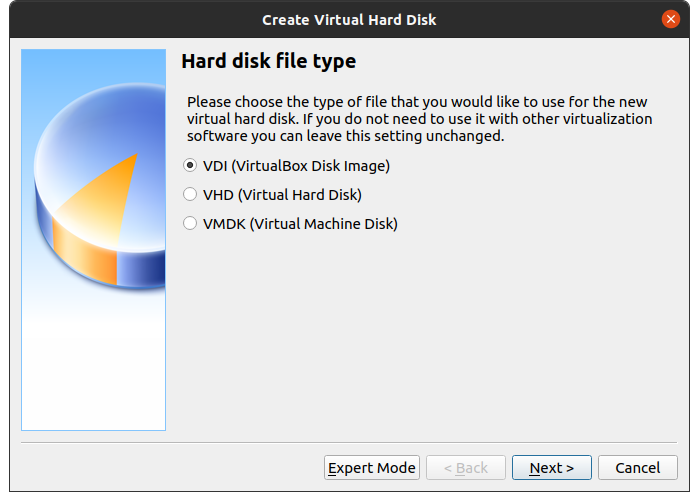
In our case, we will use 1024 MB. Click, Next. Under the Hard Disk, choose to create a virtual hard disk and click the create button.

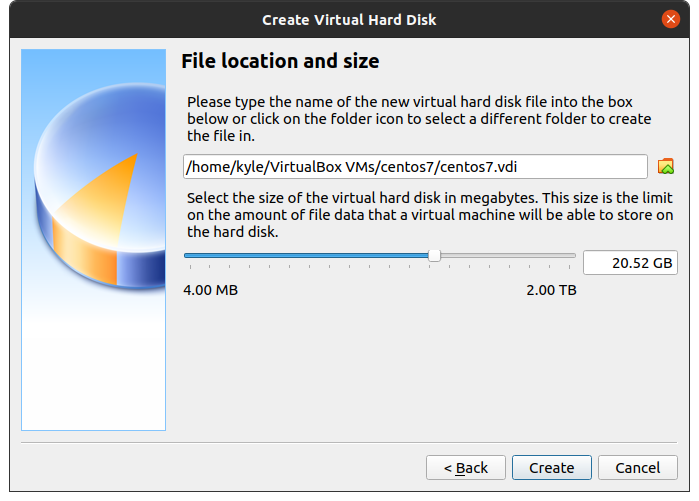
Also, leave the next screen as default to use VDI as the hard disk file type.
Using Dynamically allocated for storage is recommended, especially if you are new to Virtual Box. This option will only use your hard disk space as it fills up instead of using a fixed size.

It would help to choose how much disk space the virtual machine allocates. The allocation size depends on what you intend to do with the virtual machine, but anything from 15 GB will work fine. Besides, this will depend on how much space you have.
Finally, click the Create button, and you will notice the virtual machine gets created. You should see the name you gave your virtual image in the Virtual Box interface.
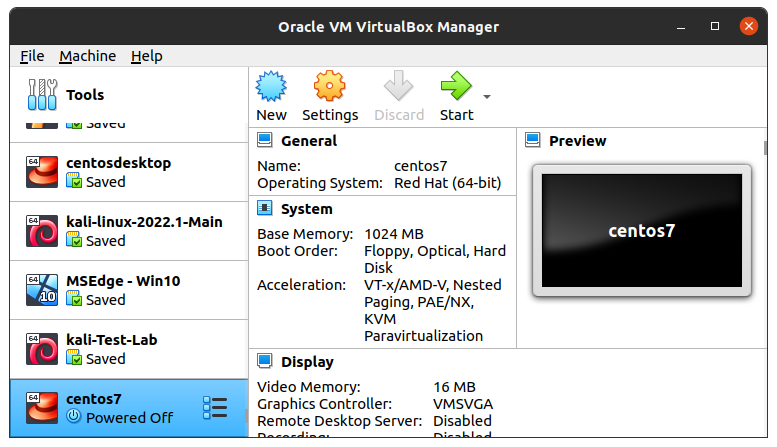
The image above has different virtual images, but the one we are creating is the selected one at the bottom.
The next thing is to install the ISO image that we downloaded. For that, ensure the created virtual machine is the selected one. It should be highlighted in blue, then click the green-arrowed Start button at the top.
A screen will pop up indicating you to Select the start-up disk. Click the folder icon at the bottom right. Under the Optical Disk Selector screen, and then click the Add button.
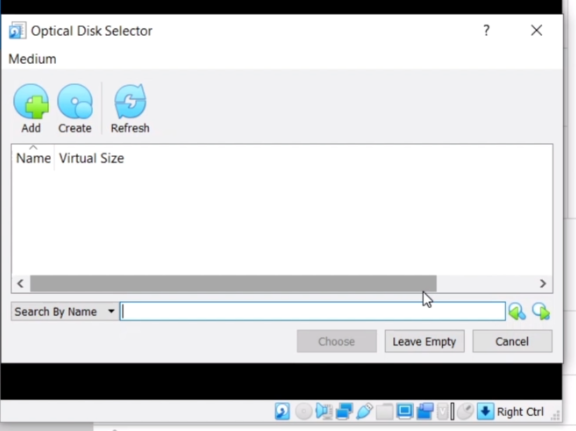
Navigate to where your downloaded ISO image is located. Click on it to open it, then choose it.
It would be best if you now had a screen like the one below with the CentOS 7 ISO image as the selected item.
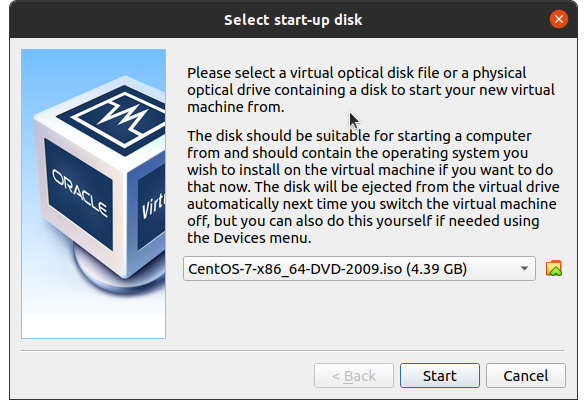
Click Start to begin the installation process, and click the enter key to go with the selected option, as shown below.

The installation will start, and the next screens will require you to choose your preferences, such as language. Click inside the virtual machine to control the cursor.
You should see an installation summary on the next screen. Start by clicking the Installation Destination.
Here, you need to ensure that the created disk space is selected. If that’s the case, click the blue Done button at the top.

Next, click the Network and Host. To enable networking for the CentOS, click the switch to turn ON the Ethernet connection.

It should read connected. Once connected, click the Done button at the top left corner.
We must enable the development tool to set the virtual machine to install new software. Click Software Selection and once it opens, click the Gnome Desktop on the left and finally the Development tools on the right.
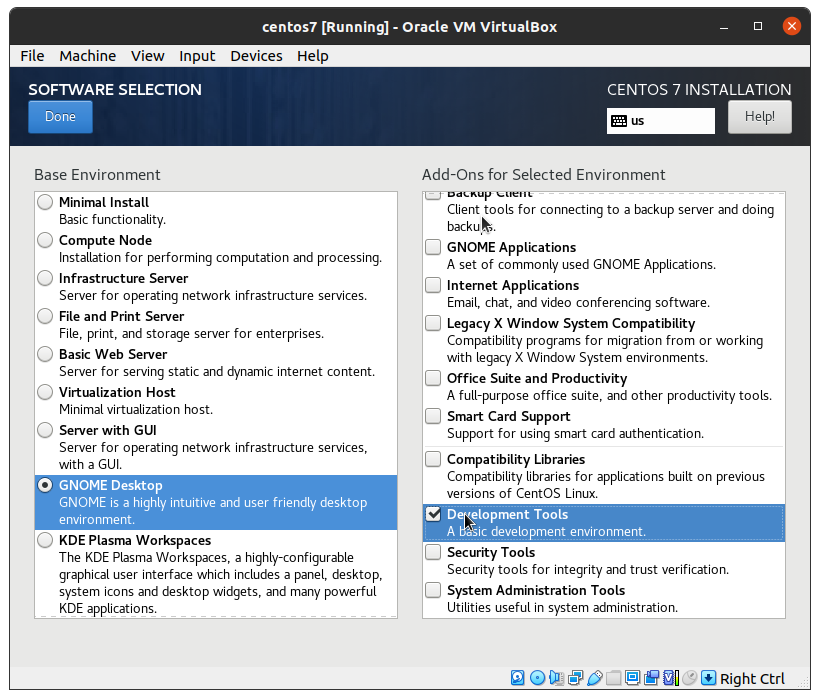
Once finished, click Done.
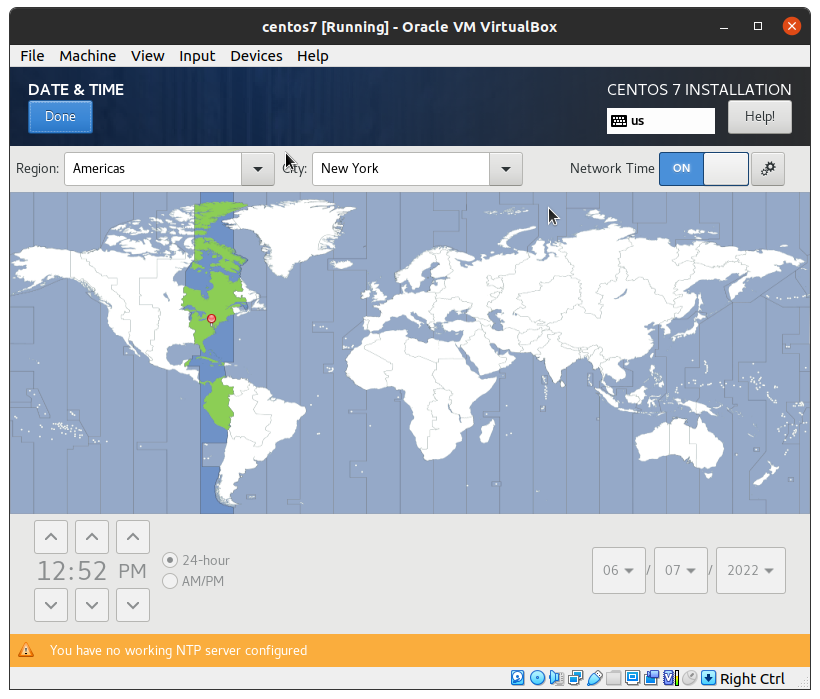
Depending on your location, you may need to set the Time & Date if it currently doesn’t match where you are. Click the Time & Date button and set your location for CentOS to display the correct date.
Once you are satisfied with the settings, click the Begin Installation button.

Click the Root Password and set a strong password for the root account. Click Done to finish.
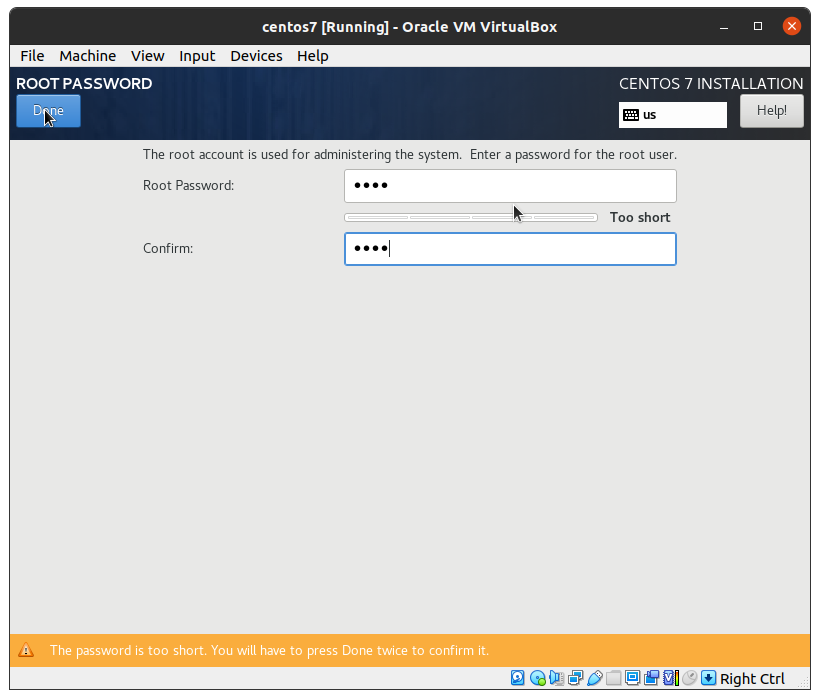
Also, you need to create a user account, and you can do that by clicking the User Creation and then adding the credentials for the new user.

Once you have the root password set and a new user created, let the process run to completion. It may take some time, but be patient.
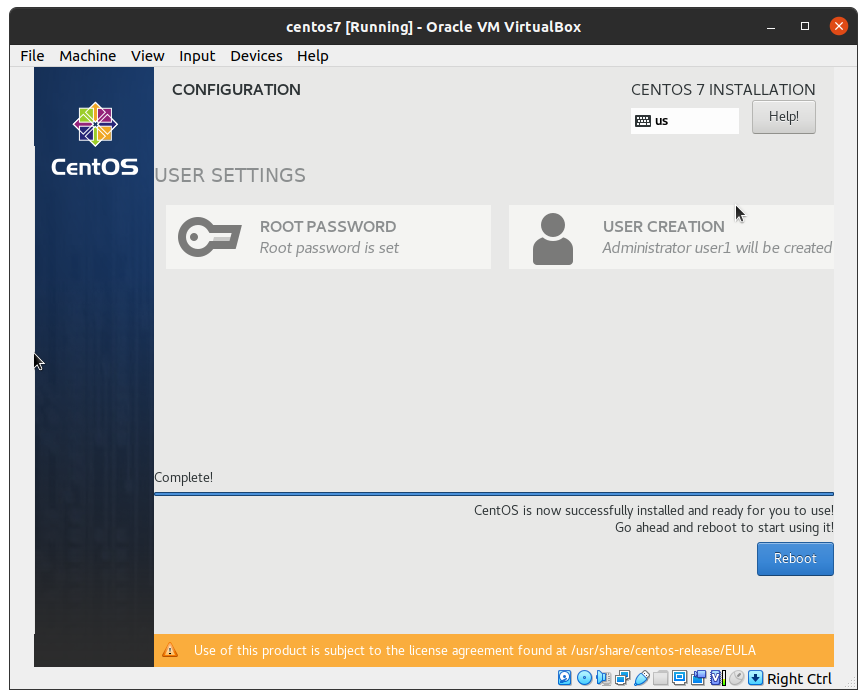
You should see the Reboot button activated once the installation completes. Click on it to reboot CentOS 7.
On reboot, CentOS should detach the ISO and not restart the installation. That’s it! CentOS 7 will restart and boot from a fresh install screen.
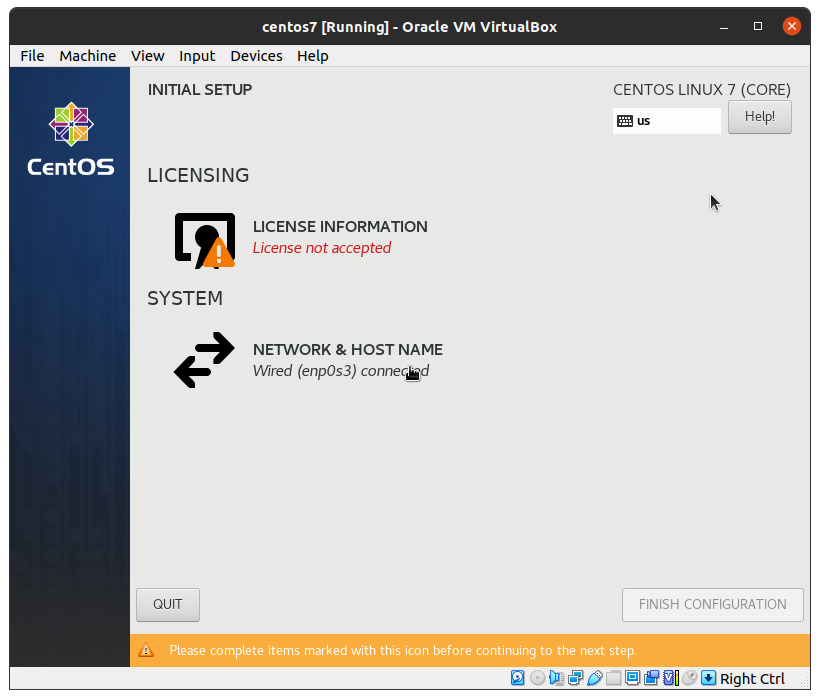
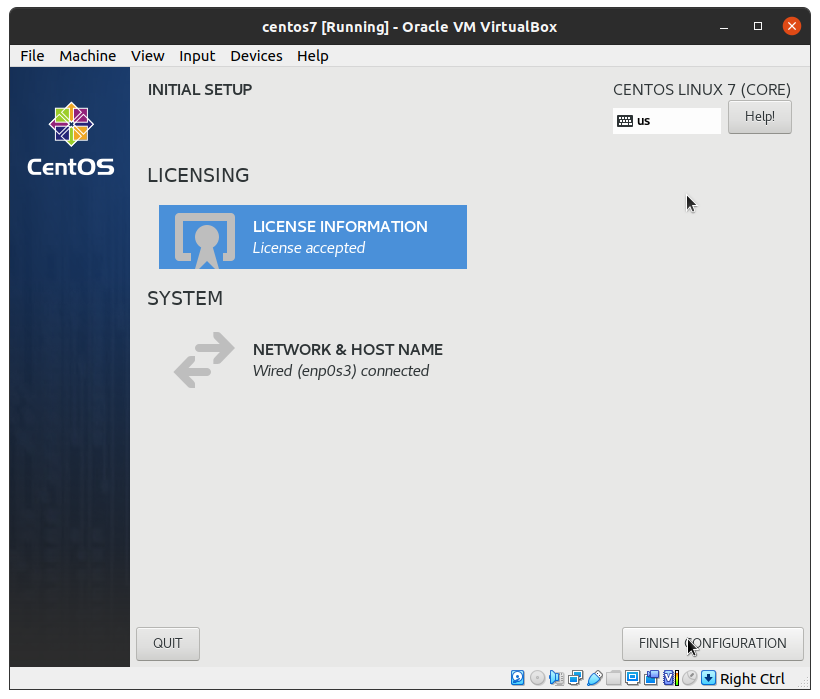
Click License information on the initial setup screen, accept the license agreement, and click Done.

Finally, click Finish Configuration.
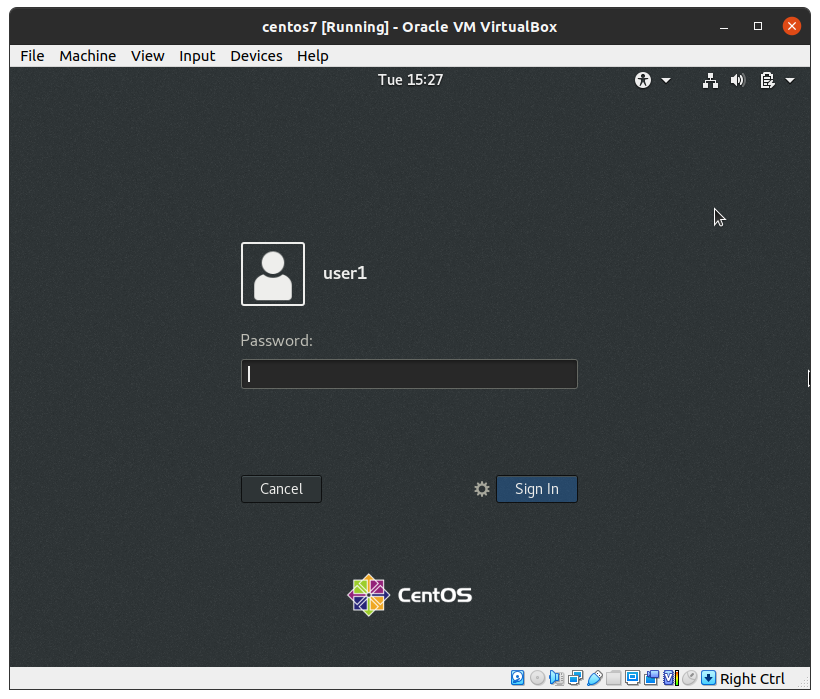
You are almost done! Go ahead and log in using the user’s details you created during installation.
Once you’ve logged in, go through the welcome screens, and you now have your CentOS 7 up and running. Bingo!

Final Thoughts
This guide covered all the necessary steps to install CentOS 7 on virtual Box, from downloading the ISO image, installing Virtual Box, and installing CentOS 7. Hopefully, you now have the easy way out when working with CentOS 7.