Installation:
First of all, run the following command on your Linux system to update your packages repositories:
Now run the following command to install autopsy package:
This will install Sleuth Kit Autopsy on your Linux system.
For windows-based systems, simply download Autopsy from its official website https://www.sleuthkit.org/autopsy/.
Usage:
Let’s fire up Autopsy by typing $ autopsy in the terminal. It will take us to a screen with information about the location of the evidence locker, start time, local port, and the version of Autopsy we are using.
We can see a link here that can take us to autopsy. On navigating to http://localhost:9999/autopsy on any web browser, we will be welcomed by the home page, and we can now start using Autopsy.
Creating a case:
The first thing we need to do is to create a new case. We can do that by clicking on one of three options (Open case, New case, Help) on Autopsy’s home page. After clicking on it, we will see a screen like this:
Enter the details as mentioned, i.e., the case name, investigator’s names, and description of the case in order to organize our info and evidence using for this investigation. Most of the time, there is more than one investigator performing digital forensics analysis; therefore, there are several fields to fill. Once it is done, you can click the New Case button.
This will create a case with given information and shows you the location where the case directory is created i.e./var/lab/autopsy/<case name> and the location of the configuration file. Now Click on Add Host, and a screen like this will appear:
Here we don’t have to fill out all the given fields. We just have to fill out the Hostname field where the name of the system being investigated is entered and the short description of it. Other options are optional, like specifying paths where bad hashes will be stored or the ones where others will go or set the time zone of our choice. After completing this, click on the Add Host button to see the details you have specified.
Now the host is added, and we have the location of all the important directories, we can add the image that is going to be analyzed. Click on Add Image to add an image file and a screen like this will pop:
In a situation where you have to capture an image of any partition or drive of that particular computer system, the Image of a disk can be obtained using dcfldd utility. To get the image, you can use the following command,
bs=512 count=1 hash=<hash type>
if=the destination of drive you want to have an image of
of=the destination where a copied image will be stored (can be anything, e.g., hard drive, USB etc)
bs= block size (number of bytes to copy at a time)
hash=hash type (e.g md5, sha1, sha2, etc.) (optional)
We can also use dd utility to capture an image of a drive or partition using
count=1 hash=<hash type>
There are cases where we have some valuable data in ram for a forensic investigation, so what we have to do is to capture the Physical Ram for memory analysis. We will do that by using the following command:
hash=<hash type>
We can further have a look at dd utility’s various other important options for capturing the image of a partition or physical ram by using the following command:
dd help options
bs=BYTES read and write up to BYTES bytes at a time (default: 512);
overrides ibs and obs
cbs=BYTES convert BYTES bytes at a time
conv=CONVS convert the file as per the comma-separated symbol list
count=N copy only N input blocks
ibs=BYTES read up to BYTES bytes at a time (default: 512)
if=FILE read from FILE instead of stdin
iflag=FLAGS read as per the comma-separated symbol list
obs=BYTES write BYTES bytes at a time (default: 512)
of=FILE write to FILE instead of stdout
oflag=FLAGS write as per the comma-separated symbol list
seek=N skip N obs-sized blocks at the start of the output
skip=N skip N ibs-sized blocks at the start of the input
status=LEVEL The LEVEL of information to print to stderr;
'none' suppresses everything but error messages,
'noxfer' suppresses the final transfer statistics,
'progress' shows periodic transfer statistics
N and BYTES may be followed by the following multiplicative suffixes:
c =1, w =2, b =512, kB =1000, K =1024, MB =1000*1000, M =1024*1024, xM =M,
GB =1000*1000*1000, G =1024*1024*1024, and so on for T, P, E, Z, Y.
Each CONV symbol may be:
ascii from EBCDIC to ASCII
ebcdic from ASCII to EBCDIC
ibm from ASCII to alternate EBCDIC
block pad newline-terminated records with spaces to cbs-size
unblock replace trailing spaces in cbs-size records with a newline
lcase change upper case to lower case
ucase change lower case to upper case
sparse try to seek rather than write the output for NUL input blocks
swab swap every pair of input bytes
sync pad every input block with NULs to ibs-size; when used
with a block or unblock, pad with spaces rather than NULs
excl fail if the output file already exists
nocreat do not create the output file
notrunc do not truncate the output file
noerror continue after read errors
fdatasync physically write output file data before finishing
fsync likewise, but also write metadata
Each FLAG symbol may be:
append append mode (makes sense only for output; conv=notrunc suggested)
direct use direct I/O for data
directory fail unless a directory
dsync use synchronized I/O for data
sync likewise, but also for metadata
fullblock accumulate full blocks of input (iflag only)
nonblock use non-blocking I/O
noatime do not update access time
nocache Request to drop cache.
We will be using an image named 8-jpeg-search-dd we have saved on our system. This image was created for test cases by Brian Carrier to use it with autopsy and is available on the internet for test cases. Before adding the image, we should check the md5 hash of this image now and compare it later after getting it into the evidence locker, and both should match. We can generate md5 sum of our image by typing the following command in our terminal:
This will do the trick. The location where the image file is saved is /ubuntu/Desktop/8-jpeg-search-dd.
The important thing is we have to enter the whole path where the image is located i.r /ubuntu/desktop/8-jpeg-search-dd in this case. Symlink is selected, which makes the image file non-vulnerable to problems associated with copying files. Sometimes you will get an “invalid image” error, check the path to the image file, and make sure the forward-slash “/” is there. Click on Next will show us our image details containing File system type, Mount drive, and the md5 value of our image file. Click on Add to place the image file in the evidence locker and click OK. A screen like this will appear:
Here we successfully get the image and off to our Analyze portion to analyze and retrieve valuable data in the sense of digital forensics. Before moving on to the “analyze” portion, we can check the image details by clicking on the details option.
This will give us details of the image file like the filesystem used (NTFS in this case), the mount partition, name of the image, and allows making keyword searches and data recovery faster by extracting strings of entire volumes and also unallocated spaces. After going through all options, click the back button. Now before we analyze our image file, we have to check the integrity of the image by clicking on the Image Integrity button and generating an md5 hash of our image.
The important thing to note is that this hash will match the one we had generated through md5 sum at the start of the procedure. Once it is done, click on Close.
Analysis:
Now that we have created our case, gave it a hostname, added a description, did the integrity check, we can process the analysis option by clicking on the Analyze button.
We can see different Analysis modes, i.e., File Analysis, Keyword Search, File type, Image details, Data Unit. First of all, we click on Image Details to get the file information.
We can see important info about our images like the file system type, the operating system name, and the most important thing, The serial number. The Volume serial number is important in the court of law as it shows that the image you analyzed is the same or a copy.
Let’s have a look at the File Analysis option.
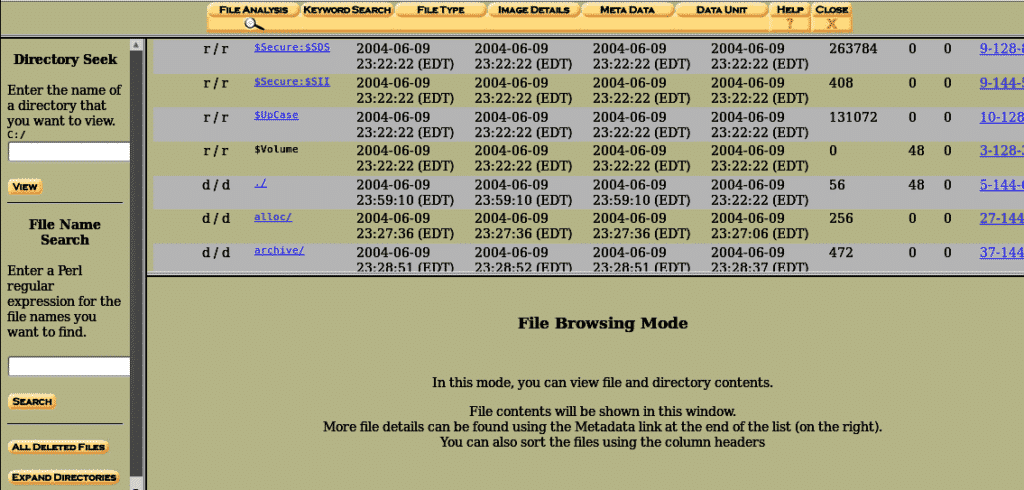
We can find a bunch of directories and files present inside the image. They are listed in the default order, and we can navigate in a file browsing mode. On the left side, we can see the current directory specified, and bottom of it, we can see an area where specific keywords can be searched.
In front of the file name, there are 4 fields named written, accessed, changed, created. Written means the date and time the file was last written to, Accessed means the last time file was accessed (in this case the only date is reliable), Changed means the last time the file’s descriptive data was modified, Created means the date and the time when the file was created, and MetaData shows the info about file other than general information.
On the top, we will see an option of Generating md5 hashes of the files. And again, this will ensure the integrity of all the files by generating the md5 hashes of all the files in the current directory.
The left side of the File analysis tab contains four main options, i.e., Directory seek, Filename search, all deleted files, expand directories. Directory seek allows users to search the directories one wants. File name search allows searching specific files in the given directory,
All deleted files contain the deleted files from an image having the same format, i.e., written, accessed, created, metadata and changed options and are shown in red as given below:
We can see that the first file is a jpeg file, but the second file has an extension of “hmm”. Let’s look at this file’s metadata by clicking on metadata on most right.
We have found that the metadata contains a JFIF entry, which means JPEG File Interchange Format, so we get that it’s just an image file with an extension of “hmm”. Expand directories expands all directories and allows a bigger area to work around with directories and files within the given directories.
Sorting the Files:
Analyzing the metadata of all the files is not possible, so we have to sort them and analyze them by sorting the existing, deleted, and unallocated files by using the File Type tab.’
To sort the files categories so that we can inspect the ones with the same category with ease. File Type has the option to sort the same type of files into one category, i.e., Archives, audio, video, images, metadata, exec files, text files, documents, compressed files, etc.
An important thing about viewing sorted files is that Autopsy does not allow viewing files here; instead, we have to browse to the location where these are stored and view them there. To know where they are stored, click the View Sorted Files option on the left side of the screen. The location it will give us will be the same as the one we specified while creating the case in the first step i.e./var/lib/autopsy/<location of files>.
In order to reopen the case, just open autopsy and Click on one of the options “Open Case.”
Case:2
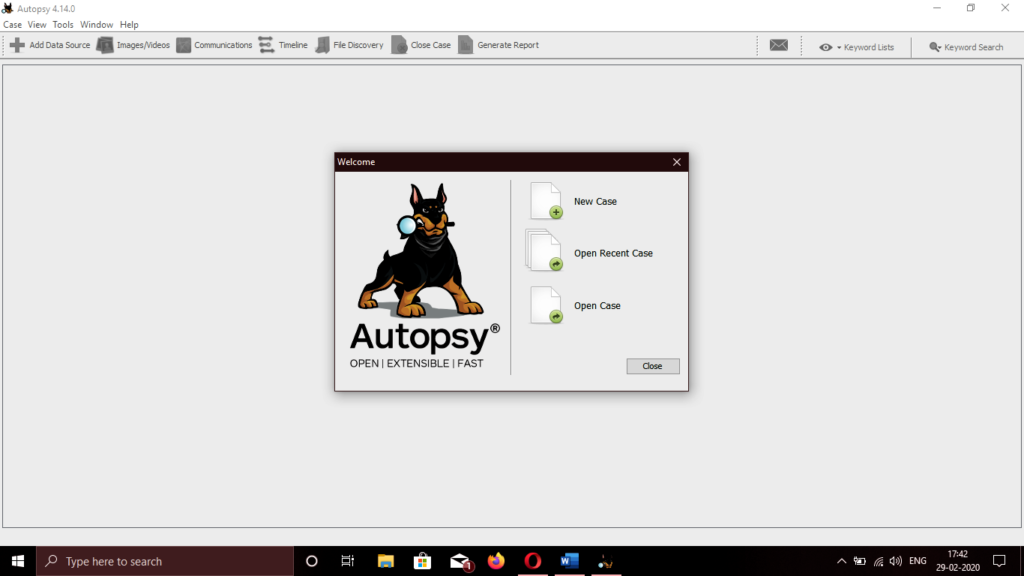
Let’s take a look at analyzing another image using Autopsy on a windows operating system and find out what kind of important information we can obtain from a storage device. The first thing we need to do is to create a new case. We can do that by clicking on one of three options (Open case, New case, recent Open case) on the Autopsy’s home page. After clicking on it, we will see a screen like this:
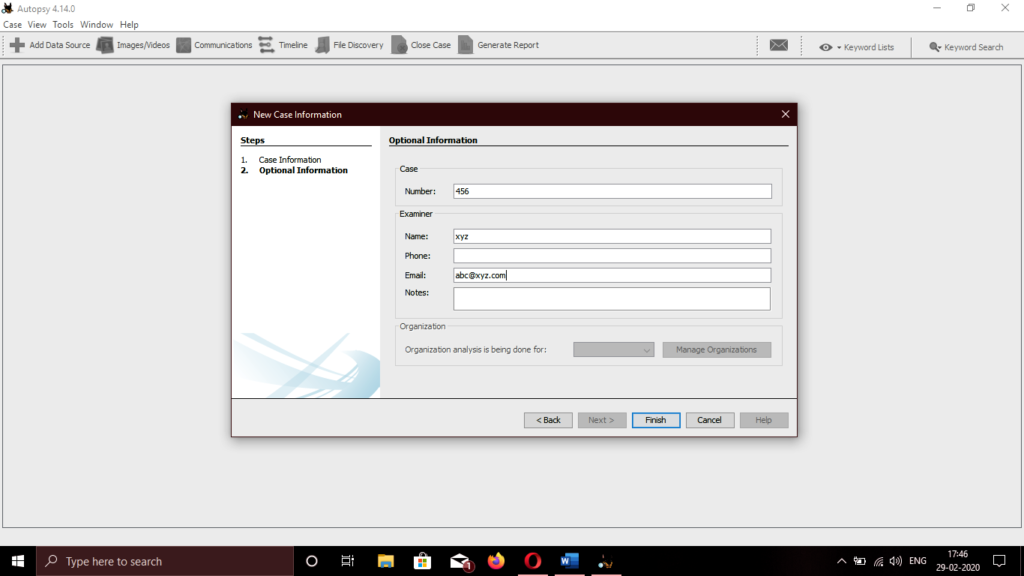
Provide the case name, and the path where to store the files then enter the details as mentioned, i.e., the case name, examiner’s names, and description of the case in order to organize our info and evidence using for this investigation. In most cases, there is more than one examiner doing the investigation.
Now provide the image you want to examine. E01(Expert witness format), AFF(advanced forensics format), raw format (DD), and memory forensics images are compatible. We have saved an image of our system. This image will be used in this investigation. We should provide the full path to the image location.
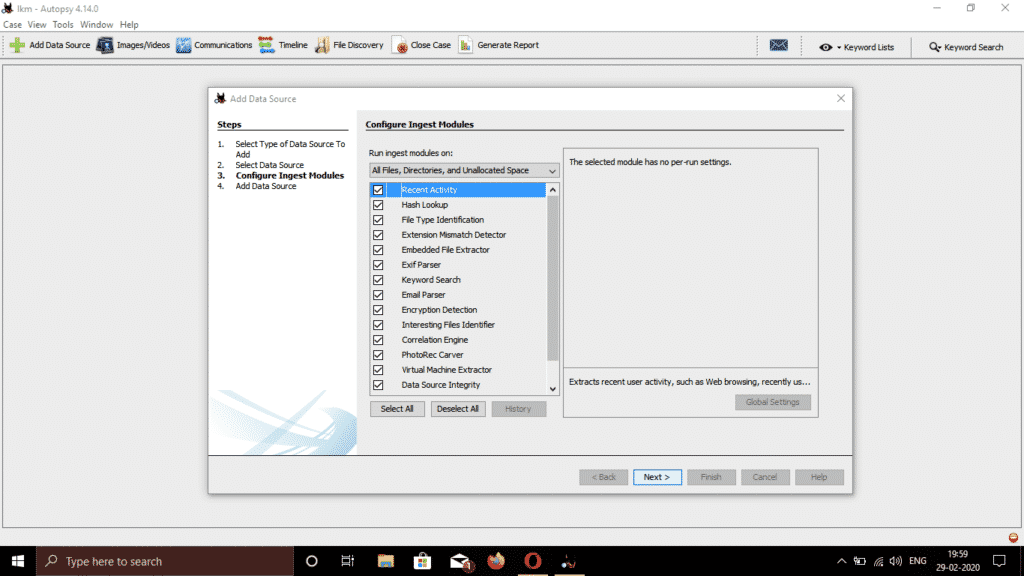
It will ask for selecting various options like Timeline Analysis, Filtering Hashes, Carving Data, Exif Data, Acquiring Web Artifacts, Keyword search, Email parser, Embedded file extraction, Recent activity check, etc. Click on select all for best experience and click the next button.
Once all done, click finish and wait for the process to complete.
Analysis:
There are two types of analysis, Dead Analysis, and Live Analysis:
A dead examination happens when a committed investigation framework is utilized to look at the information from a speculated framework. At the point when this happens, The Sleuth kit Autopsy can run in an area where the chance of damage is eradicated. Autopsy and The Sleuth Kit offer help for raw, Expert Witness, and AFF formats.
A live investigation happens when the presume framework is being broken down while it is running. In this case, The Sleuth kit Autopsy can run in any area (anything else than a confined space). This is often utilized during occurrence reaction while the episode is being affirmed.
Now before we analyze our image file, we have to check the integrity of the image by clicking on the Image Integrity button and generating an md5 hash of our image. The important thing to note is that this hash will match the one we had for the image at the start of the procedure. Image hash is important as it tells whether the given image has tampered or not.
Meanwhile, Autopsy has completed its procedure, and we have all the information we need.
- First of all, we will start with basic information like the operating system used, the last time the user logged in, and the last person who accessed the computer during the time of a mishap. For this, we will go to Results > Extracted Content > Operating System Information on the left side of the window.
To view the total number of accounts and all the accounts associated, we go to Results > Extracted Content > Operating System User Accounts. We will see a screen like this:
The info like the last person accessing the system, and in front of the user name, there are some fields named accessed, changed, created. Accessed means the last time the account was accessed (in this case, the only date is reliable) and created means the date and time the account was created. We can see that the last user to access the system was named Mr. Evil.
Let’s go to the ProgramFiles folder on C drive located on the left side of the screen to discover the physical and internet address of the computer system.
We can see the IP (Internet Protocol) address and the MAC address of the computer system listed.
Let’s go to Results > Extracted Content > Installed Programs, we can see here are the following software used in carrying out malicious tasks related to the attack.
- Cain & abel: A powerful packet sniffing tool and password cracking tool used for packet sniffing.
- Anonymizer: A tool used for hiding tracks and activities the malicious user performs.
- Ethereal: A tool used for monitoring network traffic and capturing packets on a network.
- Cute FTP: An FTP software.
- NetStumbler: A tool used to discover a wireless access point
- WinPcap: A renowned tool used for link-layer network access in windows operating systems. It provides low-level access to the network.
In the /Windows/system32 location, we can find the email addresses the user used. We can see MSN email, Hotmail, Outlook email addresses. We can also see the SMTP email address right here.
Let’s go to a location where Autopsy stores possible malicious files from the system. Navigate to Results > Interesting Items, and we can see a zip bomb present named unix_hack.tgz.
When we navigated to the /Recycler location, we found 4 deleted executable files named DC1.exe, DC2.exe, DC3.exe, and DC4.exe.
- Ethereal, a renowned sniffing tool that can be used to monitor and intercept all kinds of wired and wireless network traffic is also discovered. We reassembled the captured packets and the directory where it is saved is /Documents, the file name in this folder is Interception.
We can see in this file the data like the Browser victim was using and the type of wireless computer and found out It was Internet Explorer on Windows CE. The websites the victim was accessing were YAHOO and MSN .com, and this was also found in the Interception file.
On discovering contents of Results > Extracted Content > Web history,
We can see by exploring metadata of given files, the history of the user, the websites he visits, and the email addresses he provided for logging in.
Recovering Deleted Files:
In the earlier part of the article, we have discovered how to extract important pieces of information from an image of any device that can store data like mobile phones, hard drives, computer systems, etc. Among the most basic necessary talents for a forensic agent, recuperating erased records is presumably the most essential. As you probably are aware, documents that are “erased” stay on the storage device unless it is overwritten. Erasing these records basically makes the device accessible to be overwritten. This implies if the suspect erased proof records until they are overwritten by the document framework, they stay accessible to us to recoup.
Now we will look at how to recover the deleted files or records using The Sleuth kit Autopsy. Follow all the steps above, and when the image is imported, we will see a screen like this:
On the left side of the window, if we further expand the File Types option, we will see a bunch of categories named Archives, audio, video, images, metadata, exec files, text files, documents (html, pdf, word, .ppx, etc.) , compressed files. If we click on images, it will show all the images recovered.
A little further below, in the subcategory of File Types, we will see an option name Deleted Files. On clicking this, we will see some other options in the form of labeled tabs for analysis in the lower right window. The tabs are named Hex, Result, Indexed Text, Strings, and Metadata. In the Metadata tab, we will see four names written, accessed, changed, created. Written means the date and time the file was last written to, Accessed means the last time file was accessed (in this case the only date is reliable), Changed means the last time the file’s descriptive data was modified, Created means the date and the time when the file was created. Now to recover the deleted file we want, click on the deleted file and select Export. It will ask for a location where the file will be stored, select a location, and click OK. Suspects will frequently endeavor to cover their tracks by erasing various important files. We know as a forensic person that until those documents are overwritten by the file system, they can be recouped.
Conclusion:
We have looked at the procedure to extract the useful information from our target image using The Sleuth kit Autopsy instead of individual tools. An autopsy is a go-to option for any forensic investigator and because of its speed and reliability. Autopsy uses multiple core processors that run the background processes in parallel, which increases its speed and gives us results in a lesser amount of time and displays the searched keywords as soon as they are found on the screen. In an era where forensics tools are a necessity, Autopsy provides the same core features free of cost as other paid forensic tools.
Autopsy precedes the reputation of some paid tools as well as provides some extra features like registry analysis and web artifacts analysis, which the other tools don’t. An autopsy is known for its intuitive use of nature. A brisk right-click opens the significant document. That implies next to zero endure time to discover if explicit pursuit terms are on our image, telephone, or PC that is being looked at. Users can likewise backtrack when profound quests turn into dead ends, using back and forward history catches to help follow their means. Video can also be seen without outer applications, speeding up use.
Thumbnail perspectives, record and document type arranging filtering out the good files and flagging for awful, using custom hash set separating are only a portion of different highlights to be found on The Sleuth kit Autopsy version 3 offering significant enhancements from Version 2.Basis Technology generally subsidized the work on Version 3, where Brian Carrier, who delivered a great part of the work on prior renditions of Autopsy, is CTO and head of advanced criminology. He is likewise viewed as a Linux master and has composed books on the subject of measurable information mining, and Basis Technology creates The Sleuth Kit. Therefore, clients can most likely feel really sure that they are getting a decent item, an item that won’t vanish at any point in the near future, and one that will probably be all around upheld into what’s to come.


