Pgbouncer is a reliable connection pooling tool that you can quickly setup for PostgreSQL connection pooling. Stay tuned as this post gives a step-by-step tutorial on setting up the connection pooling in PostgreSQL with Pgbouncer. Let’s begin!
Understanding Connection Pooling
A new connection must be created whenever you want to connect to PostgreSQL. While creating the connection is a must, the problem comes in the extensive overhead cost which is incurred when each connection has to be made.
However, you can create a pool of connections that you will reuse each time you connect to PostgreSQL. Doing so enhances your database performance and increases the efficiency of your application.
To create this pool of connections, you need a connection pooler tool. For PostgreSQL, Pgbouncer is the most recommended and effective tool. With Pgbouncer, it acts as a server. Whenever you wish to access a PostgreSQL database, you connect to it via the information that is included in its config file, and it creates the connection for you or reuse an existing one.
The goal of connection pooling is to reduce the overhead costs of creating a new Postgres connection whenever you want to access your PostgreSQL database. That being said, read on to understand what steps you must follow to setup the connection pooling in PostgreSQL with Pgbouncer.
How to Setup the Connection Pooling in PostgreSQL with Pgbouncer
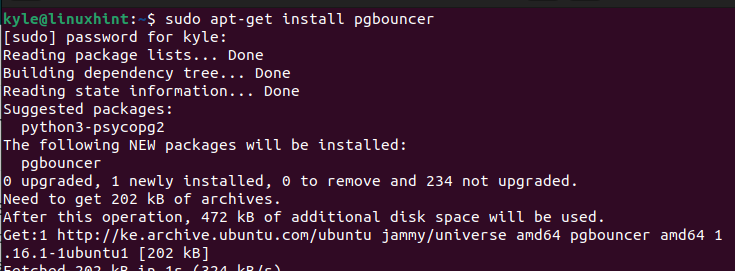
Pgbouncer doesn’t come installed on most systems. For this tutorial, we will work with Ubuntu 22.04 where we have our PostgreSQL installed. Start by installing Pgbouncer as follows:
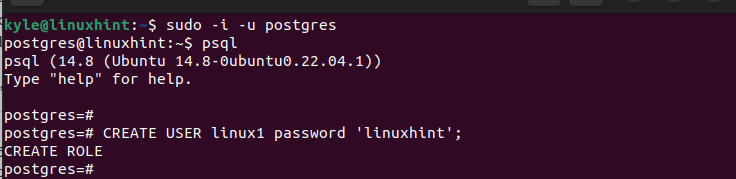
After installing Pgbouncer, you must create the particular user and the database that they will connect to. That way, you specify the user’s credentials and the database when setting up the connection pooling. Log in to Postgres using psql and create a user. We create the “linux1” user and specify the password.

Next, create a database in which you wish the created user to access using the connection pooling that you set up.
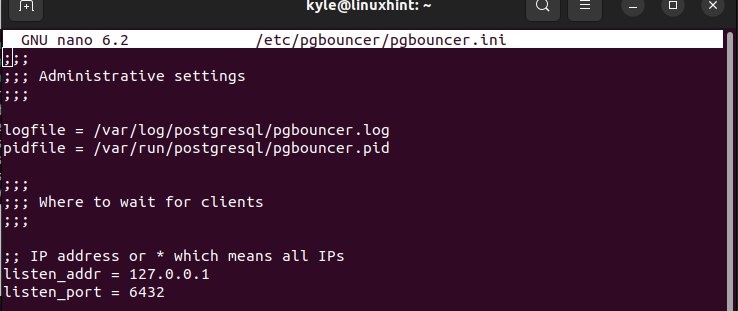
You can now exit the psql shell and proceed with the setup. Pgbouncer has a configuration file that we should edit when you want to setup the connection pooling. Open the Pgbouncer config file using an editor such as nano.

Once the configuration file opens, you will see the different sections contained. In the first section, we edit the [databases]. Scroll down and access it. Here, we must define the database to be accessed, the port, and the host.
Use the following syntax and replace the values accordingly:
Our database is “linuxdemo”, our host is localhost, and we use port 6432 to create the connection.

Scroll down to the [pgbouncer] and specify the listen_addr and the listen_port in the “administrative settings” section. The listen_addr is the IP address that creates the connection. The listen_port is the one that you specified earlier through which your connection occurs.
Next, scroll down to the authentication section. Here, we must define the authentication type to use when establishing the connection. We use “md5” for this case, and the authentication details are contained in the “userlist.txt” file. So, change the auth_type from trust to “md5” as shown in the following:

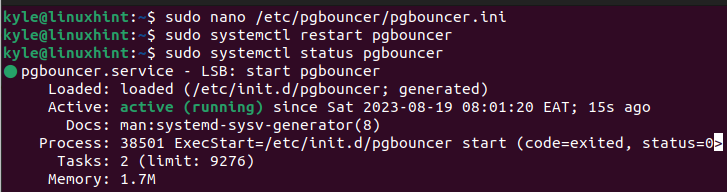
Save and exit the Pgbouncer configuration file. You must then restart Pgbouncer for the changes to take place. Restart the service and check its status with the following commands:
sudo systemctl status pgbouncer
Ensure that you get a similar output to the one in the following which confirms that Pgbouncer is active and running:
The last step is to test the connection pooling that we set up. We must log in to the database that we created using the specified host and port. Use the following syntax and replace it to match your details:
You now get a successful login.

That’s it! You managed to setup the connection pooling in PostgreSQL with Pgbouncer.
Connection
Pgbouncer is a connection pooling tool that lets the users to minimize the overhead costs when creating a Postgres connection. After installing Pgbouncer, modify its config file to allow the connection pooling. All steps are detailed in this post. Try them out!