A Syslog server is used to monitor the network devices conveniently. With the help of such a server, you can easily visualize these logs in real time. This server makes use of the System Logging Protocol. In this article, we will discuss setting up a Syslog server in CentOS 8.
Method of Setting Up a Syslog Server in CentOS 8
For setting up a Syslog server in CentOS 8, you will have to follow the procedure explained below:
Step # 1: Check the Status of the Syslog Server in CentOS 8
First, you need to check the status of the Syslog server on your system with the following command:
1 | $ systemctl status rsyslog |
![]()
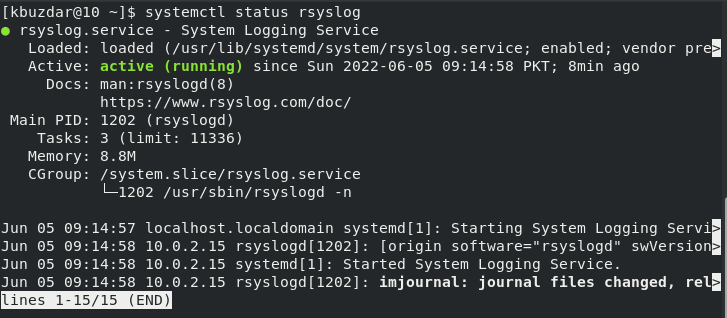
You can see from the following image that the Syslog server is up and running on our system. However, if you do not have it installed already, you can easily install it with the help of the “sudo yum install rsyslog” command.
Step # 2: Open the “rsyslog.conf” File
After ensuring that the Syslog server is running on your CentOS 8 system, you need to access the “rsyslog.conf” file since we will modify it to set up our Syslog server. For opening this file, we will use the following command:
1 | $ sudo vim /etc/rsyslog.conf |
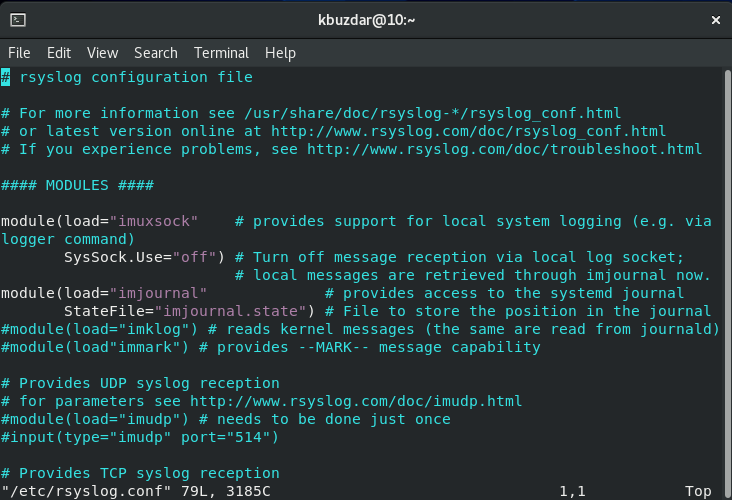
The “rsyslog.conf” file is shown below:
Step # 3: Allow the Reception of Logs Through UDP
Now, you need to locate the UDP settings in this file and uncomment the following two lines:
1 2 3 | module(load=“imudp”) # needs to be done just once input(type=“imudp” port=“514”) |
Doing so will allow the reception of logs through UDP.
Step # 4: Allow the Reception of Logs Through TCP
After that, you need to locate the TCP settings in this file and uncomment the following two lines:
1 2 3 | module(load=“imtcp”) # needs to be done just once input(type=“imtcp” port=“514”) |
Doing so will allow the reception of logs through TCP.
Step # 5: Enable the Syslog Server To Receive Logs From the Client
Once you have uncommented the lines in the “rsyslog.conf” file specified above, you need to save that file and exit from the editor. Then, you have to enable the Syslog server to receive logs from the client with the following command:
1 | $ sudo firewall-cmd --add-port=514/tcp --zone=public --permanent |
After providing the “sudo” password, you will receive a success message, as shown in the following image:
Step # 6: Reload the Firewall
Now, you need to reload your Firewall with the following command:
1 | $ sudo firewall-cmd --reload |
Again, you will be displayed with a success message upon the complete execution of this command, as shown in the image below:
Step # 7: Restart the Syslog Server
Once you have done this, you need to restart the Syslog server with the following command:
1 | $ sudo systemctl restart rsyslog |
Step # 8: Enable the Syslog Server
Then, you need to enable the Syslog server with the following command for the changes to take effect:
1 | $ sudo systemctl enable rsyslog |
Step # 9: Confirm That the Syslog Server Is Listening on Port 514
After that, you must confirm that the Syslog server has been successfully set up and is listening on port 514. For that, you need to execute the following command:
1 | $ sudo netstat –pnltu |
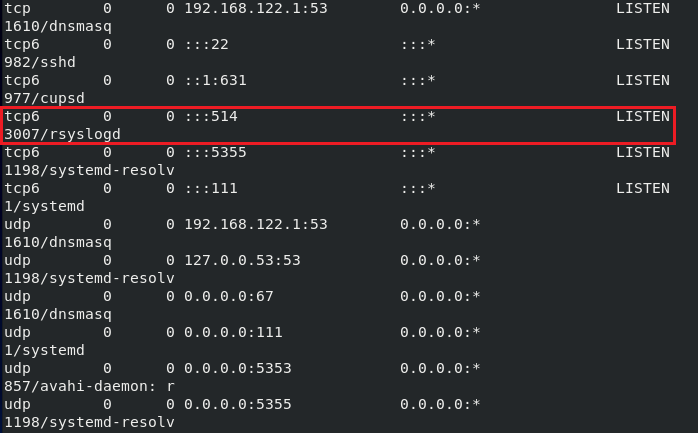
You can verify from the following image that the Syslog server has been perfectly configured. We have only highlighted the TCP entry here. However, if you scroll down, you will also be able to find the UDP entry for the Syslog server.
Step # 10: View Log Messages in Real Time
Now, you will have to run the following command if you want to view the log messages in real time:
1 | $ sudo tail –f /var/log/messages |
The log messages of our CentOS 8 system in real time are shown in the following image:
Conclusion
This article thoroughly shared all the steps involved in setting up a Syslog server on a CentOS 8 system. If you follow the prescribed method correctly, you can conveniently set up a Syslog server on your CentOS 8 system.


