What Are Tolerations and Taints in Kubernetes?
Toleration and taint in Kubernetes are used to ensure that the pods are placed in the correct node. Toleration is defined in the pod specification while the taints are defined in the node specification. When you apply the toleration on a pod, it allows the scheduler to schedule the pods on a specific node. However, the taints work opposite to the toleration. It allows the node to reject the pods to be scheduled on it. The pods are only allowed to be scheduled on the node if they have tolerations applied to them with matching taints.
Kubernetes works with pods, clusters, nodes, events, etc. In some cases, to manage these things, Kubernetes needs tolerations and taints. Toleration is the implementation of the scheduling process. The pods need to be scheduled so that they can work properly and they can have enough resources when needed to perform their operation. Tolerations are applied to the pods against taint so that they do not have any interruption or disruption while working.
The taints in Kubernetes enable a pod to reject the scheduling of a pod. It is applied to a node using the “NodeSpec” Node specification. The scheduler is unable to put a pod on a node that has a taint on it. However, if you need to schedule the pods on a node where a taint is already applied, you need to declare the toleration against it.
Toleration in Kubernetes allows a pod to be scheduled on a node where a taint is already applied. The toleration on a pod is applied using the “PodSpec” Pod specification. When you apply the toleration on a pod with matching taint, the schedular can easily schedule the pods on a specific node.
Now, let us present a scenario to help you understand how you can implement the toleration on a pod in Kubernetes. Before you proceed to the implementation section, make sure you have all the prerequisite requirements.
Prerequisite:
The following are the things that you need to implement the toleration on a node in Kubernetes:
- Ubuntu 20.04 or any other latest version of any Linux system
- Minikube (latest version)
- Installed virtual machine in your Linux/Unix system
- Kubectl command line tool
Assuming that your system meets all the needs of prerequisites, let us begin to set the Kubernetes toleration.
Step 1: Start the Minikube Terminal
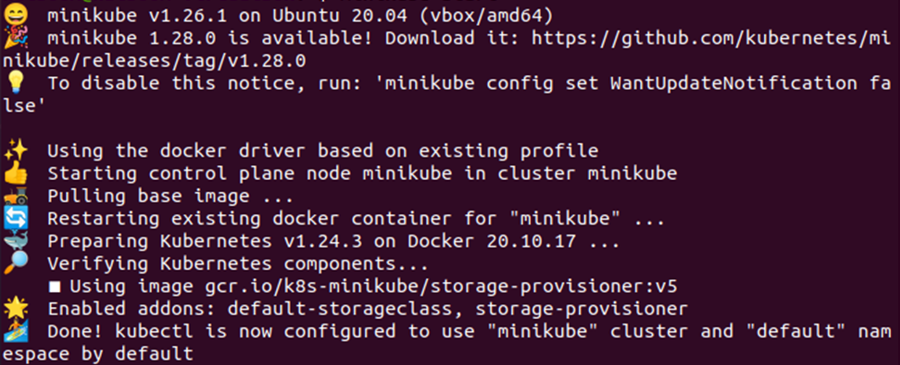
The first thing that you need to do is to start the minikube terminal so that you can use the kubectl commands for the implementation of Kubernetes toleration on a node. To start the minikube, the following command is used:
Upon the execution of this command, you get the following output in your terminal:
Step 2: Get the List of Active Nodes
Now that we started the minikube, our system is ready to set the toleration on pods in Kubernetes. Before we set the toleration on the pods, let us check how many nodes and what kind of nodes we already have. To do that, we use the following subsequent command:
This instruction lists all the nodes which are tainted by the Kubernetes default installation. Let us first see the output of this command. Then, we discuss the list of nodes:

Since there are no nodes that are created and tainted by the Kubernetes default installation and we also did not specifically create any node, the result is <none>. From the previous output, we can see that there is no node. Hence, we first create the node and then set the toleration. To set the toleration on a pod in Kubernetes, we first need to deploy an app on a cluster. The next few steps demonstrate how to deploy an app on a cluster.
Step 3: Create a Namespace
First, we create a namespace to deploy an app on a cluster. Here, we create an app with the “frontend” value with the help of the following command:
This command creates the namespace having the “frontend” value. See the following output:

Step 4: Deploy the Nginx Pod on the Namespace
Now, deploy the nginx pod on the namespace that we just created. We use the following command to deploy the nginx:
This deploys an app on a cluster with no toleration configuration in the specification of the app deployment. Using the kubectl command, we deploy the nginx pod on the namespace frontend:

Step 5: Get the List of Pods
Now, let us check the created pods to see their statuses. The given command lists down all the pods and their statuses as well:
Since we only created the nginx, this command should list down that pod with its status. See the following output:

Step 6: Analyze the Kubernetes Events
Now, let us analyze the events in Kubernetes so that we can set the toleration on the pods accordingly. We use the following kubectl command to get the list of events in Kubernetes:
This lists down all the events which are associated with the front-end value along with their properties like type, reason, object, and message. See the given list in the following output:
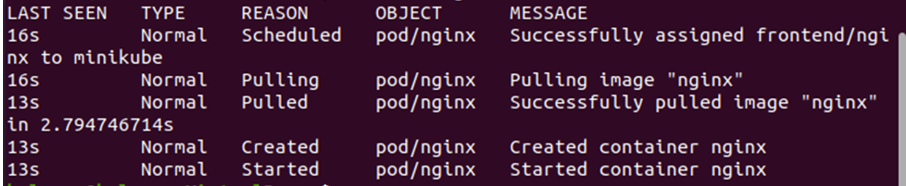
As you can see from the previous output, the nginx pod is scheduled with the specific toleration. The “message” property shows the list of actions that are performed along the process.
Step 7: Check the Status of Pods
The final step is to check again the status of the pod which we created previously to ensure that it is successfully scheduled on a specific and correct node. To do that, we use the following kubectl command:

As can be seen in the previous output, the pod is now allowed to run on the tainted node since the toleration is set against it.
Conclusion
In this guide, we explored about the taints and toleration. We learned about the basic working of taints and toleration. Then, we implemented the toleration on a pod. With the help of a simple example, we learned how to set the toleration on a node in Kubernetes.