Resource limits are an important part of Kubernetes container orchestration as they ensure that the containers do not consume too many resources or become unresponsive due to resource exhaustion. This article provides a guide on how to set the Kubernetes container resource limits to maximize their benefits and get the most out of your applications. Learn how to configure and manage your container resources quickly and easily with just a few simple steps so you can be sure that all your services are running smoothly.
Set the Container Resource Limits in Kubernetes
Container resource limits are an essential element of Kubernetes, allowing the users to manage the number of resources that a container can consume. To avoid overloading and guarantee an application performance, this is particularly crucial in production contexts. Here are some pro tips to set the container resource limits:
Start by determining the resources that your containers need. Analyze your system’s usage and determine which containers should have their memory and CPU limits adjusted. It’s also important to consider the underlying nodes when setting the resource limits – if you set too high or too low of a limit, the node might not be able to run the other applications without crashing. Next, decide what type of limit you want to use – burstable or non-burstable. Now, let’s see the necessary steps that you can follow to set the Kubernetes container resource limits. Before heading towards the steps, there are some necessary prerequisites:
Prerequisites
Before we move on to the steps, let us make sure that our system meets all the needs of the prerequisites. Make sure you have Ubuntu 20.04 or any other latest version to have a Linux/Unix environment to work, Kubernetes cluster, Kubectl CLI to use the kubectl commands, cluster communication, manage the development environment, and minikube or any other Kubernetes playground to create the clusters. Install these tools if you have not installed them yet before proceeding to the next section. Now, we move on to the step-by-step guide on how to set the Kubernetes container resource limits.
How to Set the Kubernetes Resource Limits
Setting the Kubernetes container resource limits is an important part of managing and maintaining your Kubernetes clusters. Having a proper resource limit in place ensures that each container runs optimally, without compromising the performance of other containers or the whole cluster. This can be done by setting the resource requests and limits for CPU, memory, ephemeral storage, and more. Here’s how to set the Kubernetes container resource limits properly.
Step 1: Start the Minikube
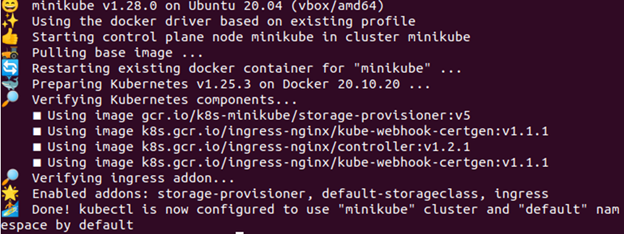
Minikube cluster must be in an active state so that you can run your applications or commands in it. To ensure it is up and running properly, use the following given command:
Step 2: Enable the Metrics Server
In this step, we share the command that lets you enable the metrics server. The command is given in the following:

Step 3: Check If the Metrics Server Is Active or Not
Type the following command to check if the metrics-server is active or not:

As seen in the previous image, it contains a reference to metrics.k8s.io in case the resource metrics API is accessible.
Step 4: Create a Namespace
To keep the resources, you create a namespace for this exercise which is separate from the rest of your cluster. We now demonstrate how to create a namespace. The command that performs is given as follows:
![]()
Step 5: Create a Configuration File
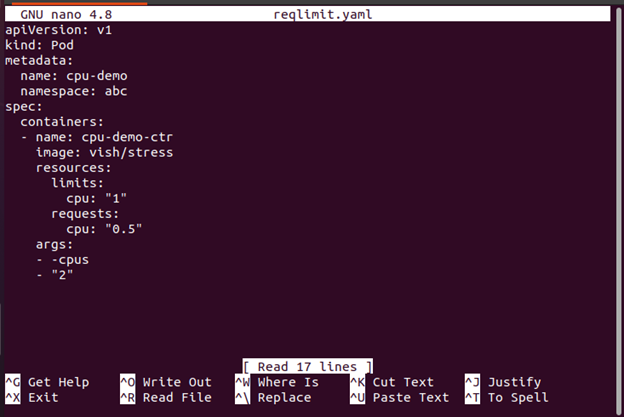
The YAML configuration file that we use to construct a pod in the container is created in this step. Here is the command that is used to accomplish this:
Here, you need to include a CPU request along with a CPU limit. Include the resources:limits to define a CPU limit. In this case, a Pod with a single container is created. The container has a 0.5 CPU request limit and a 1 CPU maximum. The Pod’s configuration file is available here. As you can see, the configuration file’s args section contains the arguments that the container uses when it starts. The container is instructed to try to utilize the 2 CPUs via the -cpus “2” parameter.
When creating resources in Kubernetes such as deployments and pods, it is important to specify the minimum number of required resources (request) and the maximum number of resources allowed (limit) for each pod or deployment. This prevents any one pod from consuming too many resources which could cause the other active pods to suffer from the decreased performance or even crash due to a lack of available resources on the cluster.
Step 6: Create a Pod
Now, we show you how to create the pod with the following command:
![]()
From the previous given output, you can notice that the pod named “cpu-demo” is created.
Step 7: Verify the Pod
In this step, we check if the created pod is active or not with the following command:
![]()
Step 8: View the Pod Details
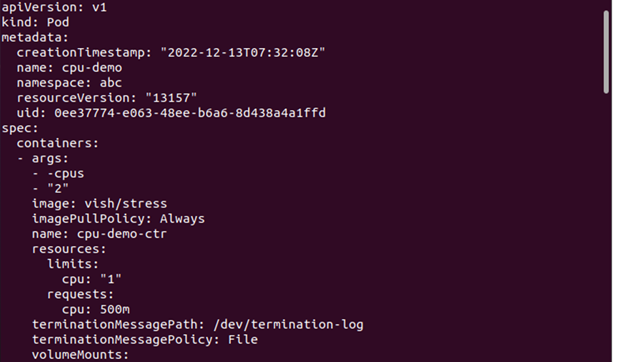
Now, if you want to view the detailed information about the Pod, here is the command that should be executed:
Step 9: Delete the Pod
Here, we will show how to delete the pod to clean up the resources. The command that is used for this purpose is as follows:
![]()
Step 10: Create a Configuration File
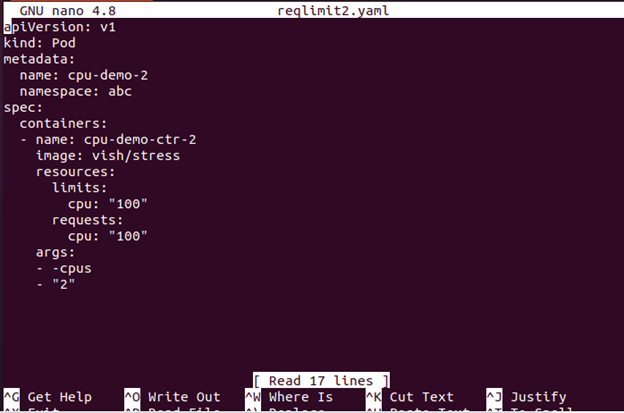
In this step, we create a configuration file. This file specifies a CPU request that is quite big for your nodes.
The configuration file with a single container may be found here. The container asks for 100 CPUs which is more than any Node that your cluster can reasonably provide.
Step 11: Create the Pod
In this step, we create the pod with the following command:
![]()
Step 12: View the Pod Status
Now, you can see the status of the pod with the command that is attached here:
![]()
The output shows that the Pod status is Pending.
Step 13: See the Pod Information
Now, we view the detailed information about the Pod including the events with the given command here:
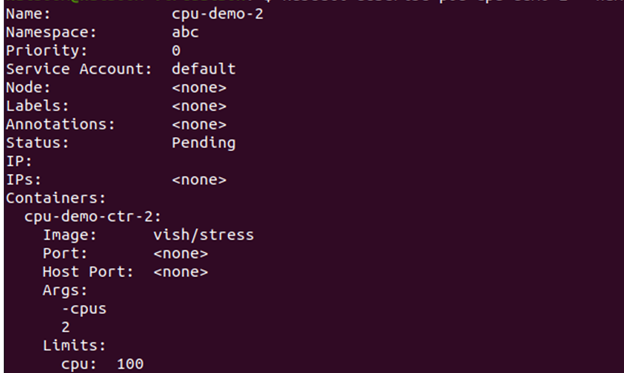
Go to the event section and see if the container is scheduled or not.
If it cannot be scheduled and the reason is insufficient CPU resources, you can delete the node. How to delete a node is explained in the next step.
Step 14: Delete the Node
You can delete the node with the following command:
![]()
What Is the Impact of Container Resource Limits on Performance?
With the increasing popularity of Kubernetes container technology, it is important to understand how the resource limits can impact the performance. Setting the resource limits inside a Kubernetes container can help you ensure that your applications are running at their optimal level and that they are not consuming too many resources from the host server. By limiting the resources, you can avoid the wasted redundant processes, help prevent the system crashes due to utilization, and optimize the performance of your containers.
To set these resource limits in a Kubernetes container, you must utilize a tool called cgroups (control groups). Cgroups allow the administrators to limit the resources such as CPU cycles or memory usage for individual containers. You can also set the other parameters such as maximum file sizes or network bandwidth usage per container.
Conclusion
Setting the Kubernetes container resource limits is a crucial part of managing your cloud computing environment. With the proper configuration, you can ensure that each container has access to the resources it needs, but not so much that it affects other containers or systems. This allows for more efficient and cost-effective use of computing resources. Additionally, by limiting how much memory or CPU a container can consume, you can prevent the outages from occurring due to runaway processes or unexpected spikes in usage.