In this article, I am going to show you how to write a simple Python Selenium web testing library and test a simple website with Selenium. So, let’s get started.
Prerequisites:
To try out the commands and examples of this article, you must have:
- A Linux distribution (preferably Ubuntu) installed on your computer
- Python 3 installed on your computer
- PIP 3 installed on your computer
- Python virtualenv package installed on your computer
- Mozilla Firefox or Google Chrome web browsers installed on your computer
- Must know how to install the Firefox Gecko Driver or Chrome Web Driver
For fulfilling the requirements 4, 5, and 6, read my article Introduction to Selenium in Python 3. You can find many articles on the other topics on LinuxHint.com. Be sure to check them out if you need any assistance.
Setting Up a Project Directory:
To keep everything organized, create a new project directory selenium-test/ as follows:

Navigate to the selenium-test / project directory as follows:
Create a Python virtual environment in the project directory as follows:

Activate the virtual environment as follows:

Install Selenium Python library using PIP3 as follows:

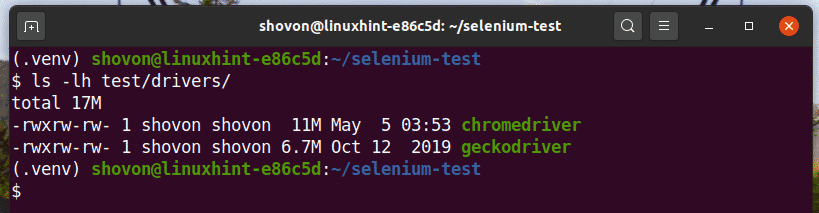
Download and install all the required web drivers in the test/drivers/ directory of the project. I have explained the process of downloading and installing web drivers in my article Introduction to Selenium in Python 3.
Preparing the Demo Website:
Before moving on any further, let’s create a simple website which we can test with Selenium.
First, create a new file index.html in the www/ directory and type in the following lines of codes in it.
<html lang="en">
<head>
<meta charset="UTF-8">
<meta name="viewport" content="width=device-width, initial-scale=1.0">
<link rel="stylesheet" href="styles/main.css">
<title>Home</title>
</head>
<body>
<div id="main-site">
<nav>
<ul id="main-nav">
<li><a href="index.html">Home</a></li>
<li><a href="products.html">Products</a></li>
<li><a href="contact.html">Contact</a></li>
</ul>
<ul id="user-nav">
<li><a href="register.html">Register</a></li>
<li><a href="login.html">Log In</a></li>
</ul>
</nav>
<div id="main-content">
<h1>Recent Posts</h1>
<article>
<h2>Lorem, ipsum dolor.</h2>
<p>Lorem ipsum dolor sit amet consectetur, adipisicing elit.
Ipsam recusandae provident dignissimos explicabo illum ea commodi?
Dolorem, quae a magni, nam totam aut possimus voluptate dignissimos
velit, excepturi delectus voluptatibus!</p>
</article>
<article>
<h2>Lorem ipsum dolor sit amet.</h2>
<p>Lorem, ipsum dolor sit amet consectetur adipisicing elit.
Tempore totam aliquid earum quam sint in? Lorem ipsum dolor sit amet
consectetur adipisicing elit. Incidunt maiores perspiciatis tenetur,
sequi cum porro?</p>
</article>
<article>
<h2>Lorem, ipsum dolor sit amet consectetur adipisicing elit.</h2>
<p>Lorem ipsum dolor sit amet consectetur adipisicing elit.
Delectus expedita eveniet iure, ad repellat, voluptatem cupiditate
minus culpa eligendi maiores porro minima nihil provident, possimus
molestiae. Ducimus voluptatum obcaecati, officiis atque asperiores
laborum dolor rerum aspernatur facere temporibus doloremque eligendi.</p>
</article>
</div>
<footer>© 2020 linuxhint.com</footer>
</div>
</body>
</html>
Once you’re done, save the index.html file.

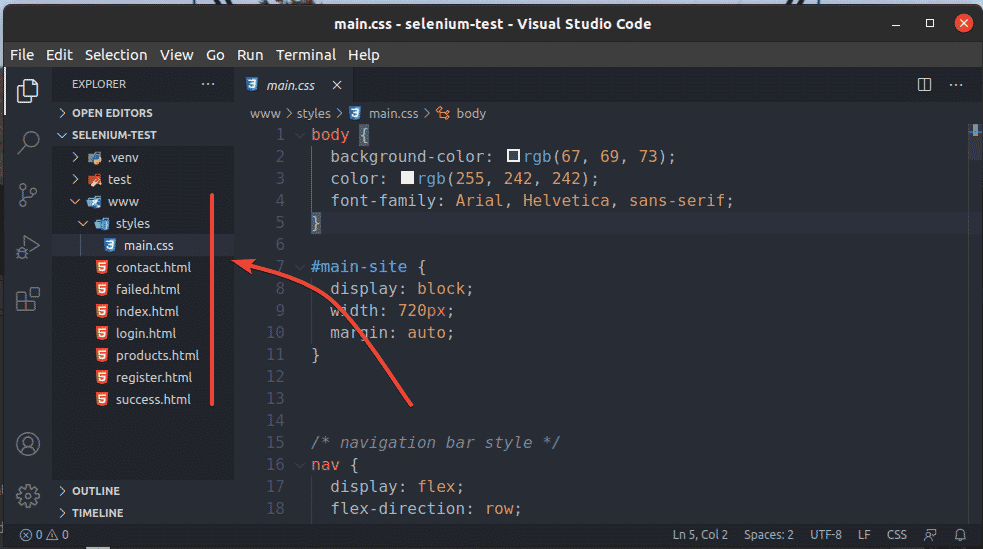
Create a main.css file in the www/styles/ directory and type in the following lines of codes in it.
background-color: rgb(67, 69, 73);
color: rgb(255, 242, 242);
font-family: Arial, Helvetica, sans-serif;
}
#main-site {
display: block;
width: 720px;
margin: auto;
}
/* navigation bar style */
nav {
display: flex;
flex-direction: row;
margin-bottom: 1.5em;
}
nav ul {
margin: 0;
padding: 0;
list-style-type: none;
}
#main-nav {
text-align: left;
flex: 2;
}
#user-nav {
text-align: right;
flex: 1;
}
nav ul li {
display: inline-block;
margin: 0 .1em;
}
/* reset first and last link margin */
#main-nav > li:nth-child(1) {
margin-left: 0;
}
#user-nav > li:nth-child(2) {
margin-right: 0;
}
nav li a {
text-decoration: none;
color: rgb(248, 168, 63);
border-bottom: 2px solid transparent;
font-size: 1em;
}
nav li a:hover {
border-bottom: 2px solid rgb(130, 177, 21);
}
/* footer style */
footer {
margin-top: 1.5em;
text-align: center;
font-size: .8em;
color: rgb(167, 167, 167);
}
/* main content style */
#main-content h1 {
font-size: .9em;
color: rgb(192, 192, 192);
margin-bottom: 0;
}
#main-content > article:nth-child(2) > h2 {
margin-top: 0;
}
article h2 {
font-size: 1.4em;
margin-bottom: .1em;
}
article p {
font-size: 1.1em;
margin-top: 0;
text-align: justify;
}
/* product page style */
.product {
display: flex;
flex-direction: row;
margin: 1em 0;
}
.product img {
width: 150;
min-width: 150px;
height: 150px;
min-height: 150px;
background-color: grey;
flex: 1;
}
.product-details {
flex: 2;
margin-left: 1em;
}
.product-details > h2 {
margin-top: 0;
margin-bottom: .1em;
font-size: 1.4em;
}
.product-details p {
margin-top: 0;
font-size: 1.1em;
text-align: justify;
}
/* Register styles */
form {
width: 400px;
margin: auto;
}
form .form-control {
display: flex;
flex-direction: row;
}
form .form-control label {
text-align: right;
padding-right: 1em;
}
form .form-control label {
flex: 1;
}
form .form-control input {
flex: 3;
}
form .form-control input[type="submit"] {
margin-top: .5em;
padding-left: 2px;
padding-right: 2px;
}
/* dialog style */
span.msg {
padding: .1em;
text-align: center;
display: block;
margin: 1em;
}
span.msg.success {
background-color: rgb(140, 247, 130);
color: rgb(53, 116, 53)
}
span.msg.fail {
background-color: rgb(247, 144, 130);
color: rgb(116, 53, 53)
}
Once you’re done, save the main.css file.

Create a products.html file in the www/ directory and type in the following lines of codes in it.
<html lang="en">
<head>
<meta charset="UTF-8">
<meta name="viewport" content="width=device-width, initial-scale=1.0">
<link rel="stylesheet" href="styles/main.css">
<title>Products</title>
</head>
<body>
<div id="main-site">
<nav>
<ul id="main-nav">
<li><a href="index.html">Home</a></li>
<li><a href="products.html">Products</a></li>
<li><a href="contact.html">Contact</a></li>
</ul>
<ul id="user-nav">
<li><a href="register.html">Register</a></li>
<li><a href="login.html">Log In</a></li>
</ul>
</nav>
<div id="main-content">
<h1>All Products</h1>
<div id="product-list">
<div class="product">
<img src="images/demo-product.jpg" alt="Photo not available" />
<div class="product-details">
<h2>Lorem consectetur adipisicing elit</h2>
<p>Lorem ipsum, dolor sit amet consectetur adipisicing elit.
Porro cum quod suscipit. Eaque modi tempora assumenda in expedita eius
voluptate, doloribus fugit accusantium suscipit perspiciatis.
Pariatur aperiam minima placeat vel!</p>
</div>
</div>
<div class="product">
<img src="images/demo-product.jpg" alt="Photo not available" />
<div class="product-details">
<h2>Ipsum voluptatibus sit amet.</h2>
<p>Lorem ipsum dolor, sit amet consectetur adipisicing elit.
Velit ea ullam quidem debitis illo! Cum beatae odit voluptates officia
maxime obcaecati quidem eum numquam, consectetur cumque expedita natus
quisquam? Rerum!</p>
</div>
</div>
<div class="product">
<img src="images/demo-product.jpg" alt="Photo not available" />
<div class="product-details">
<h2>Sit amet consectetur.</h2>
<p>Lorem ipsum dolor sit amet consectetur adipisicing elit.
Iure, aperiam tempore enim nihil ex sapiente doloribus magnam delectus
deleniti reprehenderit, sed error nisi minus temporibus, illum repudiandae.
Quod, consequuntur at!</p>
</div>
</div>
</div>
</div>
<footer>© 2020 linuxhint.com</footer>
</div>
</body>
</html>
Once you’re done, save the products.html file.

Create a new file contact.html in the www/ directory and type in the following lines of codes in it.
<html lang="en">
<head>
<meta charset="UTF-8">
<meta name="viewport" content="width=device-width, initial-scale=1.0">
<link rel="stylesheet" href="styles/main.css">
<title>Contact Us</title>
</head>
<body>
<div id="main-site">
<nav>
<ul id="main-nav">
<li><a href="index.html">Home</a></li>
<li><a href="products.html">Products</a></li>
<li><a href="contact.html">Contact</a></li>
</ul>
<ul id="user-nav">
<li><a href="register.html">Register</a></li>
<li><a href="login.html">Log In</a></li>
</ul>
</nav>
<div id="main-content">
<h1>Contact Information</h1>
<p><b>Name:</b> DemoTech Inc</p>
<p><b>Country:</b> USA</p>
<p><b>Phone:</b> +1 000 000 0000</p>
<p><b>Address:</b> Lorem ipsum dolor, sit amet consectetur
adipisicing elit. Impedit, laudantium!</p>
</div>
<footer>© 2020 linuxhint.com</footer>
</div>
</body>
</html>
Once you’re done, save the contact.html file.

Create a new file register.html in the www/ directory and type in the following lines of codes in it.
<html lang="en">
<head>
<meta charset="UTF-8">
<meta name="viewport" content="width=device-width, initial-scale=1.0">
<link rel="stylesheet" href="styles/main.css">
<title>Register</title>
</head>
<body>
<div id="main-site">
<nav>
<ul id="main-nav">
<li><a href="index.html">Home</a></li>
<li><a href="products.html">Products</a></li>
<li><a href="contact.html">Contact</a></li>
</ul>
<ul id="user-nav">
<li><a href="register.html">Register</a></li>
<li><a href="login.html">Log In</a></li>
</ul>
</nav>
<div id="main-content">
<form action="success.html">
<div class="form-control">
<label for="username">Username</label>
<input type="text" id="username" name="username">
</div>
<div class="form-control">
<label for="email">E-mail</label>
<input type="email" id="email" name="email">
</div>
<div class="form-control">
<label for="password">Password</label>
<input type="password" id="password" name="password">
</div>
<div class="form-control">
<label> </label>
<input type="submit" value="Register" />
</div>
</form>
</div>
<footer>© 2020 linuxhint.com</footer>
</div>
</body>
</html>
Once you’re done, save the register.html file.

Create a new file login.html in the www/ directory and type in the following lines of codes in it.
<html lang="en">
<head>
<meta charset="UTF-8">
<meta name="viewport" content="width=device-width, initial-scale=1.0">
<link rel="stylesheet" href="styles/main.css">
<title>Log In</title>
</head>
<body>
<div id="main-site">
<nav>
<ul id="main-nav">
<li><a href="index.html">Home</a></li>
<li><a href="products.html">Products</a></li>
<li><a href="contact.html">Contact</a></li>
</ul>
<ul id="user-nav">
<li><a href="register.html">Register</a></li>
<li><a href="login.html">Log In</a></li>
</ul>
</nav>
<div id="main-content">
<form action="failed.html">
<div class="form-control">
<label for="username">Username</label>
<input type="text" id="username" name="username">
</div>
<div class="form-control">
<label for="password">Password</label>
<input type="password" id="password" name="password">
</div>
<div class="form-control">
<label> </label>
<input type="submit" value="Log In" />
</div>
</form>
</div>
<footer>© 2020 linuxhint.com</footer>
</div>
</body>
</html>
Once you’re done, save the login.html file.

Create a new file failed.html in the www/ directory and type in the following lines of codes in it.
<html lang="en">
<head>
<meta charset="UTF-8">
<meta name="viewport" content="width=device-width, initial-scale=1.0">
<link rel="stylesheet" href="styles/main.css">
<title>Request Failed</title>
</head>
<body>
<div id="main-site">
<nav>
<ul id="main-nav">
<li><a href="index.html">Home</a></li>
<li><a href="products.html">Products</a></li>
<li><a href="contact.html">Contact</a></li>
</ul>
<ul id="user-nav">
<li><a href="register.html">Register</a></li>
<li><a href="login.html">Log In</a></li>
</ul>
</nav>
<div id="main-content">
<span class="msg fail">Unable to process your request.</span>
</div>
<footer>© 2020 linuxhint.com</footer>
</div>
</body>
</html>
Once you’re done, save the failed.html file.

Create a new file success.html in the www/ directory and type in the following lines of codes in it.
<html lang="en">
<head>
<meta charset="UTF-8">
<meta name="viewport" content="width=device-width, initial-scale=1.0">
<link rel="stylesheet" href="styles/main.css">
<title>Success</title>
</head>
<body>
<div id="main-site">
<nav>
<ul id="main-nav">
<li><a href="index.html">Home</a></li>
<li><a href="products.html">Products</a></li>
<li><a href="contact.html">Contact</a></li>
</ul>
<ul id="user-nav">
<li><a href="register.html">Register</a></li>
<li><a href="login.html">Log In</a></li>
</ul>
</nav>
<div id="main-content">
<span class="msg success">Your request is successful.</span>
</div>
<footer>© 2020 linuxhint.com</footer>
</div>
</body>
</html>
Once you’re done, save the success.html file.

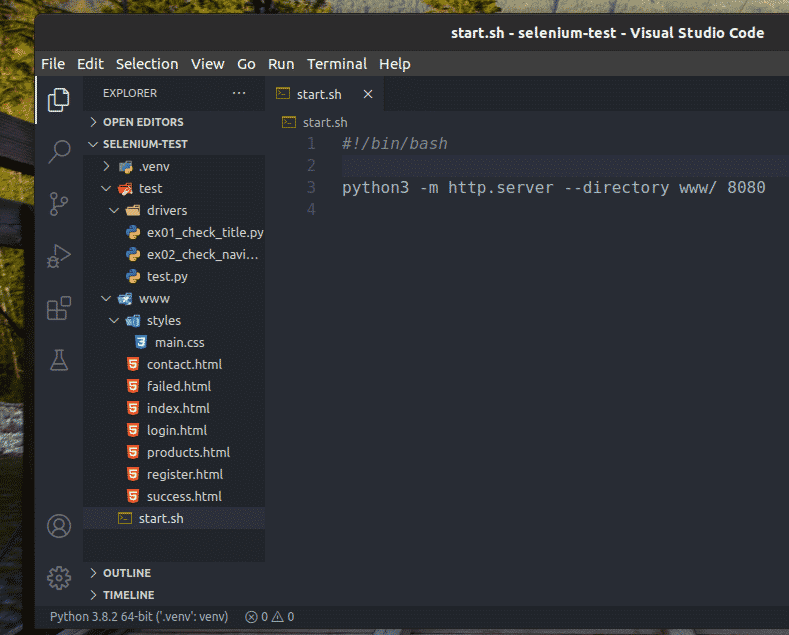
Finally, your www/ directory should have the following files, as marked in the screenshot below.
For testing the website with Selenium, we must access the website from a local webserver. Fortunately, this is very easy to do with Python.
Create a new file start.sh in the project directory and type in the following lines in it.
python3 -m http.server --directory www/ 8080
Once you’re done, save the start.sh file.
Add executable permission to the start.sh file with the following command:

Start the webserver with the following command:

The web server should start on port 8080.

Now, you should be able to access the website from a web browser.
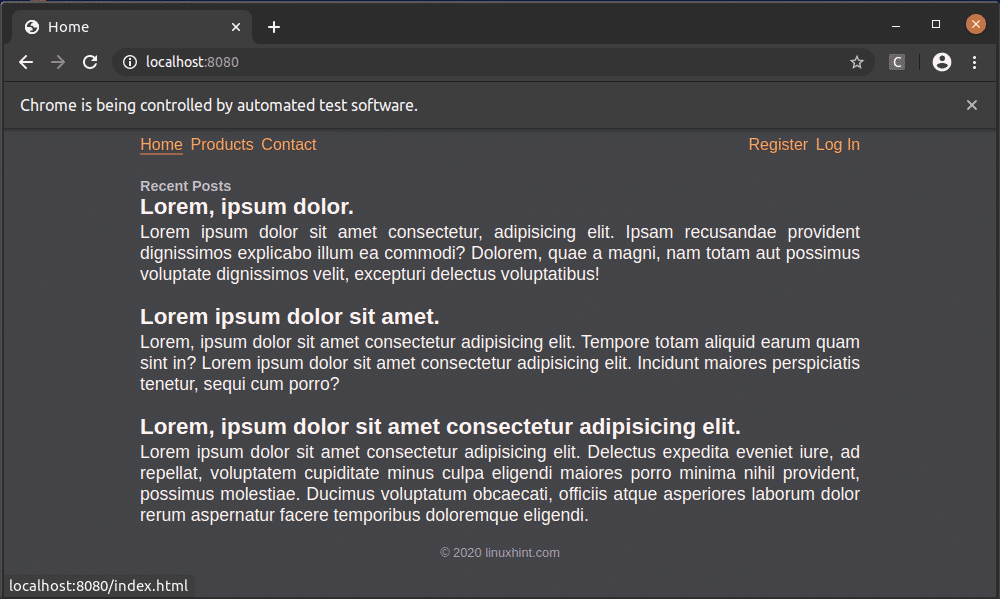
Visit http://localhost:8080 from your favorite web browser. The home page of the website should load in the browser, as you can see in the screenshot below.

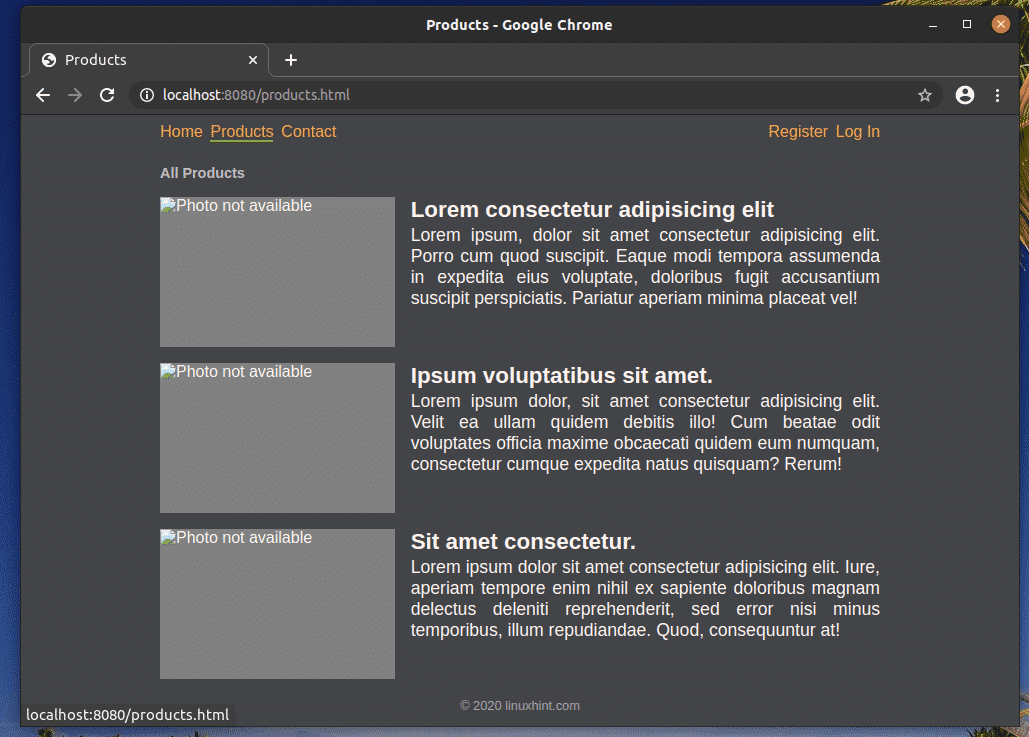
The products.html page of the website.
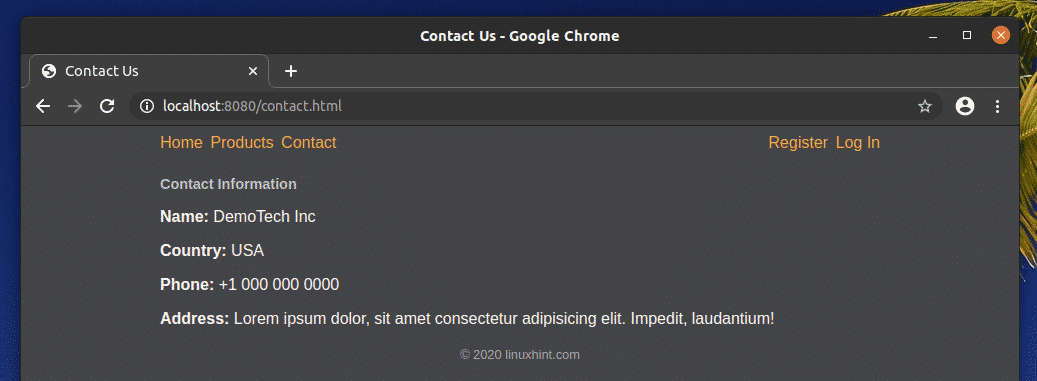
The contact.html page of the website.
The register.html page of the website.

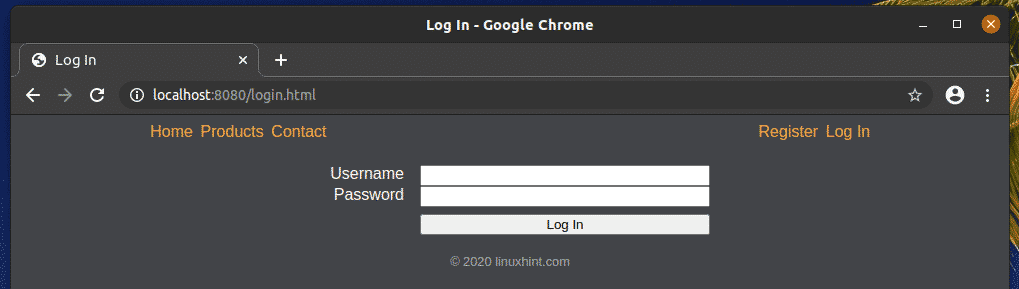
The login.html page of the website.
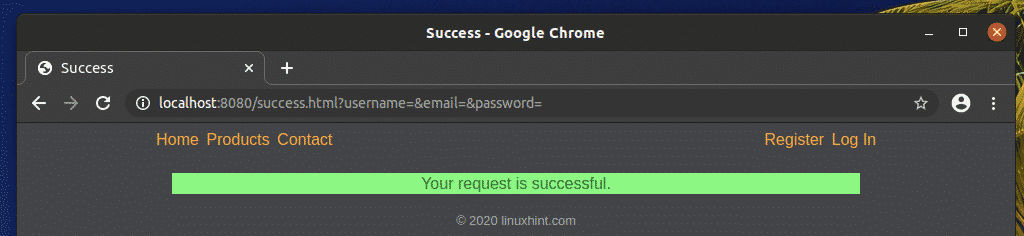
We also have a success.html page.
And a failed.html page.

The registration form (register.html) of the website is set up to always success (success.html), and the login form (login.html) of the website is set up to always fail (failed.html). This is to demonstrate how to handle errors in web testing with Selenium.
Writing a Simple Python Web Testing Library:
To make web testing with Selenium easier, I have written a simple Selenium web testing library WebTest with Python. This library checks whether a certain test is successful or not and prints a nicely formatted status message for all the tests.
Create a new Python script test.py in the test/ directory of your project and type in the following lines of codes in it.
def __init__(self):
self.errors=0
self.passed=0
self.tests = []
def add(self, test):
self.tests.append(test)
def check(self, check, title):
try:
assert check[0] == check[1]
print('[✓] %s' % title)
self.passed += 1
except AssertionError:
print("[✕] %s" % title)
self.errors += 1
def run(self):
print("Tests:")
for test in self.tests:
self.check([test["expect"], test["targetElement"]], test["name"])
def result(self):
print(self)
def __str__(self):
return "\nTest complete.\nTotal %d tests. %d passed and %d errors.\n" %
(self.totalTests(), self.passed, self.errors)
def totalTests(self):
return self.errors + self.passed
Once you’re done, save the test.py Python script.

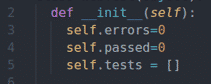
Line 1 defines a WebTest class.
![]()
Line 2-5 initializes the errors, passed, and tests variables for the WebTest object.
The error variable will hold the total number of tests that failed.
The passed variable will hold the total number of passed tests.
The tests list will hold all the tests.
Line 33-34 defines the totalTests() method. This method returns the total number of tests that the library performed. The total number of tests is simply the summation of all the tests that passed and failed.
![]()
Line 29-30 defines the __str__() method. This method defines what to return when a WebTest object is converted to a string. It just returns the summary of the test.

Line 26-27 defines the result() method. This method uses the __str__() method to convert the object to string and prints it on the console.
![]()
Line 8-9 defines the add() method. This method adds new test cases to the tests list of the WebTest object.

Line 11-18 defines the check() method. This method checks whether the test has the expected value and prints a test status depending on whether the test passed or failed.
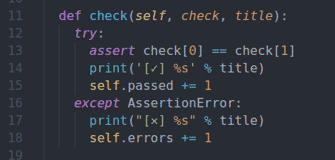
Line 21-24 defines the run() method. This method calls the check() method for each test case.

I will explain more about this web testing library when we will use it to test our website in the next section of this article.
Checking Website Title:
In this section, I am going to show you how to perform the simplest of the test, checking the web page title.
Our demo website has 5 pages: home.html, products.html, contact.html, login.html, register.html
What I want to do is to check whether each of these pages has the right title.
Create a new Python script ex01_check_title.py and type in the following lines of codes in it.
from selenium.webdriver.common.keys import Keys
from time import sleep
from test import WebTest
test = WebTest()
options = webdriver.ChromeOptions()
options.headless = True
options.add_argument('--window-size=1280,720')
browser = webdriver.Chrome(executable_path="./drivers/chromedriver", options=options)
baseUrl = "http://localhost:8000"
pages = {
"home": baseUrl,
"products": baseUrl + "/products.html",
"contact": baseUrl + "/contact.html",
"login": baseUrl + "/login.html",
"register": baseUrl + "/register.html"
}
browser.get(pages["home"])
test.add({
"name": "homepage title",
"expect": "Home",
"targetElement": browser.title
})
browser.get(pages["products"])
test.add({
"name": "products page title",
"expect": "Products 2",
"targetElement": browser.title
})
browser.get(pages["contact"])
test.add({
"name": "contact page title",
"expect": "Contact Us",
"targetElement": browser.title
})
browser.get(pages["login"])
test.add({
"name": "login page title",
"expect": "Log In",
"targetElement": browser.title
})
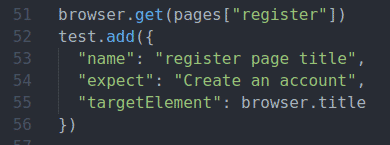
browser.get(pages["register"])
test.add({
"name": "register page title",
"expect": "Create an account",
"targetElement": browser.title
})
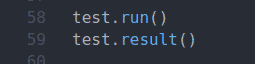
test.run()
test.result()
Once you’re done, save the ex01_check_title.py Python script.
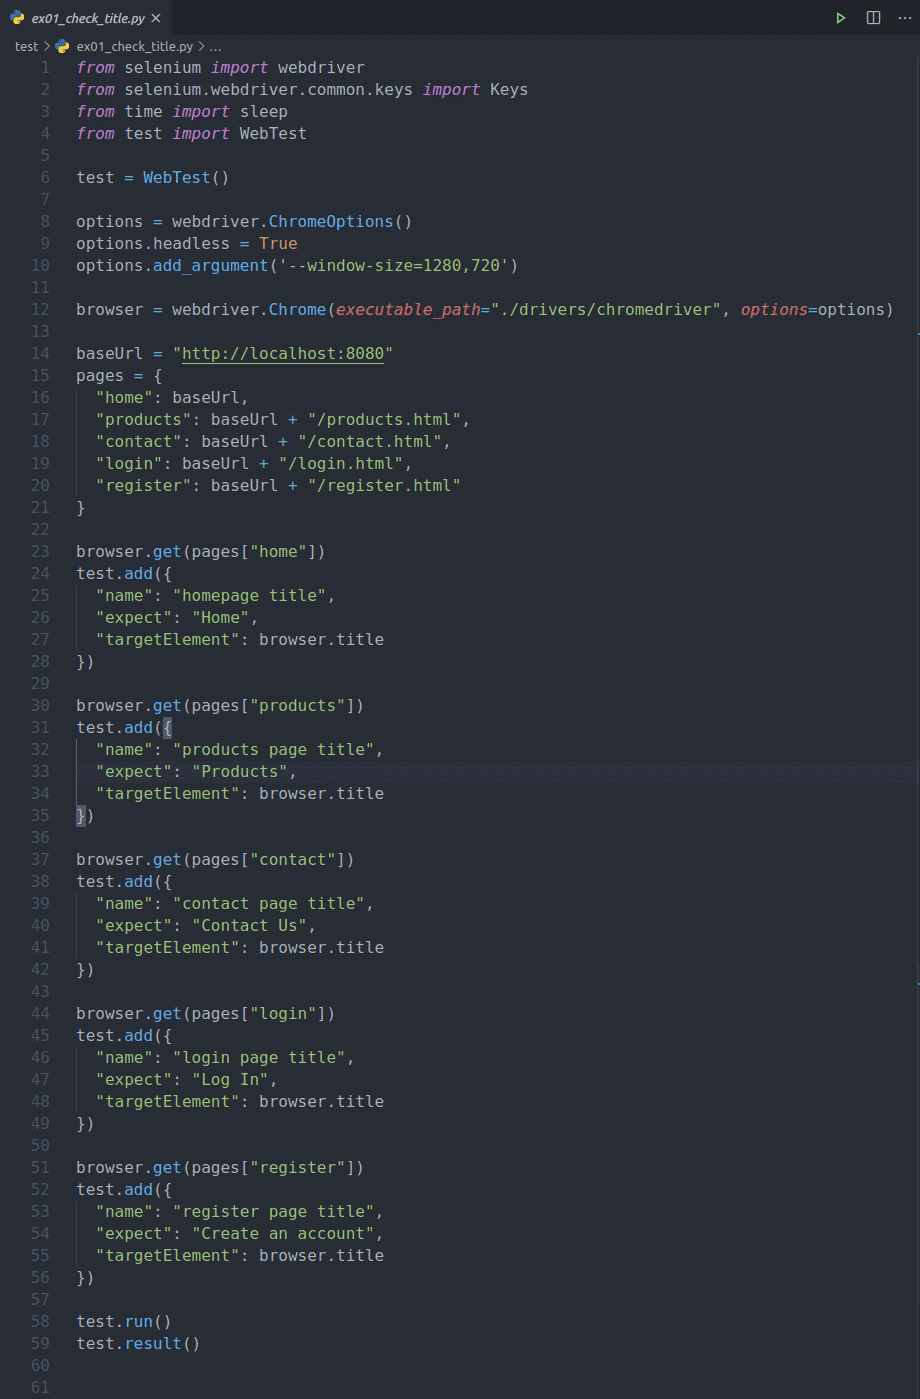
Line 1-3 imports all the required Python libraries.

Line 4 imports our homegrown WebTest Selenium web testing library.
![]()
Line 6 creates a WebTest() object and stores it in the test variable.
![]()
Line 8 creates and a ChromeOptions() object.
Line 9 enables the headless mode.
Line 10 sets the window size of the browser.

Line 8 creates a Chrome browser object using the chromedriver binary from the test/drivers/ directory of the project.
![]()
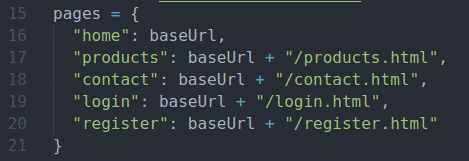
Line 14 defines the base website URL.
![]()
Line 15 to 21 creates a pages dictionary that has all the web page URLs that we want to check the title of.
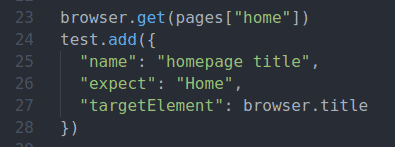
Line 23 loads the home page on the browser.
![]()
Line 24-28 adds a new test using the add() method of WebTest object.
The test has a name, expect, and targetElement property.
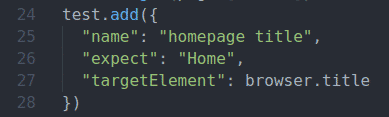
The name property will show up in the test status.
![]()
The title that we are expecting for the home page is given in the expect property.
![]()
The title of the web page (browser.title), which we are checking for the expected value, is given in the targetElement property.
![]()
So, line 23-28 is used to load the home page in the browser and check if the home page title is correct.
The codes for testing the web page title for other pages of the website are the same. You can just copy and paste the same code and modify it as required.
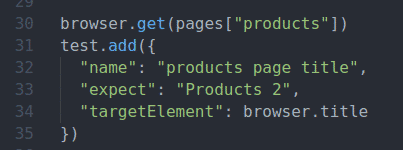
Line 30-35 is used to load the products page in the browser and check if the product page title is correct.
Line 37-42 is used to load the contact page in the browser and check if the contact page title is correct.

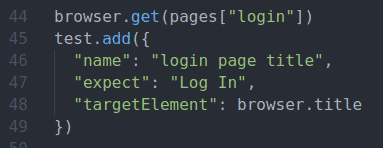
Line 44-49 is used to load the login page in the browser and check if the login page title is correct.
Line 51-56 is used to load the register page in the browser and check if the register page title is correct.
Line 58 uses the run() method of the WebTest object to run the tests.
Line 59 uses the result() method of the WebTest object to print the test summary on the console.
To run the tests, navigate to the test/ directory of the project as follows:

Run the Python script ex01_check_title.py as follows:

As you can see, all web pages are checked for the correct titles. The successful tests have a tick mark, and failed tests have a cross mark. The final test summary is also printed on the console.
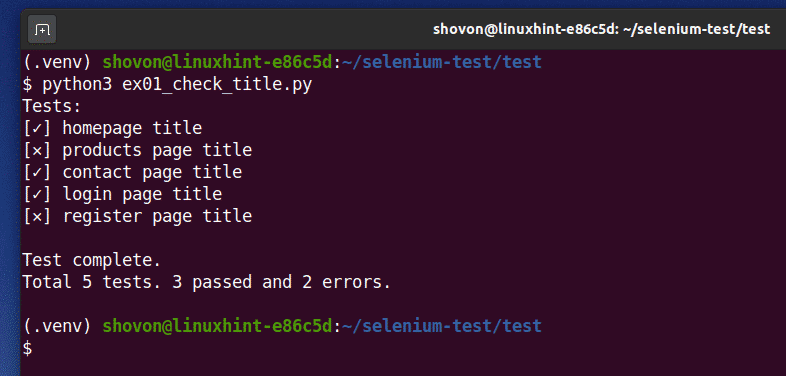
We got 2 errors in the test. Let’s fix them.
The first error is in the products page title. We are expecting an incorrect title. Change the expecting title of the products page in the ex01_check_title.py file as follows.

The second error is in the register page. We are expecting the title to Create an account. But we have something else on the register page.
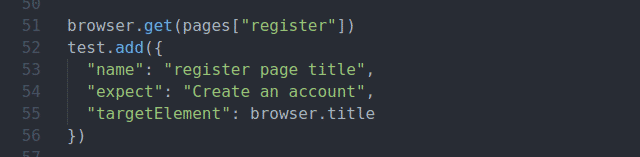
To fix the second error, change the title of the register.html file in the www/ directory of the project as follows.
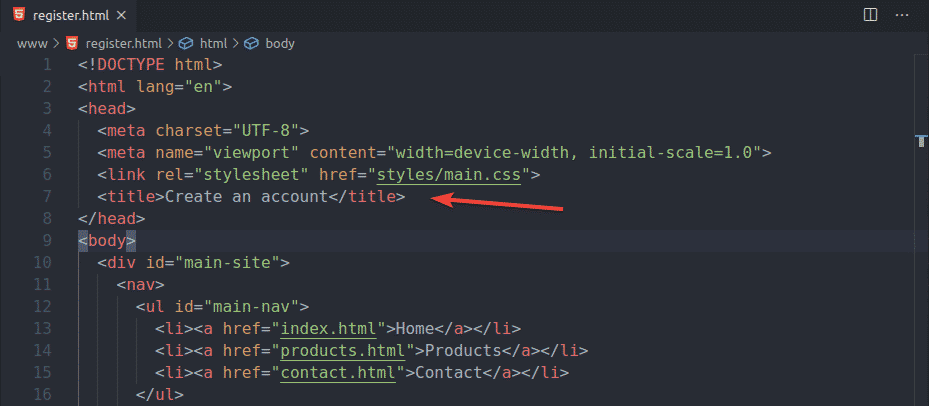
Now, run the test script ex01_check_title.py again, and all the tests should be successful, as you can see in the screenshot below. So, our Selenium web testing library is working as expected.

Checking Webpage Navigation:
In this section, I am going to show you how to check if the web page navigation links are working correctly using the Selenium Python library.
Create a new Python script ex02_check_navigation.py in the test/ directory of your project and type in the following lines of codes in it.
from selenium.webdriver.common.keys import Keys
from selenium.webdriver.common.by import By
from selenium.webdriver.common.action_chains import ActionChains
from selenium.webdriver.support import expected_conditions
from selenium.webdriver.support.ui import WebDriverWait
from test import WebTest
from time import sleep
test = WebTest()
options = webdriver.ChromeOptions()
options.add_argument('--window-size=1000,600')
browser = webdriver.Chrome(executable_path="./drivers/chromedriver",
options=options)
baseUrl = "http://localhost:8080"
browser.get(baseUrl)
sleep(2)
homeLink = WebDriverWait(browser, 10).until(expected_conditions.visibility
_of_element_located((By.XPATH, "//nav/ul[@id='main-nav']/li[1]/a")))
ActionChains(browser).click(homeLink).perform()
test.add({
"name": "navigation to homepage",
"expect": baseUrl + "/index.html",
"targetElement": browser.current_url
})
sleep(2)
productsLink = WebDriverWait(browser, 10).until(expected_conditions.visibility
_of_element_located((By.XPATH, "//nav/ul[@id='main-nav']/li[2]/a")))
ActionChains(browser).click(productsLink).perform()
test.add({
"name": "navigation to products page",
"expect": baseUrl + "/products.html",
"targetElement": browser.current_url
})
sleep(2)
contactLink = WebDriverWait(browser, 10).until(expected_conditions.visibility
_of_element_located((By.XPATH, "//nav/ul[@id='main-nav']/li[3]/a")))
ActionChains(browser).click(contactLink).perform()
test.add({
"name": "navigation to contact page",
"expect": baseUrl + "/contact.html",
"targetElement": browser.current_url
})
sleep(2)
registerLink = WebDriverWait(browser, 10).until(expected_conditions.visibility
_of_element_located((By.XPATH, "//nav/ul[@id='user-nav']/li[1]/a")))
ActionChains(browser).click(registerLink).perform()
test.add({
"name": "navigation to register page",
"expect": baseUrl + "/register.html",
"targetElement": browser.current_url
})
sleep(2)
loginLink = WebDriverWait(browser, 10).until(expected_conditions.visibility
_of_element_located((By.XPATH, "//nav/ul[@id='user-nav']/li[2]/a")))
ActionChains(browser).click(loginLink).perform()
test.add({
"name": "navigation to login page",
"expect": baseUrl + "/login.html",
"targetElement": browser.current_url
})
sleep(2)
browser.close()
test.run()
test.result()
Once you’re done, save the ex02_check_navigation.py Python script.
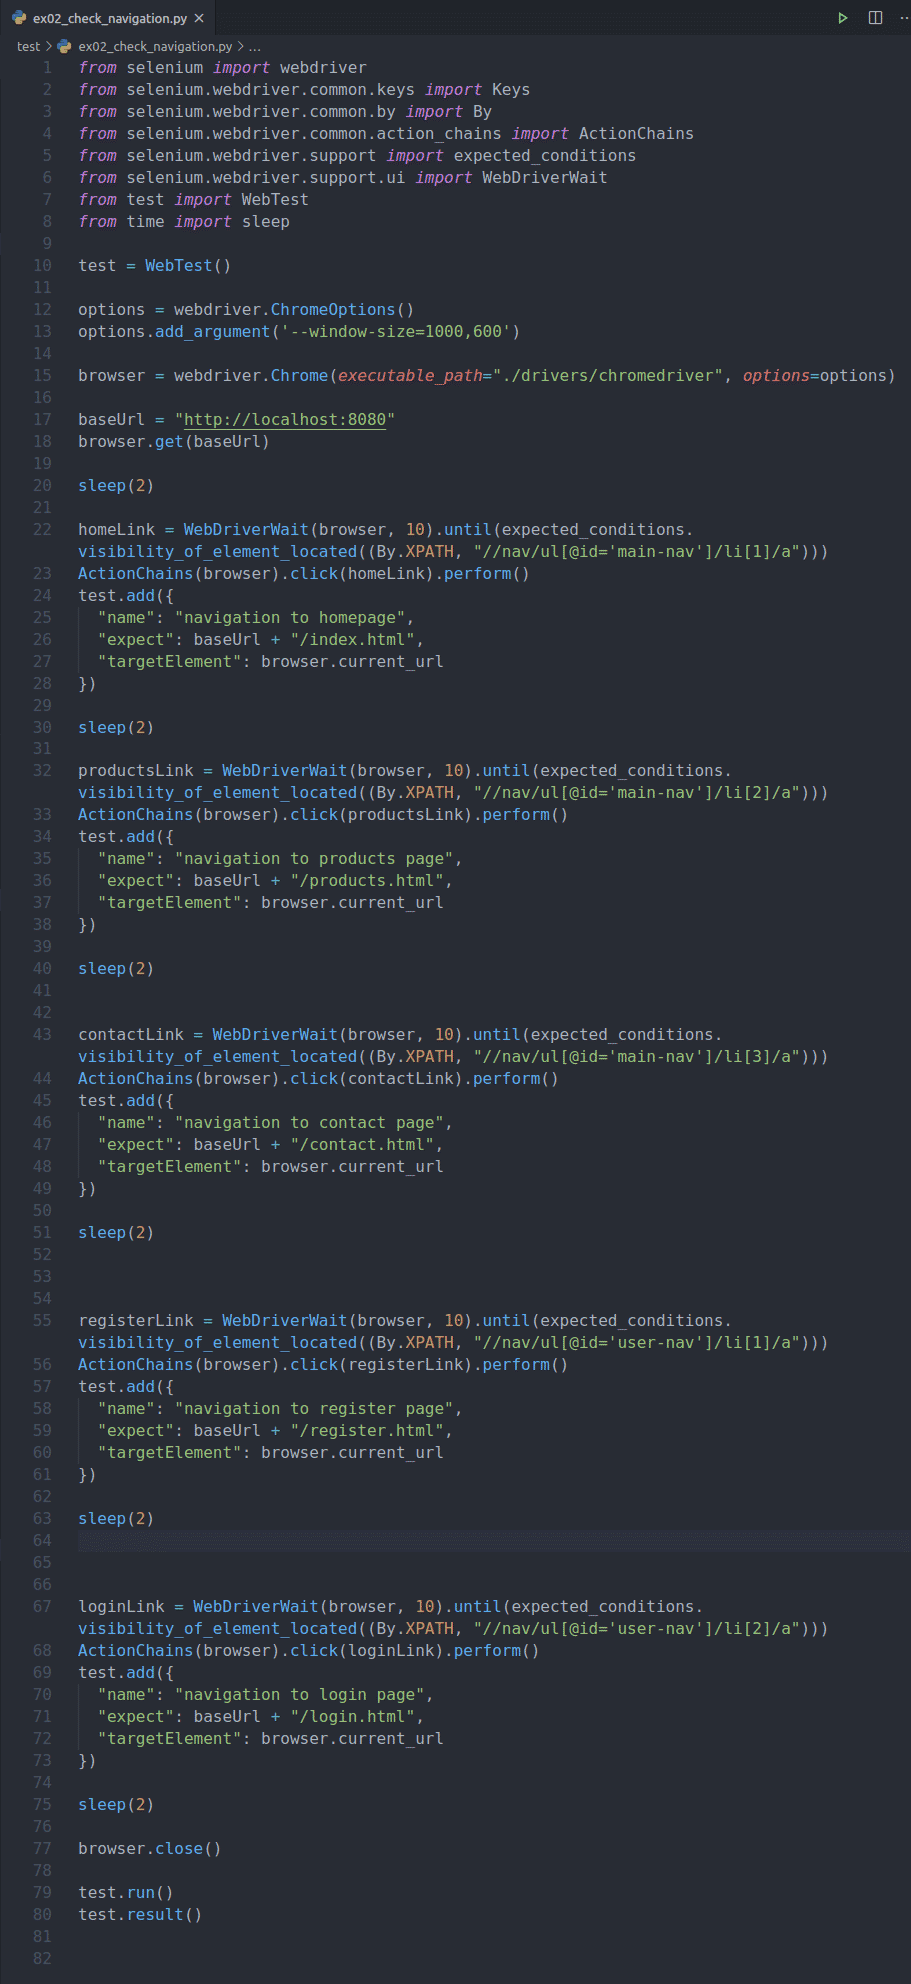
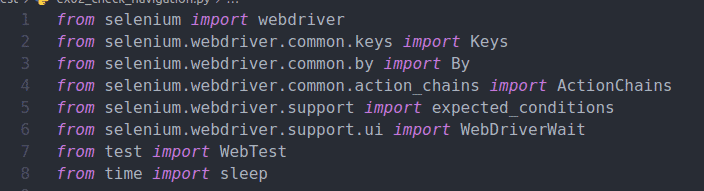
Line 1-8 imports all the required libraries.
Line 10 creates a WebTest() object and stores it in the test variable.
![]()
Line 12 creates and a ChromeOptions() object.
Line 13 sets the window size of the browser.

Line 15 creates a Chrome browser object using the chromedriver binary from the test/drivers/ directory of the project.
![]()
Line 17 defines the base website URL.
![]()
Line 18 loads the website on the browser.
![]()
Line 20 uses the sleep() function to delay the execution of the next instructions for 2 seconds. So that you will be able to observe how Selenium automates the whole process; otherwise, things will happen very fast. This is why I have used the sleep() function many times in this example.
![]()
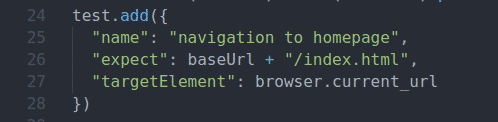
Line 22-28 is used to find the home page navigation link, move the mouse cursor to that link, click on the link, and make sure that the browser navigates to the right web page.
Line 30 delays the next instructions for 2 seconds.
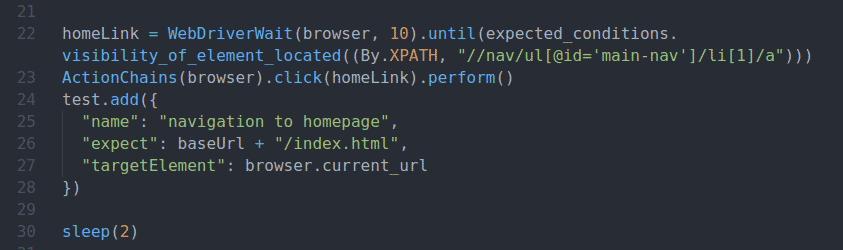
Line 22 finds the first navigation link, which is the home page link using the XPath selector //nav/ul[@id=’main-nav’]/li[1]/a.

The HTML structure of the main navigation bar of the demo website.

Line 23 uses Selenium ActionChains to move the mouse cursor to the home navigation link and click on it.
![]()
Line 24-28 is used to add a test case to the WebTest object.
The expected value is the URL of the home page http://localhost:8080/index.html
The browser.current_url is used to access the current URL of the browser. This is the targetElement in this case.
The rest of the tests are the same as the home page navigation test. So, I will not discuss them again.
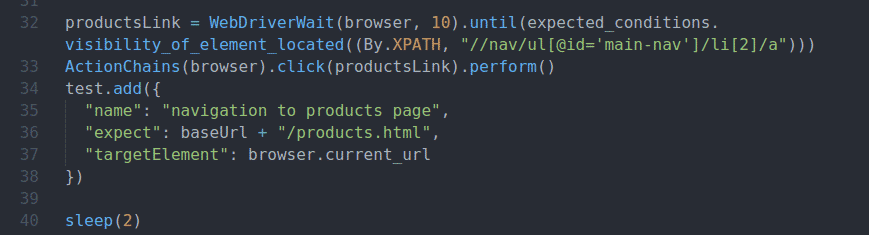
The same way, line 32-40 is used to check the products page navigation.
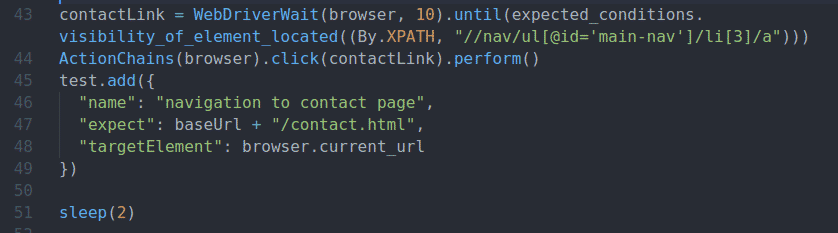
Line 43-51 is used to check the contact page navigation.
Line 55-63 is used to check the register page navigation.

Line 67-75 is used to check the login page navigation.

Line 77 closes the web browser.
![]()
Line 79-80 runs the tests and prints the result.

Run the Python script ex02_check_navigation.py as follows:

Selenium should start a web browser instance, load the website, and tests all the navigation links one by one.
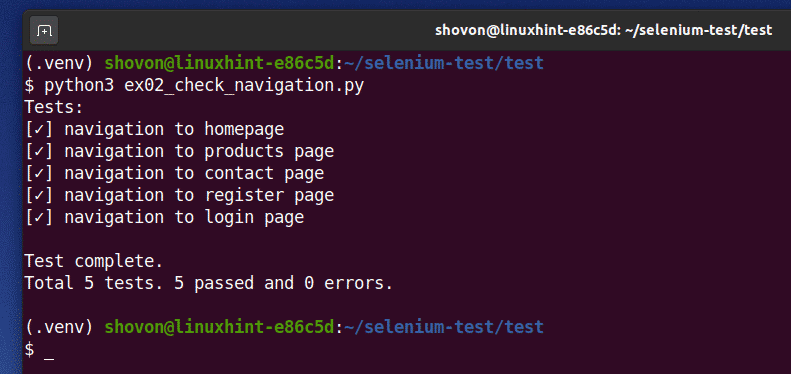
Once the tests are complete, it should print the test result. As you can see, all the navigation links are working perfectly.
Checking Copyright Information:
In this section, I am going to show you how to check the copyright information of the website.
The copyright information is in the footer tag of the webpage. The HTML structure of the copyright information is shown in the screenshot below.

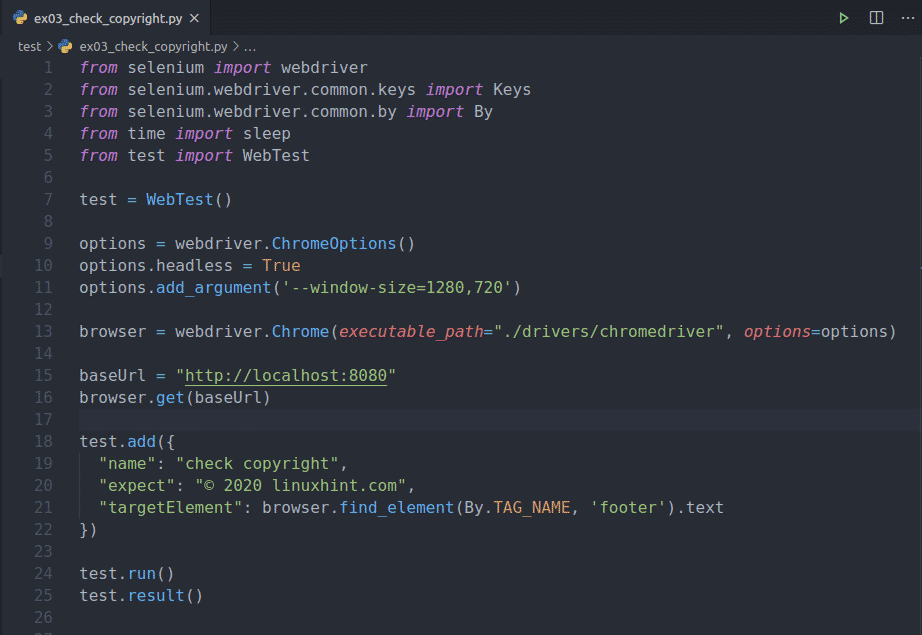
To check whether the copyright information is correct, create a new Python script ex03_check_copyright.py in the test/ directory of the project and type in the following lines of codes in it.
from selenium.webdriver.common.keys import Keys
from selenium.webdriver.common.by import By
from time import sleep
from test import WebTest
test = WebTest()
options = webdriver.ChromeOptions()
options.headless = True
options.add_argument('--window-size=1280,720')
browser = webdriver.Chrome(executable_path="./drivers/chromedriver", options=options)
baseUrl = "http://localhost:8080"
browser.get(baseUrl)
test.add({
"name": "check copyright",
"expect": "© 2020 linuxhint.com",
"targetElement": browser.find_element(By.TAG_NAME, 'footer').text
})
test.run()
test.result()
Once you’re done, save the ex03_check_copyright.py Python script.
Line 1-5 imports all the required Python libraries.

Line 7 creates a WebTest() object and stores it in the test variable.
![]()
Line 9 creates and a ChromeOptions() object.
Line 10 enables the headless mode.
Line 11 sets the window size of the browser.

Line 13 creates a Chrome browser object using the chromedriver binary from the test/drivers/ directory of the project.

Line 15 defines the base website URL, and line 16 loads the URL on the browser.

Line 18-22 adds a new test using the add() method of WebTest object.
The expected value is the copyright information of the website. The copyright information is available in the footer tag. The content of the footer tag is the targetElement.

Line 21 extracts the copyright information from the footer tag using the browser.find_element() method.
![]()
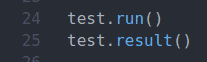
Line 24 uses the run() method of the WebTest object to run the tests.
Line 25 uses the result() method of the WebTest object to print the test summary on the console.
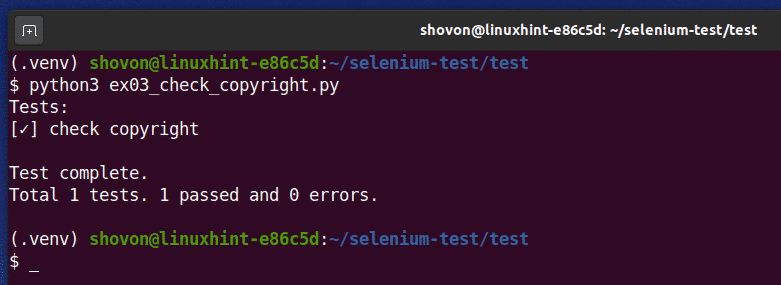
Run the Python script ex03_check_copyright.py as follows:

As you can see, the copyright information is correct. The test passed.
Checking Registration Form:
In this section, I am going to show you how to fill-up the form and submit it using Selenium. For this test, I am going to use the registration form of our dummy website.
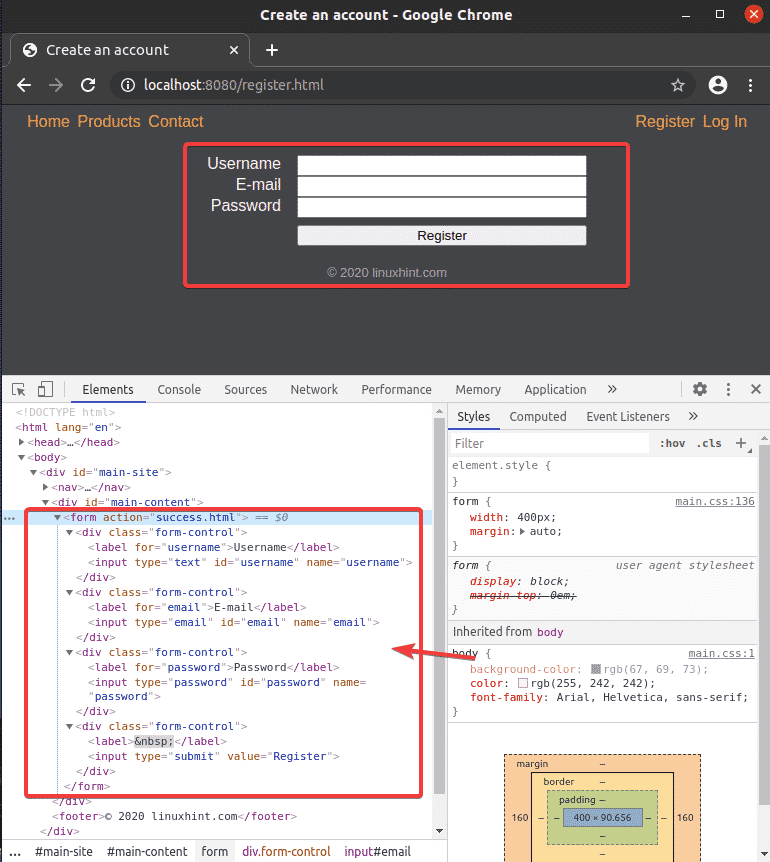
The HTML structure of the registration form is shown in the screenshot below.
Create a new Python script ex04_registration_check.py and type in the following lines of codes in it.
from selenium.webdriver.common.keys import Keys
from selenium.webdriver.common.by import By
from selenium.webdriver.support import expected_conditions
from selenium.webdriver.support.ui import WebDriverWait
from test import WebTest
from time import sleep
test = WebTest()
options = webdriver.ChromeOptions()
options.add_argument('--window-size=1000,600')
browser = webdriver.Chrome(executable_path="./drivers/chromedriver", options=options)
registerFormUrl = "http://localhost:8080/register.html"
browser.get(registerFormUrl)
usernameInput = WebDriverWait(browser, 10).until(
expected_conditions.visibility_of_element_located((By.XPATH, "//form//input[@name='username']"))
)
emailInput = WebDriverWait(browser, 10).until(
expected_conditions.visibility_of_element_located((By.XPATH, "//form//input[@name='email']"))
)
passwordInput = WebDriverWait(browser, 10).until(
expected_conditions.visibility_of_element_located((By.XPATH, "//form//input[@name='password']"))
)
submitButton = WebDriverWait(browser, 10).until(
expected_conditions.visibility_of_element_located((By.XPATH, "//form//input[@type='submit']"))
)
usernameInput.send_keys('my dummy name')
sleep(1)
emailInput.send_keys('[email protected]')
sleep(1)
passwordInput.send_keys('my super secret pass')
sleep(1)
submitButton.send_keys(Keys.ENTER)
submitStatus = WebDriverWait(browser, 10).until(
expected_conditions.visibility_of_element_located((By.CSS_SELECTOR, "#main-content span.msg"))
)
test.add({
"name": "registration test",
"expect": "Your request is successful.",
"targetElement": submitStatus.text
})
sleep(2)
browser.close()
test.run()
test.result()
Once you’re done, save the ex04_register_check.py Python script.
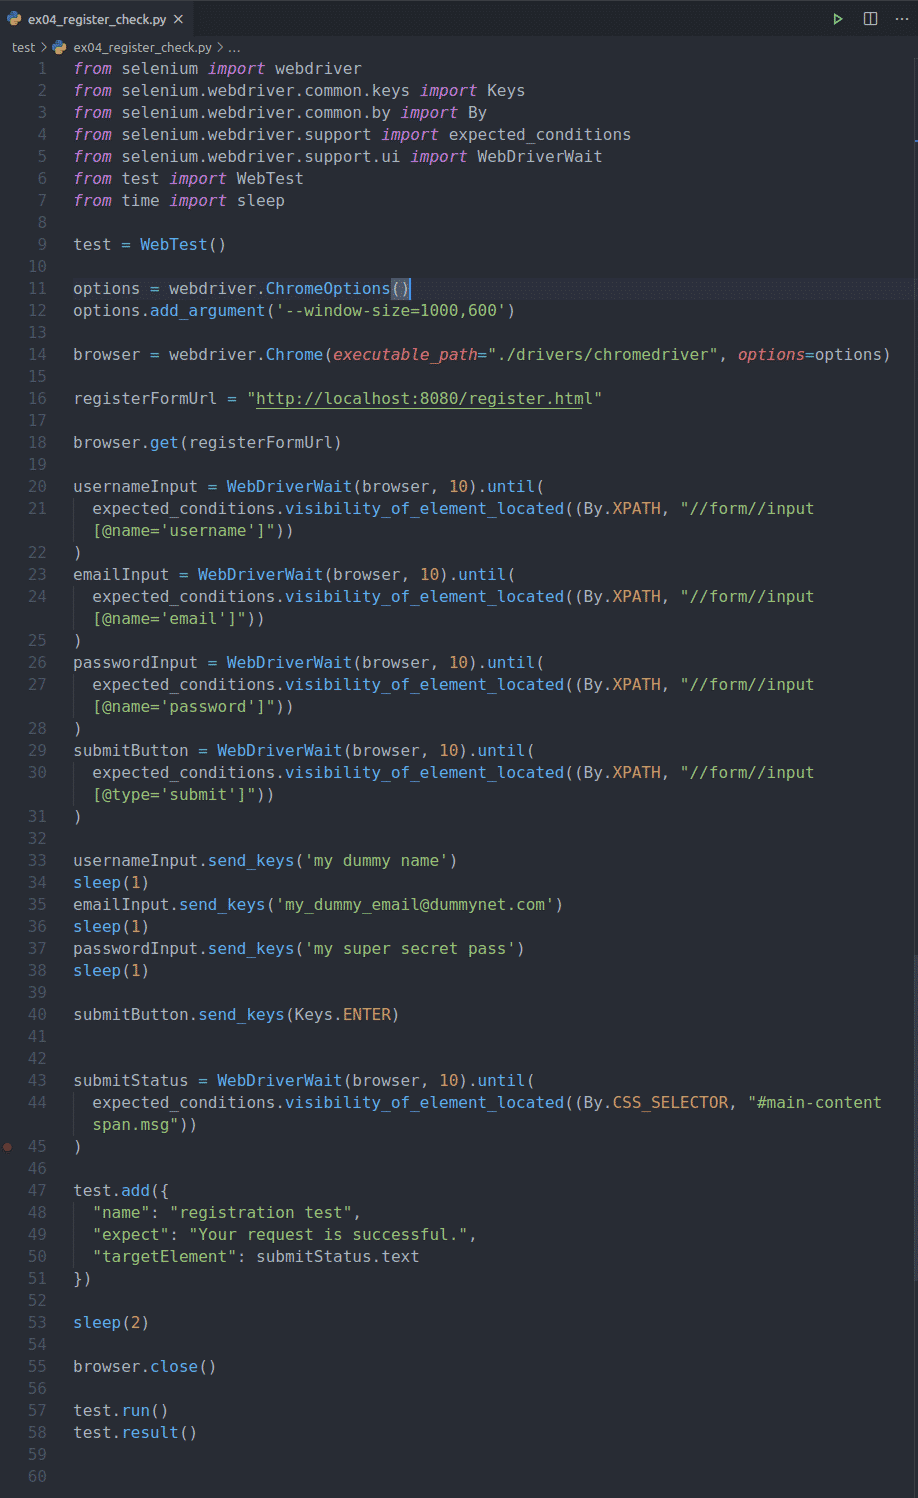
Line 1-7 imports all the required Python libraries.
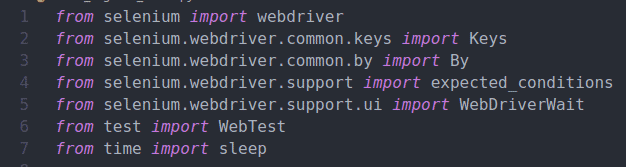
Line 9 imports our homegrown WebTest Selenium web testing library.
![]()
Line 11 creates and a ChromeOptions() object.
Line 12 sets the window size of the browser.

Line 14 creates a Chrome browser object using the chromedriver binary from the test/drivers/ directory of the project.
![]()
Line 16 defines the registration page URL of the website, and line 18 loads the registration page on the browser.

Line 20-22 finds the username form the input element from the web page and stores a reference to the form input element to the variable usernameInput.

Line 23-25 finds the email form input element from the web page and stores the elements referred to the variable emailInput.

Line 26-28 finds the password form input element from the web page and stores the elements reference to the variable passwordInput.

Line 29-31 finds the submit button of the form from the web page and stores a reference to it in the variable submitButton.

Line 33 sends a dummy username to the username form the input element.
Line 34 delays the execution of the next instruction for 1 second using the sleep() function.

Line 35 sends a dummy email to the email form input element.
Line 36 delays the execution of the next instruction for 1 second using the sleep() function.

Line 37 sends a dummy password to the password form input element.
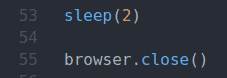
Line 38 delays the execution of the next instruction for 1 second using the sleep() function.

Line 40 presses the <Enter> key on the submit button of the form. This action submits the form.
![]()
Once the form is submitted, line 43-45 checks for the form submission status message.

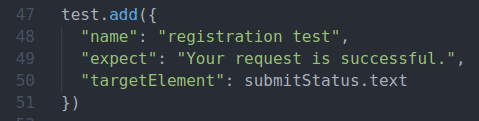
Line 47-51 adds a test case to the WebTest object.
If the form submission is successful, the status message should be Your request is successful.
Line 53 delays the execution for 2 seconds.
Line 55 closes the browser.
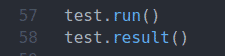
Line 57 uses the run() method of the WebTest object to run the tests.
Line 58 uses the result() method of the WebTest object to print the test summary on the console.
Run the Python script ex04_register_check.py as follows:

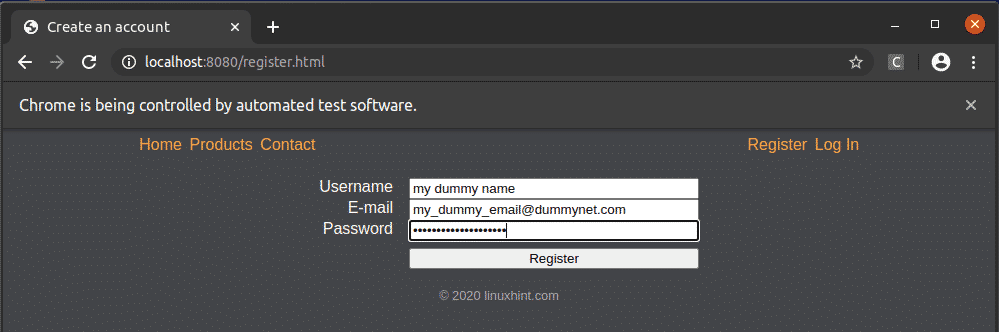
A browser instance should open and load the registration page of the website. Then, it should automatically fill-up the form and click on the Register button.
On successful form submission, the following message should be displayed.
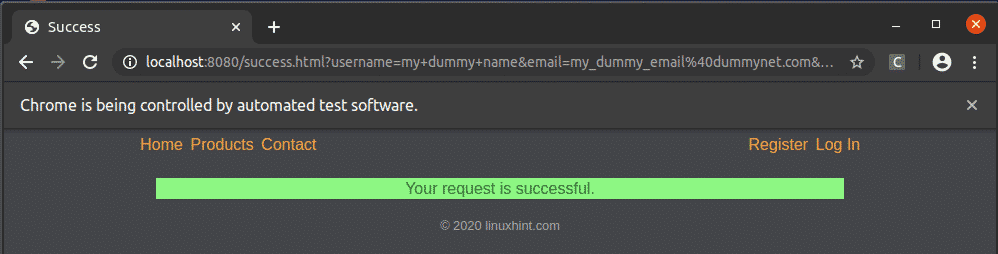
Once the test script is complete, the test summary should be printed on the console. As you can see, the registration form test is successful.
Checking Login Form:
In this section, I am going to show you how to test the login form of our demo website. The process is the same as submitting the registration form, which you have seen in the earlier section of this article.
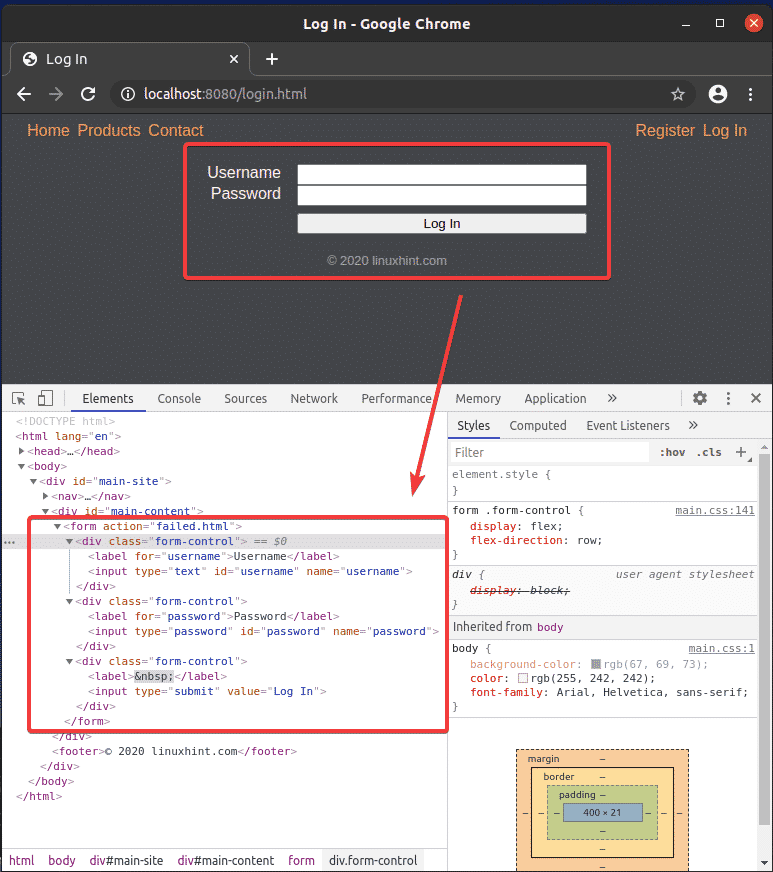
The HTML structure of the login form is shown in the screenshot below.
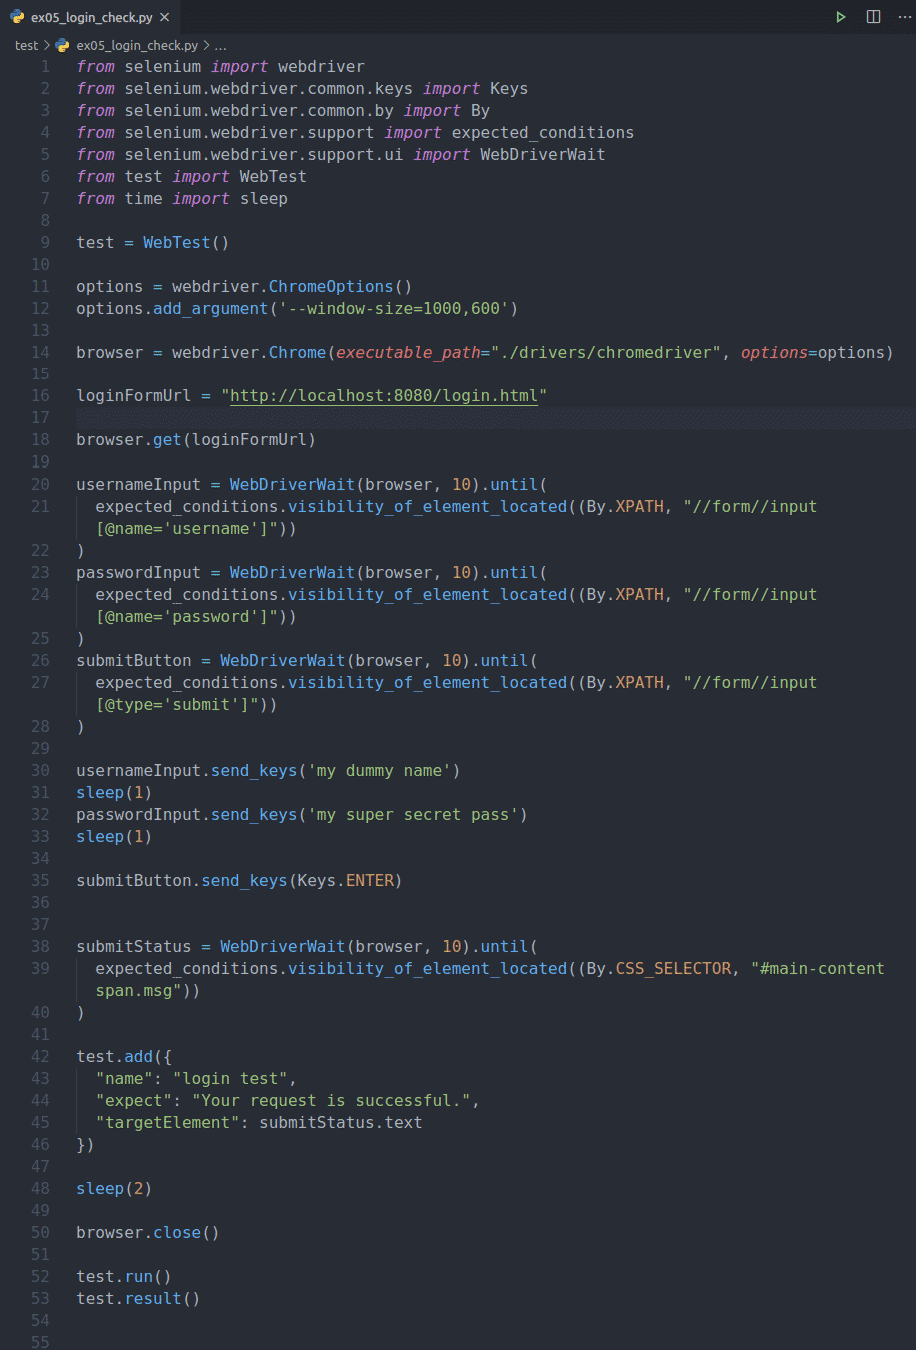
Create a new Python script ex05_login_check.py and type in the following lines of codes in it.
from selenium.webdriver.common.keys import Keys
from selenium.webdriver.common.by import By
from selenium.webdriver.support import expected_conditions
from selenium.webdriver.support.ui import WebDriverWait
from test import WebTest
from time import sleep
test = WebTest()
options = webdriver.ChromeOptions()
options.add_argument('--window-size=1000,600')
browser = webdriver.Chrome(executable_path="./drivers/chromedriver", options=options)
loginFormUrl = "http://localhost:8080/login.html"
browser.get(loginFormUrl)
usernameInput = WebDriverWait(browser, 10).until(
expected_conditions.visibility_of_element_located((By.XPATH, "//form//input[@name='username']"))
)
passwordInput = WebDriverWait(browser, 10).until(
expected_conditions.visibility_of_element_located((By.XPATH, "//form//input[@name='password']"))
)
submitButton = WebDriverWait(browser, 10).until(
expected_conditions.visibility_of_element_located((By.XPATH, "//form//input[@type='submit']"))
)
usernameInput.send_keys('my dummy name')
sleep(1)
passwordInput.send_keys('my super secret pass')
sleep(1)
submitButton.send_keys(Keys.ENTER)
submitStatus = WebDriverWait(browser, 10).until(
expected_conditions.visibility_of_element_located((By.CSS_SELECTOR, "#main-content span.msg"))
)
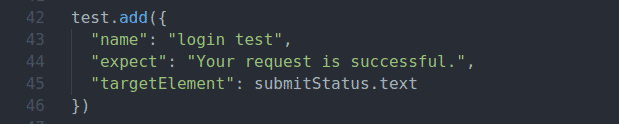
test.add({
"name": "login test",
"expect": "Your request is successful.",
"targetElement": submitStatus.text
})
sleep(2)
browser.close()
test.run()
test.result()
Once you’re done, save the ex05_login_check.py Python script.
Line 1-7 imports all the required Python libraries.

Line 9 imports our homegrown WebTest Selenium web testing library.
![]()
Line 11 creates and a ChromeOptions() object.
Line 12 sets the window size of the browser.

Line 14 creates a Chrome browser object using the chromedriver binary from the test/drivers/ directory of the project.
![]()
Line 16 defines the login page URL of the website, and line 18 loads the login page on the browser.

Line 20-22 finds the username form the input element from the web page and stores a reference to the form input element to the variable usernameInput.

Line 23-25 finds the password form input element from the web page and stores the elements reference to the variable passwordInput.

Line 26-28 finds the submit button of the form from the web page and stores a reference to it in the variable submitButton.

Line 30 sends a dummy login username to the username form the input element.
Line 31 delays the execution of the next instruction for 1 second using the sleep() function.

Line 32 sends a dummy login password to the password form input element.
Line 33 delays the execution of the next instruction for 1 second using the sleep() function.

Line 35 presses the <Enter> key on the submit button of the login form. This action submits the login form.
![]()
Once the login form is submitted, line 38-40 checks for the form submission status message.

Line 42-46 adds a test case to the WebTest object.
If the form submission is successful, the status message should be Your request is successful.
Line 48 delays the execution for 2 seconds.
Line 50 closes the browser.
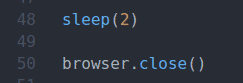
Line 52 uses the run() method of the WebTest object to run the tests.
Line 53 uses the result() method of the WebTest object to print the test summary on the console.

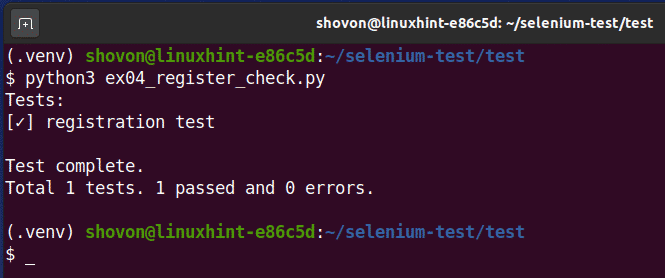
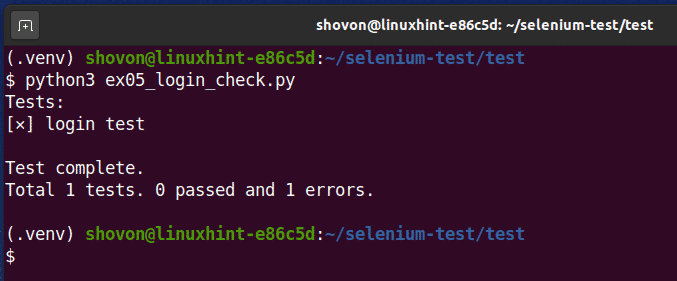
Run the Python script ex05_login_check.py as follows:

A browser instance should open and load the login page of the website. Then, it should automatically fill-up the form and click on the Log In button.
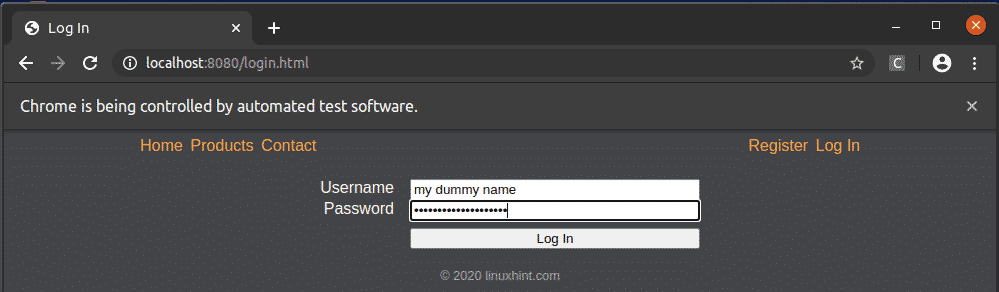
The form submission failed, as you can see in the screenshot below.

Once the test script is complete, the test summary should be printed on the console. As you can see, the login form submission test failed as expected.
Conclusion:
In this article, I have shown you how to write a simple Python web testing library for Selenium web testing. I have also shown you how to test websites using the Selenium Python library. Now, you should be able to do basic web testing using Selenium Python library.