The way we usually format SSD partitions does not remove the data from the drive. You can still recover files from it. So, your data is not safe, mainly when you sell your old SSD, as you don’t know who will buy it and what his intentions are. Your private photos, videos, and other important files can be recovered from your sold SSD, and you don’t really want that.
So, before you sell your SSD or give it away to someone, it’s best to erase all the data from your SSD securely.
In this article, I will show you how to erase all the data from your SSD securely. So, let’s get started.
Table of Contents:
- Installing GNOME Disks
- Installing hdparm
- Installing nvme-cli
- Securely Erase SSDs with GNOME Disks
- Securely Erase SSDs with the dd Command
- Securely Erase SATA SSDs using SSD Hardware Feature
- Securely Erase NVME SSDs with SSD Hardware Feature
- Sanitizing NVME SSDs with SSD Hardware Feature
- Conclusion
- References
Installing GNOME Disks:
NOTE: You can skip this section if you don’t want to erase your SSD using the GNOME Disks app securely.
You can securely erase your SSD with the GNOME Disks app. GNOME Disks should be installed by default on every Linux distribution featuring the GNOME 3 Desktop Environment. GNOME Disks also works on other desktop environments as well. All you have to do is install GNOME Disks from the package repository of your desired Linux distribution.
On Ubuntu/Debian, you can install GNOME Disks with the following commands:
$ sudo apt install gnome-disk-utility -y
On CentOS/RHEL/Fedora, you can install GNOME Disks with the following command:
On Arch Linux, you can install GNOME Disks with the following commands:
$ sudo pacman -S gnome-disk-utility
Installing hdparm:
NOTE: You can skip this section if you don’t want to erase your SATA SSD using the SSD hardware features securely.
To securely erase SATA SSDs using its Secure Erase hardware features, you must have the hdparm utility installed on your computer.
On Ubuntu/Debian, you can install the hdparm utility with the following commands:
$ sudo apt install hdparm -y
On CentOS/RHEL/Fedora, you can install the hdparm utility with the following command:
On Arch Linux, you can install the hdparm utility with the following commands:
$ sudo pacman -S hdparm
Installing nvme-cli:
NOTE: You can skip this section if you don’t want to securely erase or sanitize your NVME SSD using the SSD hardware features.
To securely erase or sanitize NVME SSDs using its hardware features, you must have the nvme-cli package installed on your computer.
On Ubuntu/Debian, you can install the hdparm utility with the following commands:
$ sudo apt install nvme-cli -y
On CentOS/RHEL/Fedora, you can install the hdparm utility with the following command:
On Arch Linux, you can install the hdparm utility with the following commands:
$ sudo pacman -S nvme-cli
Securely Erase SSDs with GNOME Disks:
This section will show you how to use the GNOME Disks app to erase SSD data securely. If you don’t have the GNOME Disks app installed, check the Installing GNOME Disks section of this article.
First, open the GNOME Disks app from the Application Menu of your computer.
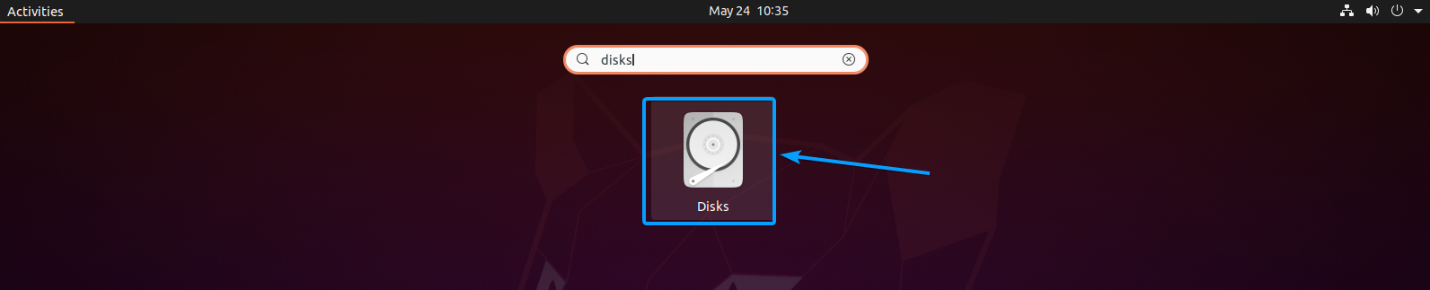
The GNOME Disks app should be opened.
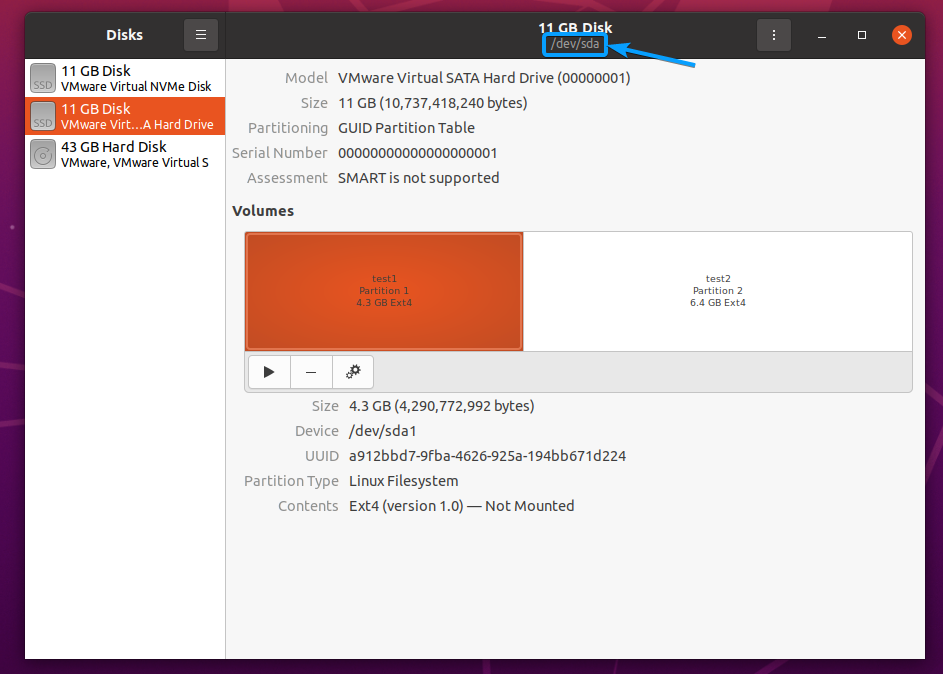
From the GNOME Disks app, select the SSD that you want to format, as marked in the screenshot below.

Once you’ve selected an SSD, you should find its device name from the GNOME Disks app marked in the screenshot below.
In my case, the device name of my SSD is /dev/sda. It may be different for you. So, make sure to replace it with yours from now on.
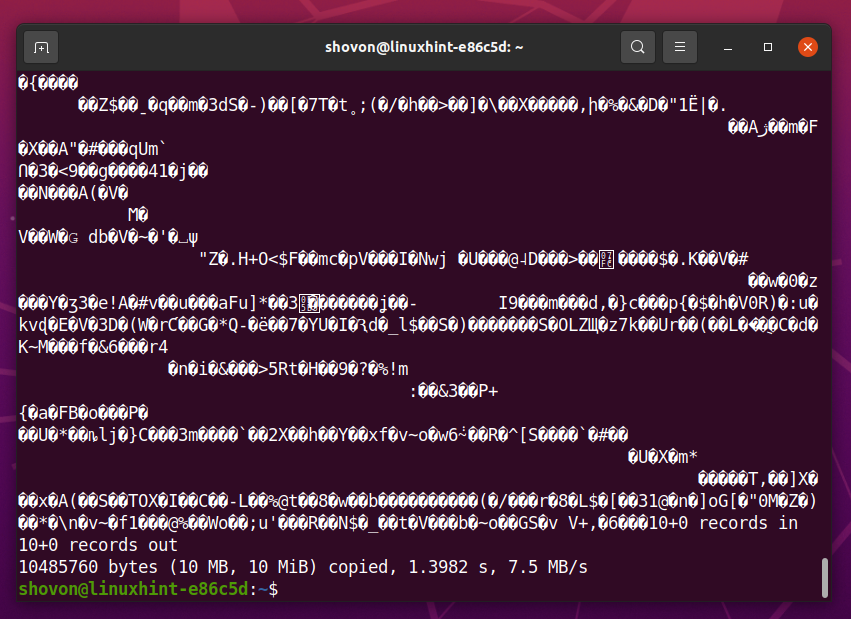
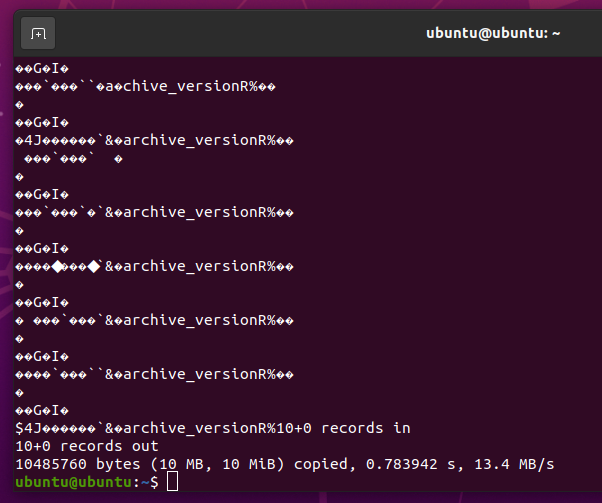
Before you format the SSD sda, you can read the first 10 MB of your SSD with the following command:

You should see a lot of random characters, as shown in the screenshot below. This means that the SSD has a lot of data in it.
Once you securely erase the SSD, you should not see any of these random characters no matter how much data you read from the SSD.
To securely erase the SSD you’ve selected with the GNOME Disks app, click on > Format Disk… as marked in the screenshot below.

The Format Disk window should be displayed.
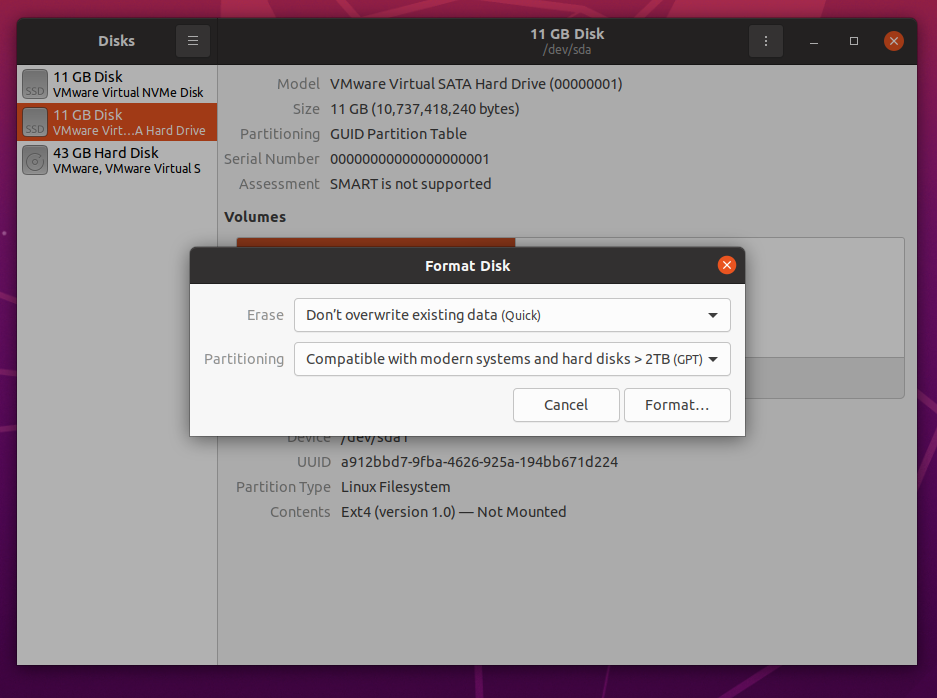
Select Overwrite existing data with zeroes (slow) from the Erase dropdown menu as marked in the screenshot below
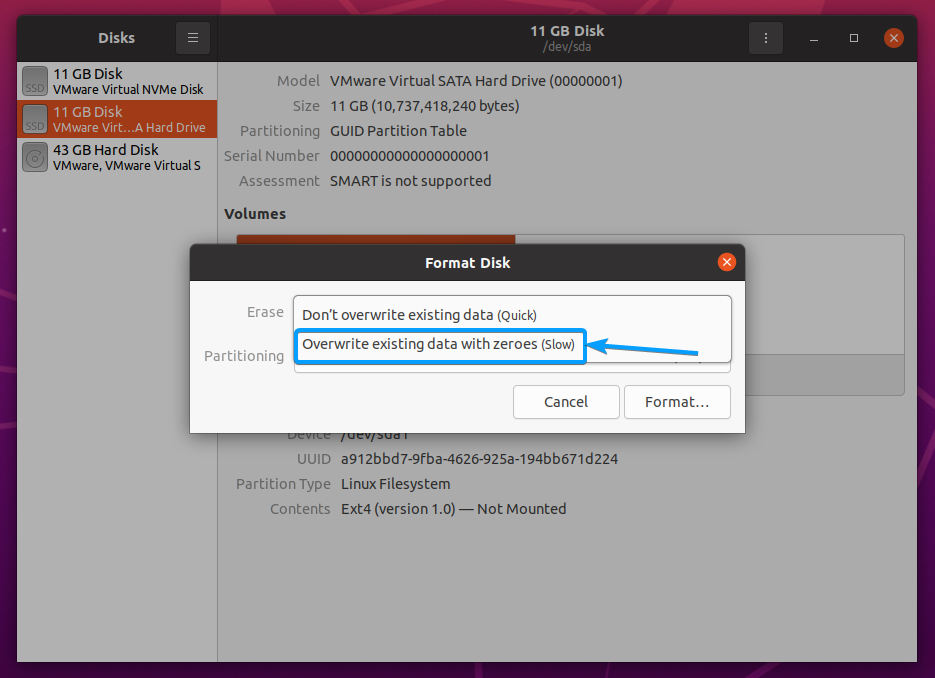
Click on Format… as marked in the screenshot below.

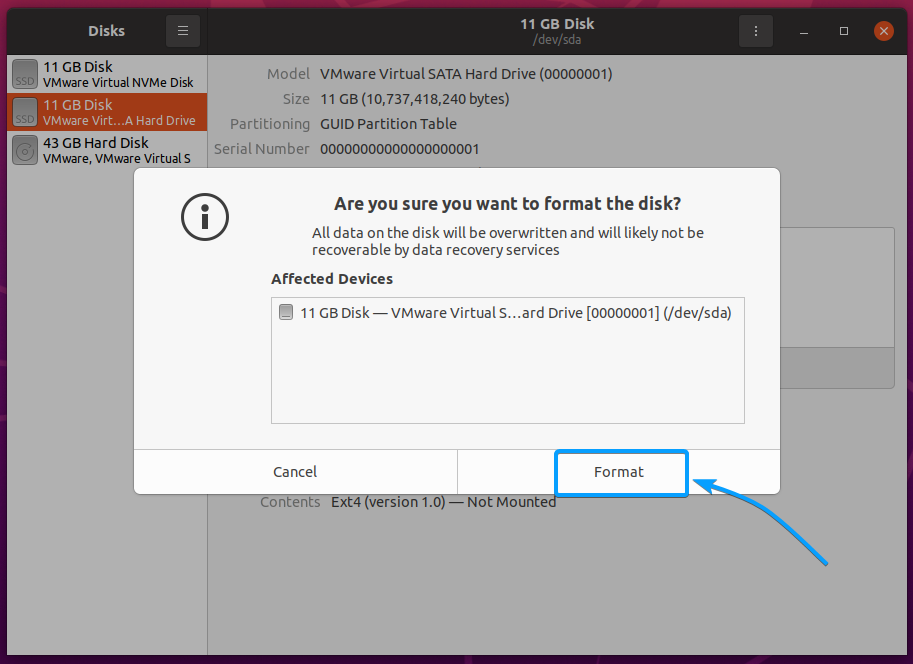
Click on Format.
Type in your login password and click on Authenticate.
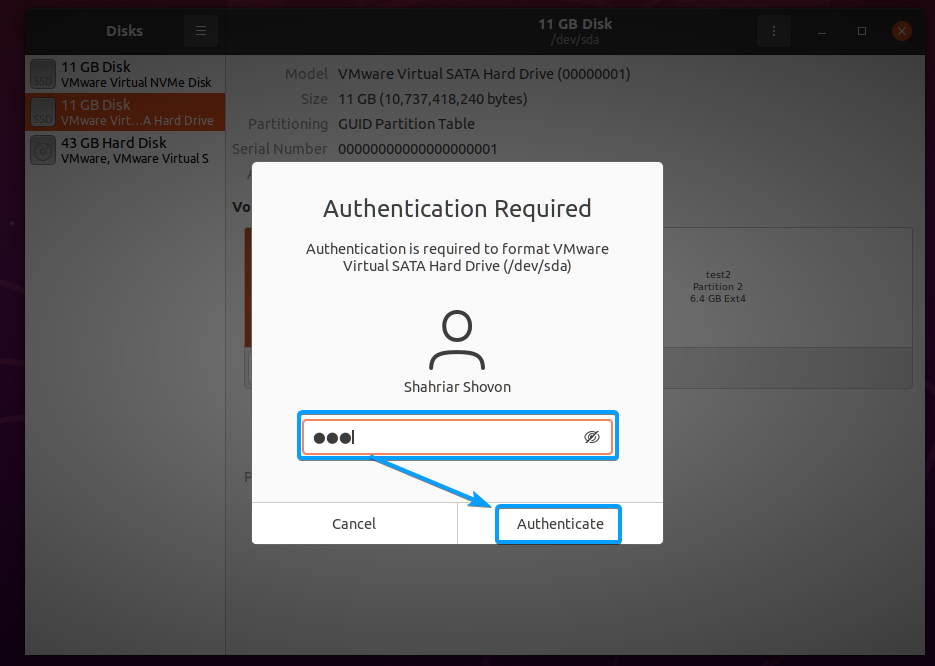
The GNOME Disks app should start filling your SSD with zeroes, as shown in the screenshot below. It may take a while to complete depending on the speed and size of your SSD.
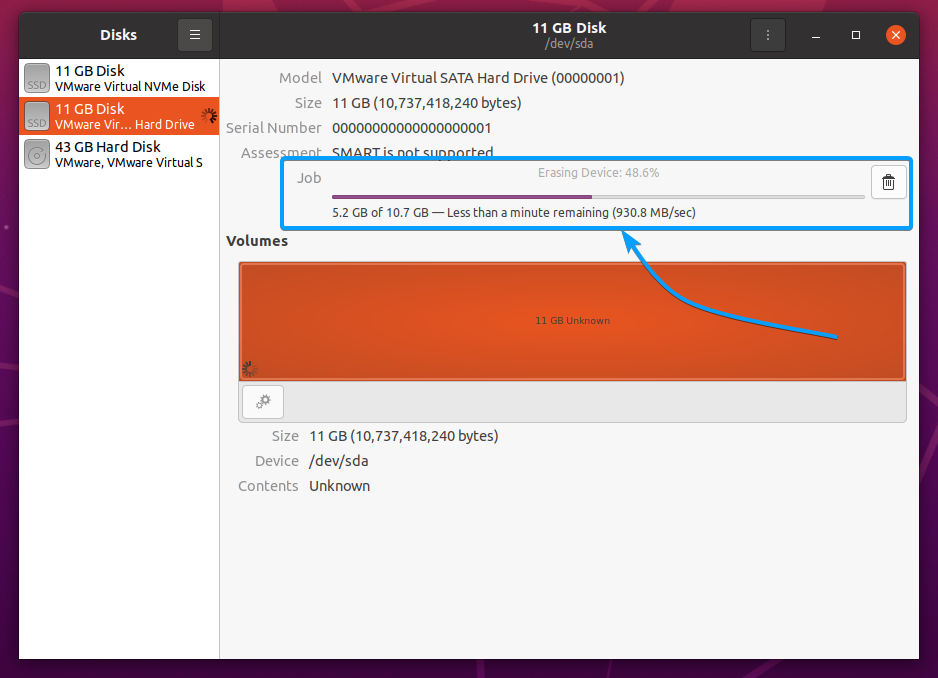
At this point, all the data of your SSD should be securely erased.

You can confirm whether all the data is removed from the SSD /dev/sda as before. Just read the first 10 MB of data from the SSD with the following command:

As you can see, there is no data in the first 10 MB of my SSD. No matter how much data you read from it, you should see the same output.
So, the SSD is securely erased. You can now sell the SSD or give it away.

Securely Erase SSDs with the dd Command:
You can securely erase all the data of your SSD with the dd command-line program.
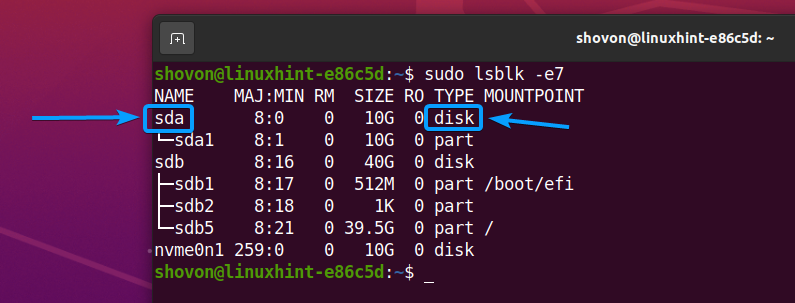
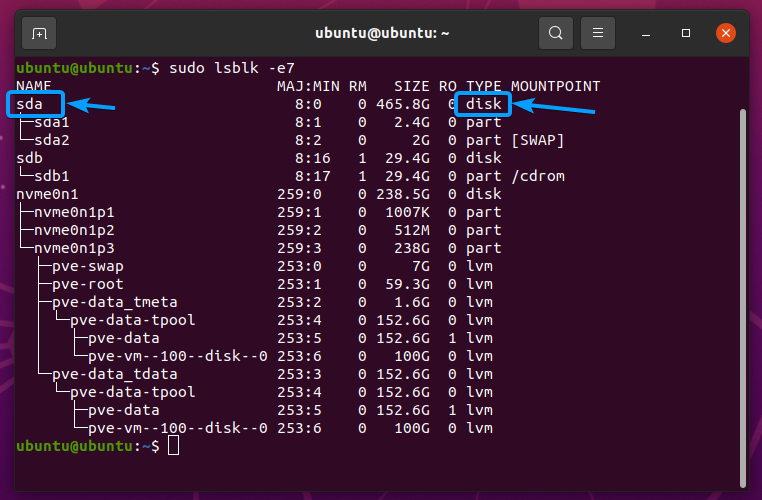
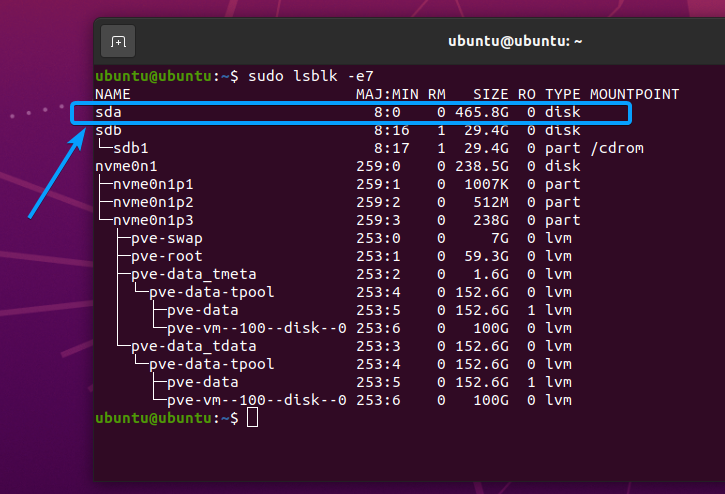
First, run the following command to find the device name of your SSD.

All the storage devices installed on your computer should be listed.
In my case, the device name of the SSD is sda. It may be different for you. So, make sure to replace it with yours from now on.
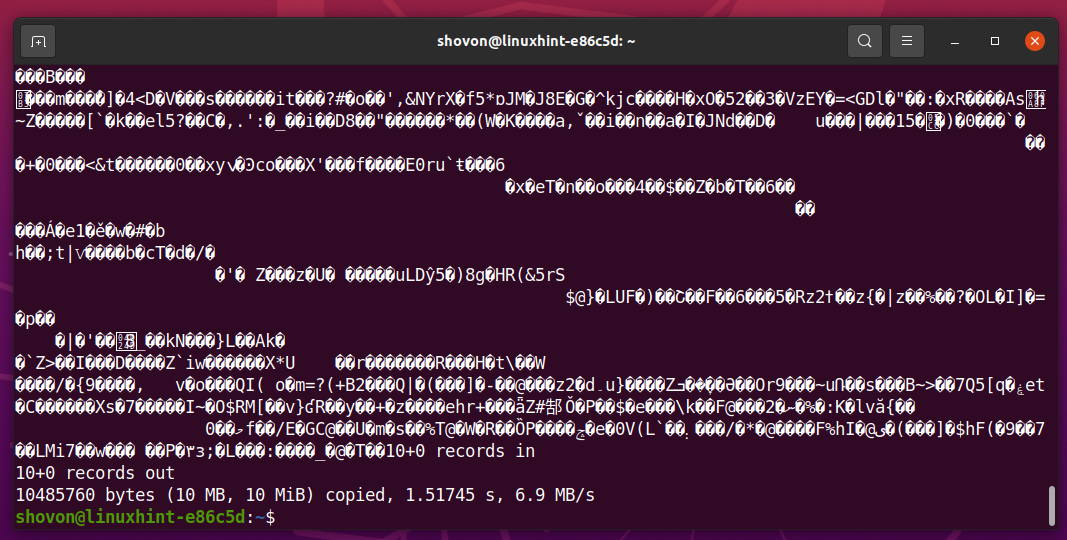
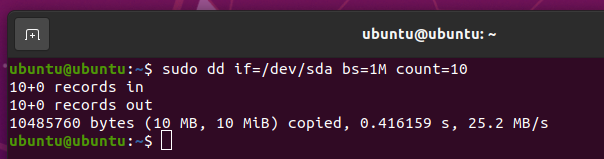
Before you format the SSD sda, you can read the first 10 MB of the SSD with the following command:

You should see a lot of random characters, as shown in the screenshot below. This means that the SSD has a lot of data in it.
Once you securely erase the SSD, you should not see any of these random characters no matter how much data you read from the SSD.
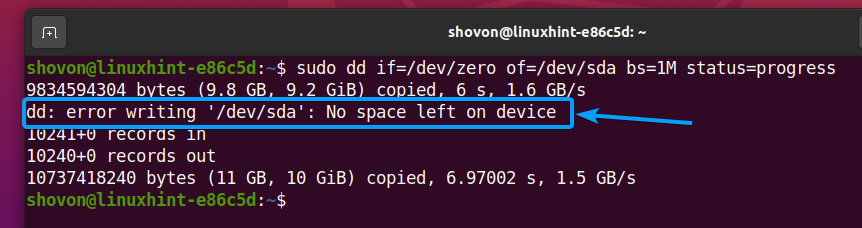
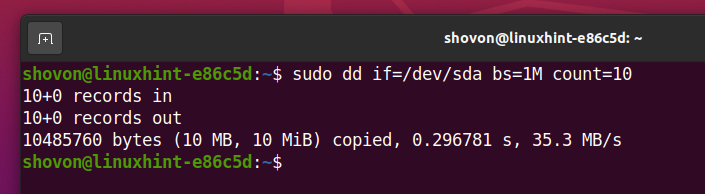
To zero-fill all the data cells of your SSD sda, run the following command:

It may take a while to zero-fill all the data cells of your SSD. It depends on the speed and size of your SSD.

Once all the data cells of your SSD are zero-filled, the dd command should stop running with the following error message.
Now, read the first 10 MB of data from your SSD sda, and you should not see any data in there. This means that the SSD is securely erased.
Securely Erase SATA SSDs using SSD Hardware Feature:
You can securely erase your SATA SSD to its factory default using the SSDs secure erase hardware features. To do that, you must have the hdparm utility installed on your computer. If you don’t have the hdparm utility installed on your computer, check the Installing Installing hdparm Securely section of this article.
First, run the following command to find the device name of your SSD.

All the storage devices installed on your computer should be listed.
In my case, the device name of the SSD is sda. It may be different for you. So, make sure to replace it with yours from now on.
To securely erase your SSD using the secure erase hardware features of the SSD, your SSD must not be in a frozen state.
To check the frozen status of your SATA SSD sda, run the following command:

As you can see, the SSD sda is in a frozen state.

To change the frozen state of your SATA SSD to not frozen, you can do one of the following things:
- Suspend your computer and wake it up.
- Restart your computer.
- Plug out the SATA cable from your SSD and plug it back in.
NOTE: Plugging out the SATA cable from your SSD when your computer is running may hang your computer. You can enable Hot Plugging for the SATA port where the SSD is attached from your computer’s BIOS to solve this issue.
Now, check the frozen state of your SSD sda with the following command:

The SSD should not be frozen, as shown in the screenshot below.

Now, you have to set a user password for the SSD and enable security for the SSD.
To enable security for the SSD sda, set the user password secret for the SSD as follows:

The security of the SSD should be enabled, and the user password should be set to secret.
NOTE: Do not restart your computer after this step. You won’t be able to access your SSD unless it’s unlocked.

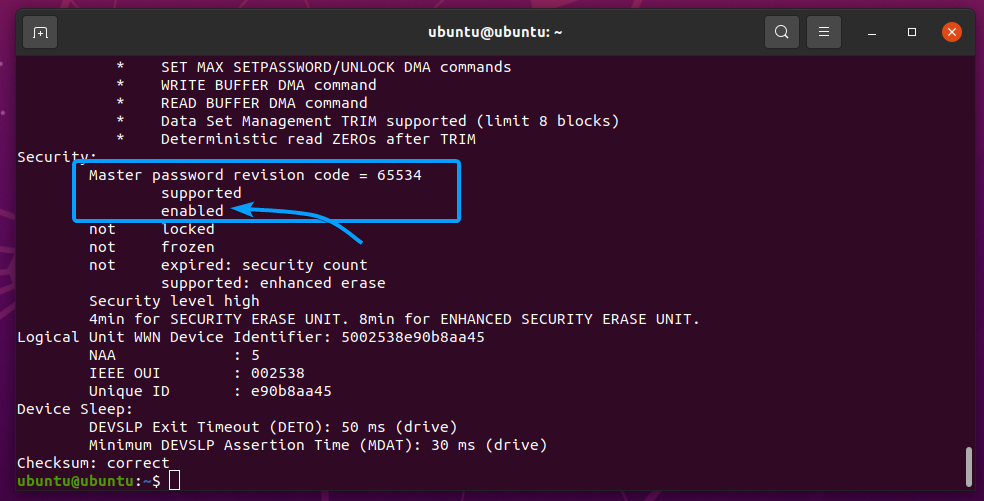
Now, check whether the user password is set with the following command:
As you can see, the user password is set.
Before you securely format the SSD sda, you can read the first 10 MB of your SSD with the following command:

You should see a lot of random characters, as shown in the screenshot below. This means that the SSD has a lot of data in it.
Once you securely erase the SSD, you should not see any of these random characters no matter how much data you read from the SSD.
There are 2 types of secure erase operations for SATA SSDs: Security Erase and Enhanced Security Erase.
Enhanced Security Erase does a more aggressive erase and takes more time to complete than Security Erase.
You can see how much time a Security Erase and Enhanced Security Erase will complete on the SSD sda with the hdparm utility. As you can see in the screenshot below, my Samsung 860 EVO 500GB SSD will take 4 minutes for Security Erase and 8 minutes for Enhanced Security Erase.
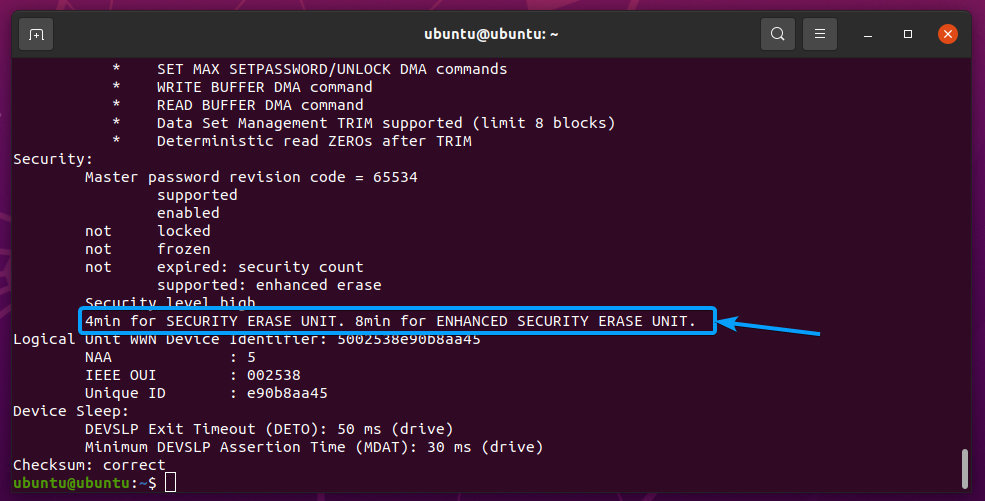
NOTE: Before you start a Security Erase or Enhanced Security Erase operation on your SSD, make sure it is not mounted. Also, once you run the Security Erase or Enhanced Security Erase command, you can’t turn back and stop it.
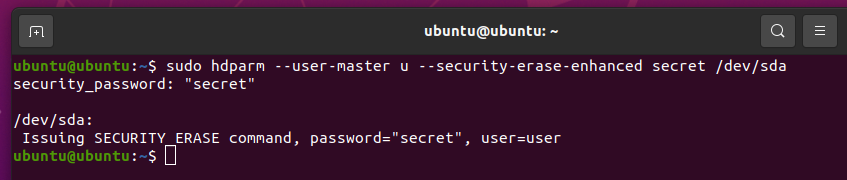
To do a Security Erase on the SSD sda, run the following command:

To do an Enhanced Security Erase on the SSD sda, run the following command:

The security erase command should be executed. It may take a while to complete.
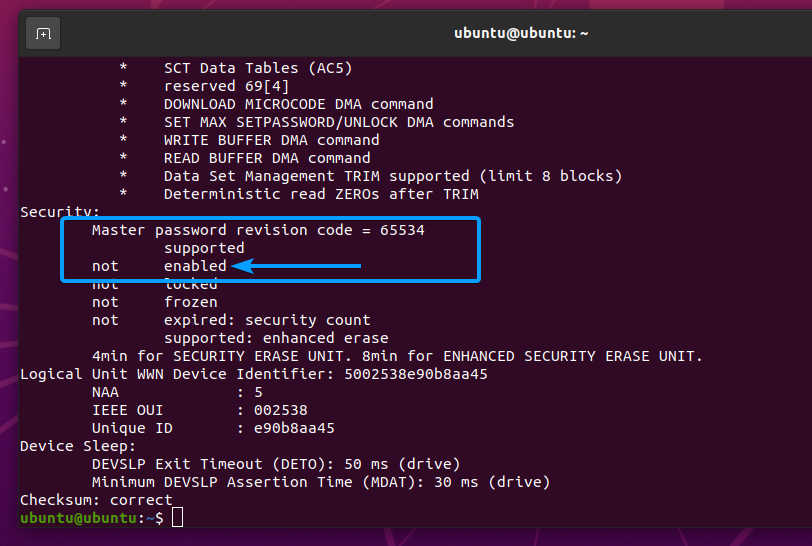
Once the SSD sda is securely erased, the user password should be reset, and security should be disabled, as you can see in the screenshot below.
Now, reboot your computer for the changes to take effect as follows:
As you can see, all the partitions of the SSD sda are removed.
Now, read the first 10 MB of data from your SSD sda, and you should not see any data in there. This means that the SSD is securely erased.
Securely Erase NVME SSDs with SSD Hardware Feature:
You can securely erase NVME SSDs with the Secure Erase hardware features of your NVME SSD. To do that, you need to have the nvme-cli package installed on your computer. If you don’t have the nvme-cli package installed on your computer, check the Installing nvme-cli section of this article.
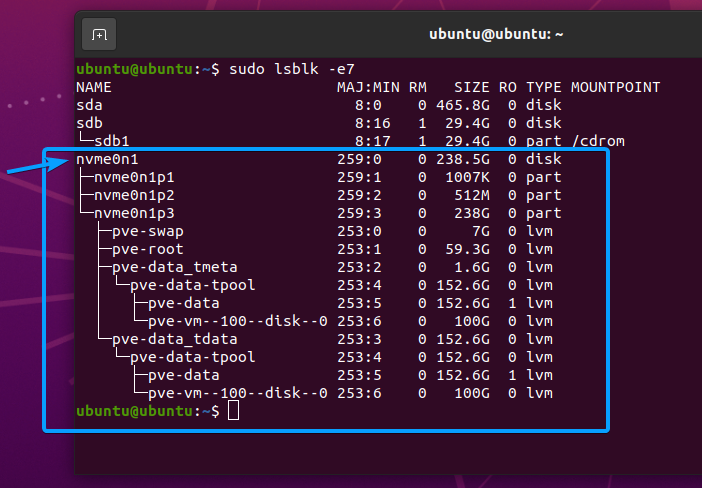
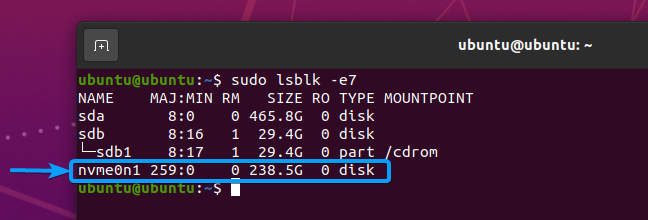
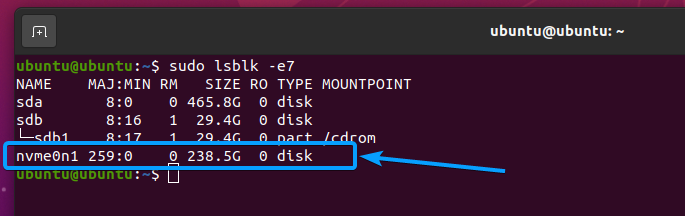
Once you have the nvme-cli package installed, you can list all the NVME SSDs installed on your computer with the following command:

The NVME SSDs installed on your computer should be listed.
In my case, the device path of my NVME SSD is /dev/nvme0n1. It may be different for you. So, make sure to replace it with yours from now on.

I have many partitions in my NVME SSD /dev/nvme0n1, as you can see in the screenshot below. Once the SSD is securely erased, the partitions will be removed as well.
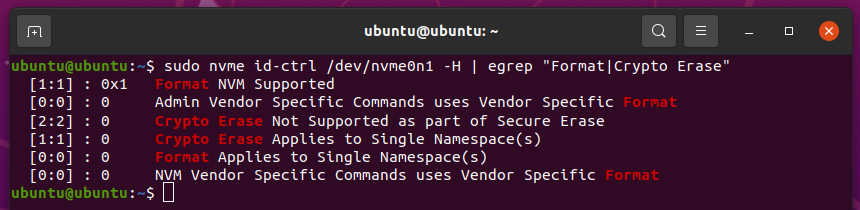
Different NVME SSDs implement different sets of features. To find out whether your NVME SSD /dev/nvme0n1 supports the required secure erase features, run the following command:

You should see the following output if your NVME SSD supports the required secure erase features.
The NVME SSD I am using supports the Format and Crypto Erase features.
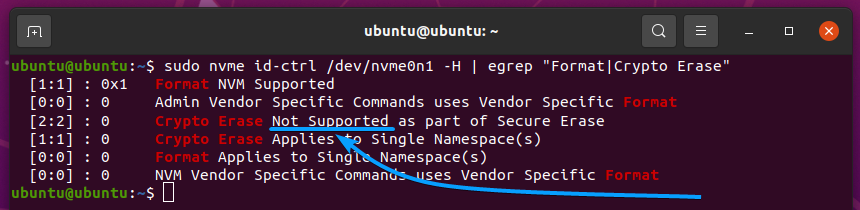
Your NVME SSD’s features do not support the Not Supported status, as you can see in the screenshot below.
There are 2 types of secure erase operations for NVME SSDs: User Data Erase and Cryptographic Erase.
User Data Erase: The SSD controller will erase all the user data. It may fill them with zeroes or ones.
Cryptographic Erase: The SSD controller will erase all the user data cryptographically.
NOTE: Once you start an erase operation, you won’t be able to stop it.
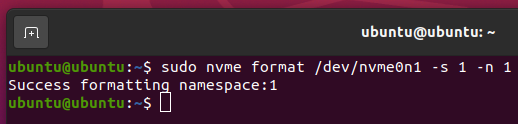
To perform a User Data Erase operation on your NVME SSD /dev/nvme0n1, run the following command:

To perform a Crytographic Erase operation on your NVME SSD /dev/nvme0n1, run the following command:

The NVME SSD /dev/nvme0n1 should be securely erased.
For the changes to take effect, restart your computer with the following command:

The data and partitions of your NVME SSD should be removed.
Sanitizing NVME SSDs with SSD Hardware Feature
You can securely erase NVME SSDs with the Sanitize hardware features of your NVME SSD. The Sanitize feature of the NVME SSD removes all the user data, caches, non-volatile media, and controller memory buffers. So, nothing can ever be recovered in any way.
To sanitize NVME SSDs, you need to have the nvme-cli package installed on your computer. If you don’t have the nvme-cli package installed on your computer, check the Installing nvme-cli section of this article.
Once you have the nvme-cli package installed, you can list all the NVME SSDs installed on your computer with the following command:
The NVME SSDs installed on your computer should be listed.
In my case, the device path of my NVME SSD is /dev/nvme0n1. It may be different for you. So, make sure to replace it with yours from now on.

I have some partitions in my NVME SSD /dev/nvme0n1, as you can see in the screenshot below. Once the SSD is securely erased, the partitions will be removed as well.

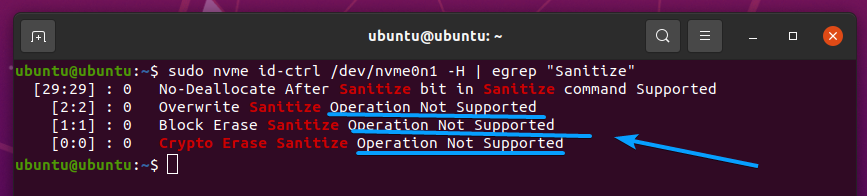
To find out whether your NVME SSD /dev/nvme0n1 supports the required Sanitize features, run the following command:

The Sanitize support status of your NVME SSD should be printed.
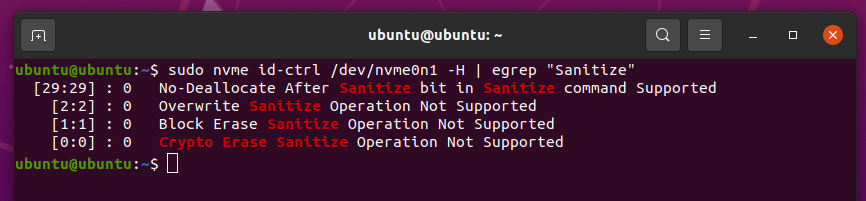
My NVME SSD does not support the Sanitize feature, as you can see in the screenshot below.
There are 4 types of sanitize operations for NVME SSDs:
- Exit Failure Mode
- Block Erase: Starts a block erase sanitize operation.
- Overwrite: Starts an overwrite sanitize operation. It is not recommended for NVME SSDs as it will wear out the NAND cells of the SSD.
- Crypto Erase: Starts crypto-erase sanitize operation.
NOTE: Once you start the sanitize operation, you won’t be able to stop it. You won’t be able to use the SSD until the sanitize operation finishes. The sanitize operation will even survive reboots.
To start a sanitize operation on your NVME SSD /dev/nvme0n1 in Exit Failure Mode, run the following command:

To start a Block Erase sanitize operation on your NVME SSD /dev/nvme0n1, run the following command:

To start an Overwrite sanitize operation on your NVME SSD /dev/nvme0n1, run the following command:

To start a Crypto Erase sanitize operation on your NVME SSD /dev/nvme0n1, run the following command:

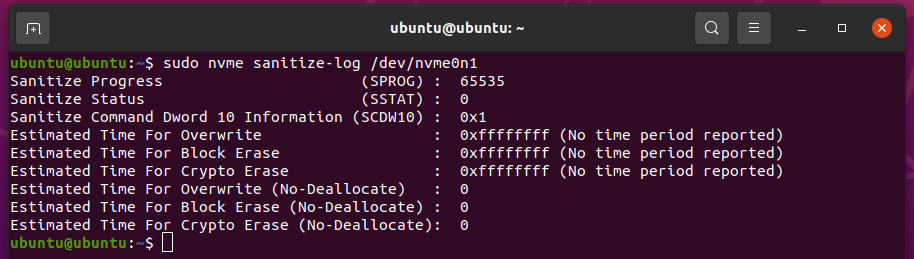
To check the sanitization progress of your NVME SSD /dev/nvme0n1, run the following command:

The running sanitization type, sanitization progress, sanitization status, and the estimated time to finish each of the sanitize operations should be listed.
Once the sanitize operation is completed, the data and partitions of your NVME SSD should be removed.
Conclusion:
This article shows you how to install GNOME disks, hdparm, and nvme-cli on your computer. I have also shown you how to securely erase SSDs with the GNOME Disks app and the dd command. I have shown you how to securely erase SATA SSDs and NVME SSDs using the SSD’s secure erase hardware feature. Finally, I have shown you how to erase NVME SSDs with the sanitize command securely.
References:
[1] Solid state drive/Memory cell clearing – ArchWiki
[2] NVMe® Technology Solves Many Common Sanitize Operation Issues – NVM Express