By default, the SCP command uses the port 22 (SSH). In case the remote system has configured the SSH service to run on a different port, you still can use SCP followed by the -P flag to specify the port you need.
Note: For instructions to change the default ssh port on the remote system read this section.
Downloading Files Using SCP on a Different Port
To specify a different port than 22 when using the SCP command, you need to implement the -P flag as shown in the example below, in which the default port was changed to port 3940.
The syntax is pretty simple as shown below.
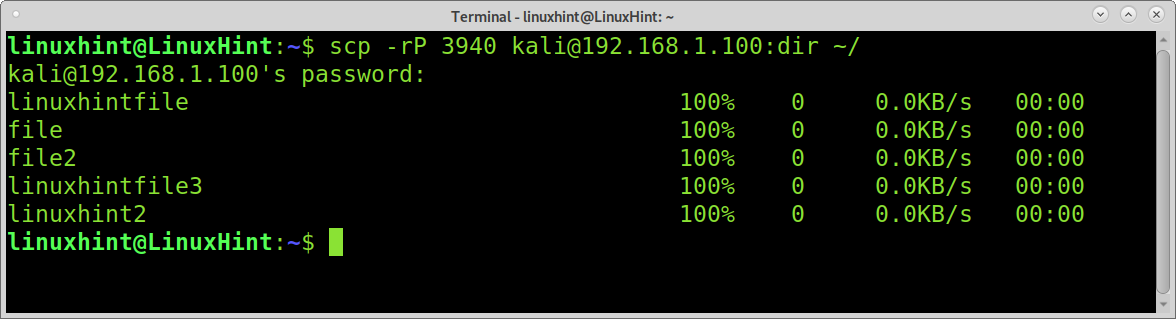
In the example below, I show how to download the file named linuxint.file from the remote host through port 3940. The file is stored in the home directory of the remote user named kali which I use to authenticate, that’s the default remote location when no other is defined.
At the end of the command, I specify the local directory in which the file will be saved (Downloads).

As you can see, the file transfer was done successfully. The reason explaining 0.0KB/S is that all files for this tutorial are empty.
Downloading Directories Using SCP on a Different Port
Downloading directories requires a very similar syntax except for the -r flag which must be added additionally to the -P flag as shown in the example below. The screenshot below shows how to cpu the remote directory named dir to the local home directory, all through port 3049.
As you can see, the directory was downloaded recursively to the local home.
Uploading Files Using SCP with Different Port
Uploading files with SCP on a different port also requires the -P flag. Remember the SCP command is similar to the cp command. Therefore, when uploading files, the file destination directory must also be placed at the end of the command.
In the example, below I upload the linuxhint.file through port 3940 to the remote subdirectory named linuxhintdir, located in the remote home directory.

Uploading Directories Using SCP with Different Port
The example below shows how to upload a directory instead of a regular file. For this purpose, just like when uploading files, you only need to add the -r flag.
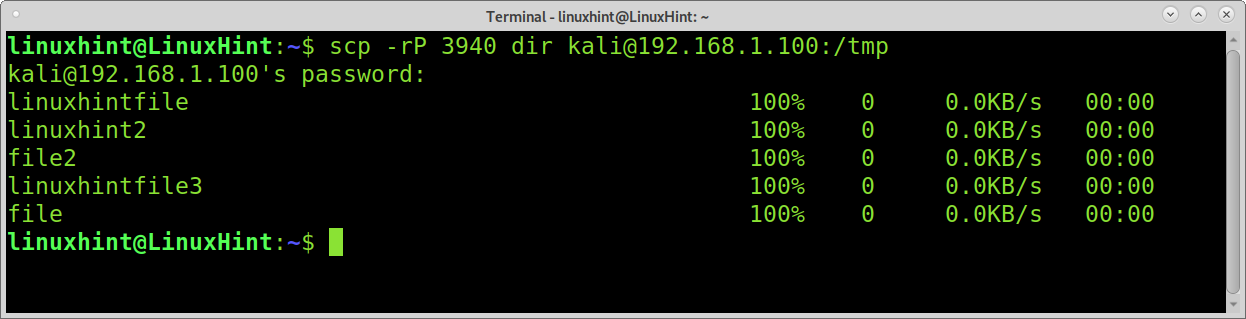
The following example shows how to upload the directory named dir to the /tmp remote directory through port 3940.
That’s all you need to know to transfer files using SCP from or to a remote device using a different SSH port.
Change the Remote Default SSH Port from 22 to Other
To use SCP through a different port, the other side must have the port you want to use configured.
To change the default SSH port, you need to edit the SSH configuration file. On most Linux distributions, you can edit that file by running the command below.
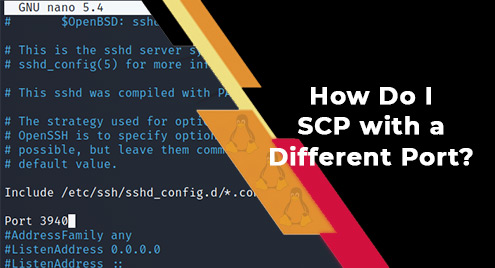
Once opened, find the line containing “Port 22” shown in the image below.
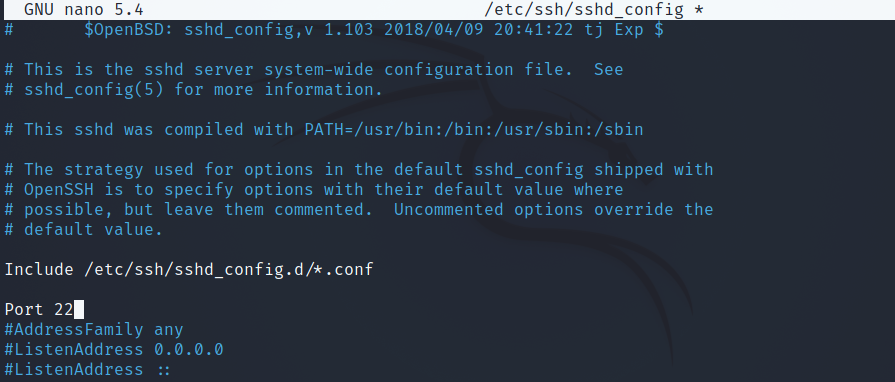
Change the number 22 for the port you want to use with SCP. In the screenshot below, you can see I changed the default port to port 3940.
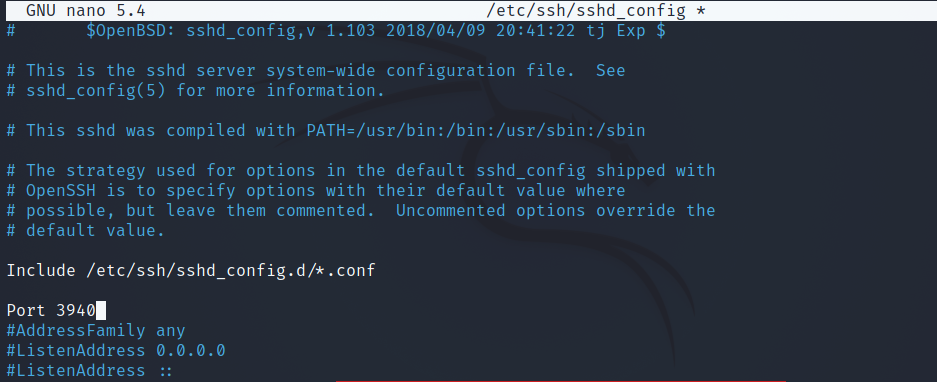
Once edited, press CTRL+X and Y to exit saving changes.
Then, restart the SSH service by running the command below.
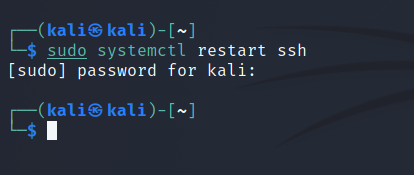
Now, you’ll be able to fetch or upload files using SCP on the port you defined.
Conclusion
As you can see, using the SCP command through different ports than 22 is pretty easy to implement. Yet, it is important to remind readers the SCP command is obsolete and replaced by safer alternatives like rsync or sftp. Users must be aware that although the SCP command is based on the SSH protocol, the -P flag must be typed in upper case, contrary to the SSH port specification which is done using a lowercase -p.
Thank you for reading Linux Hint. I hope this tutorial was useful. Keep following us for more Linux tips and tutorials.