Contents
- Print to the console
- Read from the console
- Variable types
- Arithmetic operators (+, -, *, /, %)
- OR and AND Logical Operators
- EQUAL AND NOT EQUAL Comparison Operators
- Bit-wise Operators
- if-else statement
- Ternary Operators
- Switch-case statement
- Increment and decrement operators
- For loop
- While loop
- Functions without argument
- Function with arguments and default arguments
- Passing value by reference to the function
- Arrays
- Structure
- Enumeration
- Pointer
- Use of char*
- String Class
- Date and time
- Vector
- List
- Set
- Map
- Template
- Regex
- Constant
- Writing to a file
- Reading from a file
- Recursion
- Generate Random number
- Class and object
- Constructor
- Destructor
- Inheritance
- Polymorphism
- Exception
Print to the console
Three different ways to print output in the console have been shown in this part of this tutorial. The first way is to print output without using namespace. The second way is to print output using namespace. The third way is to print output using the printf() function. Three examples are given below to know the ways to print the output to the console.
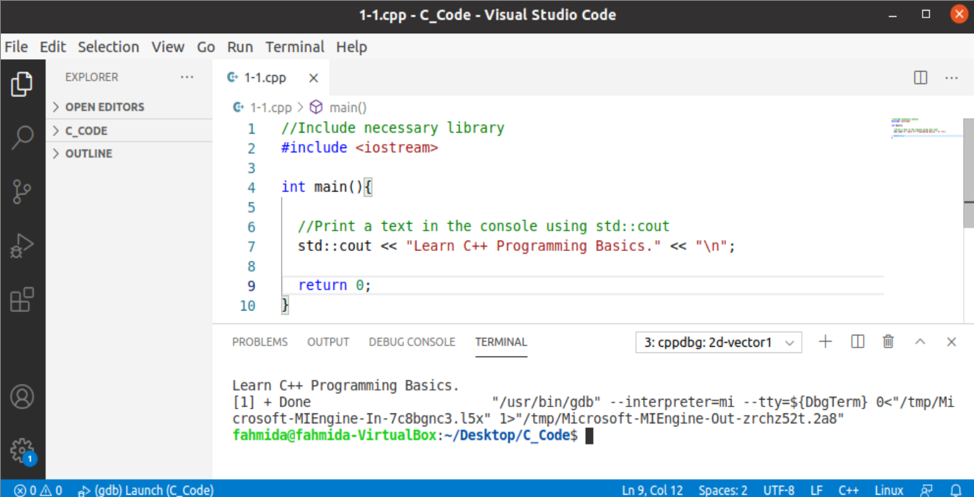
Print to the console using std::cout:
#include
int main(){
//Print a text in the console using std::cout
std::cout << "Learn C++ Programming Basics." << "\n";
return 0;
}
The following output will appear after executing the above code.
Print to the console using cout:
#include
//Using namespace
using namespace std;
int main(){
//Print a text in the console without the prefix std
cout << "cout << "Welcome to LinuxHint." << "\n";
return 0;
}
The following output will appear after executing the above code.

Print to the console using print():
#include
int main(){
//Print a text in the console using printf
printf("Learn C++ Programming Basics.\n");
return 0;
}
The following output will appear after executing the above code.

Read from the console
The way to read input from the user has shown in the following example. The cin has been used here to take input from the console. The input value will be printed later by using std::cout.
#include
int main(){
//Declare a string variable
std::string answer;
//Print a meesaage to take input
std::cout << "Do you like C++?" <> answer;
//Print the input value
std::cout << "You have typed " << answer << "\n";
return 0;
}
The following output will appear after executing the above code.

Variable types
The data type of the variable is required to mention at the time of variable declaration in C++. Six different data types of C++ variables are mentioned below.
- int – It is used to store integer or whole numbers into the variable.
- float – It is used to store small floating or fractional numbers into the variable.
- double – It is used to store long floating or fractional numbers into the variable.
- char – It is used to store a single character that is enclosed by single quotes(‘).
- string – It is used to store text or string that is enclosed by double quotes(“).
- bool – It is used to store the Boolean value that can be True or False.
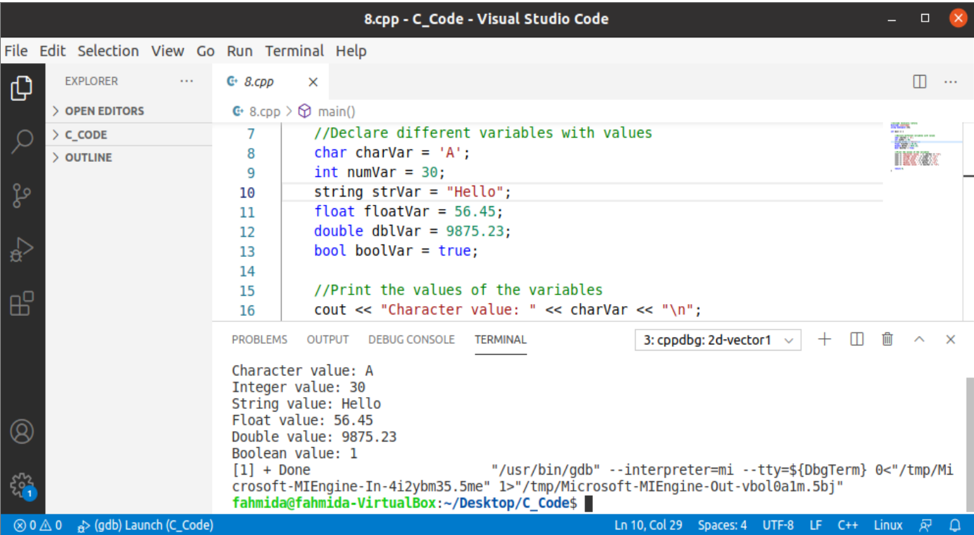
The uses of six different types of variables have shown in the following example. The variables have initialized with the default values and printed later.
#include
using namespace std;
int main () {
//Declare different variables with values
char charVar = 'A';
int numVar = 30;
string strVar = "Hello";
float floatVar = 56.45;
double dblVar = 9875.23;
bool boolVar = true;
//Print the values of the variables
cout << "Character value: " << charVar << "\n";
cout << "Integer value: " << numVar << "\n";
cout << "String value: " << strVar << "\n";
cout << "Float value: " << floatVar << "\n";
cout << "Double value: " << dblVar << "\n";
cout << "Boolean value: " << boolVar << "\n";
return 0;
}
The following output will appear after executing the above code.
Arithmetic operators (+, -, *, /, %)
The five different arithmetic operators are +, -, *, /, and %. The uses of these operators have shown the following example. Two integer numbers will be taken from the console, and the result of the addition, subtraction, multiplication, division, and the remainder of the division will be printed later.
#include
using namespace std;
int main () {
//Declare two integer variables
int n1, n2;
//Take inputs from the user
cout <> n1;
cout <> n2;
//Print the values of the arithemetic operations
cout << "The sum of " << n1 << " and " << n2 << " is " << n1+n2 << "\n";
cout << "The subtraction of " << n1 << " and " << n2 << " is " << n1-n2 << "\n";
cout << "The multiplication of " << n1 << " and " << n2 << " is " << n1*n2 << "\n";
cout << "The division of " << n1 << " and " << n2 << " is " << (float) n1/n2 << "\n";
cout << "The remainder of " << n1 << " and " << n2 << " is " << n1%n2 << "\n";
return 0;
}
The following output will appear after executing the above code for the input values 7 and 3.

Logical OR and AND Operators
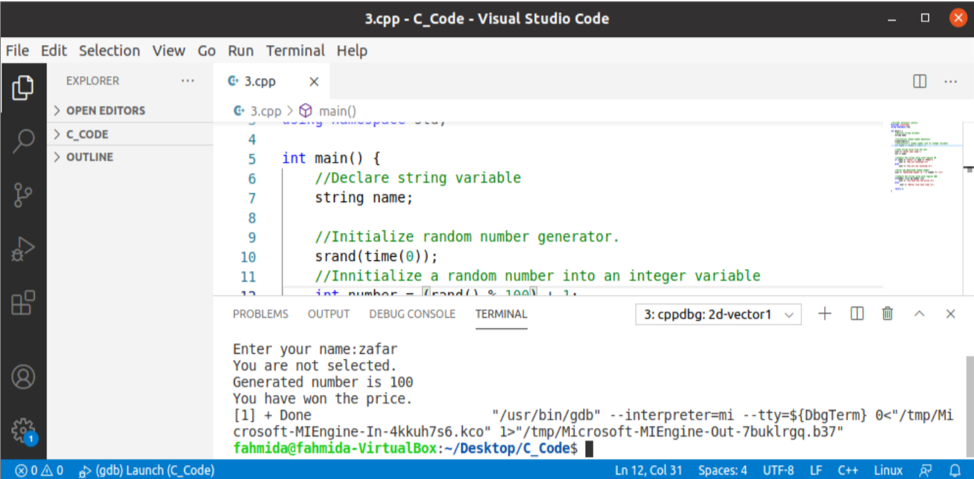
The logical OR operator is used to execute statements based on multiple conditions that return True if any condition is True. The logical AND operator is used to execute a statement based on multiple conditions that return True if all conditions are True. The uses of both OR and AND operators have shown in the following example. The logical OR operator is used here to match the input value with “Zafar” or “Meher”. The logical AND operator is used here to check the generated random number less than or equal to 100 and greater than 50 or not. The particular message will be printed based on the return value of the particular if condition.
#include
using namespace std;
int main() {
//Declare string variable
string name;
//Initialize a random number into an integer variable
int number = rand()%100;
//Take string value from the user
cout <> name;
//Compare the string value with logical OR
if (name == "Zafar" || name == "Meher")
cout << "You are selected.\n";
else
cout << "You are not selected.\n";
//Print the generated random number
cout << "Generated number is " << number << "\n";
//Compare the string value with logical AND
if(number 50)
cout << "You have won the price.\n";
else
cout << "Better luck next time.\n";
return 0;
}
After executing the above code for the random number, 32 and the input value, “Meher”, the following output will appear.

After executing the above code for the random number, 100 and the input value, “zafar”, the following output will appear.
EQUAL and NOT EQUAL Comparison Operators
Six comparison operators are used in any programming language to compare values. The EQUAL and NOT EQUAL operators are two of them. The EQUAL (==) operator is used to check the equality of the values. The NOT EQUAL (!=) operator is used to check the not equality of the values. The uses of these operators based on the input values have shown in the following example. The particular message will be printed based on the comparison output.
#include
using namespace std;
int main()
{
//Declare two integer numbers
int n1, n2;
//Take numbers from the user
cout <> n1;
cout <> n2;
//Use of eqaul operator
if( n1 == n2)
{
cout << "Two numbers are equal."<< "\n";
}
//Use of not eqaul operator
if( n1 != n2)
{
cout << "Two numbers are not equal." << "\n";
}
return 0;
}
The following output will appear after executing the above code for the input values 4 and 4.

The following output will appear after executing the above code for the input values 5 and 7.

Bit-wise Operators
The bitwise operators work on the binary bits that are 0 and 1. The uses of three bitwise operators have shown in the following examples. These are bitwise OR (|), bitwise AND (&), and bitwise XOR (^). The bitwise OR returns True if any of the bits is 1. The bitwise AND returns True if all bits are 1. The bitwise XOR returns True if one bit is 1 and another bit is 0. These operators have applied for the decimal numbers 3 and 4 in the code.
#include
using namespace std;
int main() {
//Initialize two numbers
int n1 = 3, n2 = 4;
//Perform different types of bitwise operations
cout << "Bitwise OR of " << n1 << " and " << n2 << " is " << (n1 | n2) << "\n";
cout << "Bitwise AND of " << n1 << " and " << n2 << " is " << (n1 & n2) << "\n";
cout << "Bitwise XOR of " << n1 << " and " << n2 << " is " << (n1 ^ n2) << "\n";
return 0;
}
The following output will appear after executing the above code. The binary values of 3 are 0111, and 4 is 1000. So, the output shows that bitwise OR and XOR of 0111 and 1000 are 1111 that is 7, and the bitwise AND is 0000 that is 0.

if-else statement
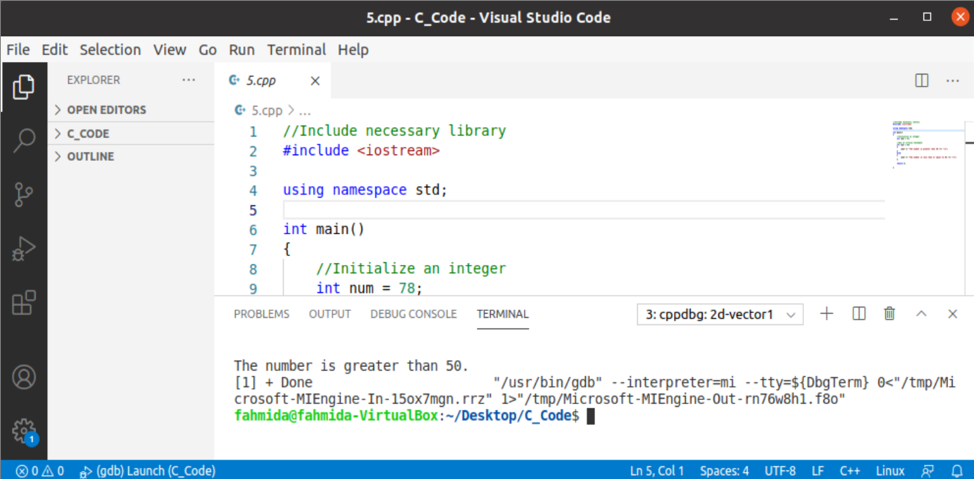
The if-else statement is used to implement the conditional statement. The statement(s) of the ‘if’ block executes when the expression of the ‘if’ condition returns True; otherwise, the statement(s) of the ‘else’ block will be executed. An integer value, 78, is assigned to a variable in the ‘if’ condition.
#include
using namespace std;
int main()
{
//Initialize an integer
int num = 78;
//Use of if-else statement
if( num > 50)
{
cout << "The number is greater than 50."<< "\n";
}
else
{
cout << "The number is less than or equal to 50."<< "\n";
}
return 0;
}
The following output will appear after executing the above code.
Ternary Operators
The alternative of the ‘if-else’ statement is the ternary operator (?:). Two different uses of this operator have shown in the following example. The first ternary operator was used for single conditions, and the second ternary operator was used for multiple conditions. A numeric value will be taken from the console and used in the ternary operator.
#include
using namespace std;
int main()
{
//Declare an integer variable
int number;
//Deaclare a string variable
string output;
cout <> number;
//Use of ternary operator
output = (number >= 80)? "Excellent" : "";
//Use of ternary operator with logical AND operator
if (output == "")
output = (number =70)? "Satisfactory" : "Need improvement.";
//Print the value of the output
cout << output << "\n";
return 0;
}
The following output will appear after executing the above code for the input value, 98.

The following output will appear after executing the above code for the input value, 78.

The following output will appear after executing the above code for the input value, 50.

Switch-case statement
The alternative of the ‘if-elseif-else’ statement is the ‘switch-case’ statement. The use of the switch-case statement has shown in the following example. Two integer values are initialized into two variables. Four options will be appeared after executing the code. The output will be generated from the case statement based on the selected value.
#include
using namespace std;
int main () {
//Declare char variable
char val;
//Initialize to integer variables
int n1 =40, n2 =10;
//Print the options
cout << "1. Addition" << "\n";
cout << "2. Subtraction" << "\n";
cout << "3. Multiplication" << "\n";
cout << "4. Division" << "\n";
//Select any option
cout <> val;
//Perform task based on the selected option
switch(val) {
case '1' :
cout << n1 << "+" << n2 << "=" << n1+n2 << endl;
break;
case '2' :
cout << n1 << "-" << n2 << "=" << n1-n2 << endl;
break;
case '3' :
cout << n1 << "x" << n2 << "=" << n1*n2 << endl;
break;
case '4' :
cout << n1 << "/" << n2 << "=" << n1/n2 << endl;
break;
default :
cout << "Invalid Selection." << endl;
}
return 0;
}
The following output will appear after executing the above code for the selected value, 1.

The following output will appear after executing the above code for the selected value, 6.

Increment and decrement operators
The increment operator is used to increment the value of the variable by 1, and the decrement operator is used to decrement the value of the variable by 1. The uses of pre-increment, post-increment, pre decrement, and post decrement have shown in the following example. An integer value will be taken from the console and assigned to the variable to use the increment and decrement operators.
#include
using namespace std;
int main () {
//Declare an integer variable
int num;
//Take a number value from the user
cout <> num;
/*
Print the values of the variable
after using increment and decrement operator
*/
cout << "The value of the variable" << " is " << num << "\n";
cout << "The value of the variable after post increment" << " is " << num++ << "\n";
cout << "The value of the variable after pre increment" << " is " << ++num << "\n";
cout << "The value of the variable after post decrement" << " is " << num-- << "\n";
cout << "The value of the variable after pre increment" << " is " << --num << "\n";
return 0;
}
The following output will appear after executing the above code for the input value, 10.

For loop
The ‘for’ loop is a useful loop for executing some statements multiple times based on the termination condition defined in the loop. This loop contains three parts. The first part is an initialization, the second part is the termination condition, and the third part is the increment or decrement condition to reach the termination condition. The ‘for’ loop has used in the following example to find out all even numbers and odd numbers within 1 to 5.
#include
using namespace std;
int main() {
//Iterate the loop for 5 times
for (int i = 1; i <= 5; ++i) {
//Find out the even and odd numbers
if(i % 2 == 0)
cout << i << " is " << "even." << endl;
else
cout << i << " is " << "odd." << endl;
}
return 0;
}
The following output will appear after executing the above code. There are two even numbers (2 and 4) and three odd numbers (1, 3, and 5) within 1 to 5.

While loop
The ‘while’ loop is another useful loop of any programming language where the initial value is declared before the loop and increment or decrement statement is declared inside the loop. The ‘while’ loop is used in the following example to calculate the sum of all numbers from 1 to 100. The initial value for the loop is assigned to the variable, num. The variable sum is used to store the result of the summation that is initialized to 0.
#include
using namespace std;
int main () {
//Initialize two variables
int num = 1;
int sum = 0;
//Iterate the loop for 100 times
while( num <= 100 ) {
//Calculate the sum
sum = sum + num;
//Increment the value of num by 1
num++;
}
//Print the sum value
cout << "The sum of 1 to 100 is: " << sum << endl;
return 0;
}
The following output will appear after executing the above code. The sum of 1 to 100 is 5050 that has printed in the output.
Functions without argument
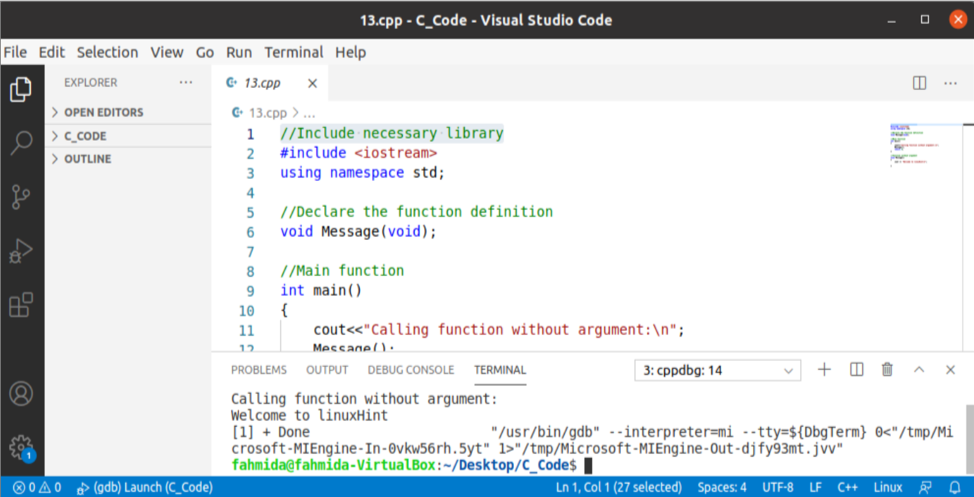
The block of code that will require execution more than once can be defined by using function. A function can be defined with the argument(s) or without any argument. The way to declare a simple function without any argument has shown in the following example. If the function is defined after the main() function, then the function will require to declare above the main() function in C++. The function used in the following example will print a text message after calling it.
#include
using namespace std;
//Declare the function definition
void Message(void);
//Main function
int main()
{
cout<<"Calling function without argument:\n";
Message();
return 0;
}
//Function without argument
void Message()
{
cout << "Welcome to linuxHint\n";
}
The following output will appear after executing the above code.
Function with arguments and default arguments
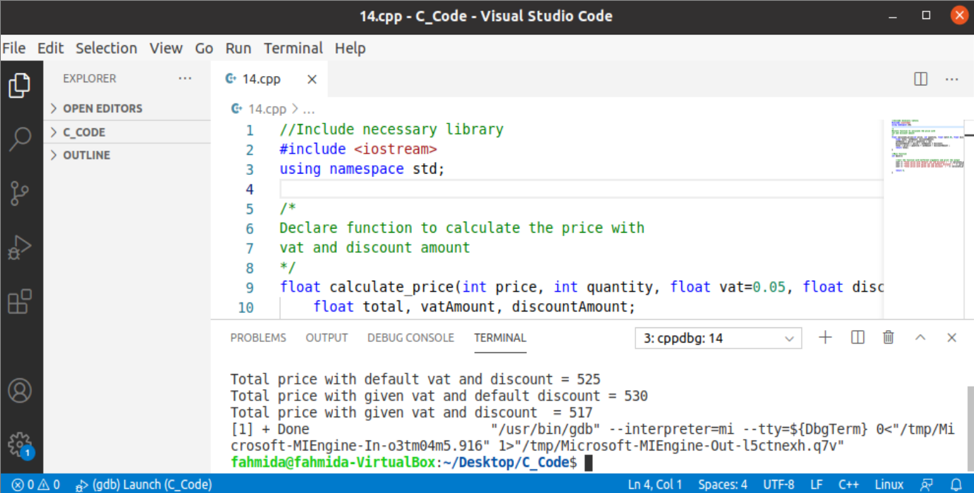
The use of the function with arguments and default arguments have shown in the following example. A function with four arguments has been defined before the main() function in the code. Here, the arguments, vat, and discount are the default arguments. When the function is called with two arguments, then the values of two default arguments will be used. When the function is called with three arguments, then the value of the last default argument will be used. When the function is called with four arguments, then no default argument value will be used. The function has been called three times from the main() function here.
#include
using namespace std;
/*
Declare function to calculate the price with
vat and discount amount
*/
float calculate_price(int price, int quantity, float vat=0.05, float discount=0.0){
float total, vatAmount, discountAmount;
vatAmount = (price * quantity) * vat;
discountAmount = (price + vatAmount) * discount;
total = price * quantity + vatAmount - discountAmount ;
return total;
}
//Main function
int main(){
//Call the function with different arguments and print the output
cout << "Total price with default vat and discount = " << calculate_price(100, 5) << "\n";
cout << "Total price with given vat and default discount = " << calculate_price(100, 5, 0.06) << "\n";
cout << "Total price with given vat and discount = " << calculate_price(100, 5, 0.06, 0.10) << "\n";
return 0;
}
The following output will appear after executing the above code.
Passing value by reference to the function
In the previous example, the function is called by values where the number of values is passed to the arguments. The arguments values can be passed by reference to the function that shares the same memory location. The way to pass a value by reference to the function argument has shown in the following example. The ‘&’ symbol is used to define the reference variable. Here, a string value will be taken from the console and passed by reference to the function argument. The value of this variable will be printed before calling the function and after calling the function.
#include
using namespace std;
//Declare function with call by reference argument
void combineString(string &msg) {
//Modify the reference variable
msg = msg + " added text.";
}
int main() {
string strVar;
cout <> strVar;
//Print the variable before update
cout << "Before calling the function:\n" << strVar << "\n";
combineString(strVar);
//Print the variable after update
cout << "After calling the function:\n" << strVar << "\n";
return 0;
}
The following output will appear after executing the above code.

Arrays
An array is used to store a list of data, and the index or key accesses the values of the array. An array can contain a list of the particular type of data in C++. Three different types of array declarations have shown in the following example. The first array contains the integer values, and each value has assigned separately. The second array contains the string values, and all values have been defined at the time of declaration. The third array contains all float values, and the size of the array has defined in the declaration. The third value of the first array, the fourth value of the second array, and all values of the third array will be printed after executing the code.
#include
using namespace std;
int main() {
//Declare an integer array with size
int array1[3];
array1[0] = 6;
array1[1] = 0;
array1[2] = 11;
printf("The third value of integer array: %d\n", array1[2]);
//Declare a string array with values
string array2[4] = {"C++", "Java", "VB.Net", "PHP"};
printf("The fourth value of string array: %s\n", array2[3].c_str());
//Declare a float array with values
float array3[] = {7.98, 4.56, 2.34, 6.80, 4.56};
cout << "All values of float array:\n";
//Iterate the array values using loop
for (int i=0; i < sizeof(array3)/sizeof(array3[0]); i++)
{
printf("%0.2f ", array3[i]);
}
printf("\n");
return 0;
}
The following output will appear after executing the above code.

Structure
The structure is used to store the collection of variables of different types by using a single name. The struct keyword is used to define the structure in C++. The way to declare a structure and use of the structure variables have shown in the following example. A structure of two variables has been defined in the code. Next, these variables have initialized with input values and printed later.
#include
#include
using namespace std;
//Define structure
struct Item
{
string name;
int price;
};
int main()
{
Item itm;
//Assign values to the memebers of the structure
cout << "Enter the item name: ";
getline(cin, itm.name);
cout <> itm.price;
//Print the values of the memebers of the structure
cout << "Item Details:\n";
cout << "Name: " << itm.name << endl;
cout << "Price: " << itm.price << endl;
return 0;
}
The following output will appear after executing the above code for the input values, “C++ Book” and 45.

Enumeration
The user-defined data type can be declared by using enumeration. The particular name is assigned to the integral constant in the enumeration that makes the code more manageable. The enum keyword is used to define the enumeration in C++. The value of the enumeration name starts from 0 if no value is assigned. The way to declare enumeration and use it has shown in the following example. Five names have been declared in the code, and three constant values are assigned in three names. Next, the 2nd , 4th , and default values of the 3rd and 5th enum have been printed.
#include
using namespace std;
//Declare an enum
enum flowers { Rose=5, Lily=4, Tulip, Orchid=11, Daffodil};
int main() {
//Print the assigned 2nd and 4th enum values
cout << "The 2nd and 4th enum values are : " << Lily << " " << Orchid << "\n";
//Print the default values
cout <<"The default enum values are : " << Tulip << " " << Daffodil << "\n";
return 0;
}
The following output will appear after executing the above code.

You can check the following tutorial to get more information about the use of enumeration in C++.
https://linuxhint.com/use-enumeration-in-c/
Pointer
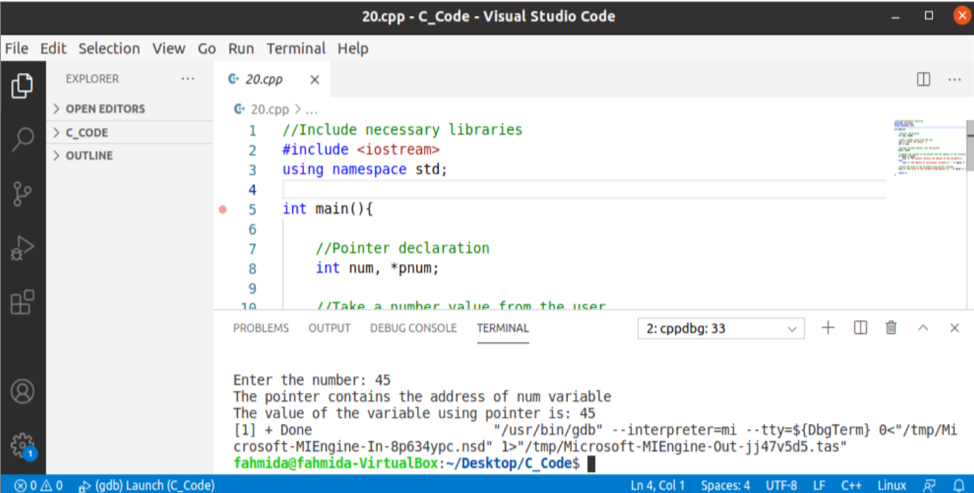
The pointer is used to store the memory location of other variables. The ‘*’ symbol is used to declare the pointer variable, and the ‘&’ symbol is used to assign the address of a particular variable to the pointer variable. The way to declare the pointer variable and use it in C++ have shown in the following example. A pointer variable of integer data type and a general variable of integer data type has been declared in the code. The address of the variable named num has been assigned to the pointer variable named pnum after assigning the input value to the num variable. Next, the particular message will be printed after comparing the address of the num variable is compared with the value of the pnum variable. The value of the variable that is pointed by the pointer variable will be printed later.
#include
using namespace std;
int main(){
//Pointer declaration
int num, *pnum;
//Take a number value from the user
cout <> num;
//Assign variable address into the pointer
pnum = #
//Compare the content of the pointer and the address of the variable
if (pnum == &num)
cout << "The pointer contains the address of num variable\n";
else
cout << "The address of the pointer variable is : " << &pnum << "\n";
//Print the value of the variable using pointer variable
cout << "The value of the variable using pointer is: " << *pnum << "\n";
return 0;
}
The following output will appear after executing the above code.
Use of char*
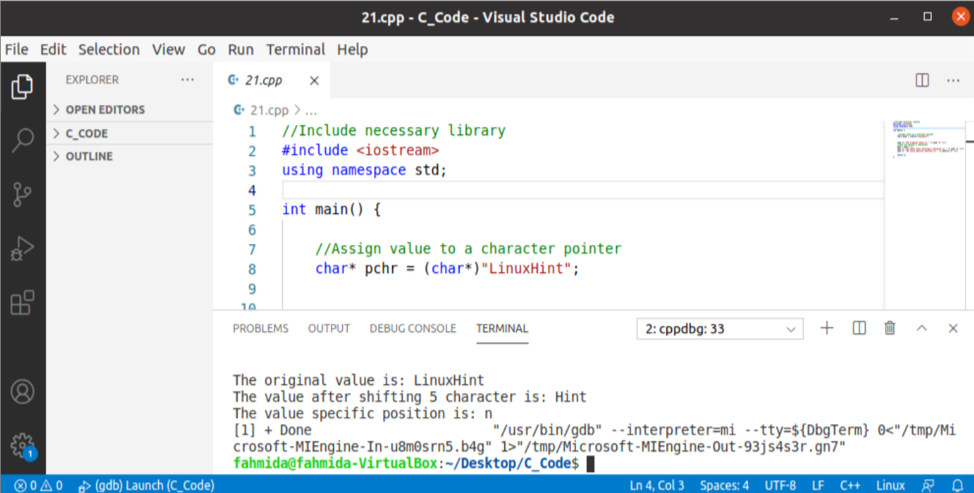
The char* is used to point an array of characters. The use of char* in C++ is shown in the following example. In the code, the char*, pchr points to an array of characters with the value, LinuxHint. The original value of pchr has been printed first. Next, the pointer has shifted by 5 characters and printed. The character of the 3rd position has printed last.
#include
using namespace std;
int main() {
//Assign value to a character pointer
char* pchr = (char*)"LinuxHint";
cout << "The original value is: " << pchr << "\n";
//Move the pointer 5 characters
pchr = pchr + 5;
cout << "The value after shifting 5 character is: " << pchr << "\n";
cout << "The value specific position is: " << pchr[2] << "\n";
return 0;
}
The following output will appear after executing the above code.
String Class
The string class of C++ contains many methods to perform different types of string operations. The uses of some methods of string class have shown in the following example. Two string values have been assigned into two variables. These two values are combined and stored into another string variable. Next, the length(), push_back(), pop_back(), and swap() methods of string class have applied into the string variables.
#include
#include
using namespace std;
int main () {
string string1, string2, string3;
int length;
//Assign string values to the variables
string1 = "Welcome to ";
string2 = "LinuxHint";
//Concatenate the string values
string3 = string1 + string2;
//Calculate the length of the concatenated string
length = string3.length();
cout << "The length of the string3 is : " << length << "\n";
//Add neline at the end of the string
string3.push_back('\n');
cout << "The current value of the string3 is: " << string3;
//Retrieve 5 characters from the end of the string
for(int i=0; i < 5; i++)
string3.pop_back();
cout << "The current value of the string3 is: " << string3;
//Exchange the value of two string variables
string1.swap(string3);
cout << "\nThe current value of the string1 is: " << string1 << "\n";
return 0;
}
The following output will appear after executing the above code.

Date and time
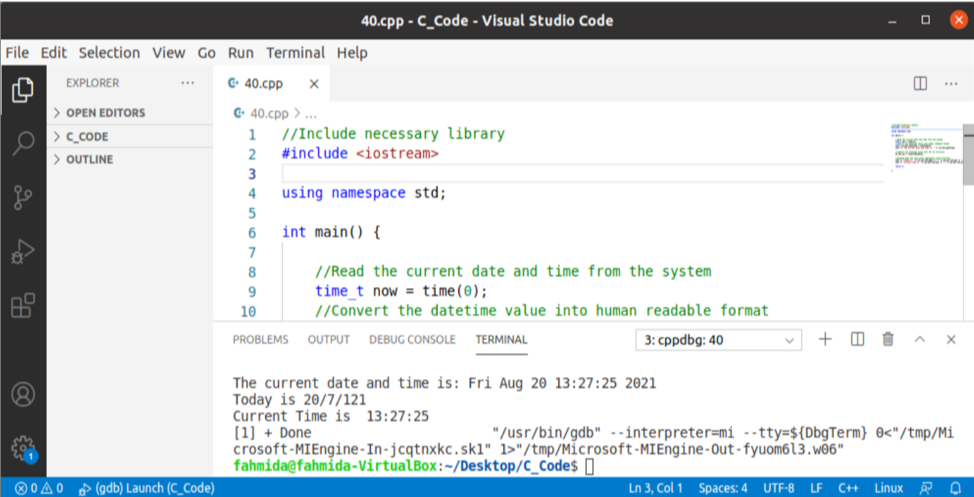
The way to read the current date and time of the system in C++ is shown in the following example. The time() function is used in the code to read the timestamp value calculated from 1st January 1970. Next, the timestamp value has converted into the human-readable date and time format by using the ctime() function. The localtime() function has been used to convert the timestamp into a tm structure to retrieve every part of the date and time separately.
#include
using namespace std;
int main() {
//Read the current date and time from the system
time_t now = time(0);
//Convert the datetime value into human readable format
char* current_datetime = ctime(&now);
cout << "The current date and time is: " << current_datetime;
//Convert the datetime value into the tm structure
tm *dt_val = localtime(&now);
//Display date and time value separately using structure
cout << "Today is " <<dt>tm_mday << "/" <<dt>tm_mon << "/" <<dt>tm_year << "\n";
cout << "Current Time is "<<dt>tm_hour << ":" <<dt>tm_min << ":" <<dt>tm_sec << "\n";
return 0;
}
The following output will appear after executing the above code.
Vector
The vector is used in C++ to create the dynamic array. The size of the vector can be increased or decreased based on the requirement. The way to declare a vector of string data and insert data using the push_back() function have shown in the following example. Next, the for loop has used to print all elements of the vector.
#include
#include
using namespace std;
int main()
{
//Declare a vector of string
vector vectStr;
//Add values to the vector
vectStr.push_back("Java ");
vectStr.push_back("C++ ");
vectStr.push_back("VB.Net ");
vectStr.push_back("C#");
//Print all values of the vector using loop
cout << "Some popular programming languages are:\n";
for (auto i = vectStr.begin(); i != vectStr.end(); ++i)
cout << *i;
cout << "\n";
return 0;
}
The following output will appear after executing the above code.

You can check the following tutorials on the vector to know more about vectors’ uses in C++.
- https://linuxhint.com/vector-insert-function-in-c/
- https://linuxhint.com/vector-erase-function-in-c/
- https://linuxhint.com/count-vector-size-c/
- https://linuxhint.com/vector-resize-function-in-c/
- https://linuxhint.com/two-dimensional-vector-cpp/
List
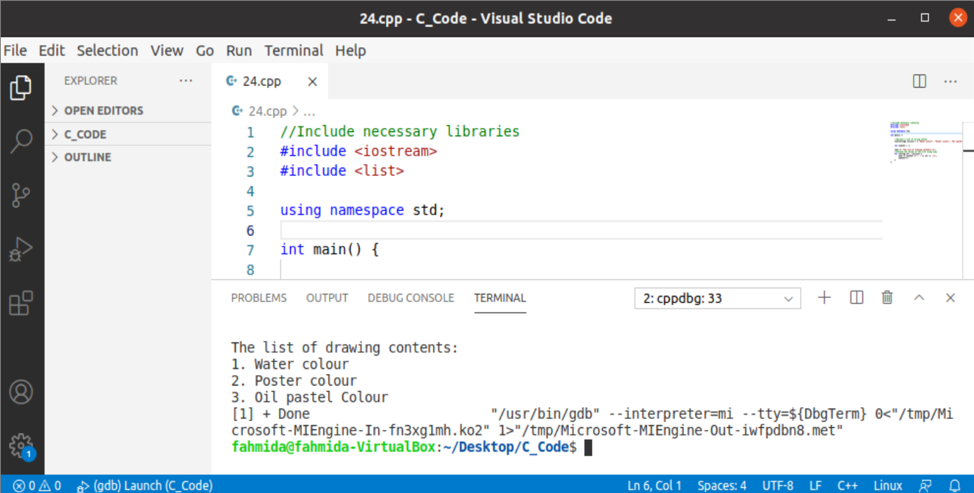
The list works like the doubly-linked list. That means the data of the list can be accessed sequentially and bi-directionally. The data can be inserted or removed anywhere from the list. The way to define and read the values of the list have shown in the following example. A list of four-string values has been defined in the code, and a ‘for’ loop has been used to print the list.
#include
#include
using namespace std;
int main() {
//Declare a list of string values
list strList = { "Water colour", "Poster colour", "Oil pastel Colour" };
int counter = 1;
cout << "The list of drawing contents:\n";
//Iterate the values of the list using loop
for (string str : strList) {
cout << counter << ". " << str << '\n';
counter++;
}
}
The following output will appear after executing the above code.
Set
The set is a C++ container to store unique values in sorted order. The value of the set can be deleted but not updatable. An empty set has been declared at the beginning of the main method. The first ‘for’ loop has used to take the input from the console and insert the values into the set. The second ‘for’ loop has used to print the values of the set.
#include
#include
#include
using namespace std;
int main()
{
//Declare an empty set
set setVar;
int n;
//Add data into the set
cout << "Enter number:\n";
for(int i=0; i > n;
setVar.insert(n);
}
//Print the values of the set using iterator and loop
set::iterator iter;
cout << "The values of set are : \n";
for (iter = setVar.begin() ; iter != setVar.end() ; iter++ )
{
cout << *iter << " ";
}
cout << "\n";
}
The following output will appear after executing the above code. The duplicate value has been removed automatically in the output for using the set.

Map
The map works like the associative array that stores data using key-value pairs. The map’s keys must be unique and can be removed and inserted but can’t be modified. The value of the map is updatable. At first, an empty map variable has been declared, and four-string values have been assigned in four unique keys of the map. The value of the particular key has been printed from the first map variable. The second map variable has been declared with three integer values. The ‘for’ loop has been used to print all values of the second map variable using an iterator.
#include
#include <map>
#include
using namespace std;
int main ()
{
//Declare an empty map of string key and string value
map mapVar1;
//Initialize the map with values by defining keys
mapVar1["CS101"] = "Computer Fundamental";
mapVar1["CS203"] = "Algorithm";
mapVar1["CS302"] = "Data Structure";
mapVar1["CS401"] = "Multimedia";
//Print the value of a specific key
cout << "Course Name: " << mapVar1["CS203"] << "\n";
//Declare a map with values where keys are string and values are integer
map mapVar2{ {"015645",78} , {"027856",80} , {"0589675",67} };
cout << "\nID\t\tMarks\n";
//Declare an iterator to read all keys and values of the map
map::iterator iter;
//Print the keys and values of the map using loop
for (iter = mapVar2.begin(); iter != mapVar2.end(); ++iter) {
cout <first << "\t\t" <second << '\n';
}
}
The following output will appear after executing the above code.

Template
One of the powerful features of C++ is the template. It is used to declare a function or class that will be able to work with different data types. It is mainly used for the reusability of the code. Two types of templates can be created in C++. One is a function template another is a class template. The way to create a function template and the uses of this template have shown in the following example. The template function with two arguments has been declared here. Next, this function has been called three times with three types of data. When the integer and float values are passed to the function argument, then the sum of the values will be returned. When the string value is passed into the function argument, the string’s concatenated value will be returned.
#include
using namespace std;
//Declare a template
template
//Define the function using template
tmp Add(tmp n1, tmp n2)
{
return n1 + n2;
}
int main()
{
//Call the template function using integer
cout << "The sum of two integer numbers is: " << Add(10, 15) << "\n";
//Call the template function using string
cout << "The concatenation of two strings is: " << Add("Hello"," World") << "\n";
//Call the template function using float
cout << "The sum of two float numbers is: " << Add(4.56, 5.45) << "\n";
return 0;
}
The following output will appear after executing the above code.

Regex
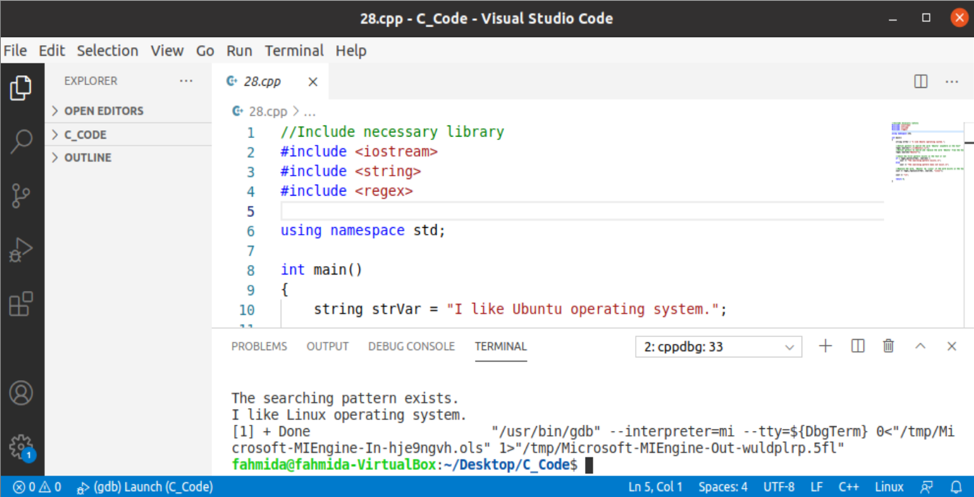
The regular expression or regex is a particular pattern or text that is used to search or replace any content from string data. The regex_match() and regex_replace() functions of the regex class are shown in the following example. The regex_match() function has been used to search for a particular pattern in a text. The regex_replace() function has been used to search a particular word and replace the word with another word.
#include
#include
#include
using namespace std;
int main()
{
string strVar = "I like Ubuntu operating system.";
//Define pattern to search the word 'Ubuntu' anywhere in the text"
regex search1("(.*)(Ubuntu)(.*)");
//Define pattern to search and replace the word 'Ubuntu' from the text"
regex search2("Ubuntu+");
//Check the first pattern exists in the text or not
if ( regex_match(strVar, search1) )
cout << "The searching pattern exists.\n";
else
cout << "The searching pattern does not exist.\n";
//Replace the word, 'Ubuntu' by 'Linux' if the word exists in the text
cout << regex_replace(strVar, search2, "Linux");
cout << "\n";
return 0;
}
The following output will appear after executing the above code.
Constant
The constant variable assigns a fixed value into a variable that can’t be altered later. The constant variable can be declared by using the #define preprocessor and const keyword. Both ways of declaring constant variables have shown in the following example. Here, the variable, VAT, has been declared by #define, and the variable, DISCOUNT, has been declared by const. The values of these variables have been used to calculate the price with vat and discount, where the main price value will be taken from the console.
#include
using namespace std;
//Define constant using #define preprocessor
#define VAT 0.15
int main() {
//Define constant using const keyword
const float DISCOUNT = 0.10;
int price;
float price_with_vat, price_with_discount;
cout <> price;
//Use the constant VAT
price_with_vat = price + price * VAT;
cout << "The price with VAT is : " << price_with_vat << "\n";
//Use the constant DISCOUNT
price_with_discount = price_with_vat - price_with_vat * DISCOUNT;
cout << "The price after discount is : " << price_with_discount << "\n";
return 0;
}
The following output will appear after executing the above code for the input value, 50.

Writing to a file
The fstream class of C++ is used to read from a file and write into a file. The way to write the file using the fstream class has shown in the following example. A variable of ofstream data type has been declared in the code to write data into a text file named weekday.txt. Next, the short form of weekday names with newline has been written into the file.
#include
#include
using namespace std;
int main() {
//Open a text file for writing
ofstream fileHandler("weekday.txt");
//Write data to the file
fileHandler << "Sun\nMon\nTue\nWed\nThu\nFri\nSat\n";
//Close the file
fileHandler.close();
cout << "The file has created.\n";
}
The following output will appear after executing the above code.

Reading from a file
The way to read data from an existing text file is shown in the following example. A variable of ifstream data type has been declared in the code to read data from a text file named weekday.txt that was created in the previous example. Next, the ‘while‘ loop has been used to print the file’s content by using the getline() function.
#include
#include
using namespace std;
int main() {
//Declare string variable to store each line from the file
string data;
//Open a text file for reading
ifstream fileHandler("weekday.txt");
//Read data from the file
while (getline(fileHandler, data)) {
// Output the text from the file
cout << data << "\n";
}
//Close the file
fileHandler.close();
}
The following output will appear after executing the above code.

Recursion
The way to call a function by itself is called recursion, and that function is called a recursive function. Different logical problems can be solved using a recursive function, such as generating Fibonacci numbers, calculating factorial, calculating xn, etc. The way to calculate the xn using recursive function has shown in the following example. When the value of the power is 1, then the function will return 1; otherwise, the function will be called recursively.
#include
using namespace std;
//Declare the function
int Power(int, int);
int main()
{
int x = 2, n = 3, result;
//Call the power function to calculate x to the power n
result = Power(x, n);
cout << x << " to the power " << n << " is " << result < 0)
//Calculate power using recursive function
return (base*Power(base, powerVal-1));
else
return 1;
}
The following output will appear after executing the above code.

Generate Random number
Many built-in functions are available in C++ to generate a random number. Generating the random number of specific ranges by using the time(), srand(), and rand() functions has shown in the following example.
The srand() and time() functions have been used to initialize the random number generator. Next, the ‘for’ loop has used to generate 5 random numbers within 1 to 50.
#include
#include
#include
using namespace std;
int main()
{
//Initialize the random number generator
srand(time(0));
cout << "5 random numbers between 1 and 50:\n";
for(int i = 0;i < 5; i++)
//Generate a random number using rand() function
cout << (rand() % 50) + 1 << " ";
cout << "\n";
return 0;
}
The following output will appear after executing the above code.

Class and object
All features of object-oriented programming are supported by C++ programming. The class and object are the main parts of object-oriented programming. The way to create a class and access the properties of the class using objects have shown in the following example. A class with two variables and a method has been defined in the code. Next, the object of this class has been created to initialize the class variables and print the values of the class variables using the class method.
#include
using namespace std;
//Define Student class
class Student {
public:
//Member variables
string ID;
string Name;
//Member function
void Display()
{
cout << "Student ID: " << ID << "\n";
cout << "Student Name: " << Name << "\n";
}
};
int main() {
//Create object of Student class
Student stdObject;
//Initialize the class variables
stdObject.ID = "01178564";
stdObject.Name = "Mir Hossain";
//Print the values of class variables
stdObject.Display();
return 0;
}
The following output will appear after executing the above code.

Constructor
The method which is created with the name of the class is called the constructor method. This method is called automatically when the object of the class is created. The main purpose of using this method is to do the initial tasks, such as variable initialization. The way to use a constructor in the class has shown in the following example. A class with three variables and a constructor method have been defined in the code. The constructor method will initialize the variables with default values when this class’s object is created.
#include
using namespace std;
//Define Employee class
class Employee
{
public:
//Declare class variables
string name, post;
int salary;
//Define Constructor
Employee()
{
name = "Mehrab Hossain";
post = "Assistant Manager";
salary = 7000;
}
};
int main()
{
//Create Employee object
Employee emp;
//Print Employee details
cout << "Employee Details:\n";
cout << "Name: " << emp.name << "\n";
cout << "Post: " << emp.post << "\n";
cout << "Salary: " << emp.salary << "\n";
return 0;
}
The following output will appear after executing the above code.

Destructor
The destructor method is called automatically like the constructor method, but it is called after executing all tasks of the object. The name of the destructor method is the name of the class with the tilde(~) symbol. The way to declare and use of destructor method have shown in the following example. The class defined in the code contains a constructor method, a destructor method, and a normal method. When the object of the class is created, the constructor method will be called, and the destructor method will be called after executing the Print() method.
#include
using namespace std;
class MyClass
{
public:
int num;
//Constructor method
MyClass(){
num = 30;
cout << "The data is initialized.\n";
}
//Destructor method
~MyClass(){
cout<<"The destructor method is called."<<endl;
}
//Member function
void Print(){
cout << "num = " << num << "\n";
}
};
int main(){
//Create object
MyClass Object;
//Call method
Object.Print();
return 0;
}
The following output will appear after executing the above code.

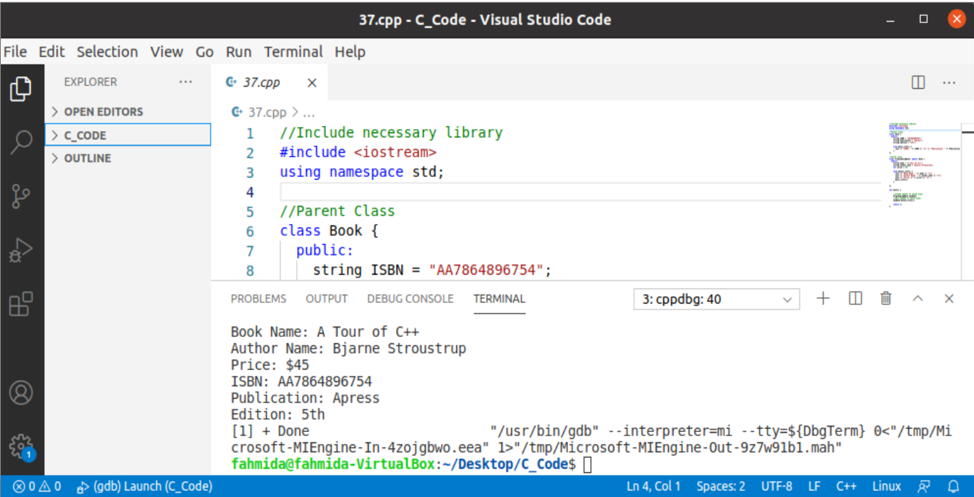
Inheritance
The process of creating a new class by inheriting another class is called inheritance. The class from which the new class will be created is called the base class or parent class. The inherited class is called the derived class or child class. The way to create a child class by inheriting a parent class has shown in the following example. In the code, the Book is the parent class, and the ProgrammingBook is the child class.
#include
using namespace std;
//Parent Class
class Book {
public:
string ISBN = "AA7864896754";
string Publication = "Apress";
string Edition = "5th";
void basic_info() {
cout << "ISBN: " << ISBN << "\n" << "Publication: " << Publication << "\n" << "Edition: " << Edition << "\n" ;
}
};
//Child class
class ProgrammingBook: public Book {
public:
string name = "A Tour of C++";
string author_name = "Bjarne Stroustrup";
int price = 45;
void detail_info() {
cout << "Book Name: " << name << "\n";
cout << "Author Name: " << author_name << "\n";
cout << "Price: $" << price << "\n" ;
basic_info();
}
};
int main() {
//Create object of child class
ProgrammingBook objBook;
//Call method of child class
objBook.detail_info();
return 0;
}
The following output will appear after executing the above code.
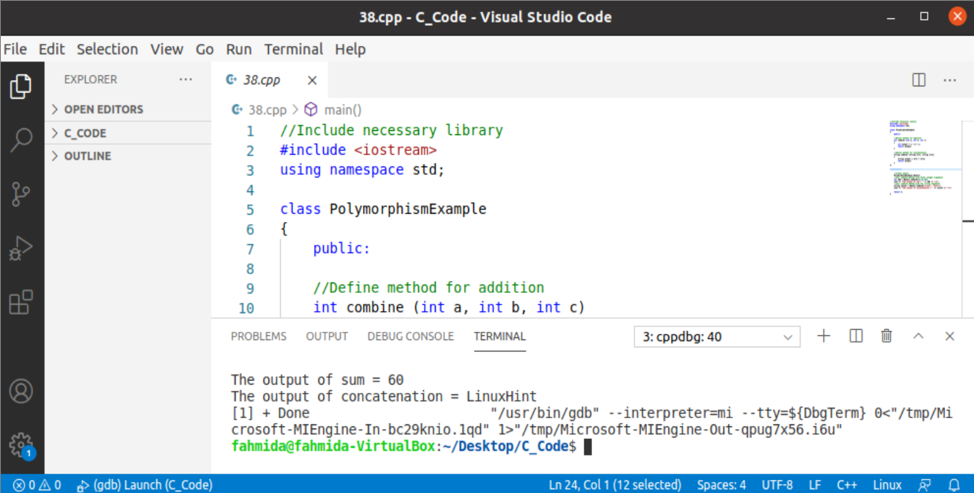
Polymorphism
One of the important features of object-oriented programming is polymorphism. It means many forms. Using polymorphism, the function of the same name can be defined multiple times with different arguments. The way to implement the polymorphism concept in C++ has been shown in the following example. In the code, the combine() method has been declared two times in the PolymorphismExample class. The combine() method with three integer arguments will calculate and return the sum of three numbers. The combine() method with two string arguments will return the concatenated value of the strings.
#include
using namespace std;
class PolymorphismExample
{
public:
//Define method for addition
int combine (int a, int b, int c)
{
int output = a + b + c;
return output;
}
//Define method for concatenation
string combine (string str1, string str2)
{
string output = str1 + str2;
return output;
}
};
int main() {
//Create object
PolymorphismExample Object;
//Call combine method with three integer arguments
int add = Object.combine(10,20,30);
cout << "The output of sum = " << add << "\n";
//Call combine method with two string arguments
string concat = Object.combine("Linux", "Hint");
cout << "The output of concatenation = " << concat << "\n";
return 0;
}
The following output will appear after executing the above code.
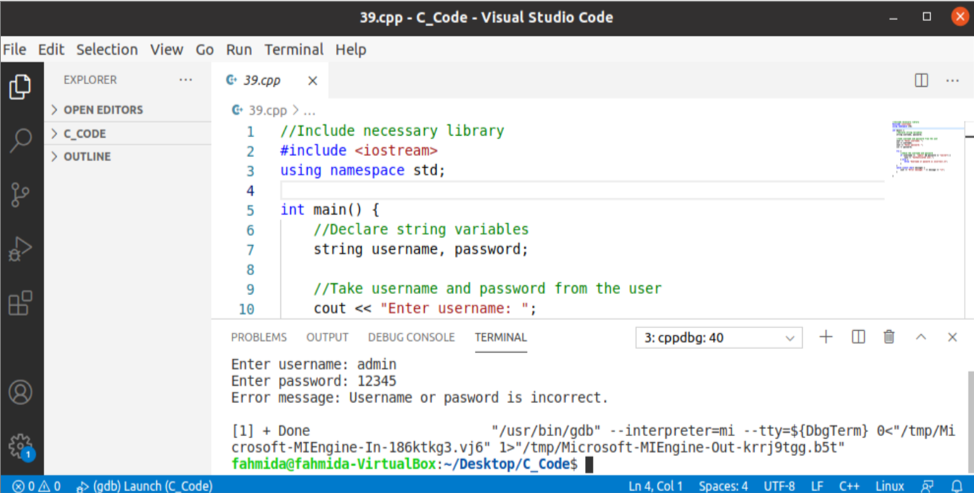
Exception
The way to handle the error of the code at the time of code execution is called exception handling, and the error condition is called the exception. The try-catch block is used to implement the exception handling in C++. The use of the try-catch block has shown in the following example. Here, the try block will check the username and password. If the username or password is incorrect, then the exception will be thrown to the catch block.
#include
using namespace std;
int main() {
//Declare string variables
string username, password;
//Take username and password from the user
cout <> username;
cout <> password;
try {
//Check the username and password
if (username == "admin" && password == "secret") {
cout << "Authenticated user.";
} else {
throw "Username or pasword is incorrect.\n";
}
}
catch (const char* message) {
cout << "Error message: " << message << "\n";
}
}
The following output will appear after executing the above code for the correct username and password.

The following output will appear after executing the above code for the incorrect password.
Conclusion
The most common 40 topics of C++ programming have tried to explain in this tutorial for the beginners to learn C++ programming from the basic. A very simple example has been included with each topic here for the C++ learners to understand the concept properly.