Syntax:
The following is the simple syntax for generating a trigger:
Here is the explanation of the above general query.
- Trigger_name: Name of a trigger
- BEFORE, AFTER, INSTEAD OF: Terms that decide when the trigger would be active
- Event_name: Title of the occurrence which might set off the trigger (This could be, whether from INSERT or UPDATE or DELETE)
- Table-name: Specifies the table upon which trigger will be constructed
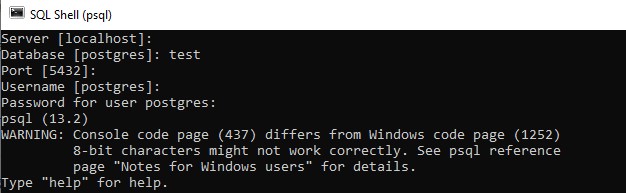
To understand the trigger concept briefly, launch the PostgreSQL shell from the applications. Change the server if you want to work on another server, or else press enter from your keyboard. Add the database name you want to work on, otherwise, leave it as it is and tap enter. As you can see, we have currently working on port 5432 as default; you can also change it. After that, provide a username other than Postgres if you want to work with another user, or else leave it blank and hit enter button. Now your command shell is ready to be used.
TRIGGER Upon INSERT Command
Let us look at the example of a trigger when the INSERT command has been used as a trigger event. For this, we have to create two new tables, e.g., “employ”, and “audit”. The table “employ” will contain the employees’ personal records from a specific company and the table “audit” will contain the information about when the employees joined the company. The queries for creating the tables are given below.

![]()
You have to create a procedure that will automatically be executed or work when the trigger will be called. It will be used in the next CREATE TRIGGER command. From the below command, you can get an idea that we have been creating a procedure “auditlogfunc()”, which will return a trigger as variable “$examp_table$”. The function begins with BEGIN clause, followed by the INSERT statement. This INSERT statement inserts automatic id and current time-date using the built-in function into the “audit” table and returning this result to TRIGGER.

It’s time to generate a TRIGGER using the CREATE TRIGGER command. We create a trigger named “emp_trig” on the table “employ”. The clause AFTER INSERT ON means that this trigger will only work after the execution of the insert command. FOR EACH ROW means upon the execution of every INSERT command, this trigger will call and execute the “auditlogfunc()” procedure created just before.
![]()
It’s time to insert some data into the table “employ”. Execute the below INSERT command in the shell.

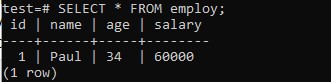
Have a look at the table “employ”. The data has been added successfully with the INSERT command.
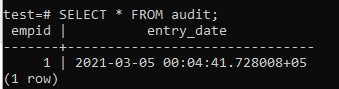
Now have a glimpse of the “audit” table. You can see, it is also updated due to trigger “emp_trig” and auditlogfunc().
TRIGGER Upon UPDATE Command
We will be now looking at an example of a trigger using the UPDATE command as a trigger event. We have to create a new procedure again with the different name “update” as presented in the image. This procedure will also insert records in the ‘audit’ table upon call.

Now, create a new trigger named “update_emp” using the CREATE TRIGGER command. This will only work after the execution of the UPDATE query on the table employ and it will call the procedure “update”.
![]()
Update the table “employ” by setting its ID to “2”.
![]()
Fetch the records of a table “employ” to view the changes as appended below.
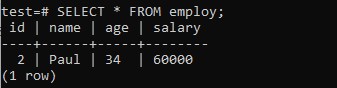
As you can see on the table “audit”, it has been reorganized as the table “employ” got updated.

TRIGGER Upon DELETE Command
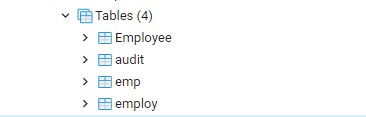
Open pgAdmin 4 from applications to work on GUI PostgreSQL. Under the schema “test”, you will discover a list of tables. Create a new table “emp” and the same “audit” table.
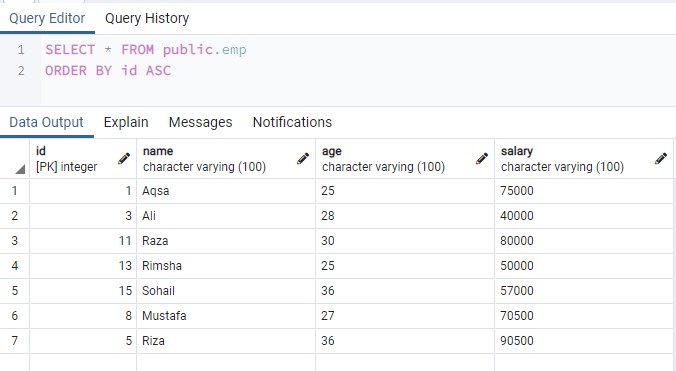
This time we will invoke the trigger command by the DELETE command. Below is the table “emp” with some records.
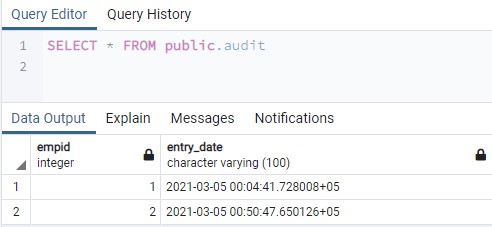
Here is the audit table with the previous two updates.
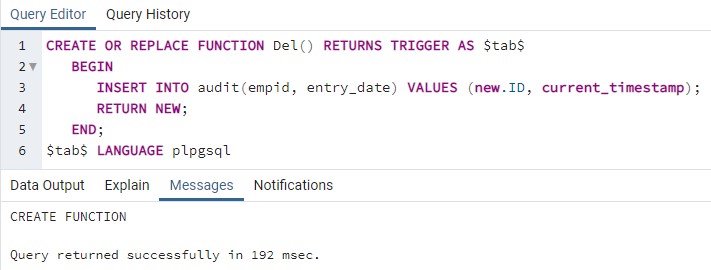
Create a procedure named “Del()” to trigger the insertion in the “audit” table upon deleting the records from table “emp”.
Create a trigger “del_trig” using the CREATE TRIGGER query. This trigger will execute the procedure “Del” when some DELETE clause will be performed on the table “emp”.

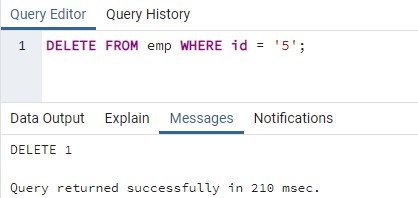
Let’s delete a record from the table “emp” where the employee “id” is “5”. It will delete one row from the table “emp”.
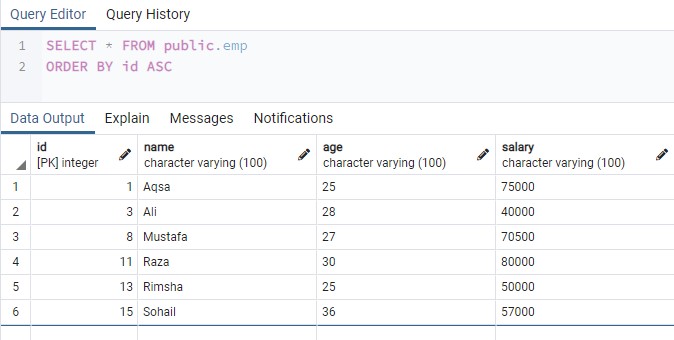
Fetch the records of table “emp” and have a look at it. You can view that the row has been removed where the “id” was “5”.
Now extract the “audit” table records and you will notice that it has been updated because the DELETE operation has been performed on the table “emp”.

Conclusion:
We have done almost every essential example to understand the concept of TRIGGER while performing INSERT, UPDATE, and DELETE operations.