PostgreSQL is a very extensive and cross-platform database system. This tutorial teaches us how to install PostgreSQL on various operating systems.
NOTE: In this tutorial, we will demonstrate how to install PostgreSQL using Windows 11, Ubuntu 22.04, and MacOS Ventura. However, PostgreSQL is backward compatible and supports the older versions of either system.
Install PostgreSQL in Ubuntu
We start by learning how to install PostgreSQL in Ubuntu. Luckily, PostgreSQL is readily available in Ubuntu packages.
Start by refreshing the system packages with the following command:
Once updated, run the apt install command to install your desired PostgreSQL version. For example, to install the PostgreSQL version 14, we can run the following command:
The given command downloads the PostgreSQL and all the necessary dependencies and configure them on your system.
Once installed, you can proceed and configure the server to your liking. To start the PostgreSQL server, you can run the following command:
Once started, you can check the service status with the following command:
Output:
Loaded: loaded (/lib/systemd/system/postgresql.service; enabled; vendor preset: enabled)
Active: active (exited) since Mon 2023-05-29 21:16:19 EAT; 49s ago
Process: 4255 ExecStart=/bin/true (code=exited, status=0/SUCCESS)
Main PID: 4255 (code=exited, status=0/SUCCESS)
CPU: 2ms
May 29 21:16:19 linuxhint systemd[1]: Starting PostgreSQL RDBMS...
May 29 21:16:19 linuxhint systemd[1]: Finished PostgreSQL RDBMS.
You now successfully learned how to install and start the PostgreSQL server on your Linux system.
Install PostgreSQL on Windows
You can install PostgreSQL using the provided graphical installer if you are on Windows. Open your browser and navigate to the link:
https://www.enterprisedb.com/downloads/postgres-postgresql-downloads
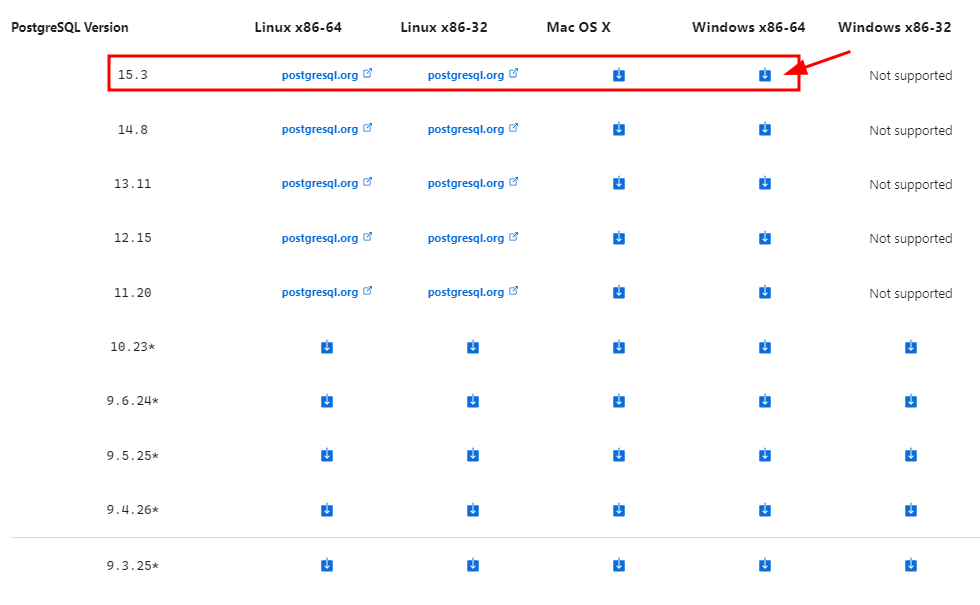
Choose the appropriate installer for your target system and click the download icon.
In our case, we install PostgreSQL 15.3 by downloading the Windows x86-64 installer. Then, save the installer file to your system and wait for the download process to complete.
Once the download is complete, open the file explorer and navigate to the downloaded file. This should launch the PostgreSQL installer wizard which allows you to install and configure the PostgreSQL server in a few steps.
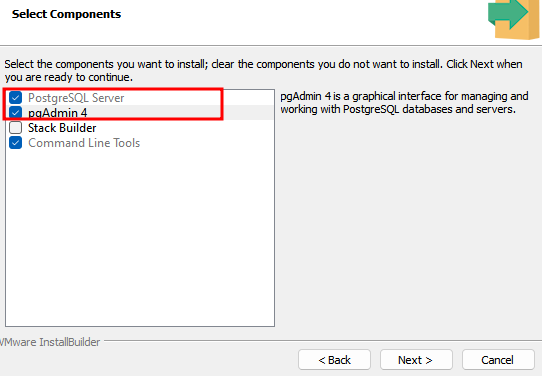
Start by selecting the components that you wish to install. In this case, we are interested in the PostgreSQL server. You can also download and install pgAdmin 4, a graphical manager for the server.
Ensure to include the command line tools to access the CLI tools for PostgreSQL such as PSQL.
In the following steps, you need to choose the installation directory and the default port for PostgreSQL. You can select the default values for both for ease of use.
Once completed, you will be prompted to configure the superuser to administer and manage the database server. Use the postgres user and configure the desired password for that user.
Finally, complete the installation and follow the instructions to install the pgAdmin 4 utility on your system.
Install PostgreSQL in MacOS
You can use the Homebrew package manager on macOS to configure PostgreSQL on your system. Ensure that you have Homebrew installed on your machine https://brew.sh
Once you have the Homebrew installed, you can install PostgreSQL by running the following command in your terminal:
After the installation process completes, you can start the PostgreSQL service with the following command:
To stop the PostgreSQL server running on Homebrew, you can run the following command:
Conclusion
You now learned how to install the PostgreSQL server on various systems using various tools and package managers.


