This tutorial explains all Nmap techniques to define IP ranges to scan.
Nmap is the most popular network scan among Linux users and network administrators. It is extremely powerful and flexible, allowing it to scan ports, IP ranges, entire networks, multiple unrelated targets, vulnerabilities, and more.
It is widely used for both network problems diagnosis and security auditing. Managing Nmap is mandatory for server, network administrators, and any user concerned on his network security.
Scanning IP ranges with Nmap (Network Mapper) network scanner is easy thanks to Nmap’s flexibility. Users can scan single targets, whole subnets, partial subnets, file lists with targets, and can even instruct Nmap to generate random targets, or to discover possible targets within a network based on specific conditions or arbitrarily.
All examples given in this document include screenshots, making it easy for all readers to understand how commands are applied.
Previous Example With Single Target
Before starting with IP ranges and multiple targets, users without experience with Nmap can see how attacks against single targets are launched.
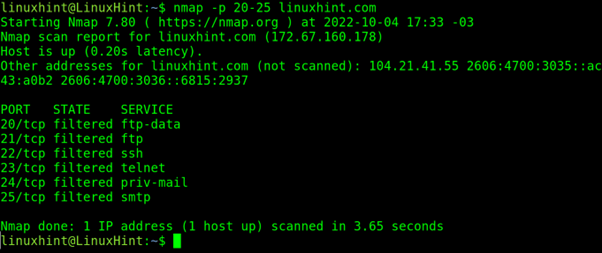
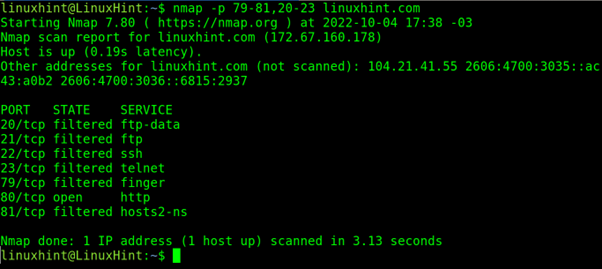
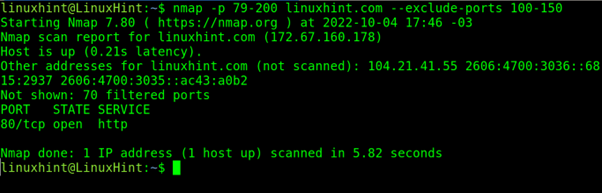
The first introductory example shows how to scan a single target (linuxhint.com). Nmap sees any content of the argument which isn’t an option as a target. The following example doesn’t include options, it only calls nmap and defines the target by its domain name, which can be replaced with an IP address.
Or

Nmap reveals ports http and https are open while 996 ports remain filtered by a firewall. Nmap by default scans the 1000 main common ports only.
How to Scan IP Ranges With Nmap
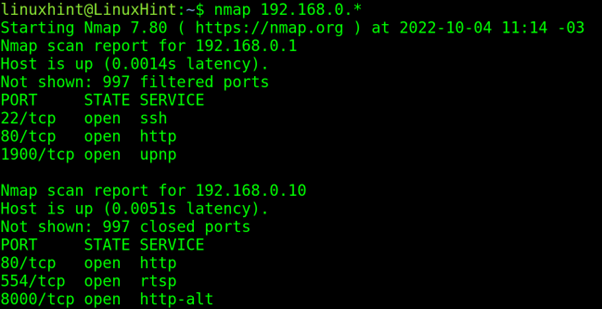
Scanning a range belonging to a Class C network is easy using a hyphen to define the range. My home network is a class C network with IPs 192.168.0.X. The following example shows how to scan a specific range of hosts within my class C network, the range goes from 1 to 30:
Users can define IP ranges by implementing a hyphen between the minimum and maximum ranges (e.g, nmap 10.0.0.1-50).
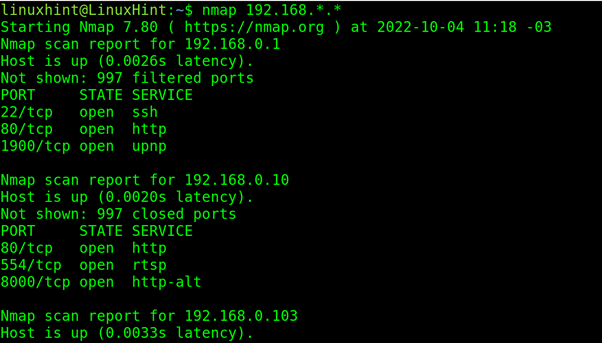
In the following example, the user scans a C class network (/24) range between IPs 192.168.0.1 and 192.168.0.200.
For users who are not familiar with IP classes, we have added an introduction to them at the end of the practical sections of this document.
The IP range is defined with a hyphen between 1 and 200 in the last octet destined for hosts.
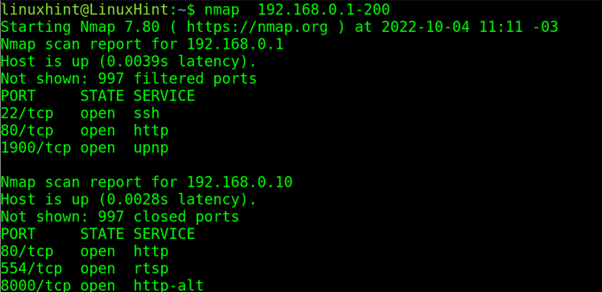
In the previous example, the user scans for available hosts on addresses going from 192.168.0.1 to 192.168.0.200 finding 2 devices within the instructed range. nmap shows their opened ports from the most common 1000 ports.
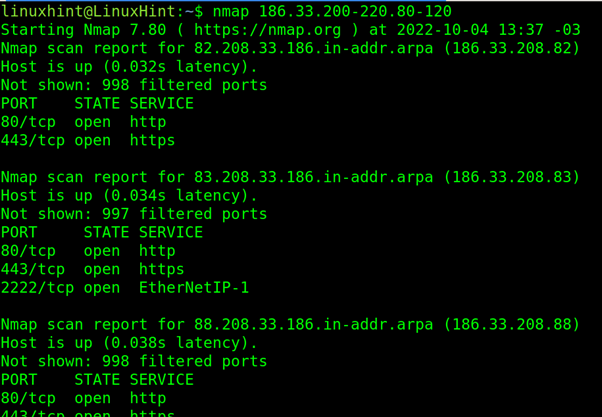
The user can define IP ranges in all octets, as shown below.
To scan a Class B network specific range, the user can implement the same method adding a hyphen in the last 2 octets. In the following example, the last two octets of the Class B network with IP 186.33.X.X will be scanned. For the third octet, the IP range 200-220, while for the fourth octet the range 80-120 are scanned. Such a scan may take a while to end.
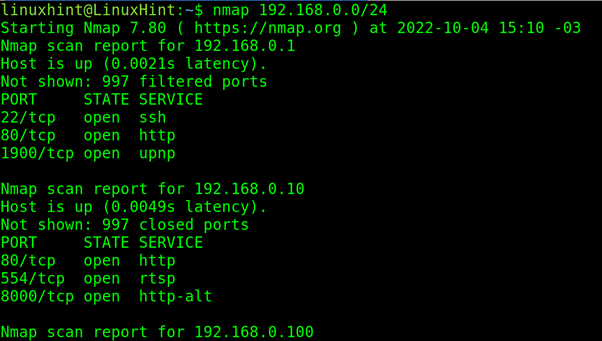
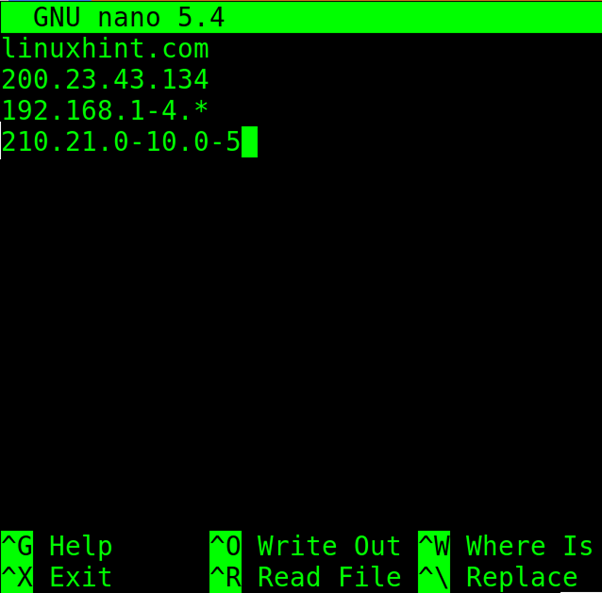
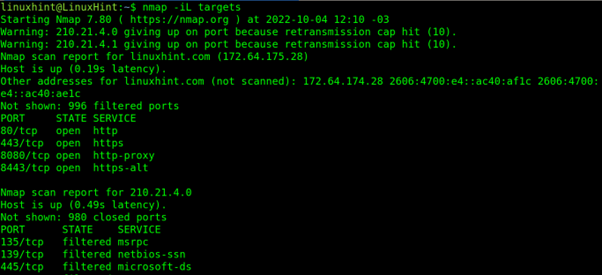
To scan an entire subnet, the user can use the CIDR format as shown below.


| Range | Class | Octets |
| 1-126 | Class A | X.Y.Y.Y |
| 128-191 | Class B | X.X.Y.Y |
| 192-223 | Class C | X.X.X.Y |
Where: X is the network address and Y the host address.
Therefore, if your network starts as 192.X.X.X, you have a Class C IP and only the final octet will vary to identify each device connected to your network. So, if your network is 192.168.0.X, the first 3 octets will remain and only the final octet will be different for each device, one may be 192.168.0.3, other 192.168.0.5, first 3 octets will remain as network identifiers.
Note: For deeper information on this subject, we recommend reading IP Classes Explained.
Conclusion
Nmap is extremely flexible allowing users to play with the syntax for custom scans. Defining targets with Nmap is part of the basic knowledge new Nmap users acquire. There is no need for advanced knowledge, by incorporating knowledge on IP classes and CIDR, users can fully understand this Nmap aspect.
Instructions previously described can be applied on all Linux distributions and even the Zenmap GUI for Nmap. Nmap is also available for Unix, Mac and Windows operating systems. Other good alternatives to Nmap you may want to check are OpenVAS, Nexpose, Nikto and Superscan, which aim to be faster than Nmap, but with a lot less functionalities.
About the author
David Adams
David Adams is a System Admin and writer that is focused on open source technologies, security software, and computer systems.