This tutorial explains how to execute banner grabbing techniques to get information on a target, using the Nmap network/security scanner.
Banner grab techniques consist of requests to services to get a response allowing us to learn certain information on the target. It is part of the footprinting process which includes operating system and service versions detection. This can be used both by network administrators to manage inventories of installed software, or by attackers to possible vulnerabilities to be exploited.
After reading this article, you will be able to execute different banner grab techniques using Nmap (Network Mapper).
All instructions described in this banner grab tutorial include screenshots, making it easy for all users to understand and follow them.
Installing Nmap to Execute Banner Grab
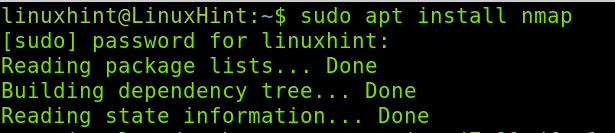
In case you don’t have Nmap installed yet, on Debian and its Linux distributions like Ubuntu, you can install it by running the command shown in the screenshot below.
Now, Nmap is installed and you can start running banner grab techniques.
Running Banner Grab Scans Using Nmap NSE (Nmap Scripting Engine)
The first section of this article explains how to use an Nmap Scripting Engine (NSE) script, specifically designed for banner grabbing.
The NSE is an Nmap feature including scripts to execute specific tasks like banner grabbing, brute force, vulnerabilities check, etc. It also allows users to write their own scripts to automate scanning tasks.
Note: You can learn more about NSE at https://linuxhint.com/nmap-scripting-engine-tutorial/.
For banner grabbing, Nmap Scripting Engine includes a script named “banner”. To use it, we need to specify we are using NSE by adding the –script= flag followed by the script we want to use, in this case, banner.
The example below shows a banner grabbing execution to learn the SSH server version of a device. The service to analyze is specified with the -p 22 (Port 22, SSH) flag.
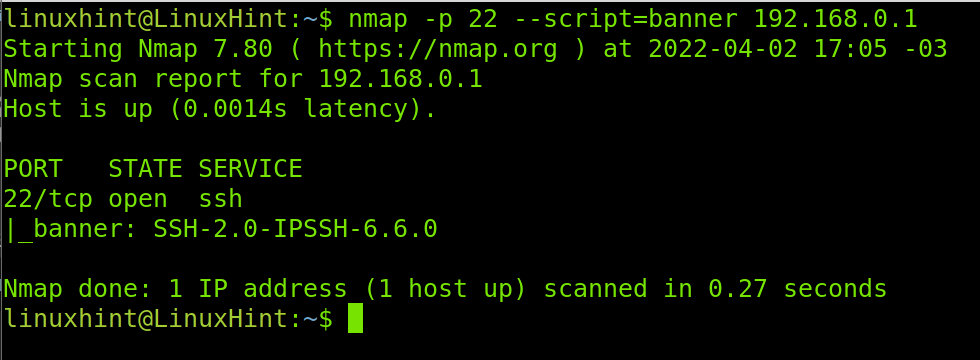
As you can see in the screenshot above, the version detected is SSH-2.0-IPSSH-6.6.0. We can see the server is using SSH 2.0.
You can combine the NSE with additional Nmap flags to increase the results accuracy, or maybe to get some more info on the target.
In the following example, I’m adding two other flags: -Pn to prevent the scan process from pinging the target, making it harder for the target to detect the scan. The second flag, -sV, which is deeply explained in the next section, is useful to learn the software versions in the target, this may result in additional useful information.
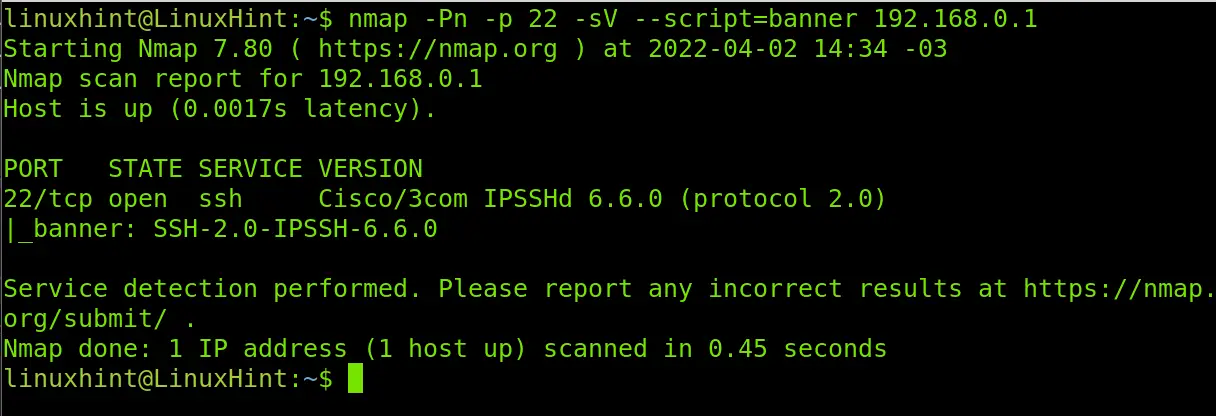
As you can see, the -sV flag returned additional information showing our target is a Cisco device.
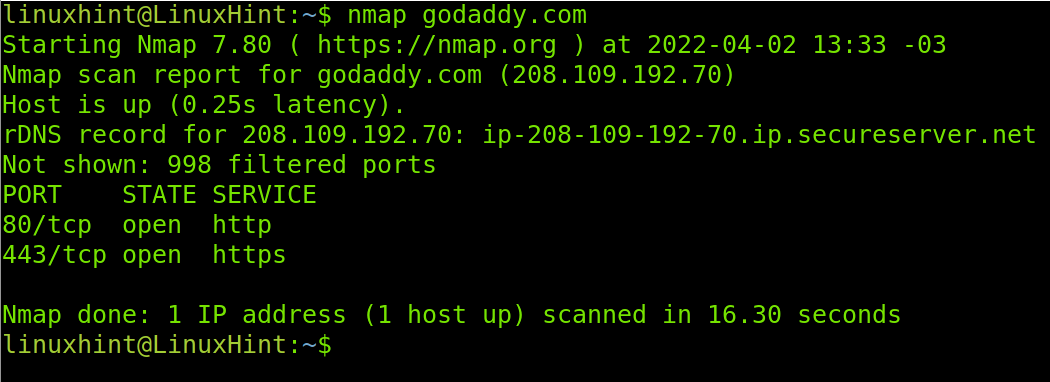
When no port is specified by default, Nmap scans the most popular 1000 ports. The Godaddy website server has only HTTP/HTTPS ports open (80 and 443), which are included among the most popular ports. In the example below, I run a banner grabbing scan to learn more about Godaddy’s web server. As in the previous example, I combine the banner script with the -sV flag.
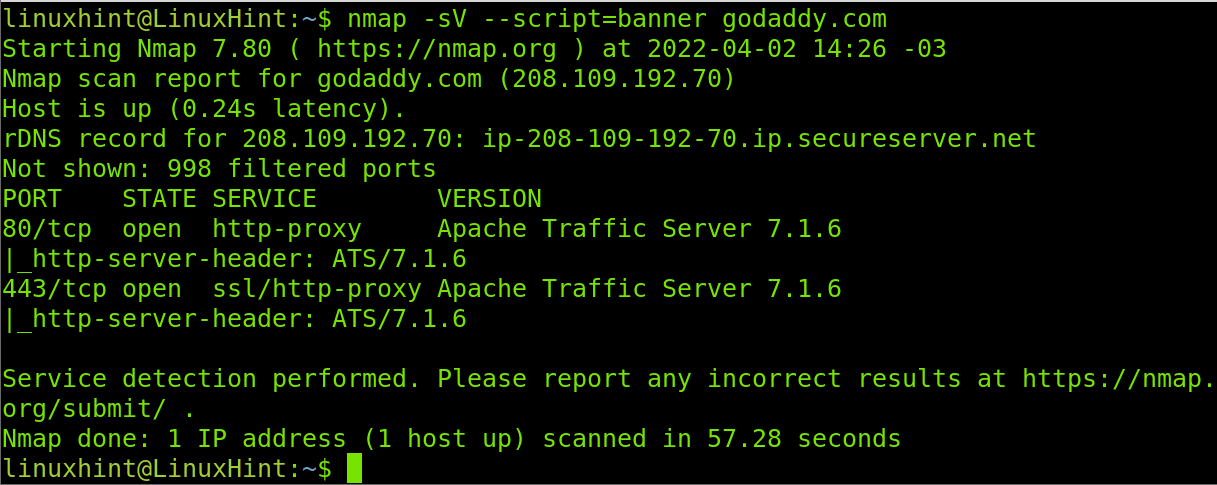
As you can see, Godaddy is using Apache Traffic Server 7.1.6 and learning it only took us less than a minute. If you were a hacker or a sysadmin auditing the security of your server, you could check for vulnerabilities of this software in databases like
In the next example, I will run both the -sV and -Pn flags together with the banner script, to learn the running FTP version on the server of the specified domain.

As you can see, the server is using the Pure-FTPd server software.
How to Execute Banner Grabbing Using Nmap Flags Without NSE
Going without NSE is a no sense decision, because NSE is included with Nmap by default. If you have Nmap, you have NSE.
Yet, you still can learn software versions on a target without using NSE and learning it will help you understand how Nmap flags work.
Therefore, this tutorial second section focuses on flags for target footprinting. But before starting, let’s see the output of a default Nmap scan.
As you can see, the default scan returns the state of the open ports.
To learn the software versions on the open ports, we can use the previously used –sV flag, but in this case, we will specify the intensity of the request.
The -sV flag contains different intensity levels ranging from 0 to 9 and being 7 the default intensity level. As the intensity level is lower, the scan will run faster but with less probes. As the intensity level increases, the scan will run slower, but returns a more accurate result. In most cases, the result is the same.
Below, you can see an example of the lower intensity level (0) for the -sV flag.
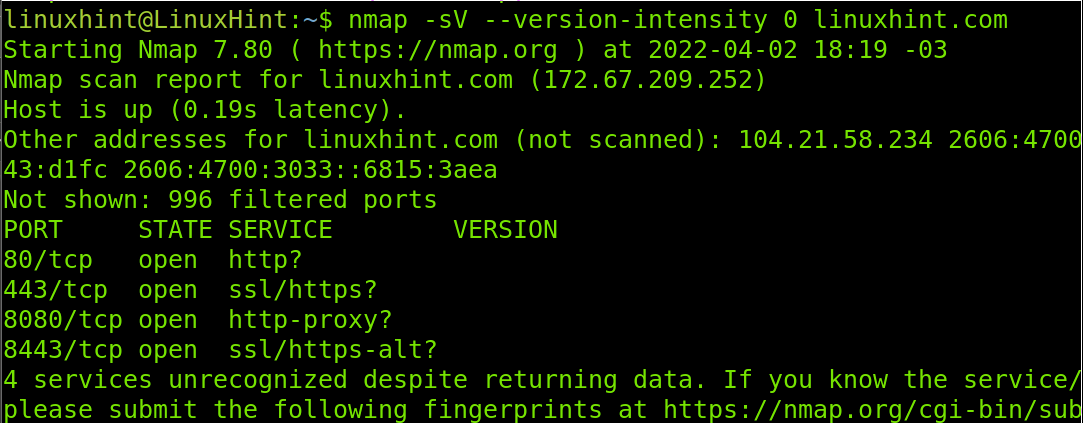
As you can see, the command did not return the versions of the software behind our target. And there is a reason for this, probably a defensive measure.
Now, let’s increase the intensity of the scan to the higher value (9), to check if we can learn more about our target.
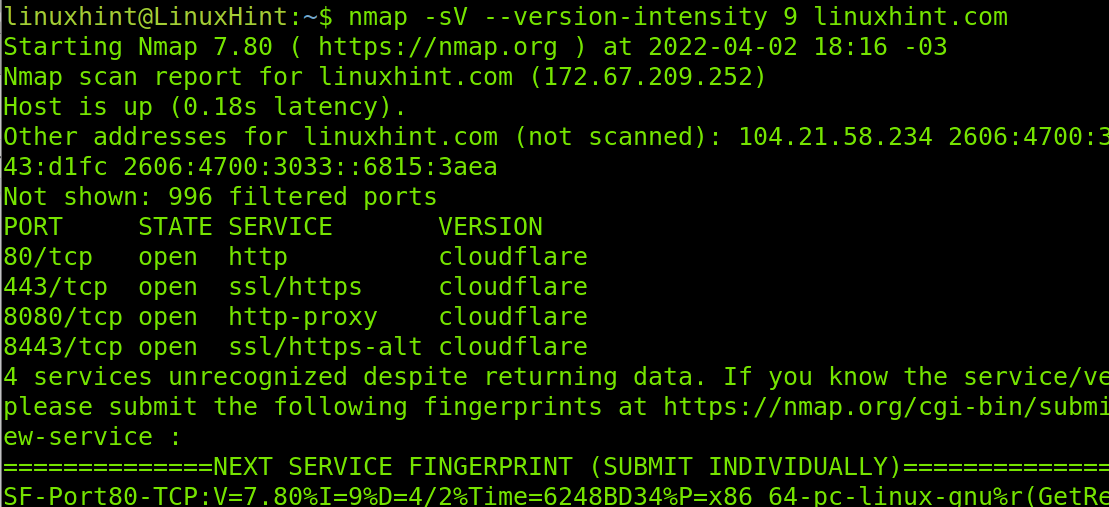
As you can see in the screenshot above, now we know our target is being protected by the Cloudflare service, preventing us from getting the running software versions on our target.
With this result, you know the steps to follow will include tools to reveal the real server IP address behind Cloudflare, some of which may be Cloudfail, Fierce, Shodan, etc.
Conclusion
Banner grabbing is one of the first stages when auditing a target. It is especially useful for big network administrators to generate an inventory of client devices and the software versions installed on them. As you can see, learning the software versions on a target is pretty easy and can be done by any Linux level user. The market offers a lot of tools for banner grabbing, but none of them is so potent as Nmap is. Remember combining different banner grabbing techniques may return a more accurate and informative result.
Thank you for reading this tutorial showing how to run banner grab checks using Nmap. I hope it was useful for you. Keep following Linux Hint for more professional tutorials and tips.