This tutorial explains how to use Nmap to find servers and vulnerabilities behind ports.
Nmap is one of the most helpful networking tools allowing you to map networks, discover hosts, scan ports, diagnose network problems, detect and exploit vulnerabilities, and more.
This tutorial focuses on the services version and vulnerabilities detection techniques. Readers unfamiliar with Nmap may prefer to start by reading our Nmap basics tutorial.
All instructions in this document contain screenshots, making it easy for all readers to understand how they are implemented in the terminal.
Scan Ports To Detect Services With Nmap
The first section of this tutorial explains how to detect services and their software version listening on open ports.
As shown in the first screenshot, a regular Nmap scan will return the open ports among the 1,000 most commonly used ones. By default, Nmap scans the 1,000 most popular ports.
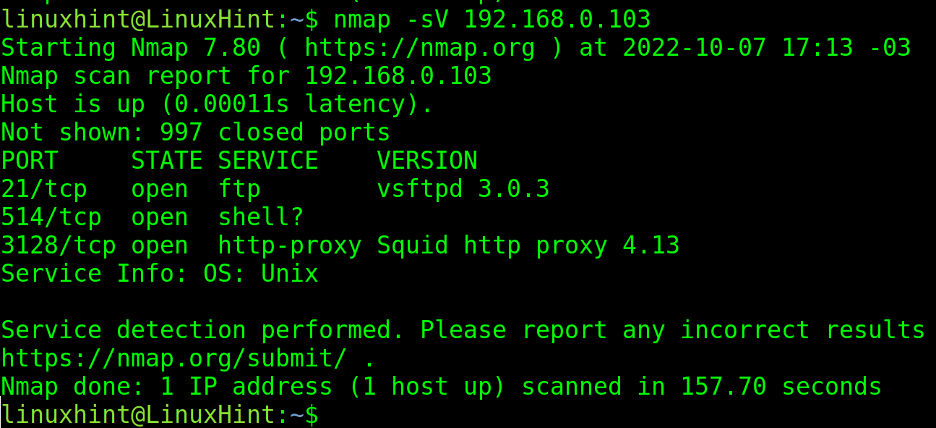
Ports are associated with related service protocols. In the following output, Nmap finds open ports 21, 514, and 3128.
The user knows ports 21, 514 and 3128 are open. For example, he knows that there is an FTP server in port 21. But the user wants to learn the FTP software and all other services.
To detect software and versions, the -sV (Version) flag can be passed, as shown in the screenshot below. Wherein you can see, Vsftpd 3.0.3 and Squid Proxy 4.13 are detected.
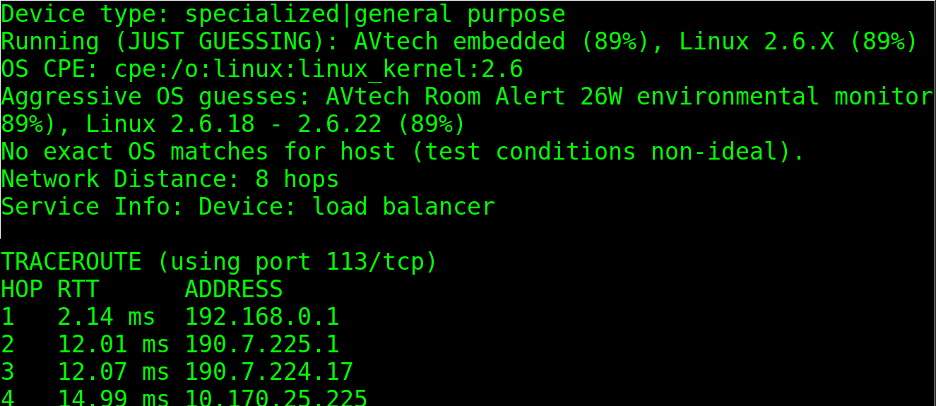
The -A flag also returns service versions together with operating system information.
In the following example, the -A flag revealed the target is a Linux operating system, probably 2.6.18 or 2.6.22:
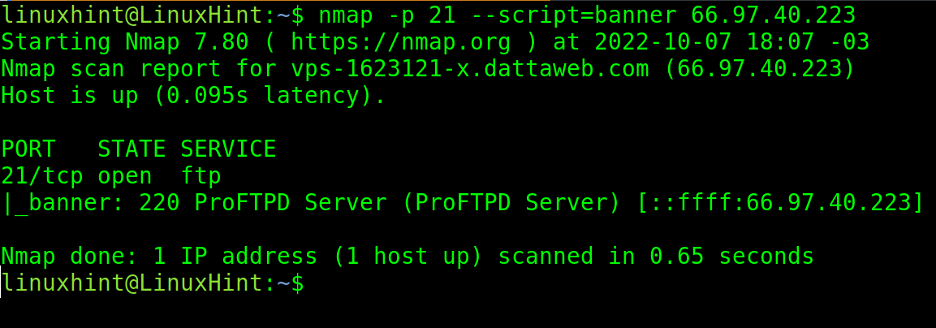
The next section of this tutorial describes NSE (Nmap Scripting Engine) techniques. This practical example shows which the –script flag is implemented to incorporate the banner grab script into the scan.
The banner grab script analyzes service replies to realize their software version.
In the following example, the banner script is executed in the scan targeting port 21, revealing the FTP server is ProFTPD.
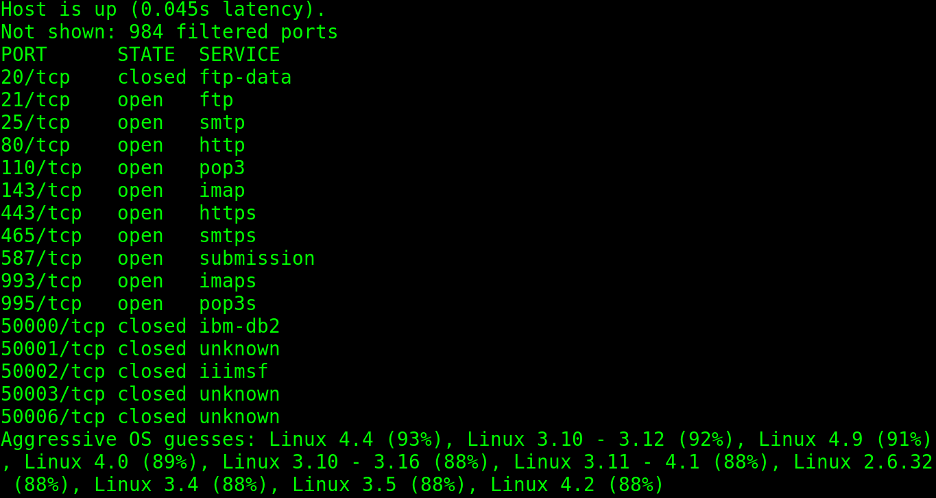
To end this section and continue with vulnerability scan types, the practical example below shows the -O (Operating System) flag implementation to guess the target operating system.
In this case, Nmap is 93% sure the target has Linux with kernel 4.4.
These are the most known Nmap techniques for service and OS version detection.
Detecting vulnerabilities with NSE (Nmap Scripting Engine)
This section describes some techniques to detect vulnerabilities through Nmap scans, with the aid of the NSE (Nmap Scripting Engine), explained in our NSE tutorial.
The Nmap Scripting Engine is a set of scripts users can include in their scans, designed mainly to detect and exploit vulnerabilities. Users can also write their scripts for custom purposes.
The first step for the NSE scripts is to update the database, making sure Nmap is up to date with the latest vulnerabilities and techniques.
To update NSE, run the following command:
After updating the database, the user can run various scripts to find vulnerabilities. The scripts are classified by categories you can see at https://nmap.org/nsedoc/categories/.
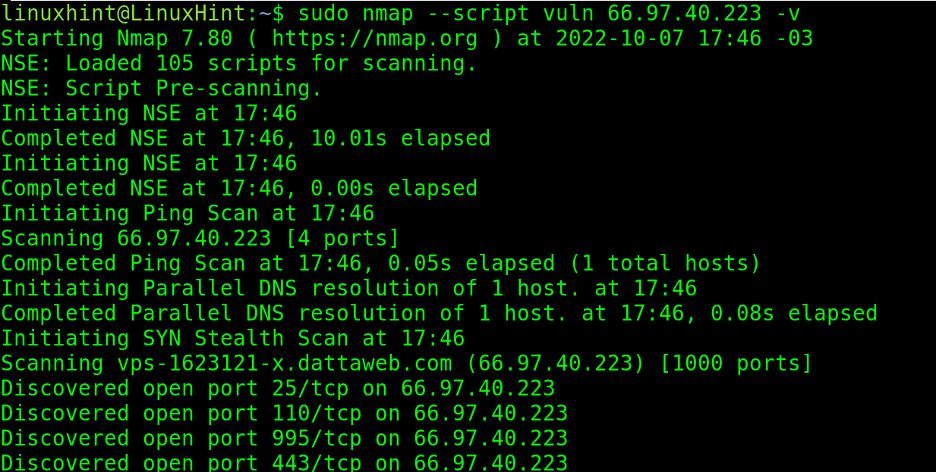
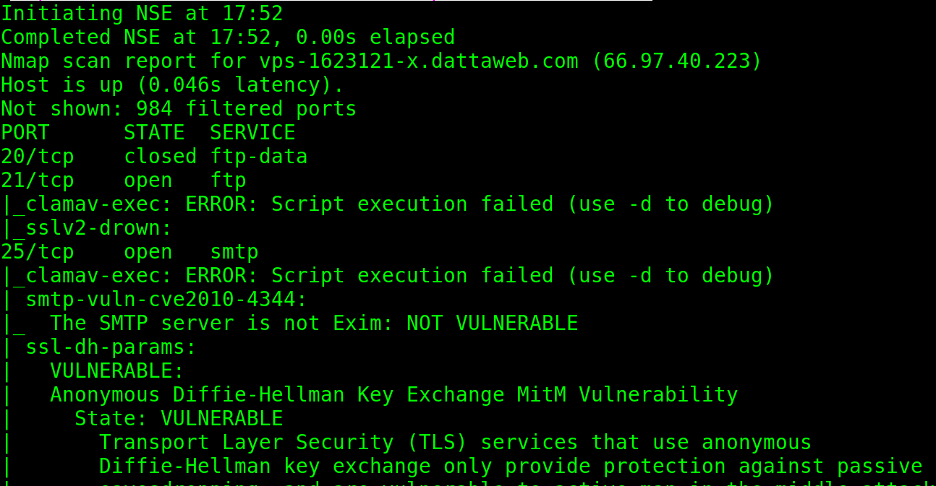
In the following example, the –script flag calls the scripts from the vuln category, scanning for around 150 popular vulnerabilities.
As you can see in the following screenshot, Nmap reports some vulnerabilities are discarded while others are probable:
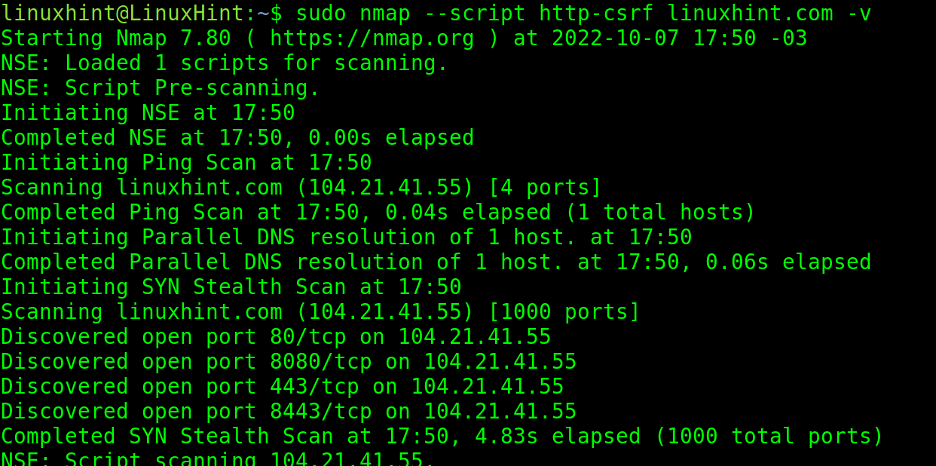
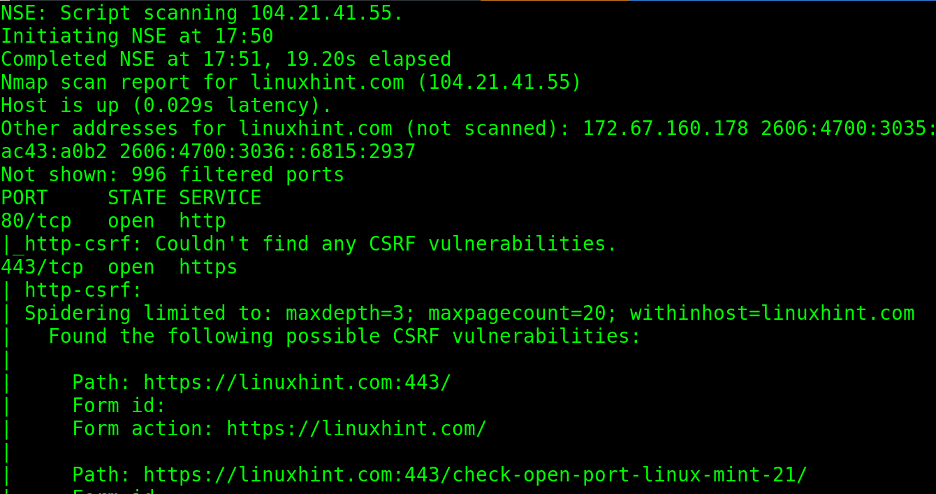
The http-csrf script allows users to scan websites to find csrf (Cross Scripting Request Forgery) vulnerabilities.
As you can see below, if verbosity (-v) is instructed, Nmap prints the result of all checks it does against the website.
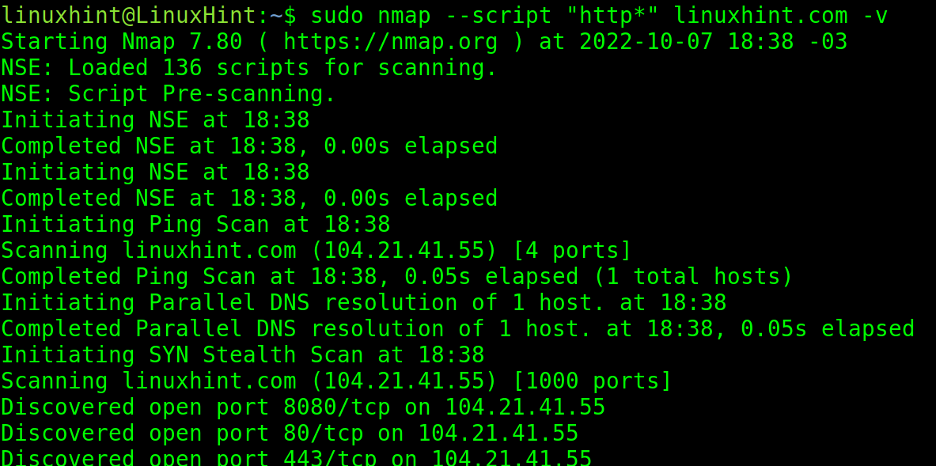
Users can implement wildcards to complete script names. In the following example, the user adds all http-related scripts or all scripts whose name begins with “http”, independently of how it continues.
The Nmap Scripting Engine can target whole networks to detect computers infected with malware. This is a great technique for administrators to approach possible malware intrusions.
Available malware scripts can be found at https://nmap.org/nsedoc/categories/malware.html.
Detect Vulnerabilities With Nmap and Vulscan
Vulscan is an additional set of scripts for NSE, which is not included in Nmap by default.
Vulscans is deeply explained in the Nmap Vulscan tutorial, but this section offers a brief review, installation, and basic instructions.
Vulscan is a Nmap Scripting Engine script to aid in vulnerability detection tasks,
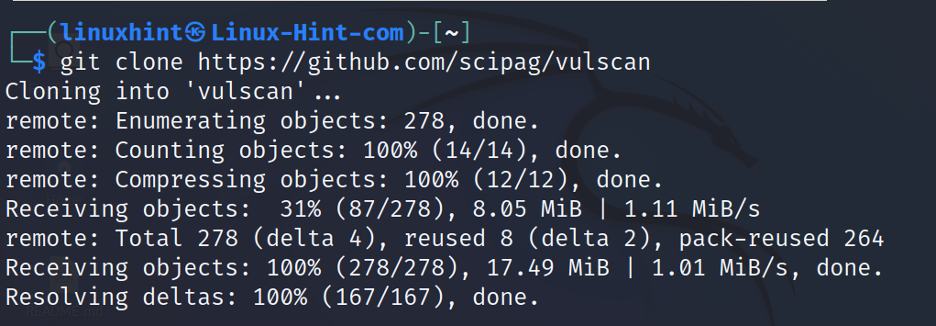
To get it, clone vulscan using the git command, as shown below:
Create a soft link to the NSE scripts directory by executing the following command:
Now, Vulscan is available to be called by the –script flag to run additional vulnerability checks.
The syntax is the following:
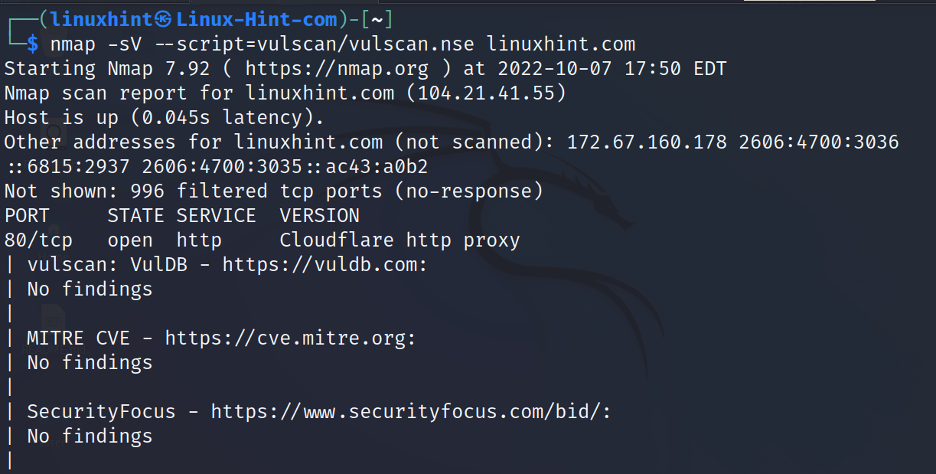
In the following example, vulscan is launched against linuxhint.com.
When Vulscan detects a probable security hole, it executes all related scripts.
Vulscan is an excellent addition for Nmap users, especially those used to the Nmap Scripting Engine. We highly recommend you continue reading our Vulscan tutorial mentioned in the introduction of this section.
Vulners
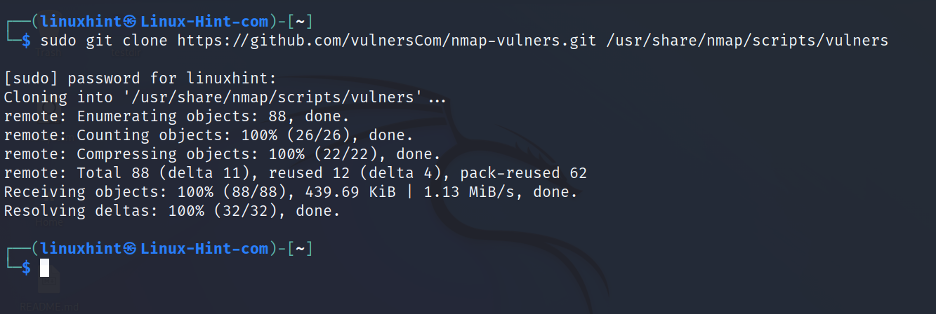
Use the following command to clone Nmap-vulners to your NSE scripts directory:
Execute Nmap with vulners using the following syntax:
About the NSE (Nmap Scripting Engine)
The NSE (Nmap Scripting Engine) is among the most required Nmap features.
It is a collection of scripts to automate and customize scanning tasks. The scripts can be executed before, during, or after the scan.
While Nmap offers diverse script categories, users can also write their own scripts in the Lua language.
In addition, NSE scripts can be used for vulnerability exploitation to service and vulnerability detection or even for brute force attacks.
Scripts are divided into the following categories: auth, broadcast, default, discovery, dos, exploit, malware, intrusive, fuzzer, external, safe, version, and vuln, the category used in the first usage example on the NSE section.
Metasploitable virtual devices are an excellent resource for testing NSE capabilities. Scripts can also be included in massive scans targeting multiple networks.
The scripts of the NSE are categorized according to specific criteria based on the moment of the script execution, the script purpose, and functionality.
The first classification based on the execution time includes four types of scripts:
- Prerule scripts: These are executed before any Nmap scan phase, for example, scripts used to generate new targets.
- Host scripts: Host scripts are executed in the scan process.
- Service scripts: These scripts are executed after each batch of targets is scanned, like Host scripts.
- Postrule scripts: Postrule scripts are executed after the scan process; these scripts can exploit vulnerabilities discovered in the scan process.
The second classification is based on the script’s safety and purposes.
Purpose and safety define the script category. Categories were previously listed in this document.
Conclusion
Nmap is extremely powerful and flexible. In other tutorials on Nmap port scan, host discovery was unrevealed. The previous content shows any user, independently of knowledge level, can get introduced to IT security and execute important tasks, like vulnerability scans. All instructions above are valid for all Linux distributions and probably for the Windows command-line tool too.
Nmap is the oldest living port scanner, initially developed by Fyodor Vaskovich in 1997 to discover services and map networks. Written initially in C was rewritten to C++ and highly improved by the Open Source community in its second release of 1998. It continues adding features and improvements today.
It is probably the most widely used scan engine for diagnosing and security purposes, the market offers a lot of alternatives, but Nmap features and the efforts behind its community are not equaled yet.
Thank you for reading this Nmap tutorial explaining how to scan ports to find services and vulnerabilities. Keep following us for more Linux and IT security professional content.


