In this post, we will go through the simple guide on how to perform the basic network configuration and set or change the static IP address of the CentOS 8:
- through Terminal
- Using GUI
Set the Static IP address of CentOS 8 machine through Terminal
The IP address can be configured in the CentOS 8 Operating system using the NIC(Network Interface Card) system files. To configure the static IP address on CentOS 8, first, know the IP address and Interface Card name of your network using the command:
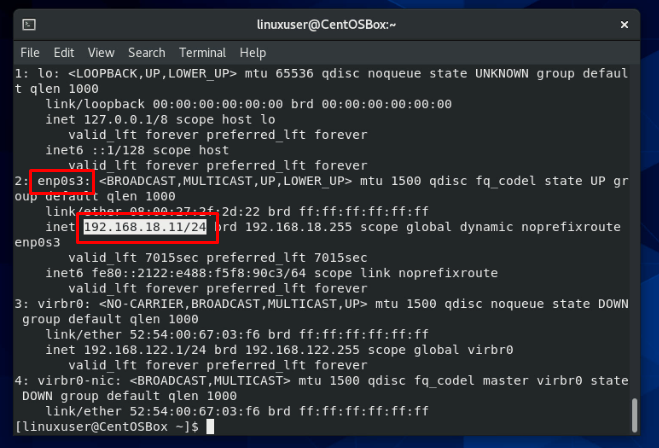
After getting the IP address of your system and knowing the Network Interface Card name, run the following command to know the file name of the Interface card:
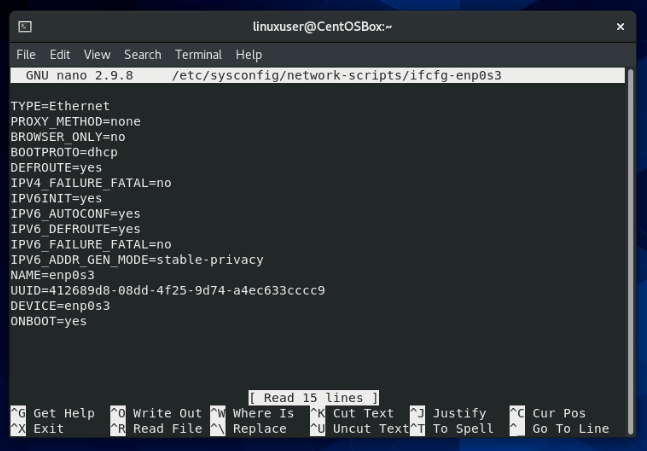
It will show all the files in the /etc/sysconfig/network-scripts/ directory, choose the Network Interface Card file and type the command given below to edit that file:
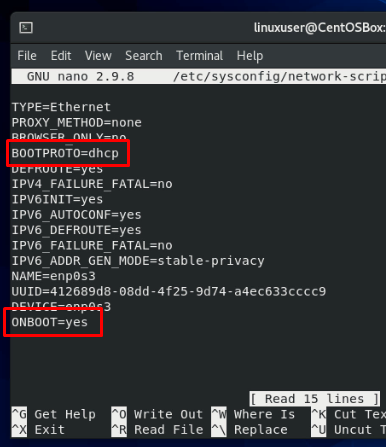
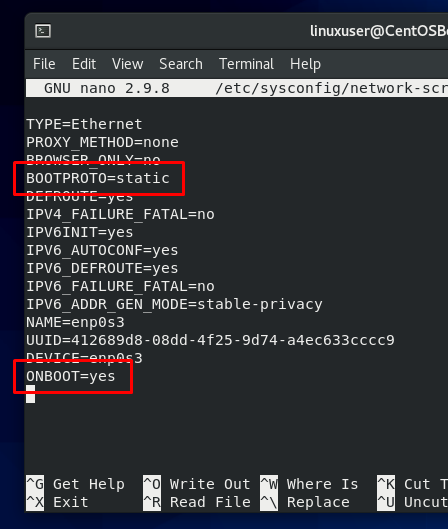
Once the Network Interface card file is opened, make sure to change the state of the following options as shown below:
ONBOOT=yes
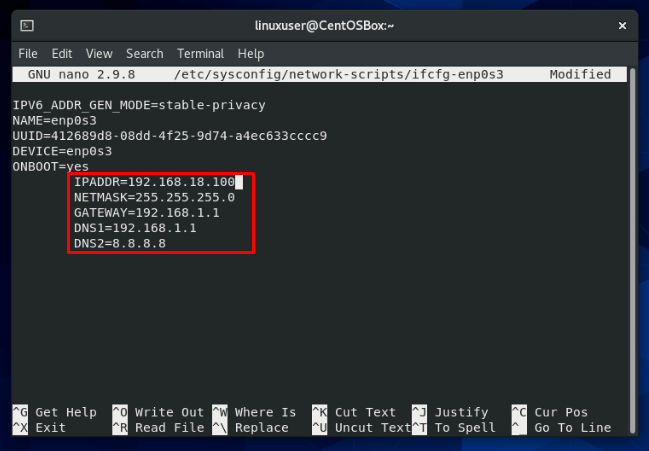
After changing the options given above, append the following lines at the end of the Network Interface Card file:
NETMASK=255.255.255.0
GATEWAY=192.168.1.1
DNS1=192.168.1.1
DNS2=8.8.8.8
After editing the file, as per requirement, save and close it using the keyboard shortcut CTRL +S and CTRL + X.
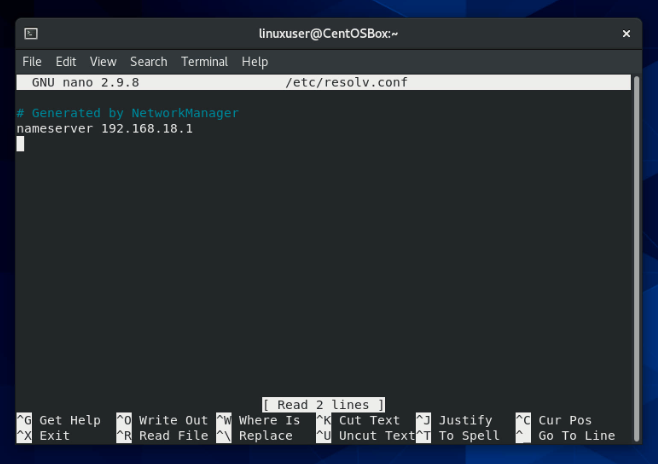
Now, we need to add the DNS servers to the resolv.conf file to enable them system-wide. Open up the resolv.conf file in a nano editor:
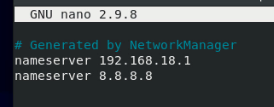
In this file, you can add multiple DNS servers:
nameserver 8.8.8.8
Once you have added the DNS servers, the Network interface is configured successfully; you just need to restart the network interface to get the changes to take effect.
To restart the Network Interface on CentOS 8, type the command:
After restarting the Network Interface, the IP address will be changed successfully on the CentOS 8 Operating system through Terminal.
Set the Static IP address of CentOS 8 machine using GUI method
The IP address can also be changed from the GUI of CentoS 8 by going to the Networks tab in the CentOS 8 Operating system settings.
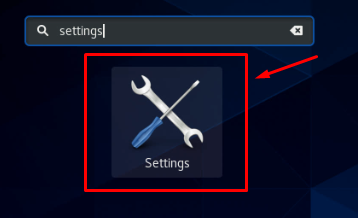
First, go to the Application menu, search for the settings, and from the search results, click on the Settings icon as shown below:
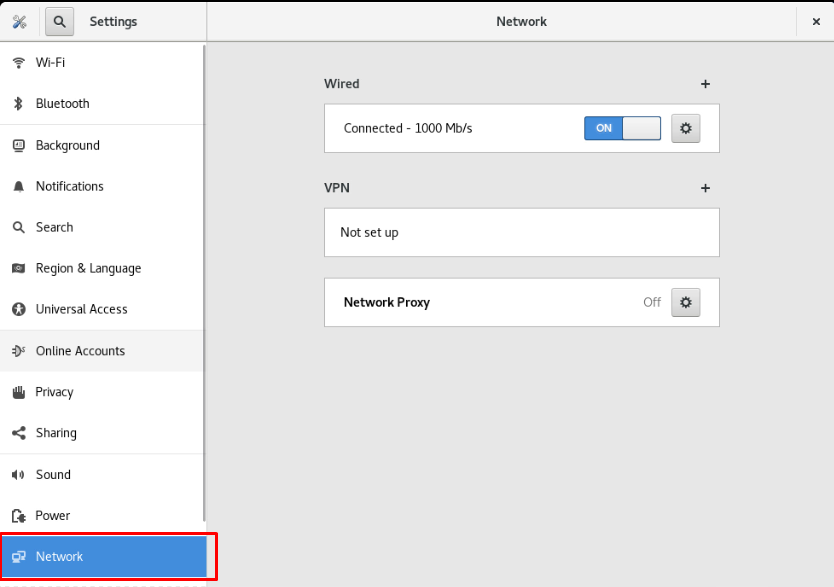
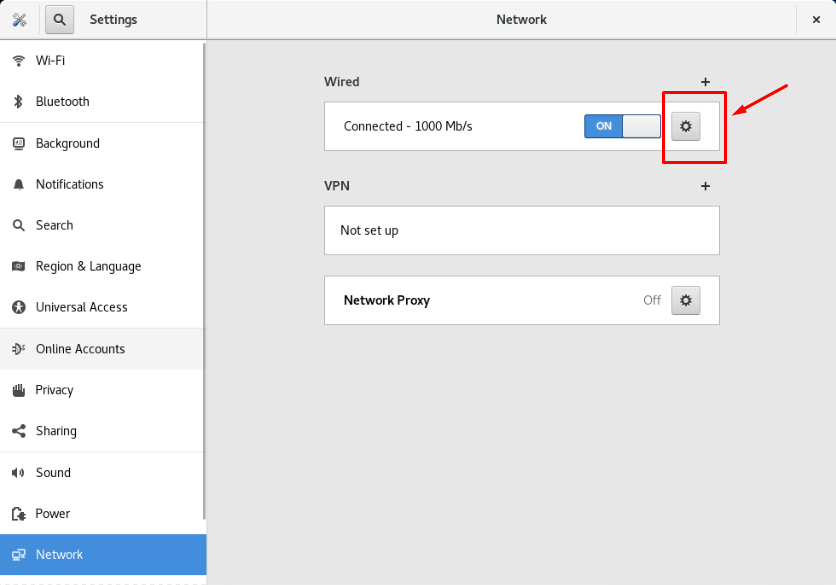
In the settings window, if you are connected to a Wifi network, then click on the Wireless tab from the left bar, or if you are connected to a wired network, then click on the network tab:
In the Network section, click on the gear icon as shown in the screenshot given below to open up the network settings:
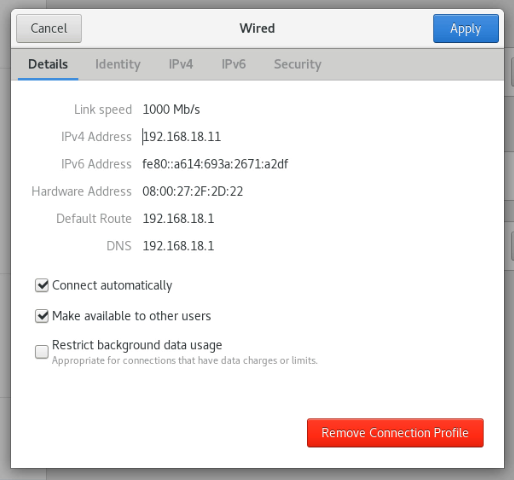
A pop-up window will appear containing the details about network connection like IP Address, Hardware Address, Default Route, and DNS.
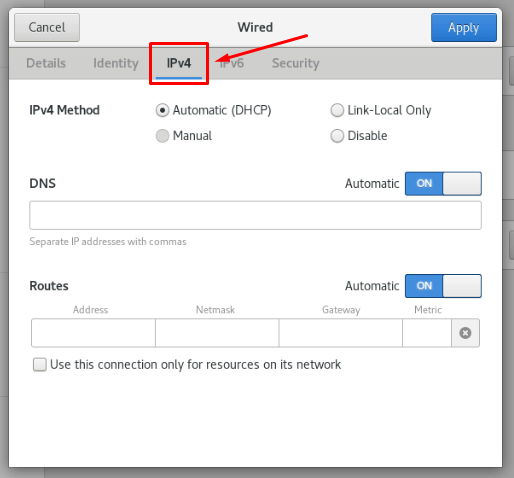
Click on the IPv4 tab from the tab menu at the top of the network settings pop-up menu:
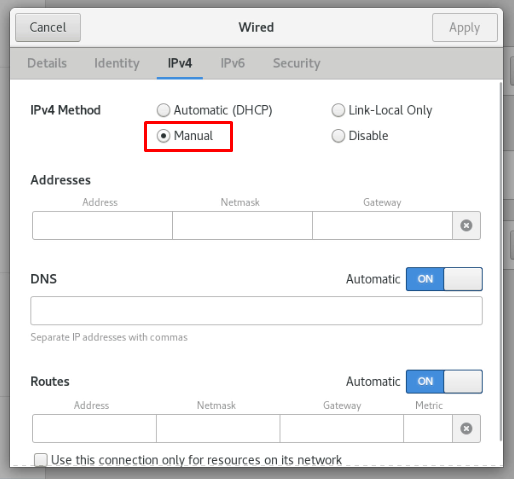
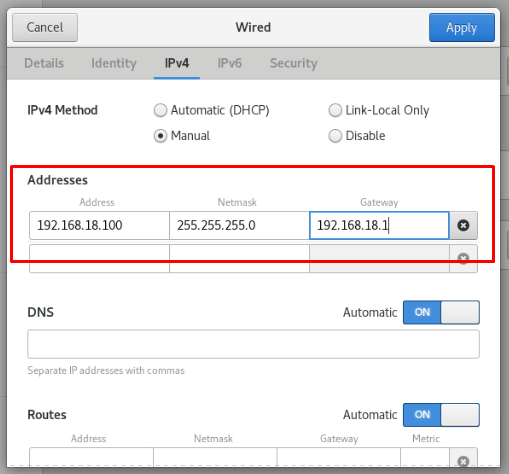
From the IPv4 methods, select Manual, and the Addresses field will appear.
Provide the new static IP address, Netmask, and Gateway as shown in the screenshot given below:
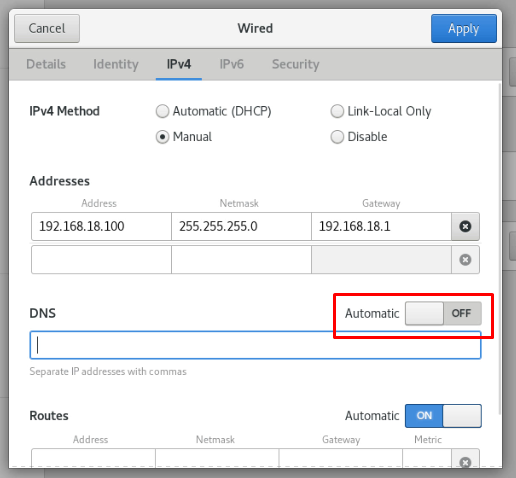
To set up DNS manually, turn off the toggle button of the DNS section:
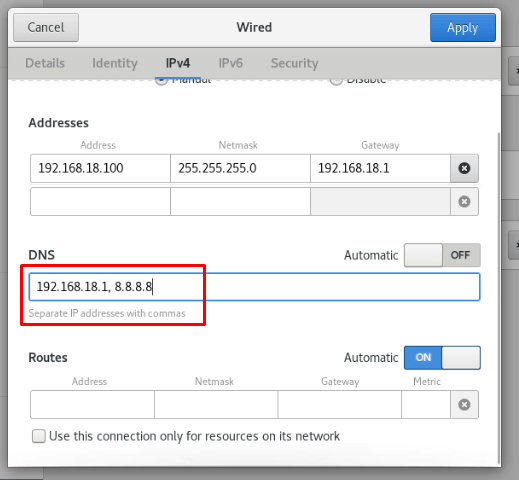
Provide the DNS server address or addresses separated by a comma.
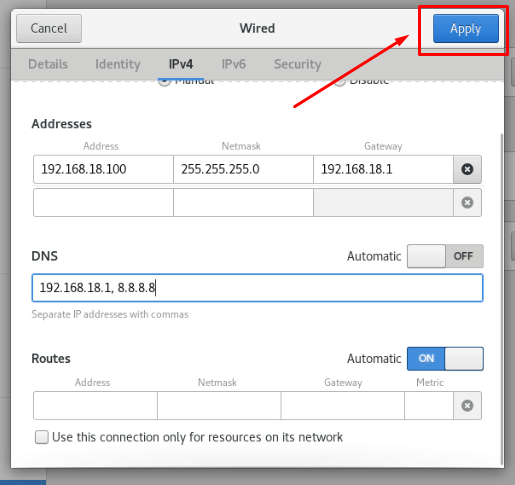
After doing all the steps given above, click on the apply button at the top right corner of the pop-up window for saving the manual network settings.
In the network window back again, restart the connection by turning off and on the network connection for the changes to get in action.
Once the network is restarted, you can verify the new changes in action by clicking on the gear icon again.
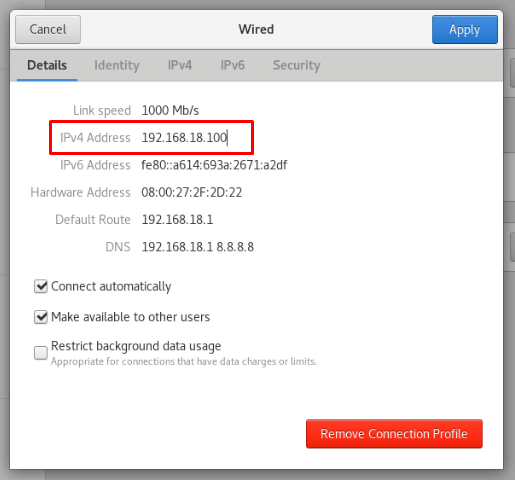
You can witness that the IP address of the CentOS 8 system is changed as we expected it to happen.
Conclusion
This is how you can perform some basic network configuration on CentOS 8. This post provides a brief and in-detail explanation about changing the terminal IP address from the terminal by changing the network Interface card file and the GUI of the CentOS 8 Operating system. If you are using the CetnOS 8 server, you can go with the terminal method; otherwise, if you are using the GUI of CentOS 8, you can use any of the two provide methods.


