Prerequisites:
To perform the steps that are demonstrated in this guide, you need the following components:
- A suitable Markdown editor. For example, VSCodium, Pulsar (fork of Atom), or any online markup editor.
- A basic understanding of Markdown (optional).
Markdown
Markdown is a popular markup language that allows adding various elements (headings, images, tables, etc.) to plain the text documents. Besides its built-in syntaxes, Markdown also supports various HTML tags. It has gained popularity over time for its interesting set of features:
- Lightweight: Compared to other markup languages, Markdown is simple and lightweight. The standard Markdown doesn’t include many syntaxes while preserving its diverse features.
- Portability: A Markdown document is fundamentally plain text. Thus, any program can work with it. You can also create a Markdown-formatted text on any platform.
- Popularity: Markdown is used to make websites, documents, notes, emails, and others. Big corporations like Reddit, GitHub, etc. also support Markdown.
Horizontal Lines in Markdown
In Markdown, the horizontal line appears as something like this:
There are various occasions where you may want to add a horizontal line in a document. For example, denoting the start/end of a section.
Creating a New Document
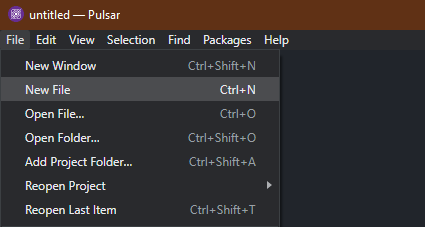
As we work with the Pulsar editor, we need to open a new text file to store our Markdown document. From the main window, go to File >> New File or use the “Ctrl + N” keyboard shortcut.
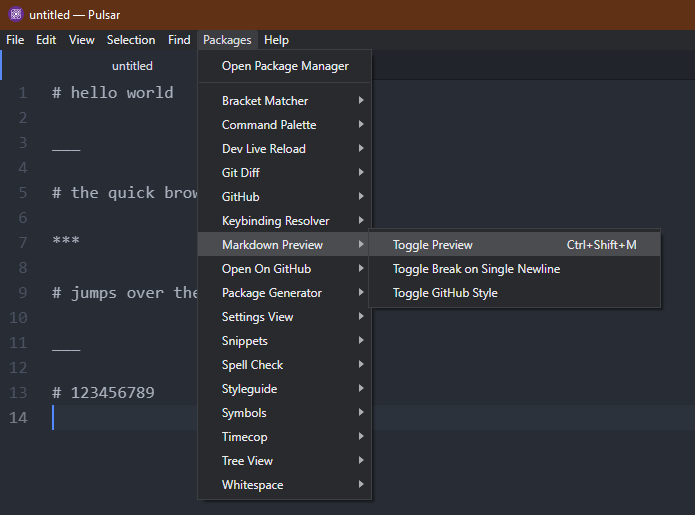
The Pulsar editor comes with a live Markdown preview feature. To enable the live preview, go to Packages >> Markdown Preview >> Toggle Preview. Alternatively, use the “Ctrl + Shift + M” keyboard shortcut.
Creating Horizontal Lines
In Markdown, there are a couple of syntaxes to denote a horizontal line:
- ***
- —
- ___
All of them will result in a similar output.
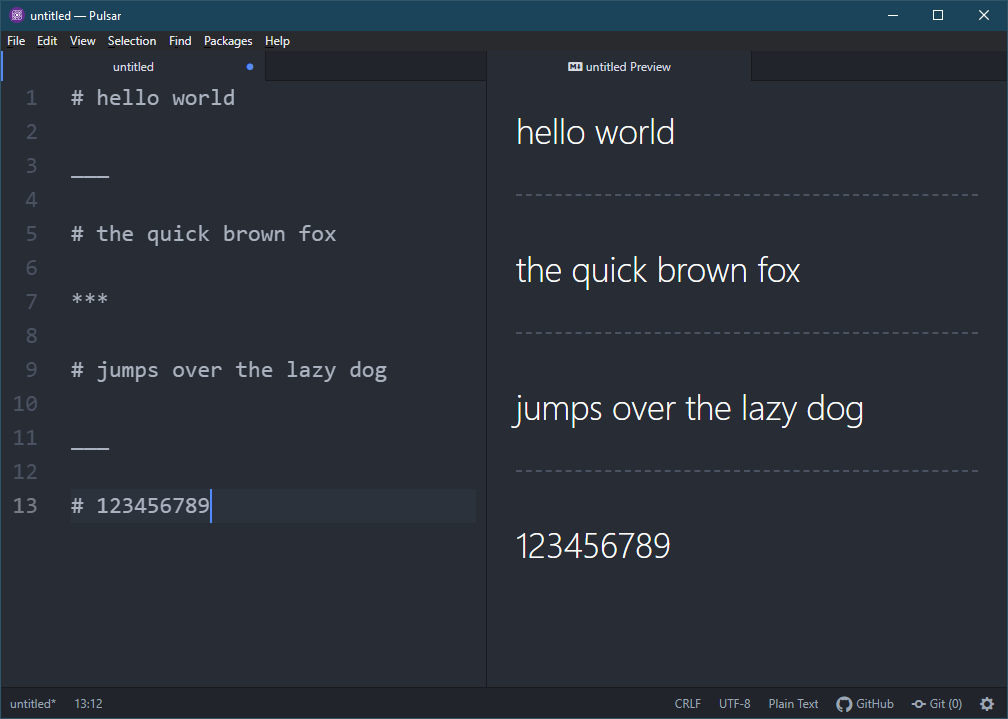
To demonstrate, copy and paste the following code into the text editor:
___
# the quick brown fox
***
# jumps over the lazy dog
___
# 123456789
Here:
- For better visuals, we use the H1 formatting for each line of texts.
- We create three horizontal lines using three different symbols.
- There’s a new line before and after each of the horizontal line symbols.
It’s recommended to use such spacing because the “—” symbol without spacing denotes a heading:
---
hello world
Creating Horizontal Lines Using HTML
If you worked with HTML before, you are probably familiar with the <hr /> to create horizontal lines. It also works in Markdown.
Check out the following code:
<hr />
Here:
- We use the H2 formatting for the text.
- The <hr /> tag generates a horizontal line in the rendered output.
One interesting benefit of this approach is that you don’t need to worry about accidentally creating a heading.
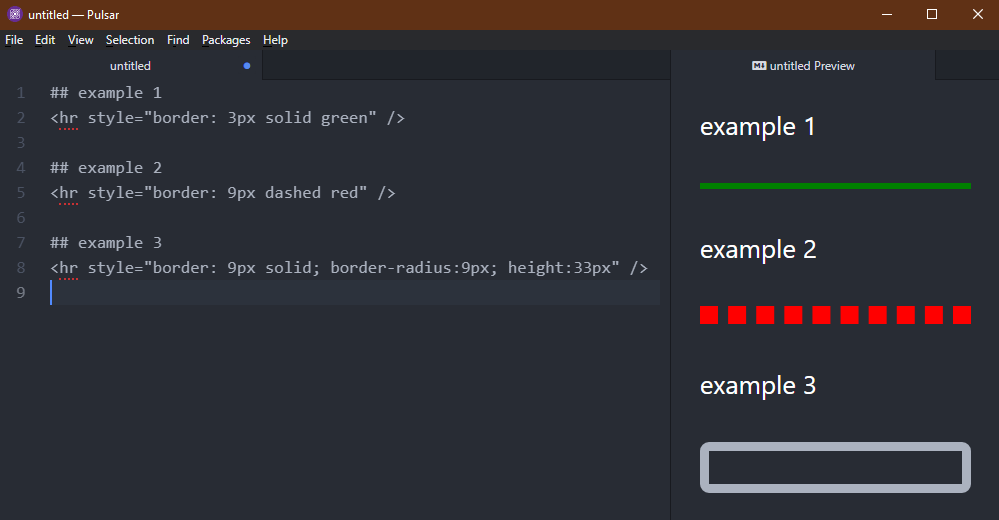
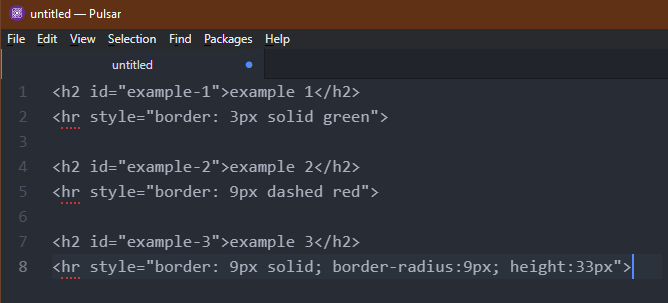
The <hr /> tag also allows tweaking various properties of the output. For example: color, width, etc. Check out the following example:
<hr style="border: 3px solid green" />
## example 2
<hr style="border: 9px dashed red" />
## example 3
<hr style="border: 9px solid; border-radius:9px; height:33px" />
Here:
- All the examples incorporate CSS to stylize the horizontal line.
- In the first example, we create a simple colored horizontal line.
- In the second example, we create a dashed horizontal line.
- In the third example, we create a rounded horizontal line.
To learn more, check out the <hr /> tag in HTML.
Exporting Markdown as HTML
With the right tool, a Markdown-formatted document can be converted into HTML. The Pulsar editor comes with this built-in feature.
To copy the rendered output as HTML, right-click on the preview window and select “Copy as HTML”.
The resultant HTML looks like this:
Conclusion
We discussed about creating horizontal lines in Markdown. We showcased using both the built-in Markdown syntax and the HTML syntax to create horizontal lines.
Interested in learning more about Markdown? Check out the Markdown sub-category.


