How to create a game on Arduino Uno using LCD
To create a game, we have to create a circuit that we will implement on the hardware and before that we have to shortlist the necessary components that are required to design the circuit:
- Breadboard
- 1 16x2Liquid Crystal Display
- Connecting wires
- 1 push button
- 1 Potentiometer
- Arduino Uno
The figure below shows the schematic of the circuit designed for creating a game using Arduino Uno:
How to assemble the Hardware for creating the game using Arduino Uno
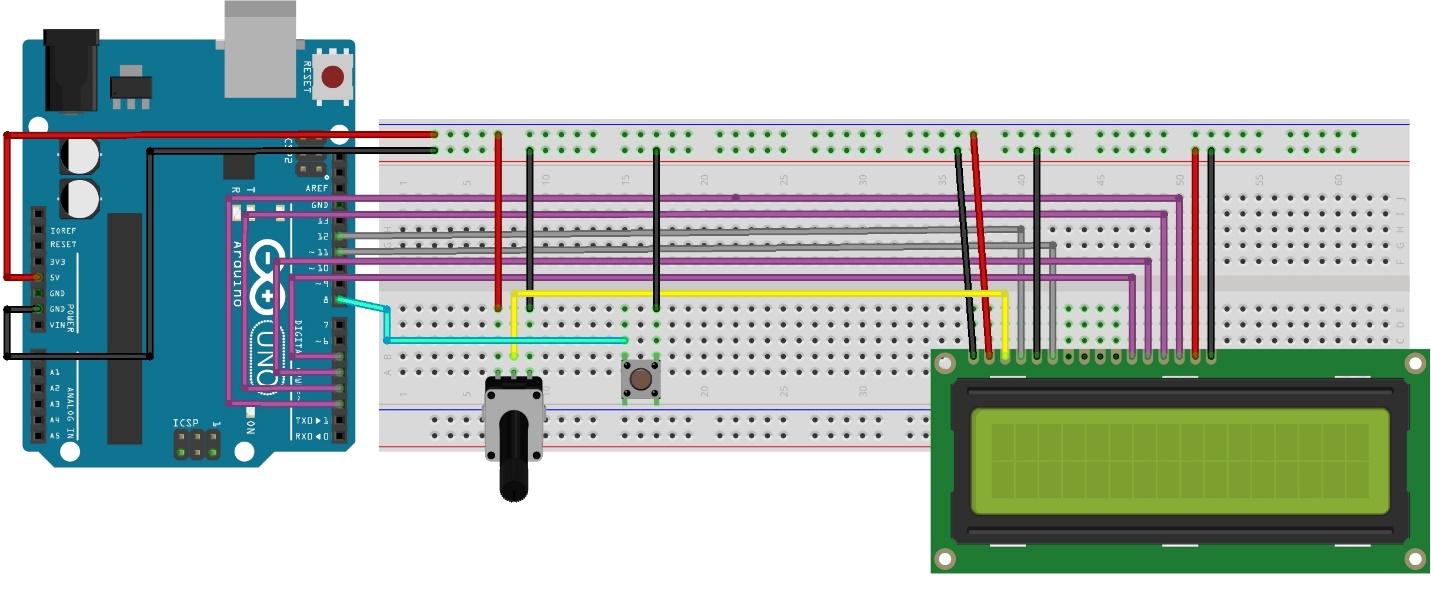
To make the assembling of hardware easy we have given the image below that show how we can connect the components required to create the Arduino game:
We have connected the LCD data pins to Arduino Uno using its pin 5,4,3,2 with the purple wires and for the brightness adjustment of the LCD we have connected the potentiometer. The yellow wire connects the potentiometer output with the LCD. To play the game we have used the push button that will change the position of the character by connecting its one pin using cyan color wire to pin 8 of Arduino and grounding the other pin.
For connecting the LCD, potentiometer and the push button with supply we have taken the supply from Arduino Uno using the breadboard pins.
How to write Arduino code for creating a game using Arduino Uno
We have provided below the Arduino code for making a obstacle avoidance game using Arduino Uno:
LiquidCrystal lcd(12, 11, 5, 4, 3, 2);/* assigning the pins of Arduino to LCD*/
int Button=8;/*assigning the Arduino pin for push button*/
/*variables for storing time to move the enemy and character*/
unsigned long a;
unsigned long b;
unsigned long c;
unsigned long d;
int Delay=500; /* defining the speed of enemy */
int DecreaseDelay=20; /* for decreasing the speed of enemy */
int State2=0;/* variable that will store the value of push button when pressed at the start of the game */
int state1=0;/* variable to store the value of the button pressed to move the place of character*/
bool pac=0;/* variable that will save the value for character to detect the collision with the enemy*/
int i;/* variable that is used to move the enemy on the LCD*/
int points=0;/* variable to store the points achieved the player */
/*declaring the binaries for enemy and character*/
byte enemy[8] = {
B00000,
B00100,
B01110,
B11111,
B10101,
B11111,
B11111,
B10101
};
byte pac1[8] = {
B00000,
B01110,
B11011,
B11110,
B11100,
B11110,
B11111,
B01110
};
byte pac2[8] = {
B00000,
B01110,
B11011,
B11111,
B11111,
B11111,
B11111,
B01110
};
void setup() {
pinMode(Button,INPUT_PULLUP);// assign the working mode to the push button */
lcd.begin(16, 2);/* declaring the size of display*/
lcd.createChar(7, enemy);// declaring the enemy as a character
lcd.createChar(6, pac1);// declaring the pac1 as a character
lcd.createChar(5, pac2);// declaring the pac2 as a character
i=15;/* defining the number of columns for the enemy */
/* saving time in the time variables declared above */
a=millis();
b=millis();
c=millis();
d=millis();
state1 = digitalRead(Button);/* reading the state of the button pressed first time */
while(state1 == HIGH) {/* if button is not pressed */
/* displaying the game and character animation */
lcd.setCursor(3, 0);
lcd.print("Ardi-Pac");
lcd.setCursor(3, 1);
lcd.print("PRESS START");
lcd.setCursor(13, 0);
lcd.write(6);
delay(300);
lcd.setCursor(13, 0);
lcd.write(5);
delay(300);
state1 = digitalRead(Button);/* again read the state of the push button*/
if (state1 == LOW) {/* if pressed then move to the loop section */
break;
}
}
delay(500);
}
void loop() {
State2 = digitalRead(Button);/* check the state of button */
if((millis()-a)>=Delay) { /* start the motion of enemy on LCD*/
a=millis();
lcd.clear();
lcd.setCursor(i, 1);
lcd.write(7);
i=i-1;
if(i == -1) {/* condition to move the enemy on the LCD starting from 15 and going to zero*/
i=15;
}
lcd.setCursor(6, 0);
lcd.print("Points:");
lcd.print(points);/* displaying the points achieved by the player */
}
if((millis()-b)>=50) {
b=millis();
if (State2 == LOW && pac == false) { /* displaying character on LCD by reading the state of button */
lcd.setCursor(1, 0);/* placing the character on first column and first row when button is pressed*/
lcd.write(6);
pac = true; /* updating that no collision with enemy */
b=millis();/* saving the time */
}
else if(pac == true) { /* if still no collision place it on the same place*/
lcd.setCursor(1, 0);
lcd.write(6);
}
else if(pac == false) {/* move the character to second row first column on LCD*/
lcd.setCursor(1, 0);
lcd.print(" ");
lcd.setCursor(1, 1);
lcd.write(6);
}
}
if((millis()-c)>=1500 && pac == true) {/* if button is pressed again move the character to the first row */
c=millis();
lcd.setCursor(1, 1);
lcd.write(6);
lcd.setCursor(1, 0);
lcd.print(" ");
pac = false;
}
if(((millis()-d)>=1000) && (i == 1)) { /* if the enemy takes its first round LCD without any collision*/
d=millis();
if (pac == true) {
points=points+1;/* collision is detected then add one in the points*/
if (points%5 == 0) {
Delay=Delay-DecreaseDelay;/* decrease the speed of enemy*/
if(Delay <= 200) { //changed the speed of enemy to 200
DecreaseDelay=0; /* do not increase the speed of enemy */
}
}
}
else {/* when collision occurs clear the LCD and display game over */
lcd.clear();
lcd.setCursor(0, 0);
lcd.print("GAME OVER!");
lcd.setCursor(0, 1);
lcd.print("START AGAIN");
points=0;
i=15;
Delay=500; //toggles back to basic speed
State2 = digitalRead(Button);
while(State2 == HIGH) {/* keep reading the state of button when the state is HIGH*/
State2 = digitalRead(Button); /*if button pressed then start the game again*/
}
delay(500);
}
}
}
We have created a simple game that avoids the collisions with incoming objects and for that we have first declared the binaries for the enemy and the character. Also, we have defined the library for the display used with Arduino Uno.
To move the enemy on the LCD we have used the for loop that will decrement one in its value at each iteration. Next to move the position of the character we have used the push button in such a way that when the button is pressed the character moves to the first row of the LCD.
To bring back the character to its original place we have used the mills() function. We have saved the time when the character moved up and then we have defined the time after which the character will come back to its position.
When the place of the enemy and the character gets the same the game will stop and will start again when the button is pressed.
How to create hardware for making a game using Arduino and LCD
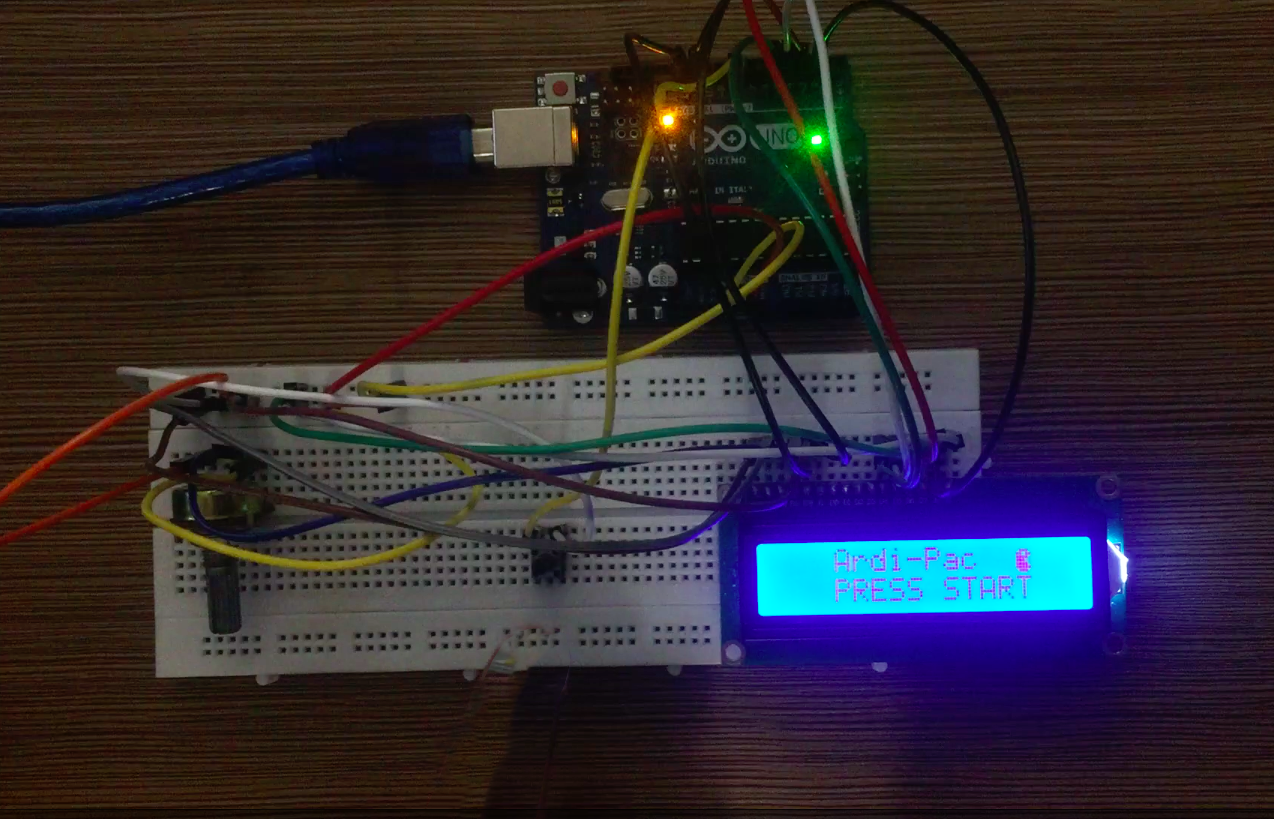
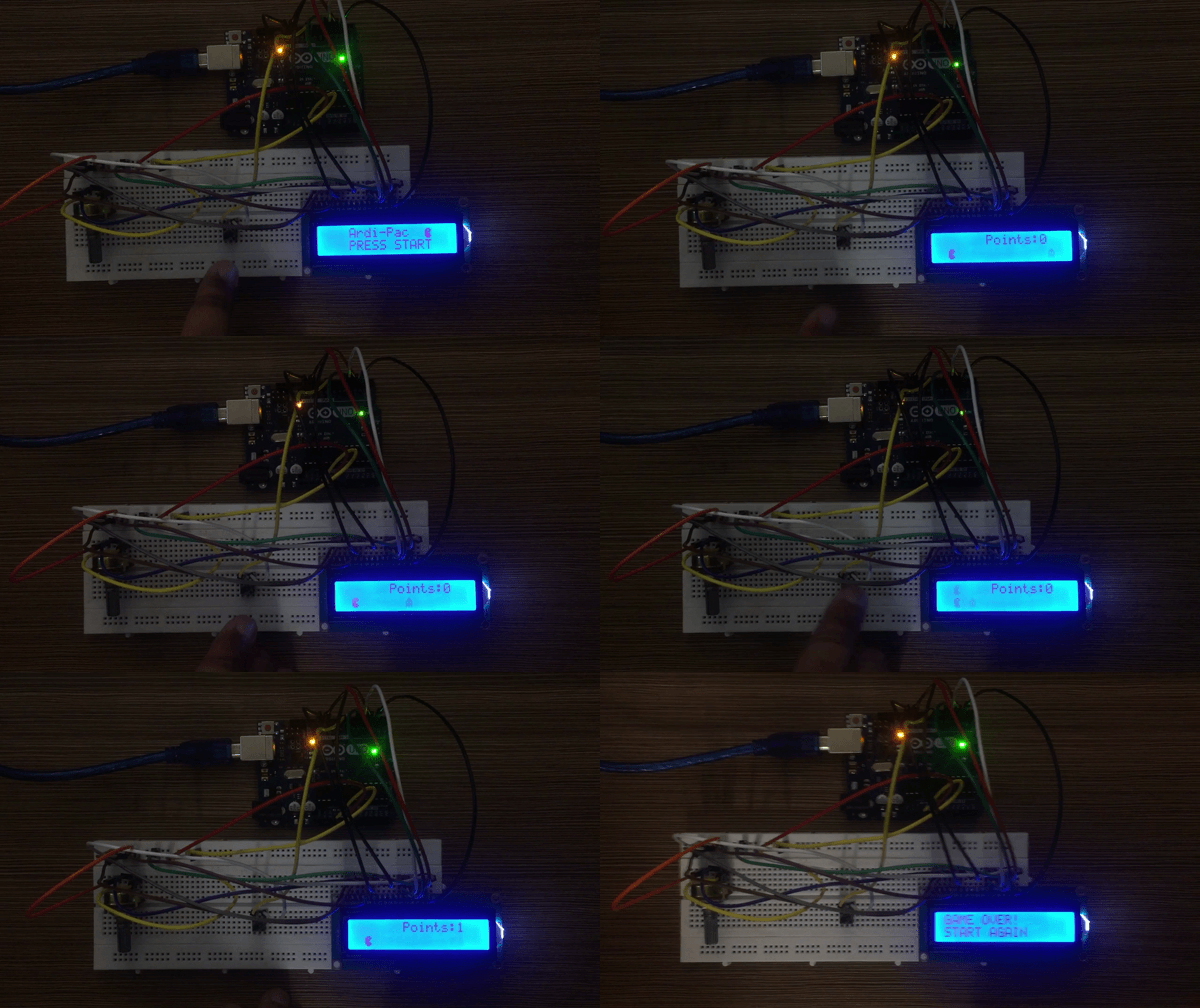
The image below is the hardware implementation according to the hardware assembly described above:
The above image is the main menu of the game, pressing the push button will start the game:
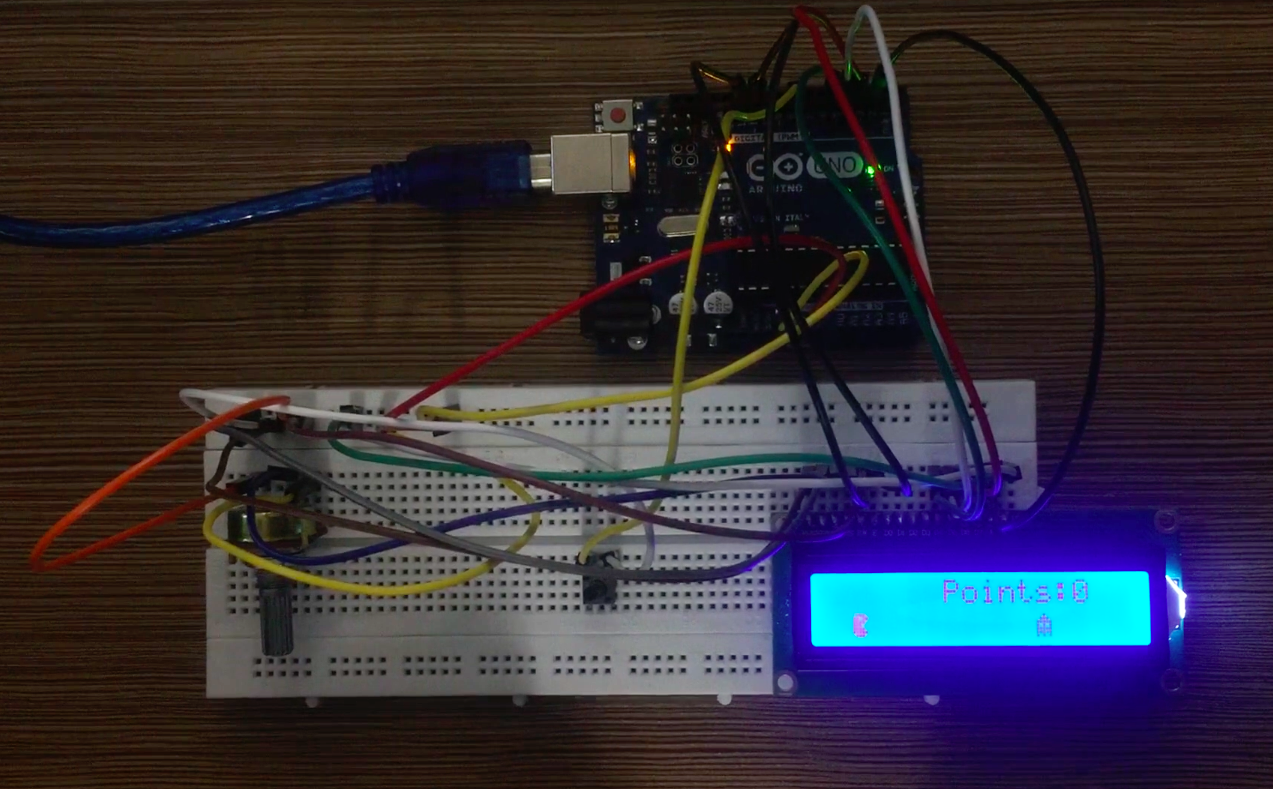
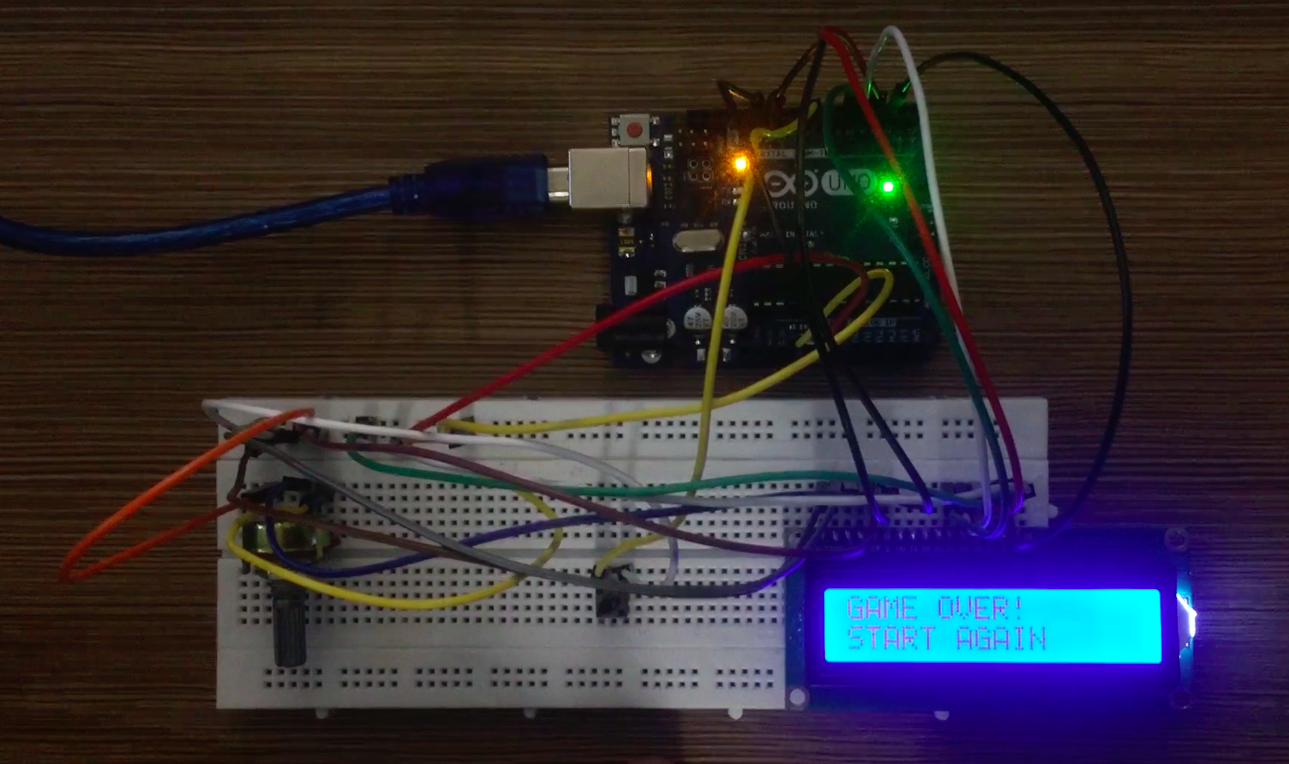
Pressing the button will make the character jump to avoid enemies and upon colliding with the enemy the following menu will display:
To illustrate how the game will work we have given the animated GIF below:
Conclusion
The Arduino platform can be used to create a variety of projects that can be of great help for beginners to learn about the circuits. We have created a game in which the player has to avoid the incoming objects. To move the player, we have used the push button and also calculated the points equal to the number of obstacles avoided. We have also provided the Arduino code to create the game as well as given the hardware demonstration.


