In this article, we first review the Kubernetes cluster log system. Then, we implement them in a Minikube virtual environment. This article describes each detailed steps where we first start the Minikube. The second step contains the set of the cluster credentials. In the last step, we implement how to set and name the context to switch between the namespaces.
How to Log into the Kubernetes Cluster
There are two types of cluster users: one is a normal cluster user and the other is a service account user. A normal user can’t be added to the cluster on an API call. So, the authentication method works for such cases where the cluster should identify the type of user and authenticate the verified user.
When we deploy the different applications to the clusters and a user wants to access the cluster with a specific application, he can access it with their login credentials. Using the cluster context, a Kubernetes cluster can change from one cluster to another.
The first time you visit the Kubernetes API, use the “kubectl” command to get an access to the cluster. Using “kubectl”, you can easily interact with the available clusters by accessing it. A “.kubeconfig” file is made available when a cluster is created so that the number of Kubernetes clusters can be managed. To use “kubectl” to access the cluster, we must first be aware of its location and have the required login credentials. The local machine terminal is where the Kubernetes clusters run. We can deploy the applications using “kubectl”.
This tutorial assumes that the Minikube setup already exists. Let’s learn, step by step on how to log in to the Kubernetes cluster and create the credentials of clusters:
Step 1: Start the Minikube Cluster
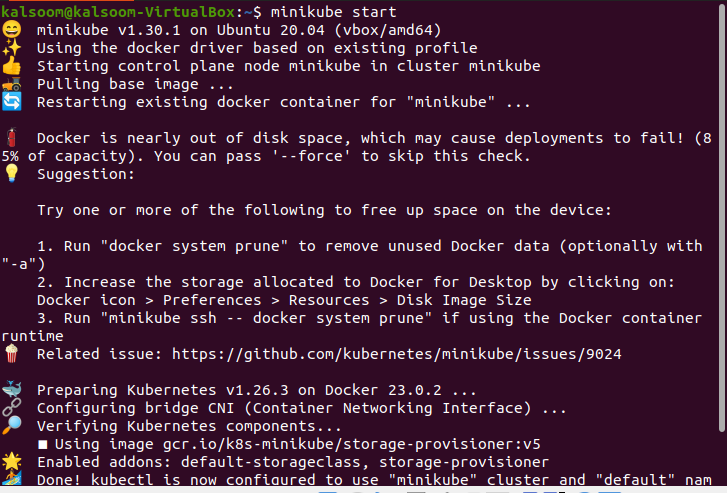
In this step, to run the Kubernetes commands, a virtual environment or Docker is required. Minikube is the local machine in Kubernetes. We use the “minikube start” command to run the Kubernetes cluster code. Once we have the cluster up and running, we can use the “kubectl config view” command to get an information about the cluster. In this example, we start a Minikube cluster using the following command:
When you execute this command, it shows the following output:
Now, let’s move to the next step and view the cluster credentials.
Step 2: Check the Credentials
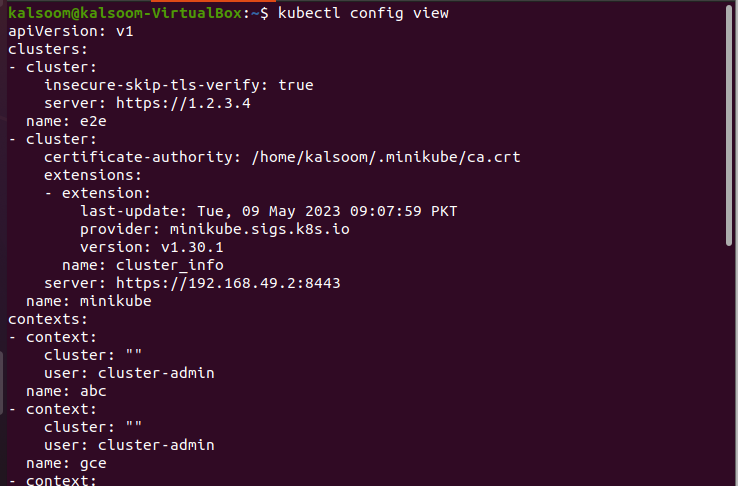
In this step, we learn to configure the various clusters to find the location and credentials using the “config” command. The “kubectl config view” command is executed to get the configuration details of the current cluster where kubectl uses the “.kubeconfig” files to find the details of the selected cluster and interact with the Kubernetes API of the cluster. A “.kubeconfig” file is operated to get a configured access. This checks the file location where the default location of the config file is the $HOMe/.kube directory. This command is executed by running the following script in your Minikube cluster.
When you execute this command, it shows the following output:
After reviewing the configured credentials, let’s now move to the next step and add the new credentials to the cluster.
Step 3: Add New Credentials
In this step, we learn to add the new cluster credentials by running the “set-credentials” command. The user and cluster relationships are many to many by following a credential particular method. One can add a user/url to differentially compare one cluster to another cluster like the cluster url that is used in this example like kubeuser/foo.kubernetes.com. The script that is listed in the following must be run in your Minikube cluster to execute this command:
When you execute this command, it generates the following output:

Now, in the next step, we assign the newly created credentials to the cluster.
Step 4: Point to a Cluster
In this step, we will learn to set up the URL that points to the cluster and assign the name to that Kubernetes cluster to make it easy to find. Configure the URL and point to the created cluster to match what credential we used at the time of creation such as “foo.kubernetes.com”. The following script is executed in the Minikube tool:
When you execute this command, it shows the following output:

Now, move to the next step and create a new context for the cluster.
Step 5: Set the Context
Now, we will show you how to create a new context. The context indicates to the particular username and namespace of the cluster. With the help of a unique username and namespace, we can easily locate the cluster and switch between different clusters. Note that the context is set as user = kubeuser/foo.kubernetes.com and namespace = default. The following script is executed in the Minikube virtual tool to create a new context:
When you execute this command, it gives the following output:

Now, after setting up the context name, let’s move to the next step and give a name to the new context.
Step 6: Use the Context
In the previous step, we learned to set up the context username and namespace. Now, in this step, let’s use the context name. As shown in the previous step, the context is created where the namespace is set to default and the user is kubeuser/foo.kubernetes.com. We name our context as namespace/cluster-name/cluster-user. Now, use the “kubectl config“ command to use the default/foo.kubernetes/kubeuser context and configure the context. The following script is executed in the Minikube virtual tool to create a new context:
The following output is obtained after running the previous command:

Conclusion
One of the most useful commands is “kubectl” which helps the Kubernetes cluster to interact with each other and perform useful actions such as deploying an app, checking the logs, etc. This article focused on the log in Kubernetes clusters using cluster’s “.kubeconfig” file which contains the detail of the specific cluster such as spec and name. This article explained each step one by one and showed the generated output.
The first step started the Minikube virtual environment where we executed the Kubernetes commands. The second step checked the configured credentials of the cluster. In the third step, we added the new credential to the cluster. Then, in the last step, we set the context (user and namespace) to the cluster and used that context.