The Laravel query builder provides a simple and convenient way for creating and running database queries and is supported by all of the Laravel database systems. It is used to protect the Laravel application from the SQL injection attack using PDO parameter binding. This package can perform several different types of database operations, such as CRUD (Insert, Select, Update and Delete) and aggregate functions, such as UNION, SUM, COUNT, etc. This tutorial shows you how to apply a query builder to perform various CRUD operations in the database.
Prerequisites
Before starting this tutorial, first, complete the following tasks.
Create a new Laravel project
Make database connection
Create a Table
You can use one or more database tables to apply a query builder for executing different types of queries. A new table, named clients, is created here to show the uses of the query builder. Run the following command to create a migration file for creating the structure of the clients table. A migration file will be created in the database/migration folder after executing the command.
$ php artisan make:migration create_clients_table
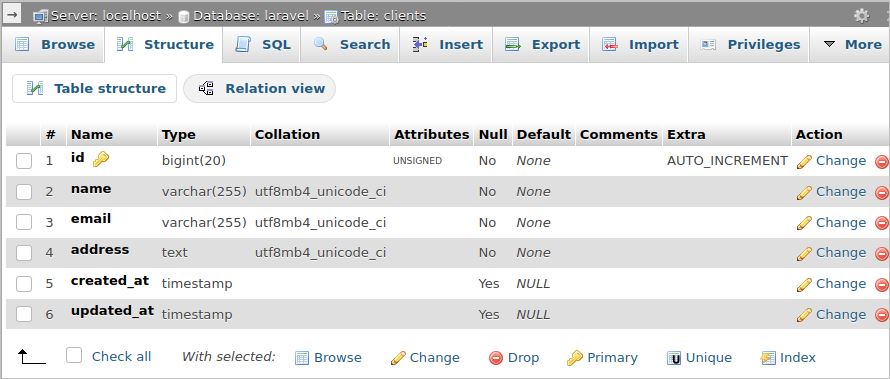
Open the newly created migration file and update the up() method with the following code. Six fields will be generated for the clients table after running the migrate command. The fields are id, name, email, address, created_at, and updated_at.
Run the following command to create the table in the database based on the structure defined in the migration file.
$ php artisan migrate
You can check the fields of the table by opening the structure of the clients table from the phpMyAdmin. The following output will appear after opening the table structure.
Insert Data into Table Using Query Builder
You can insert data into the table using the query builder. Here, the web.php file is used to insert three records into the clients table and it is located in the routes folder. Open the file and add the following route to insert the records.
The following message will appear in the browser after inserting the data. You can check the content of the table by opening it from the phpMyAdmin.
Read Data from Table Using Query Builder
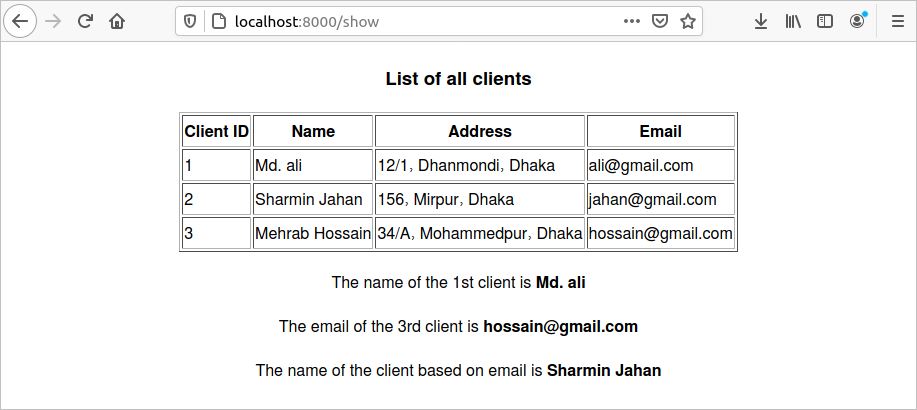
You can execute different types of Select queries using the query builder. The four types of records are retrieved using the query builder in the following route function. A view file named clients.blade.php is used here to show the data retrieved from the table and the code of the view is given later.
Route::get('show',function(){ /* Retrieve all records of the clients table */ $clientList1= DB::table('clients')->get(); /* Retrieve the first record of the clients table */ $clientList2= DB::table('clients')->first(); /* Retrieve the third record of the clients table */ $clientList3= DB::table('clients')->find(3); /* Retrieve the name of a client based on the email from the clients table */ $clientList4= DB::table('clients')->where('email','[email protected]')->value('name'); /* Return the values of the four variables into the view file to show the data
Retrieved from the table */ return view('clients',['clientList1'=>$clientList1,'clientList2'=>$clientList2, 'clientList3'=>$clientList3,'clientList4'=>$clientList4]);
The following output will appear in the browser after executing the URL. The content of $clientList1 variable is shown in tabular form and the output of $clientList2, $clientList3 and $clientList4 are shown in a line.
Update Data Using Query Builder
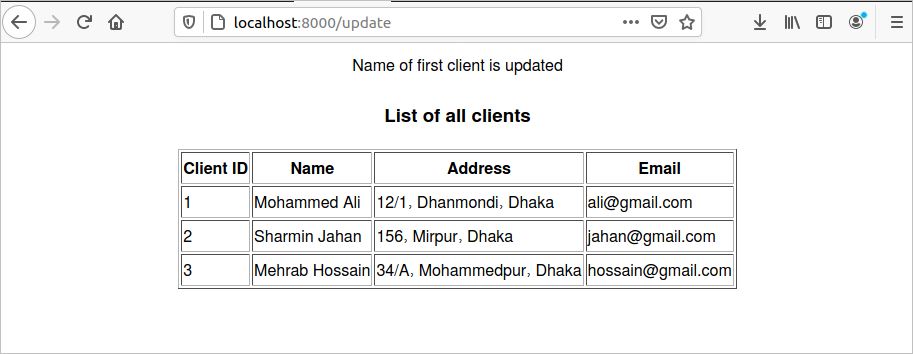
You can update single or multiple fields based on single or multiple conditions using the query builder. According to the following route function, the value of the name field will be updated based on the value of the email field. Next, the content of all records in the clients table will be retrieved and sent to the view file to check the updated content of the table.
Route::get('update',function(){
DB::table('clients')->where('id',1)->update(['name'=>'Mohammed Ali']); echo"<center>Name of first client is updated</center>"; $clientList1= DB::table('clients')->get(); return view('clients',['clientList1'=>$clientList1]);
});
Run the following URL in any browser after starting the Laravel development server to update the data of the clients table.
The following output will appear in the browser after executing the URL. The content of the $clientList1 variable is shown in tabular form. Here, the value of the name field is updated with the new value.
Delete Data Using Query Builder
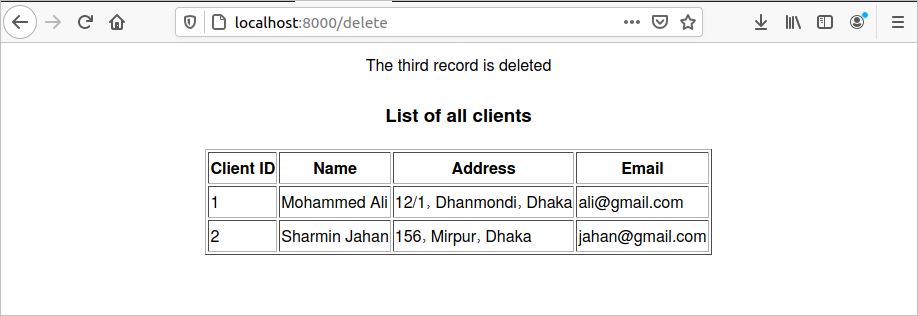
All records or a particular record can be deleted using the query builder. The following route function will delete the third record in the clients table, retrieve all records after deletion, and return the values into the view file.
Route::get('delete',function(){
DB::table('clients')->where('id','=',3)->delete(); echo"<center>The third record is deleted</center>"; $clientList1= DB::table('clients')->get(); return view('clients',['clientList1'=>$clientList1]); });
Run the following URL in any browser after starting the Laravel development server to delete a record from the clients table.
The following output will appear in the browser after executing the URL. The content of the $clientList1 variable is shown in tabular form. Here, the third record is deleted from the table.
Video Tutorial
Conclusion
The basic uses of the query builder are shown in this tutorial for helping new Laravel developers to better understand methods for executing database queries in the Laravel application.
About the author
Fahmida Yesmin
I am a trainer of web programming courses. I like to write article or tutorial on various IT topics. I have a YouTube channel where many types of tutorials based on Ubuntu, Windows, Word, Excel, WordPress, Magento, Laravel etc. are published: Tutorials4u Help.