“Today, we are learning an important topic of Laravel with an example. I hope it will help you to understand today’s topic. In this example, we will show how to track the login history of your application and store data in the database using events and Listener.”
What is an Event Laravel?
Laravel events are a way to simple observer pattern implementation of the activity of your application. Like you want to monitor, when your application user login from which IP you can execute some function using events. If you have an e-commerce site, sometimes you need to notify or send an SMS to your vendor whenever a new order is placed. So, we can call events as action takers of our application. Laravel has some default functionality to handle an event.
What is a Listener in Laravel?
In the Laravel, the listener is a class that performs event instructions. For example, you want to send a one-time welcome mail to your client when they register on your site. In this case, we can set an event that calls a listener to send the mail.
Let’s move to our example; for this, we have to install Laravel on our local server.
Note: Before starting this project, you have to preinstall Laravel auth in your project. If you don’t know how to install and configure auth in Laravel, please check another tutorial, where we explained how you could add auth to your project.
Event Project working process –
- Step 1 – Create a Laravel 9 event Project in the local host
- Step 2- Connect Database with the event project
- Step 3- Create an Event and listener in Laravel
- Step 4 -Create a data table and migration
- Step 5- Run and Test the event application
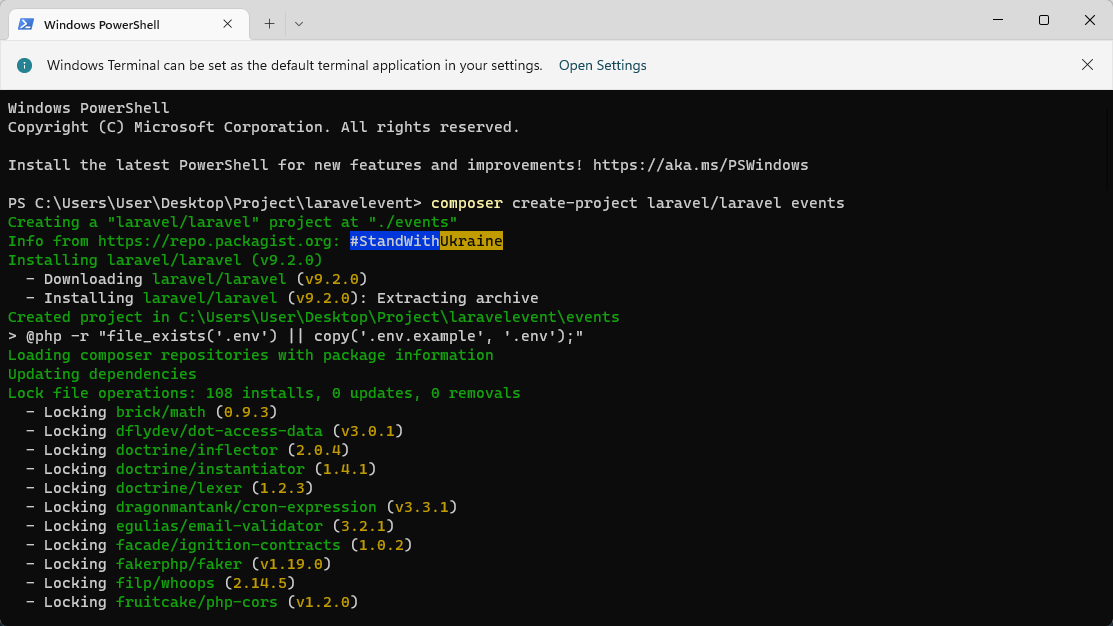
Step 1 – Create a Laravel 9 Event Project in the Local Host
Before creating the project, ensure the Laravel environment is ready on our computer.
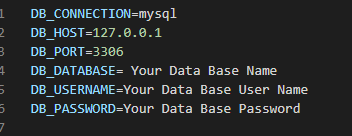
Step 2- Connect Database With Theevent Project
To connect the Database, we need to open the .env file from the project directory. We have to create a new database user before connecting.
Step 3- Create an Event and Listener in Laravel
Before we started, we needed to know where we had to register for the event. It’s called EventServiceProvider, where we register our event and listeners. It’s located in the app\Providers directory. Now we have to go to the folder and need to open the file.
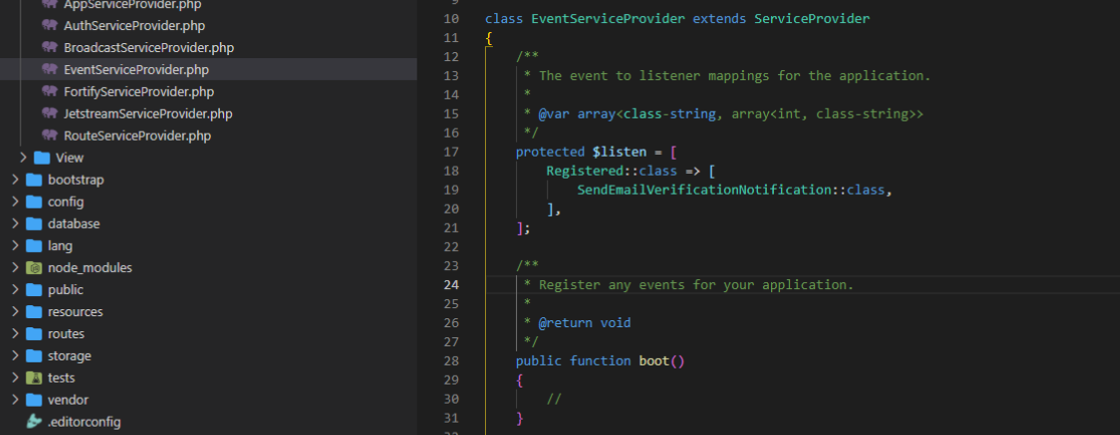
As you see, there is already an event, and the listener was registered by the name of Registered::class and SendEmailVerificationNotification::class .
Now, need to run these two commends
php artisian make:listener StoreloginHistory - - event=UserLoginHistory

The next step is will add our own event and the listener to the EventServiceProvider.
Registered::class => [
SendEmailVerificationNotification::class,
],
UserLoginHistory::class => [
StoreLoginHistory::class,
],
];
Now, need to modify the UserLoginHistory event file under app\events with this code
/**
* Create a new event instance.
*
* @returnvoid
*/
publicfunction__construct($user)
{
$this->user = $user;
}
We need to write the code in the listener for executing the program.
{
$loginTime = Carbon::now()->toDateTimeString();
$userDetails = $event->user;
$input['name'] = $userDetails->name;
$input['email'] = $userDetails->email;
$input['login_time'] = $loginTime;
$saveHistory = ModelsUserLoginHistory::create($input);
return$saveHistory;
}
All done now; need to create a table.
Step 4 -Create a data table and migration
Now, need to create a UserLoginHistory table in our database, using this commend

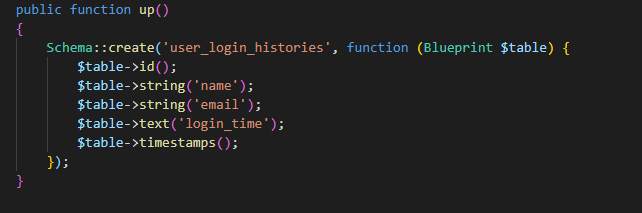
Then we have to add this line to our table
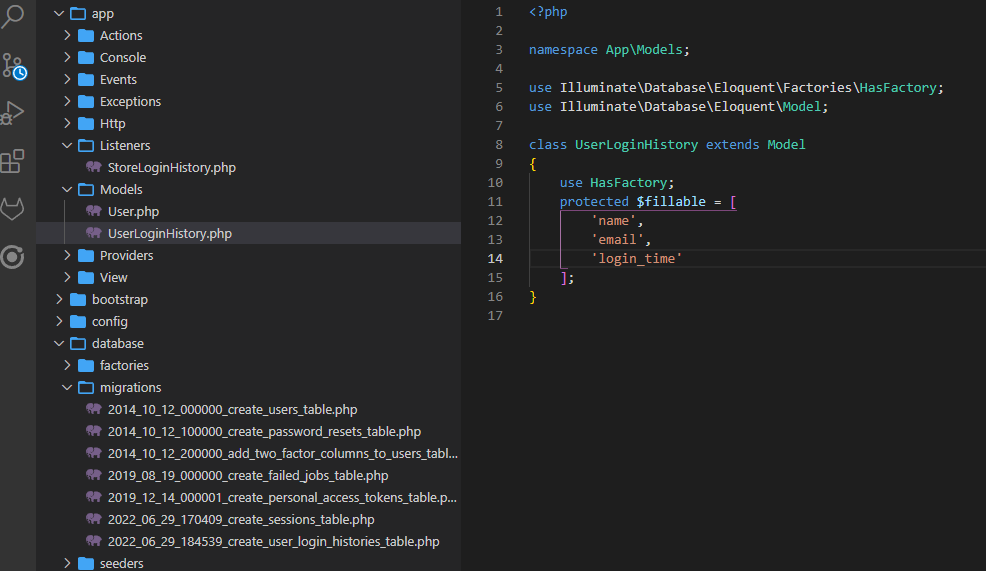
Now, need to add this to the UserLoginHistory model
Now need to run this commend
We are almost done. Now, needs to configure a function to call the event. Let’s call when the user login and go to the dashboard.
Step 5- Run and Test the event application
Now, need to run the command for the final of test the project
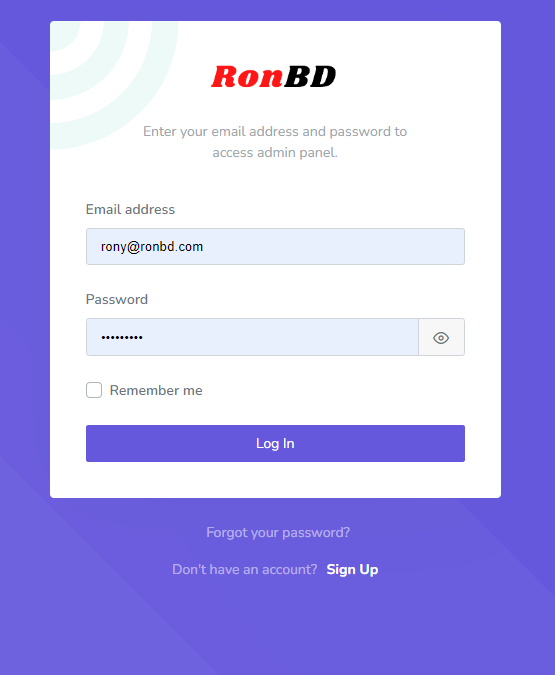
and go to the login area, put your user name and password, and login.
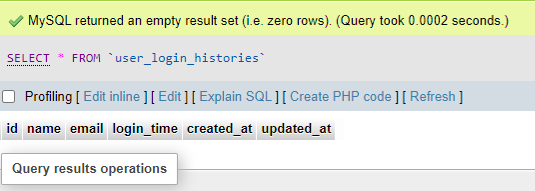
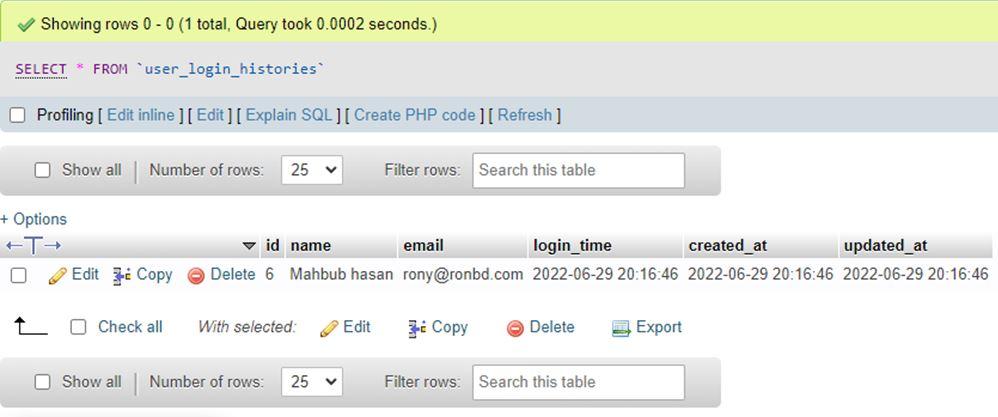
Once you login, check in the database. It will show the stored data in the MySQL Database.
Before Login
After Login
Consolations
Today we learned how to event and listeners work in laravel. So, if you need to assign multiple listeners to your event, then you can add the listener class to your event. I hope the event project will help you understand the Laravel 9 event and listeners.