“Laravel is one of the strongest Open-Source PHP framework with expressive, elegant syntax. It is an MVC (Model-View-Controller) framework for building simple or complex web applications using the PHP programming language. Laravel 9Auth security was very high.
Authentication in Laravel is the way of identifying user information. In web-based applications, authentication is managed by user sessions that take the input parameters like email or username and password from an input form for user verification. If these credentials match, the user is approved to be authenticated. Else it will reject the user to get some authorized information.
In a Laravel project, an authentication system is needed to keep our application data private. Creating authentication in Laravel 9 is quite easy. It has a built-in authentication solution, and various customization is available according to our project requirements. Suppose you are very new to the Laravel environment in this tutorial. In that case, I’ll help you to understand the step-by-step working process for creating an authentication system for your Laravel 9 project. Let’s go through the step-by-step process of creating an authentication system for your Laravel 9 project.”
Project Working Process
- Step 1 – Install the Laravel 9 project
- Step 2 – Configured database
- Step 3 – Creating Login and Registration form
- Step 4 – Configure Bootstrap in Laravel 9
- Step 5 – Run and Test the project
Step 1 – Install the Laravel 9 Project
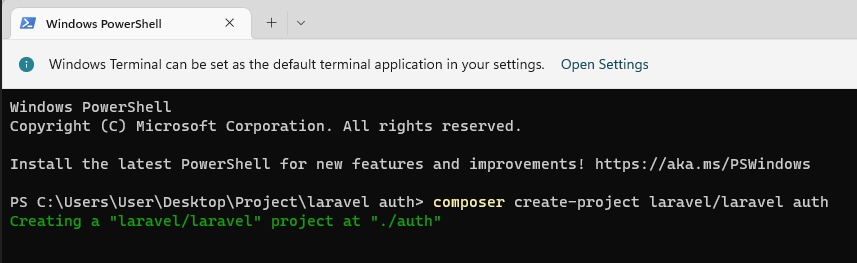
Before creating this project, ensure you have the Laravel environment on your computer. Now open the windows terminal and run this command.
Once Laravel is installed, then we will go to the next step
Step 2 – Configured Database
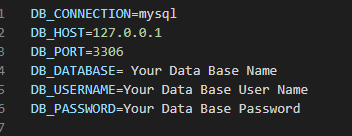
Use your database user name and password to the project
Step 3 – Creating Login and Registration Form
For the Authentication system, we need to know what is required to create a complete system. For this project, we need the login and registration form with some staff. In this Laravel auth project, we will use bootstrap to create a user’s login and registration form.
We need to run this command to add laravel login and registration to your project. Laravel has good optimization; you don’t have to do it manually. Laravel will do that for you. Now run this command.
php artisan ui bootstrap –auth
After running this commends in our Laravel project, it will generate some controllers in your auth project directory. It will create a folder called Auth under app\Http\Controllers\Auththere you can find all stuff for your authentication system.
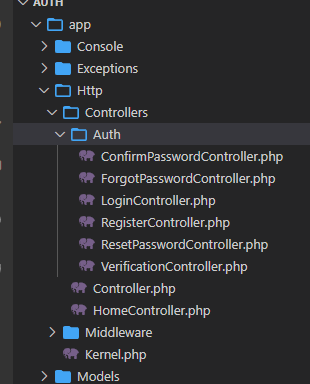
Here you can find
- ConfirmPasswordController.php
- ForgotPasswordController.php
- LoginController.php
- RegisterController.php
- ResetPasswordController.php
- VerificationController.php
Here you can modify it as per your project requested.
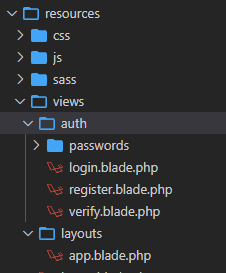
Also, it will make some views in your resource directory. It’s in the resources\views\auth folder.
Step 4 – Configure Bootstrap in Laravel 9
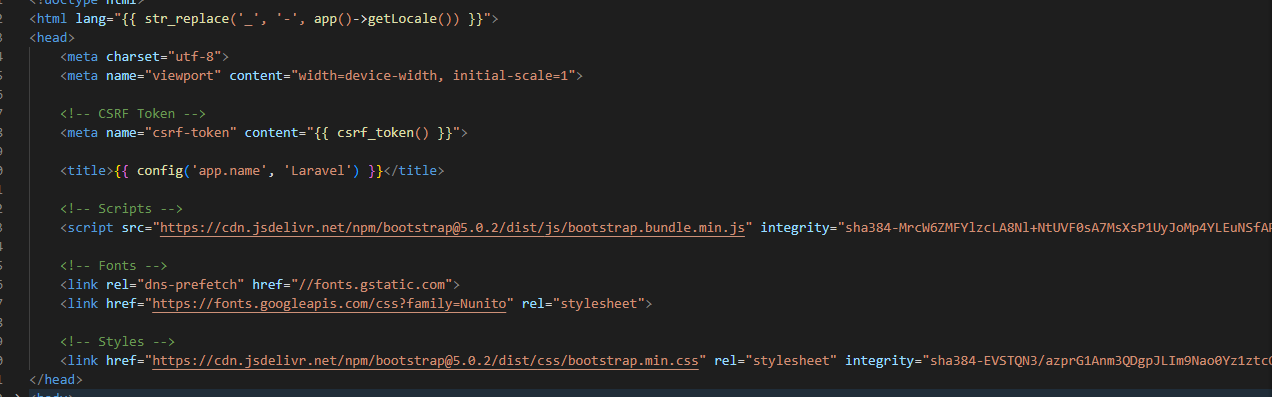
Now we will add Bootstrap 5 CDN to our project. For that, we have to go to the file resources\views\layouts\app.blade.php add these 2 lines
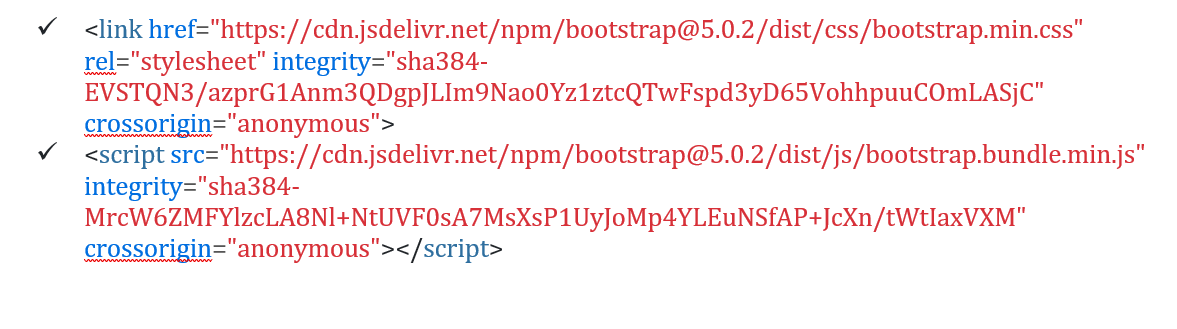
After that, it will look like this
In Login View look like
<divclass="row justify-content-center">
<divclass="col-md-8">
<divclass="card">
<divclass="card-header">{{__('Login') }}</div>
<divclass="card-body">
<formmethod="POST"action="{{route('login') }}">
@csrf
<divclass="row mb-3">
<labelfor="email"class="col-md-4 col-form-label text-md-end">{{__('Email Address') }}</label>
<divclass="col-md-6">
<inputid="email"type="email"class="form-control @error('email') is-invalid @enderror"name="email"value="{{old('email') }}"requiredautocomplete="email"autofocus>
@error('email')
<spanclass="invalid-feedback"role="alert">
<strong>{{$message}}</strong>
</span>
@enderror
</div>
</div>
<divclass="row mb-3">
<labelfor="password"class="col-md-4 col-form-label text-md-end">{{__('Password') }}</label>
<divclass="col-md-6">
<inputid="password"type="password"class="form-control @error('password') is-invalid @enderror"name="password"requiredautocomplete="current-password">
@error('password')
<spanclass="invalid-feedback"role="alert">
<strong>{{$message}}</strong>
</span>
@enderror
</div>
</div>
<divclass="row mb-3">
<divclass="col-md-6 offset-md-4">
<divclass="form-check">
<inputclass="form-check-input"type="checkbox"name="remember"id="remember"{{old('remember') ? 'checked' :''}}>
<labelclass="form-check-label"for="remember">
{{__('Remember Me') }}
</label>
</div>
</div>
</div>
<divclass="row mb-0">
<divclass="col-md-8 offset-md-4">
<buttontype="submit"class="btnbtn-primary">
{{__('Login') }}
</button>
@if (Route::has('password.request'))
<aclass="btnbtn-link"href="{{route('password.request') }}">
{{__('Forgot Your Password?') }}
</a>
@endif
</div>
</div>
</form>
</div>
</div>
</div>
</div>
</div>
And Registration View Look like
<divclass="row justify-content-center">
<divclass="col-md-8">
<divclass="card">
<divclass="card-header">{{__('Register') }}</div>
<divclass="card-body">
<formmethod="POST"action="{{route('register') }}">
@csrf
<divclass="row mb-3">
<labelfor="name"class="col-md-4 col-form-label text-md-end">{{__('Name') }}</label>
<divclass="col-md-6">
<inputid="name"type="text"class="form-control @error('name') is-invalid @enderror"name="name"value="{{old('name') }}"requiredautocomplete="name"autofocus>
@error('name')
<spanclass="invalid-feedback"role="alert">
<strong>{{$message}}</strong>
</span>
@enderror
</div>
</div>
<divclass="row mb-3">
<labelfor="email"class="col-md-4 col-form-label text-md-end">{{__('Email Address') }}</label>
<divclass="col-md-6">
<inputid="email"type="email"class="form-control @error('email') is-invalid @enderror"name="email"value="{{old('email') }}"requiredautocomplete="email">
@error('email')
<spanclass="invalid-feedback"role="alert">
<strong>{{$message}}</strong>
</span>
@enderror
</div>
</div>
<divclass="row mb-3">
<labelfor="password"class="col-md-4 col-form-label text-md-end">{{__('Password') }}</label>
<divclass="col-md-6">
<inputid="password"type="password"class="form-control @error('password') is-invalid @enderror"name="password"requiredautocomplete="new-password">
@error('password')
<spanclass="invalid-feedback"role="alert">
<strong>{{$message}}</strong>
</span>
@enderror
</div>
</div>
<divclass="row mb-3">
<labelfor="password-confirm"class="col-md-4 col-form-label text-md-end">{{__('Confirm Password') }}</label>
<divclass="col-md-6">
<inputid="password-confirm"type="password"class="form-control"name="password_confirmation"requiredautocomplete="new-password">
</div>
</div>
<divclass="row mb-0">
<divclass="col-md-6 offset-md-4">
<buttontype="submit"class="btnbtn-primary">
{{__('Register') }}
</button>
</div>
</div>
</form>
</div>
</div>
</div>
</div>
</div>
You can change Anything from this form as per your need.
Our view is ready. Now we have to go to the next step.
Step 5 – Run and Test the Project
Before we run the project, we need to migrate the database in our project. For that, we have to run this commend
Now we can run our project. For that, we have to run this commend
Once the project runs, we can see the Login And Register button on our home page’s top right side.

After clicking the login button, we can see
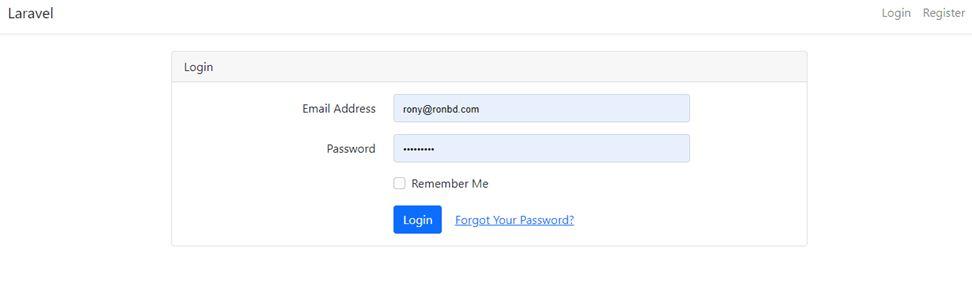
We can input our login details here.
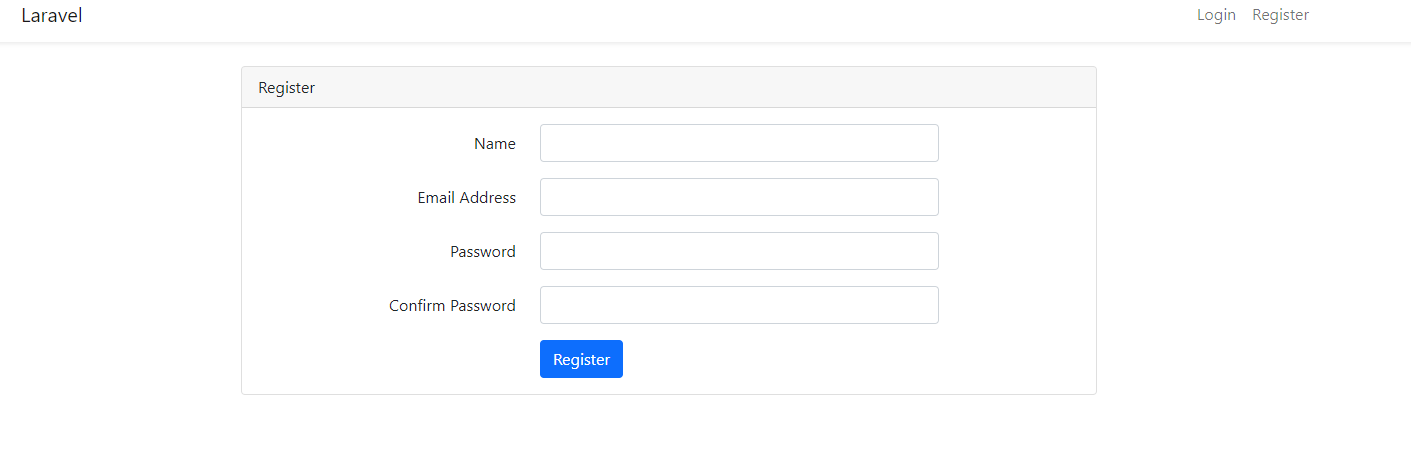
Also, it creates a registration form there. You can register there easily.
After login, it will show like this

Consolation
Finally, we created this project with laravel auth. Laravel authentication is very high. So don’t worry about the login security. Happy coding!!!