Prerequisites:
Prerequisites mean that for using Nginx in Kubernetes, an operating system and system specifications are essential. Ubuntu’s latest version must be installed on your computer. If you are a Windows user, install a virtual machine or virtual box in the system. Use Ubuntu or Linux virtually after installing the virtual machine. Fix up and run the Kubernetes in the system perfectly.
Let’s start the article the proper way. First, we create a manifest, like a YAML file, in our application. We will walk you through the process of deploying the Kubernetes with Nginx using examples and demos in the following sections.
Step 1: Start the Kubernetes
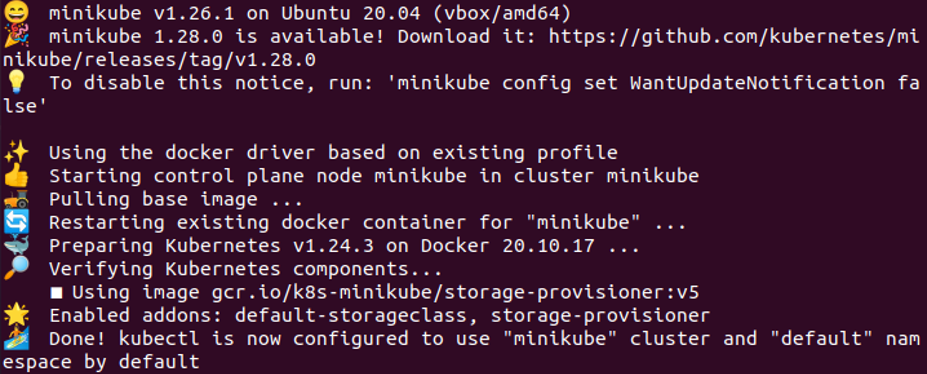
Initially, we start the Kubernetes application by opening the terminal and running the command that starts the Kubernetes project in the system. You might be familiar with this command because we use it in every tutorial to start the Kubernetes. The command is as follows:
Minikube is used to generate the locally based Kubernetes clusters with the terminal on the system. This provides us with an editor to run the Kubernetes effective commands further when we run the minikube command in the terminal. The execution of the command provides a detailed explanation of Kubernetes Docker. The following attached result is shown after executing the command:
Step 2: Create the Nginx Deployment in Kubernetes
In this step, we create the deployment of nginx in Kubernetes after starting the minikube cluster. The “kubectl create” command is utilized to build the deployment of the ngnix container. We can create the deployment of the ngnix container on the Kubernetes cluster with the help of the Nginx image from the master node.
![]()
Following the execution of this command, our system’s Nginx deployment is successfully created. We also specify an image for deployment in the system. Here, we take the image as nginx.
Step 3: Get the Deployments in Kubernetes
Now, we want to show the total number of deployments of Ngnix in our system. So, we run another command in the terminal.
Through this command, we see that the deployment is successfully created in the folder. A list of all deployments is retrieved through this command in a way that is shown in the following attached screenshot:

Here, we can see that only one deployment is created at this time. Through this command, we get the name, ready status, Up-To-Date status, availability, and age of deployment easily. As the “NAME” parameter shows the name of the deployment, the “READY” parameter shows us how many deployments are running for the user and how much is available for the users.
In the previous scenario, we have only one deployment and this is running also for the user at that time. The “UP-TO-DATE” parameter shows us the updated deployments to achieve the required state. The “AVAILABLE” parameter shows us the number of deployments that is available for the user. The “AGE” parameter shows us the running time of deployment.
Step 4: Create the NodePort Services in Kubernetes
In this step, we create a NodePort service in Kubernetes by running the command in a container. We use the NodePort service to allow the external traffic in your app or Kubernetes container by giving an IP address. By giving the IP address port, we can easily allow the public to access the application in the browser.
![]()
As per the previously-mentioned screenshot, when we run this command, it gives an error like “failed to create the NodePort services” or “nginx already exists”. In our case, the Nginx service is already running so we cannot create a new node port to provide the external services to the user. Here, tcp=80:80 means the system IP address and port number is 80. Nginx cannot provide the nodeport services with the same name and IP address.
Step 5: Get the Kubernetes Services
In this step, we want to check how many services are running in the internal IP address on the Kubernetes cluster. Using this following command, only the internal IPs allow and block the external IP address to run the application of Kubernetes:
Kubectl is a command line tool and svc means services. When we run this command, the following result appears in the attached screenshot:

After executing the command, we get the provided result. We can see that this command returns the different parameters like Name, Cluster-IP, External-IP, ports(s), and Age. The name shows us the name of the cluster, Cluster-IP shows us the IP address of your cluster from where this cluster is made and run, External-IP shows us the IP address of external devices that visit your applications in the browser, ports parameter shows us the Cluster ports or node ports, and the age parameter shows us the time since this cluster is running. In this way, the commands give us information which is related to Kubernetes.
Conclusion
In this article, we used the different kubectl commands on the container to cover the sessions like how we create the deployments using Nginx with proper examples and how we get or fetch the deployment from a system that is made or running in the system through the command. In this article, we learned the deployment of Kubernetes as well as the deployment of fetching and creating the nodeport in Kubernetes using nginx. You can also practice all these commands for their use.