An overview of service accounts and how they operate is provided in this article. A crucial part of Kubernetes that provides secure access to the API server is the service account. An interaction with a Kubernetes cluster requires communication with the API server. Requests are made to the API server to communicate. When an API server receives a request, it first attempts to authenticate it. If this authentication fails, the request is considered anonymous. This means that every process, whether it is part of the cluster or not, must authenticate before sending a request to the API server, including a user typing kubectl on its desktop and the kubelet process which runs on a node. This context describes the types of Kubernetes accounts and how to configure a service account with basic examples.
Types of Account in Kubernetes
In Kubernetes, there are two types of accounts that are mentioned in the following:
User Account
It is used by humans who can be admin or developer users who are trying to access the cluster-level resources and access the Kubernetes cluster. Those users can manage the external of the cluster, but the Kubernetes cluster is aware of it. The user account doesn’t have a specific namespace.
Service Account
These are the machine-level accounts. The processes that are active in the cluster’s pods are represented by the service accounts. The API server authenticates the pod using a service account before it can access the cluster.
What Is a Kubernetes Service Account?
It is applied to authenticate the processes at the machine level to allow them to access our Kubernetes cluster. The API server is in charge of doing such authentication for the processes that run in the pod. The Kubernetes cluster manages the service accounts. The service accounts have a specific namespace. These are generated either automatically by the API server or manually via API calls.
How Does the Kubernetes Service Account Work?
We will explain how it works in a scenario where an application from a third party tries to connect to the Kubernetes cluster API servers.

Let’s say that there is a website, My Web Page, which needs to retrieve the data from an API server located in the Kubernetes cluster, as illustrated in the previous figure, to display a list of objects. To access the data from the cluster servers and authenticate it, we require a service account that acts as the bridge that is made available by the cluster API servers.
Prerequisites
Before working with the startup probe, prerequisites are a Kubernetes cluster with two nodes that are not acting as hosts and kubectl command-line software that must be configured to communicate between clusters. If you haven’t created a cluster, you can use the minikube to create a cluster. There are other Kubernetes playground options available online that you can use to create the cluster.
Create Service Account
We must now create a Service Account by following the step-by-step instructions to access the Kubernetes cluster. Let’s begin!
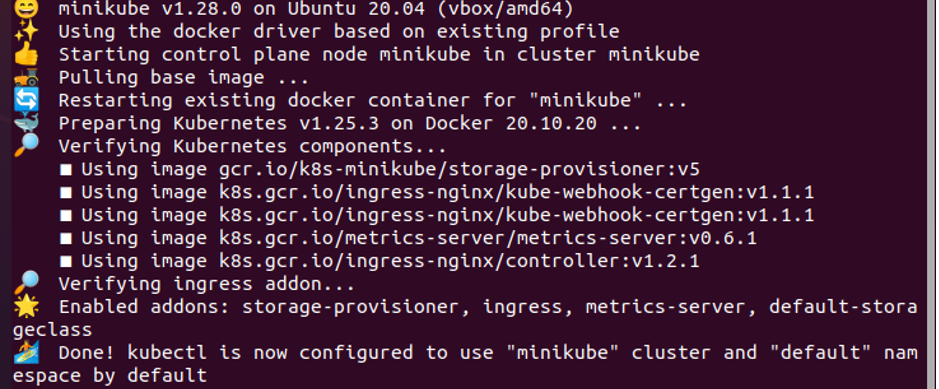
Step 1: Start the Minikube
First, start the minikube cluster so that you can use the kubectl commands and run your application. The minikube cluster allows you to deploy your nodes, pods, and even cluster in the Kubernetes environment. Hence, it’s essential to keep the minikube in active mode using the following command:
This activates the minikube cluster and makes the Kubernetes environment ready.
Step 2: Use the Default Service Account to Access the API Service
Pods authenticate as a certain Service Account when they communicate with the API server. The default Service Account for each Kubernetes namespace, by default, is present in every namespace and constitutes the minimum number of Service Accounts. When you build a pod, Kubernetes automatically allocates the Service Account called default in that namespace if you don’t specify one.
You can retrieve the information for a generated Pod by executing the following command:

Step 3: Output of API Credential Automounting
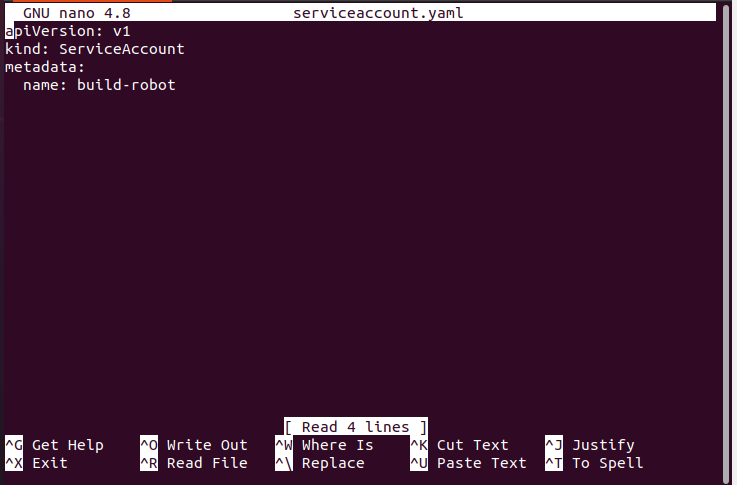
The service account YAML manifest file should be opened first.
Instead of the kubelet to automatically mount a ServiceAccount’s API credentials, you can choose to alter the normal behavior.
Step 4: Create an Additional Service Account
Additional Service Account objects can be created in the following way as mentioned:
![]()
Step 5: Use Multiple Service Accounts
In this context, every pod that is generated in the Kubernetes cluster with a specific namespace produces a service account by default with the name default. The service token and necessary secret object are automatically created by the default service account.
By running the following command, you can list every ServiceAccount resource in your current namespace:

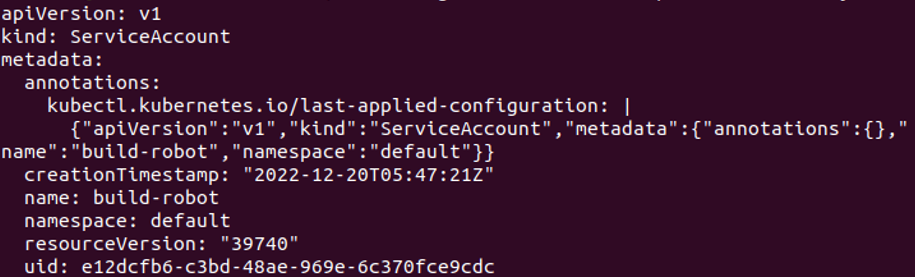
Step 6: Get a Dump of the Service Account
If the service account object is completely dumped, it looks like the following screenshot. It is done with the attached command here:
Step 7: Cleanup the Service Account
Delete the running account before you setup the build-robot Service Account with the following command:
![]()
Step 8: Create an API Token
Assume that you already have the “build-robot” service account name as mentioned in the previous example. Using the following command, you can obtain a brief API token for that Service Account:
The output of the previous command is taken to authentication for that Service Account. Using the command implies —duration, you can generate a unique token duration.
Step 9: Create a Manually Long-Lived API Token for Service Account
Create a new Secret with a unique annotation if you want to get an API token for a Service Account. Here is the following command:
Here is the complete configuration file:
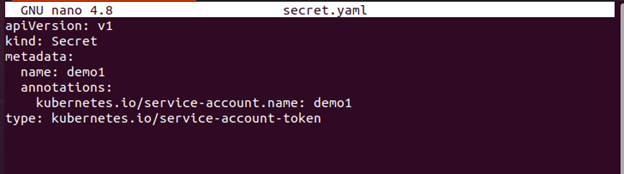
In the attached screenshot, you can see that a service account is created successfully.

Step 10: View the Secret Object Details
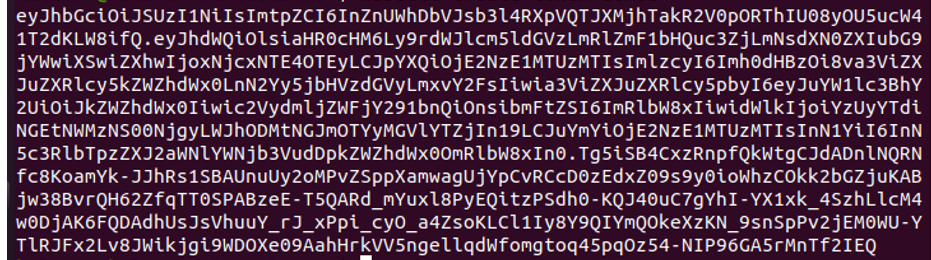
You must use the following command to make the contents of a secret item visible:
As you can see, the “build-robot” ServiceAccount’s API token is now present in the Secret object.
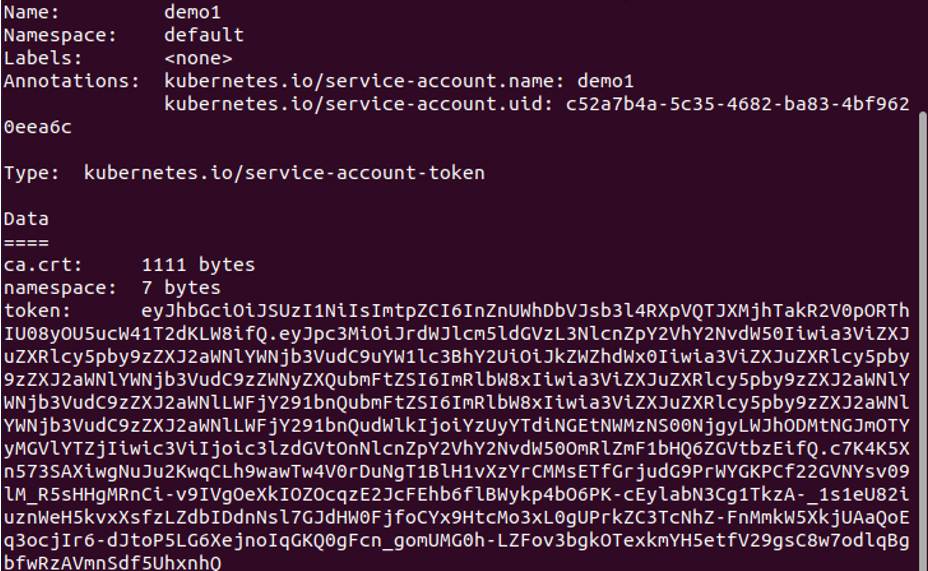
By running the aforementioned command, you can see the token’s encoded hash-key value which is displayed in the previous image.
Therefore, this default secret object may be used to grant an access to the API servers which are located in the same cluster namespace for our application, which is deployed in the pod of the same namespace.
Step 11: Add the ImagePullSecrets to a Service Account
Make an imagePullSecret. Then, make sure it was generated. For that, the command is as follows:
Make sure it is created. You can check this with the given command here:

Step 12: Add the ImagePullSecret to a Service Account
Alter the namespace’s default service account such that it uses this Secret as an imagePullSecret. The command is given as follows:
![]()
Conclusion
We learned about the service account that, by offering authentication, authorization, and administration control, enables the API server in making the application secure. To authenticate the communication between external programs and APIs, the service account serves as a link to a process that runs in a pod. The practice example to create the service account and to configure it with a simple example is implemented in this article.