What Are Annotations in Kubernetes?
We will give a brief overview of annotations in this section. Annotations are used to attach the metadata to different types of Kubernetes resources. In Kubernetes, annotations are used in a second way; the first way is using labels. In annotation, the arrays are used like keys and values are in pairs. Annotations store the arbitrary, non-identifying data about Kubernetes. Annotations are not used for grouping, filtering, or operating the data on the resources of Kubernetes. Annotation arrays have no constraints. We cannot use the annotations to identify the objects in Kubernetes. Annotations are in different shapes like structured, unstructured, groups, and may be small or large.
How Does Annotation Functions in Kubernetes?
Here, we will learn how annotations are used in Kubernetes. We know that annotations are consist of keys and values; a pair of these two is known as a label. The keys and values of annotations are separated by a slash “\”. In the minikube container, we use the “annotations” keyword to add the annotations in Kubernetes. Keep in mind that the key name of annotations is mandatory, and the characters of the name are not more than 63 characters in Kubernetes. The prefixes are optional. We start the annotations name with Alphanumeric characters having dashes and underscores in between the expressions. Annotations are defined in the metadata field in the configuration file.
Prerequisites:
On the system, Ubuntu or the latest version of Ubuntu is installed. If the user is not on the Ubuntu operating system, install the Virtual Box or VMware machine first that provides us with the facility to run the other operating system virtually at the same time as the Windows operating system. Install the Kubernetes libraries and configure the Kubernetes cluster in the system after confirming the operating system. We hope that these are installed before we start the main tutorial session. The pre-requisites are essential to run the annotations in Kubernetes. You must know the Kubectl command tool, pods, and containers in Kubernetes.
Here, we arrived at our main section. We divided this part into different steps for a better understanding.
The procedure for annotating in different steps is as follows:
Step 1: Run the MiniKube Container of Kubernetes
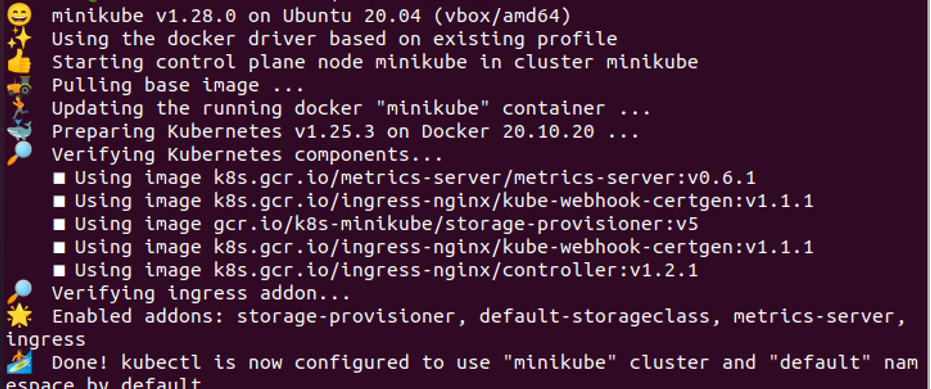
We will teach you about minikube in this step. Minikube is a scope of Kubernetes that provides a local container to the users in Kubernetes. So, in every case, we start with a minikube for further operations. At the start, we execute the following command:
Running the command successfully creates a Kubernetes container, as shown in the previously attached screenshot.
Step 2: Use CRI Socket or Volume Controller Annotations in Kubernetes
To comprehend how a minikube node functions and retrieve the annotations that are applied to an object, we utilize the CRI socket annotations in Kubernetes by running the following kubectl command:
When the command is finished, it displays all annotations that are currently stored in Kubernetes. The output of this command is displayed in the screenshot that is attached. As we see, the annotations always return the data in keys and values form. In the screenshot, the command returns three annotations. These are like “kubeadm.alpha.kubernetes.io/cri-socket” is a key, “unix:///var/run/cri-dockerd.sock” are values, and so on. The cri-socket node is created. In this way, we instantly use the annotations in Kubernetes. This command returns the output data in JSON form. In JSON, we always have the key and value formats to follow. Using this command, the kubectl user or we can easily extract the metadata of pods and perform an operation on that pod, accordingly.
Annotation Conventions in Kubernetes
In this section, we’ll talk about the annotation conventions which are created to serve the human needs. We follow these conventions to improve readability and uniformity. Another crucial aspect of your annotations is namespacing. To understand why Kubernetes’s conventions are implemented, we apply the annotations to the service object. Here, we explain a few conventions and their useful purposes. Let’s have a look at the annotation conventions of Kubernetes:
| Annotations | Description |
| a8r. io/chat | Used for the link to the external chat system |
| a8r. io/logs | Used for the link to the outer log viewer |
| a8r. io/description | Used to handle the unstructured data description of the Kubernetes service for human beings |
| a8r. io/repository | Used to attach an outer repository in different formats like VCS |
| a8r. io/bugs | Used to link an outer or external bug tracker with pods in Kubernetes |
| a8r. io/uptime | Used to attach the outer uptime dashboard system in applications |
These are a few conventions that we explained here, but there is a huge list of annotation conventions that the humans use to handle the services or operations in Kubernetes. Conventions are easy for humans to remember as compared to queries and long links. This is the best feature of Kubernetes for user comfort and reliability.
Conclusion
The annotations are not used by Kubernetes; rather, they are used to give details about the Kubernetes service to humans. Annotations are just for human understanding. Metadata holds the annotations in Kubernetes. As far as we know, the metadata is used only for humans to give them more clarity about the pods and containers in Kubernetes. We assume that by this point, you know why we use the annotations in Kubernetes. We explained every point in detail. Lastly, remember that annotations are not dependent on container functionality.


