What Is the Kubectl Rollout Command?
The Kubectl “rollout” command is the most used command of the kubectl Kubernetes cluster that helps manage and maintain the process of deployment rollout of applications. Using this command, we can easily monitor the status of our Kubernetes cluster deployments. Along with that, we perform the different operations of the rollout.
By running this command, we can easily perform the deployments or modify our new deployments with the previous version. This command replaces the old version of deployments with the new deployment of cluster easily. In rollout, the bugfix, minor changes, etc., are all included without lacking the time measurements.
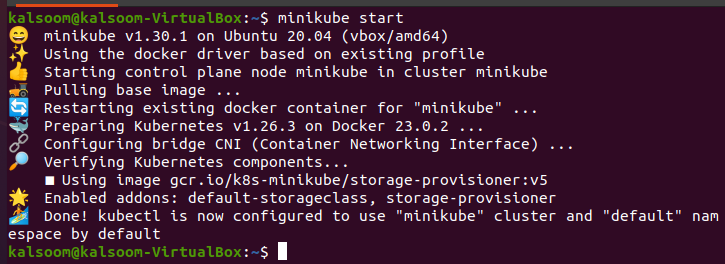
Step 1: Launch the Minikube Cluster Dashboard
At the very start, we run the new Kubernetes cluster on which we can perform our kubectl “rollout” command. Once a new cluster is created and running, we can open the kubectl command line tool to run the “rollout” command. We run the “minikube start” command to start the minikube cluster dashboard:
Step 2: Create a YAML File for Deployment
In this step, we create a YAML file for deployment using the nano editor of our Linux system. We navigate to the directory where we want to create a YAML file. We run the following command to create a file:
Here, the name of the file is “deployment” which has a “.yaml” extension.
Step 3: Set the Configuration of the Deployment File
When the previous command (step 2) is executed successfully, the file opens which is created with a specific name. We set the configuration of our file easily and all information about our cluster is visible in this file as you see in the following attached text:
kind: Deployment
metadata:
name: nginx1-deployment1
labels:
app: nginx
spec:
replicas: 7
selector:
matchLabels:
app: nginx
template:
metadata:
labels:
app: nginx
spec:
containers:
- name: nginx
image: nginx:1.14.2
ports:
- containerPort: 79
Press Ctrl + O to save the file and Ctrl + X to leave the nano editor. You can also perform the different operations using a different command that is displayed at the end of the file.
Step 4: Deploy the Cluster in Kubernetes
After creating the deployment file, we create the deployment of this file in our cluster easily. We execute the command that is mentioned in the following for deployment:
When this command is executed, the deployment in apps is created successfully with the cluster name, “nginx1-deployment1”.

Step 5: Check the Status of the Cluster in Kubernetes
When the cluster deployment is created and to show the status and all statistics, we run the following command. Through this command, we fetch all the deployments in Kubernetes:
The output of this command is attached in the following as a screenshot:

In the output, we can see the name, ready status, up-to-date, available, and age of our cluster.
Step 6: Roll Out the Deployment of the Cluster
In this step, we run the command that rolls out the status of our current cluster deployment. The rollout command is mentioned in the following:
The output of this command is attached in the following for your understanding:

As you can see, the cluster deployments are rolled out or created successfully.
Step 7: Check the Status of Deployments Again
In this step, we again get the deployments of our cluster done. We run the following kubectl command to obtain the result:
 ~$ kubectl get deployments
The output of this command is attached in the previously given screenshot:
Step 8: Retrieve the List of All ReplicaSets in Kubernetes
In this step, we will get the list of all replicaSets in the specific namespaces of our Kubernetes cluster. We run the given command here to fetch a list:
The output of this command is attached in the following in which you can see that we get different information of related namespace. It includes the name, desired, current, ready, and age:

Step 9: Update the Image of the Deployment
In this step, we will update the image of deployment in the Kubernetes cluster that includes a set of images for our specific cluster in the new version deployment. We run the given command here for updating purposes:
As you can see, the image of our deployment is now updated. The output of this command is attached here for your better understanding:

Step 10: Restart the Deployment of the Cluster
In this step, we will try to learn how we can restart the deployment of our cluster that rolled out recently.
When this command is executed, the deployment of the cluster name “ngnix1-deployment1” is restarted successfully as you can see in the following:

Step 11: Undo the Previous Rollout of the Cluster
In this step, we will learn how we can move back to the previous step or undo the previous cluster easily by entering the command on the kubectl command line tool. The command is mentioned in the following:
The output of this command is attached in the following. We can see that the cluster deployment rolled back or is reverted successfully:

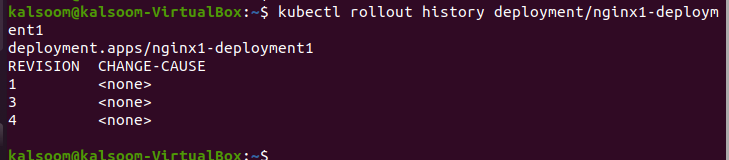
Step 12: Fetch the History of Specific Deployment in Kubernetes
In kubectl, we can easily retrieve the previous history of an identical deployment in Kubernetes. This includes information like revision and date of revision. We run the command that is given in the following to fetch the history:
When this command is executed, it generates the following result which is attached here. Through this command, we examine the changes and rollbacks of the cluster:
Step 13: Pause the Rollout of Deployment
We can pause the rollout of the deployment of the cluster temporarily and prevent further updates. We run the “rollout pause” command that is mentioned in the following:

When this command is executed, our deployment of the cluster is paused successfully.
Step 14: Undo the Previous Rollout of the Cluster
In this step, we undo the changes of our cluster deployment again because we previously paused the deployment. So, we run the command of undo rollout deployment again. The command is mentioned as follows:
The deployment of the cluster is undone successfully as you can see in the following screenshot:

Step 15: Resume the Deployment of the Cluster
In this step, we will learn how we can resume the rollout of the deployment of the cluster easily. We run the following command:
The deployment of the cluster whose name is “ngnix1-deployment1” is resumed successfully. See the following output:

Conclusion
Here, we conclude the information by saying that we can easily make changes in our deployment of the Kubernetes cluster. In this article, we learned how we can rollout the deployment in different ways like how we can resume, undo, restart, and update the cluster deployment with the help of the kubectl command. Hopefully, you now understand the topic with the detailed information and screenshots that we provided.