We launch the Minikube first. After which, the YAML file is replaced using the stdin technique. Finally, we will learn about the forcing replacement method using the “–force” command. This article contains the basic implementation and concept of the “replace” command.
What Is the Kubectl Replace Command?
Kubernetes’ kubectl interface tool is a command-line tool that deals with various clusters. To modify the resources in Kubernetes, you can use the commands like replace, edit, apply, and patch. Every update type is employed in a variety of contexts.
The “kubectl apply” command provides the specification to edit the file resource; if the specification is missing, it must be created. The command that sets the specification in local computer files is “kubectl edit”. The updates that are sent to the API can be edited. It puts the adjustments into effect for the resources. We can update the portion of the specification in the resource using the “kubectl patch” command. The “kubectl replace” is the manual version of “kubectl edit”.
Using the Kubernetes “kubectl replace” command, a resource in a cluster can be replaced with a newer version of the same resource. You can change an existing resource by specifying a new configuration file or directly providing the updated resource definition. The “kubectl replace” is similar to the “kubectl edit” command but it is the manual version of the edit command. These commands configure the entire file resource including file properties.
When a change occurs between reading a file and updating it, the “kubectl replace” command fails to make the necessary adjustments. The alterations must be “Atomic” in nature. There are two types of file formats that are accepted by Kubernetes to replace: one is YAML and the second is JSON.
Step 1: Start the Minikube Cluster
We need the minikube tool to construct and test the local Kubernetes cluster before we can work on the “kubectl” command. Without setting up a full-scale system, it is installed on the Linux virtual environment to give the users a practical knowledge of Kubernetes concepts. Minikube offers an isolated environment that helps in setting up a local Kubernetes cluster.
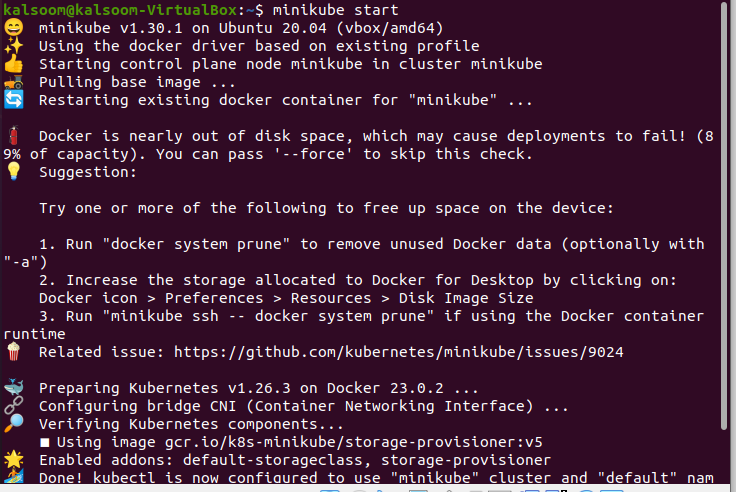
In the first step, write down the “minikube start” command to start the minikube virtual environment. With the help of Minikube, the developers can set up and test the apps in a local Kubernetes environment. Hence, it’s essential to keep the minikube in active mode using the following command:
The output of the previous “minikube start” command is given as follows:
After the minikube starts successfully, we can now execute the “kubectl” commands. Let’s move on to the next step:
Step 2: Replace the Existing Resource
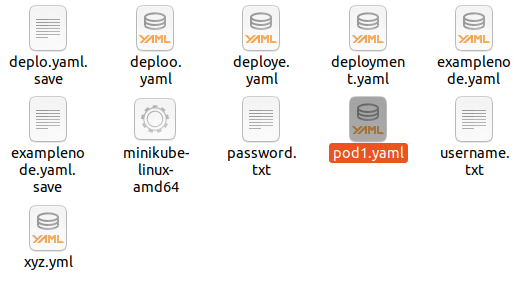
In the second step, we run the “kubectl replace -f [filename]” command to replace the YAML file that contains the updated resource. The “replace” command is used to update the entire resource from the local directory. Here, in the following screenshot, it can be seen that the “deploo.yaml” file exists in the current local machine dictionary and it needs to be updated:

The following script is executed to replace the updated file with the existing file in the local address:
After executing the script, we get the following output:
![]()
Step 3: Replace the Stdin File
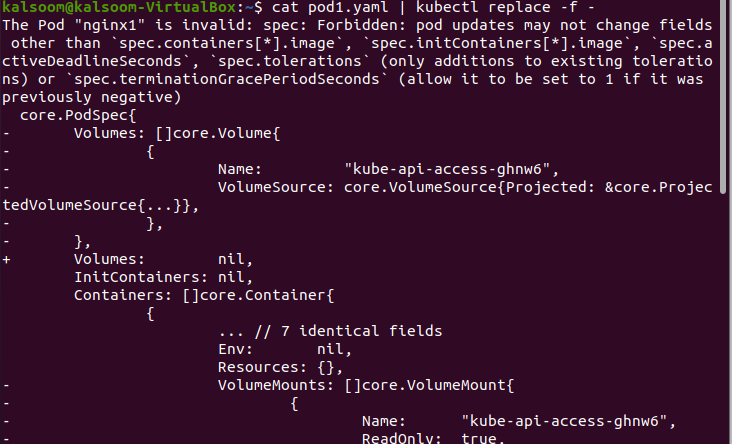
In this step, we run the “cat [filename] | kubectl replace -f-” command to replace the updated version of the file in standard input (stdin). The information from the “pod1.yaml” file is shown using the “cat” command. The file is read and its contents are printed to standard output (stdout) by the “cat pod1.yaml” command. The “|” pipe denotes that the next command receives the input from the cat’s stdout. The “kubectl replace -f-” command replaces the file. The (-) shows the content of “pod1.yaml” which is passed to the “kubectl replace” resource. Here, we can see the local directory which contains the “pod1.yaml” file.
The following script is executed to replace the new version file with the existing file:
Here is the screenshot of the output result:
Step 4: Update the Pod’s Image
In this step, we update the image version of the one-container pod with the “kubectl get pod nginx1 -o yaml | sed’s/(image:nginx:1.14.2):.*$/1:v4/” | kubectl replace -f -” command. The pod [nginx1 container] for yaml representation can be obtained with the “kubectl get pod nginx1 -o yaml” command.
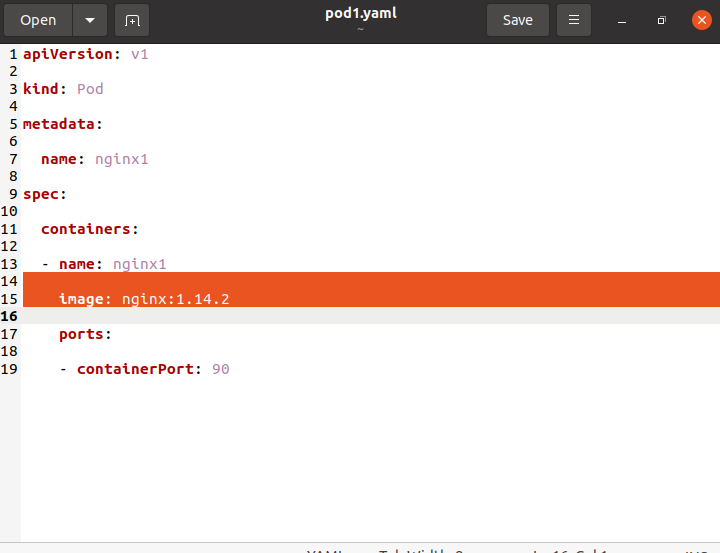
The forwarding input to the next resource is indicated by the pipe symbol “|”. The “sed” command is used to offer the search and replace functionality, updating the “image:nginx:1.14.2” with “image:nginx:v4”. The image is replaced via the “kubectl replace -f -” command. As seen in the following screenshot, the image may be found in the “pod1.yaml” file under the “nginx” container name:
The following code is executed to image at the nginx container:Bottom of Form
The following screenshot shows the result:

Step 5: Force to Replace
The “kubectl replace –force -f [filename]” command is used to force the replacement of the “pod1.yaml” file in the fifth phase. The YAML file is replaced using the “kubectl replace” command. The “–force” option is used to quickly replace the file and ignore any interruptions or warnings. The updates are in the “pod1.yaml” file. To force the replacement, the following listed script is run:
The output result (attached below) shows the successful execution of the command:

Conclusion
Kubernetes provides a variety of resource update types using kubectl. This article taught us how to use the “replace” command to update an existing resource with updated data. In this tutorial, we started with how to launch the minikube tool before using the “kubectl replace -f filename” to replace the existing “deploo. yaml” file with the new version. It’s important to remember that no changes take place between reading a file and performing the updates.
Then, we learned the replacement procedure using (stdin). Next, we learned how to update the image version, and implemented the “—force” command to forcefully update the file and ignore the warnings and any prompts.