Kubernetes clusters can be managed through the kubectl command-line tool. For configuration, Kubectl searches the $HOME/.kube directory for a file called config. Different kubeconfig files can be specified using the KUBECONFIG environment variable or the —kubeconfig flag. The kubectl syntax, command actions, and common examples are covered in this introduction. For further information on each command, including all supported flags and subcommands, consult the kubectl reference manual. Installation instructions may be found at kubectl installation. To perform kubectl commands from your terminal window, use the format
In the above syntax, command, TYPE, NAME, and flags are as follows:
Create, get, describe, and delete are examples of commands that you can use to perform operations on one or more resources. The resource type is specified by TYPE. You can provide the singular, plural, or shortened forms of resource types, which are case-insensitive. The resource’s name is specified by NAME. Case matters when it comes to names. Keep in mind that if no name is given, all resources, such as kubectl get pods, are listed. The command-line flags override default values as well as any related environment variables. When applying a command on more than one resource type, you can specify each resource by using its type and name and for that make use of the following syntax, and group them together if they are all of the same type: TYPE1 name1 name2 name3 name#….
Let’s get started with the kubectl command, but first, make sure:
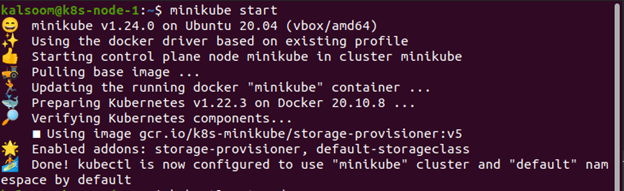
A Kubernetes cluster is required, as well as the kubectl command-line tool configured to connect to it. This tutorial should be done on a cluster that has at least two nodes that do not control plane hosts. You can use minikube to construct a cluster if you don’t currently have one. To run minikube, type the attached command in the command line:
Kubectl Get Pods
Display the pods with the kubectl get pods command and choose one to run with the exec command:
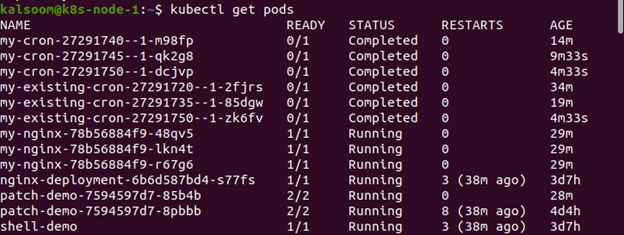
The get command in Kubectl displays one or more resources. Pods (po), replicationcontrollers (rc), services (svc), nodes (no), componentstatuses (cs), events (ev), limitranges (limits), persistentvolumeclaims (pvc), persistentvolumes (pv), resourcequotas (quota), endpoints (ep), namespaces (ns), horizontalpodautoscalers (hpa), serviceaccounts, or secrets are some of the possible resource types.
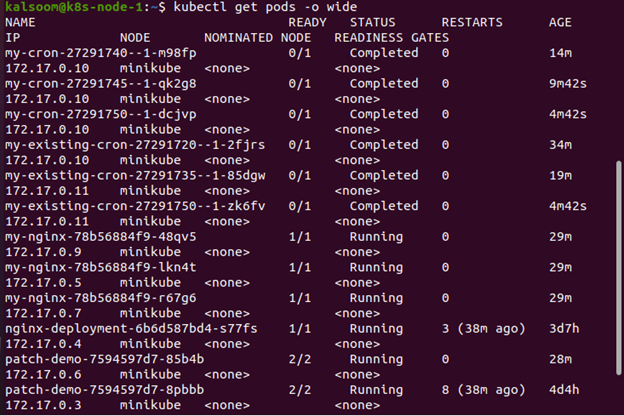
Kubectl Get Pods -o Wide
The get pods -o wide command displays a list of all pods in the current namespace, along with other information. Any additional information will be published alongside the results in plain language. Pods hold the name of the node.
For all kubectl instructions, the plain-text format is the default output format. To show results in a specific format to your terminal window, you can use the -o or —output flags with a supported kubectl command.
Kubernetes Pods
When a deployment is created, Kubernetes also creates a Pod to specifically host the application instance. A Pod is basically a collection of application container(s), as well as the resources they share. A Pod is modeled after an application-specific “logical host” and can hold several tightly connected application containers. A Pod, for example, may include both the container and the Node. js application as well as a separate container that is used to feed the data that the Node.js website will broadcast.
Containers in a Pod are all assigned the same IP address as well as port space. They are always in the same place and on the same schedule. They run on the same Node in the same shared context. The Kubernetes platform’s atomic unit is the pod. When we build a Deployment in Kubernetes, it generates Pods that contain containers (as opposed to creating containers directly). Each Pod is specifically assigned to the Node that it is scheduled on and stays there until it is deleted or destroyed.
Conclusion
In this article, we have provided you with the basics of kubectl and how to list all pods in “ps” output format in this exercise. In addition to that, we have also given instructions on listing all pods in ps output format, as well as other useful information. You can use this command as a whole, the plural form (pods), or the short code option at the start of each section for each object. They’ll all produce the same result. Most of the commands will need to be followed up with the precise name of the resource you’re controlling.