Java is very popular for developing different types of applications such as console applications, desktop applications, and web applications. The Java “servlet” class is used to develop web applications in Java. The web requests that are received from the client and the sent responses to the client after processing the request are handled by this class. The necessary interfaces and classes to use the Java servlet are provided by the “javax.servlet” and “javax.servlet.http” packages. The Servlet container is used to handle the server requests and pass these to the required Servlet when the web application is running on a web server. The uses of the Java servlet to develop the web applications are shown in this tutorial.
Prerequisites:
- Install the latest version of OpenJDK with JRE.
- Install any useful editor to write and execute the Java code. You can check this tutorial to install the Eclipse editor.
- Install Tomcat to run the Servlet in the web server. Tomcat9 is used in this tutorial.
Different Phases of Java Servlet
The Java Servlet works in three phases. These are mentioned as follows:
- The first phase is to create the servlet that is initialized by the Servlet container.
- The second phase is to handle the request and return the response to the browser.
- The third phase is to destroy the servlet and free up the resources.
Servlet Methods
Different types of methods are used for three phases of the servlet applications. The purposes of these methods are mentioned in the following:
| Method | Purpose |
|---|---|
| init() | This method is used to initialize the servlet object when any request comes to the web server. |
| doGet(), doPost(), service(), etc. | These methods are used in the second phase of the servlet application to handle different types of requests. |
| destroy() | This method is used to destroy the servlet. |
Download the JAR File to Run the Servlet Application
You have to do some steps to run before creating and executing the servlet application. The steps are given as follows:
- Download the “servlet-api.jar” file from the following location:
http://www.java2s.com/Code/Jar/s/Downloadservletapijar.htm
- After downloading, extract the zip file and copy the file inside any folder. The file is copied inside /usr/share/tomcat9/ folder in this tutorial.
Create a Simple Servlet Application
Create a Java project and a Java class named “JavaServlet.java” inside the project by extending “Httpservlet”. A string variable is assigned inside the init() method. The doGet() method is used to handle the request and return the formatted content of the string variable and other content in the browser. An unordered list of five elements is printed with a class variable. The HTML content is generated inside the doGet() method of the class. The content type of the response is set to “text/html” to generate the HTML page in the browser. The “PrintWriter” class is used in the code to write the HTML content.
import javax.servlet.*;
import javax.servlet.http.*;
public class JavaServlet extends HttpServlet {
private String text;
public void init() throws ServletException {
//Assign the string value
text = "Learn Java Programming";
}
public void doGet(HttpServletRequest request, HttpServletResponse response) throws ServletException, IOException {
//Assign the response content type
response.setContentType("text/html");
//Create an object to write into the browser
PrintWriter out = response.getWriter();
//Print the formatted text with other values
out.println("<div><h2 style='color:Green'>" + text + "</h2>");
out.println("<ul><li>Java Treemap</li>");
out.println("<li>Java Stream</li>");
out.println("<li>Java Method</li>");
out.println("<li>Java XML Parser</li>");
out.println("<li>Java Servlet</li></ul></div>");
}
}
Compile the Servlet
You have to complete the following steps to compile the Java servlet from the Tomcat web server. The steps are given as follows:
- Create a folder named “WEB-INF” inside the /var/lib/tomcat9/webapps/ROOT/ folder.
- Create another folder named “classes” inside the WEB-INF folder.
- Run the following command to compile the Java servlet file and create the Java class file. If the following command can execute successfully, the JavaServlet.class file is created inside the /var/lib/tomcat9/webapps/ROOT/WEB-INF/classes folder. The JDK version 10 is used in the following command that is compatible with the JAR file that is used in this tutorial.
Deploy the Servlet
Before deploying the servlet, you have to modify the “web.xml” file of the Tomcat server to add the entry of the servlet class that will be executed from the tomcat server. Open the “web.xml” file from the /etc/tomcat9/ location and add the following lines inside the <web-app>…</web-app> tags to run the servlet that is created before. The Servlet name, class name, and URL pattern that will be used after the base URL in the browser are set here:
<servlet-name>JavaServlet</servlet-name>
<servlet-class>JavaServlet</servlet-class>
</servlet>
<servlet-mapping>
<servlet-name>JavaServlet</servlet-name>
<url-pattern>/JavaServlet</url-pattern>
</servlet-mapping>
Now, restart the Tomcat server with the following command:
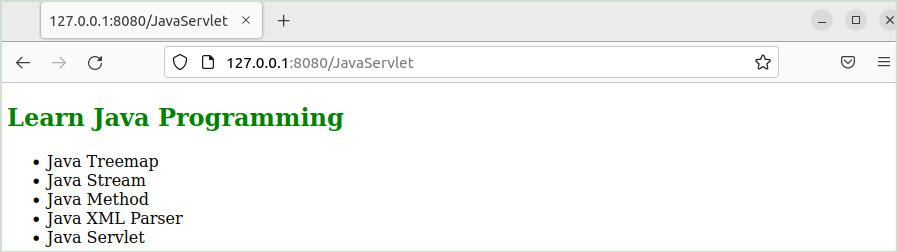
The port number 8080 is used here to run the Tomcat server. Open a browser and go to the following URL to run the output of the JavaServlet.class in the browser:
http://127.0.0.1:8080/JavaServlet
The following output appears after executing the Java class from the web server:
If you modify anything in the “JavaServlet.java” file, you have to re-compile the Java file by the command that is mentioned previously to create the Java class again and restart the Tomcat server to get the updated content of the servlet.
Conclusion
A simple use of the Java servlet is shown in this tutorial to learn the method of developing the web applications using Java. The HTML code is embedded in the Java file here. But you can create the HTML files separately and use them with the Java servlet class. You can use the database also with the Java servlet to develop the web applications.