Nginx is a stylization for engine x. It is a free and open-source HTTP server written and developed by the Russian software engineer Igor system. Nginx is also frequently used as a reverse/mail proxy server and a load balancer. Although lightweight in its web server class, it is highly robust and produces impressive results nonetheless. As a result, it has been steadily on the rise and has gained a significant reputation as a reliable web server. It’s scalability and resource-optimization features have earned its place as one of the most popular webservers, with one estimate reporting over 38 percent of the top 1 million websites on the internet being hosted on Nginx servers around the world.
Nginx- HTTPS Features
As mentioned earlier, Nginx can be used as an HTTP server, proxy server, load balancer, and mail server as well. Here, we’ll list some of the uses of Nginx as an HTTPS webserver/Proxy.
- Outstanding Static/index/auto-indexing files management features
- Comes with load balancing operational with features to monitor connections health.
- Module-based architecture with supports from both the main and third parties.
- Capable of handling well over 10,000 connections at once, and that too on a low memory footprint within the range of 2.5 MB per 10k low-bandwidth connections.
- Transport layer security/Secure Socket Layer connections with OpenSSL supported Onile Certificate Status Protocol stapling features
- Launch virtual servers with your name and system’s IP address.
- Handy features to redirect and rephrase URLs
- Newer versions capable of supporting gRPC remote procedural call.
- Employs cache to launch reverse proxies
- Compatible with Internet Protocol Version 6
- Supports WebSockets and performs load balancing and reverse proxy for Websocket programs.
- Fortified client-server connection, with features for updating and configuration during operation.
Installing NGINX on FreeBSD
This tutorial is going to be about setting up and getting started with the Nginx web server under the FreeBSD Unix-operating system.
Installation Overview
The whole procedure can be summarized as follows:
- Use the pkg command or ports system to install Nginx on FreeBSD.
- Enable the Nginx support on FreeBSD.
- Edit the file located at /usr/local/etc/nginx/nginx.conf to configure Nginx
- Verify the install
Follow the instructions below to set up Nginx on your FreeBSD server.
Step 1: Update the ports tree in FreeBSD
Issue the following command to update the ports tree in FreeBSD:
Step 2: Install Nginx on FreeBSD
There are two ways you can install Nginx on your server:
1) using via ports system
Then install Nginx webserver port with the commands below:
$ makeinstall clean
While you install Nginx, select the options relevant to your use of the webserver. Here, we chose REWRITE_MODULE, SSL_MODULE, etc., to present as an example.
2) using the pkg command
Alternatively, you can choose to install Nginx by adding the nginx binary package with the package manager, using the pkg command:
This should install Nginx on your FreeBSD webserver.
Step 3: Enable the Nginx Service on FreeBSD
Type in the command below to enable the Nginx web server
Alternatively, you can also type in:
That’s about it with the installation.
Getting started with Nginx on FreeBSD
Launch an Nginx server
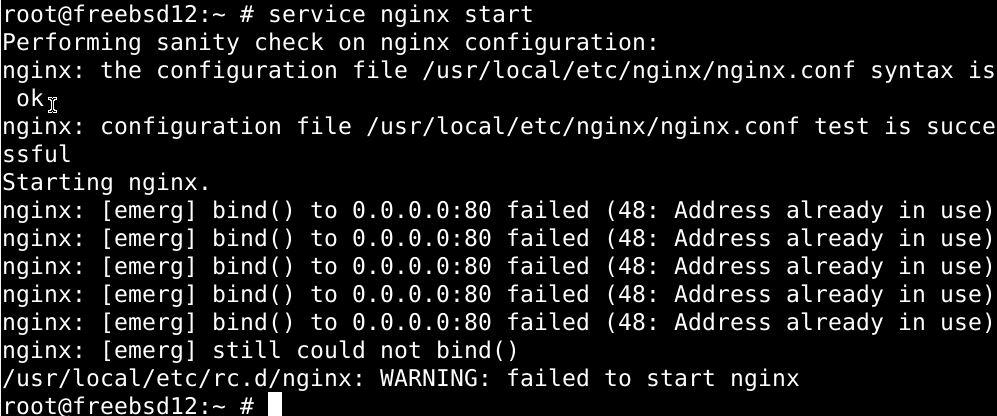
Launch Nginx by typing the following into the command shell and pressing enter:
Alternatively, you can issue the command below:
Close an Nginx Server
To exit an Nginx server, issue the command below:
You can also type in the more concise command as well:
This command should quit the Nginx server
Rebooting Nginx server
Issue the command below to restart the Nginx server.
Alternatively,
The Nginx server should restart upon the execution of the command above.
Reloading Nginx webservers post configuration
To restart an Nginx server after editing the configuration file, use the command below:
You can also use:
Important files in Nginx
- The Default configuration file for Nginx in FreeBSD is located at: /usr/local/etc/nginx/nginx.conf
- The ports on which Nginx listens to by default are 80 & 443
- The file that contains all the error details is /var/log/nginx-error.log
- The file that records the details related to access requests is /var/log/nginx-access.log
- The root document in Nginx is located at the /usr/local/www/nginx/ directory.
Testing the Nginx setup on FreeBSD
Copy and paste the following link into the URL field in your web browser:
http://server-ip-here/
Creating a website with Nginx
Start by setting up a directory by issuing the mkdir command:
Then create a new user for your domain with the command below:
Lock the username with the following command:
Then chalk up a file to test things out:
Then copy-paste the following into the file:
Then allot the group ownership with the commands below:
$ chmod -R 0555 /wwwwiki/
$ ls -ld /wwwwiki/
Configure Nginx for wiki virtual domain or IP address
Start by creating a configuration file with the commands below:
$ sudo nano /usr/local/etc/nginx/vdomains/http.10.0.2.15.conf
Then copy-paste thefollowing text to this file and make appropriate changes to the text below:
# server_name 10.0.2.15; # virtual IP or domain name here
# access_log /var/log/nginx/10.0.2.15.access.log; # log files
# error_log /var/log/nginx/10.0.2.15.error.log;
# root /wwwwiki; # root dir for this virtual host
# ## add more config below such as PHP and so on ##
#}
Don’t forget to save the file before you exit it. Then use the command below to update our configuration file:
Then append the following towards the end:
Again, save and exit this file. Then verify nginx using the following command:
$ service nginx reload
Lastly, test the configuration by issuing your IP address:
http://10.0.2.15/
In summary
That’s about it for today’s tutorial. We explained how to install Nginx on a FreeBSD server using the ports system and the pkg command, and how to enable the Nginx service on FreeBSD. We also saw how to set up a website with Nginx and introduced Nginx to the new users. The instructions here should work out for you just fine.


