In this article, I will show you how to install Oracle JDK 11 on CentOS 7. So, let’s get started.
Downloading Oracle JDK 11:
Oracle JDK 11 is not available in the official package repository of CentOS 7. But you can download Oracle JDK 11 from the official website of Oracle and install it on CentOS 7.
First, visit the official webpage of Oracle JDK at https://www.oracle.com/technetwork/java/javase/overview/index.html
Once the page loads, click on Downloads as marked in the screenshot below.
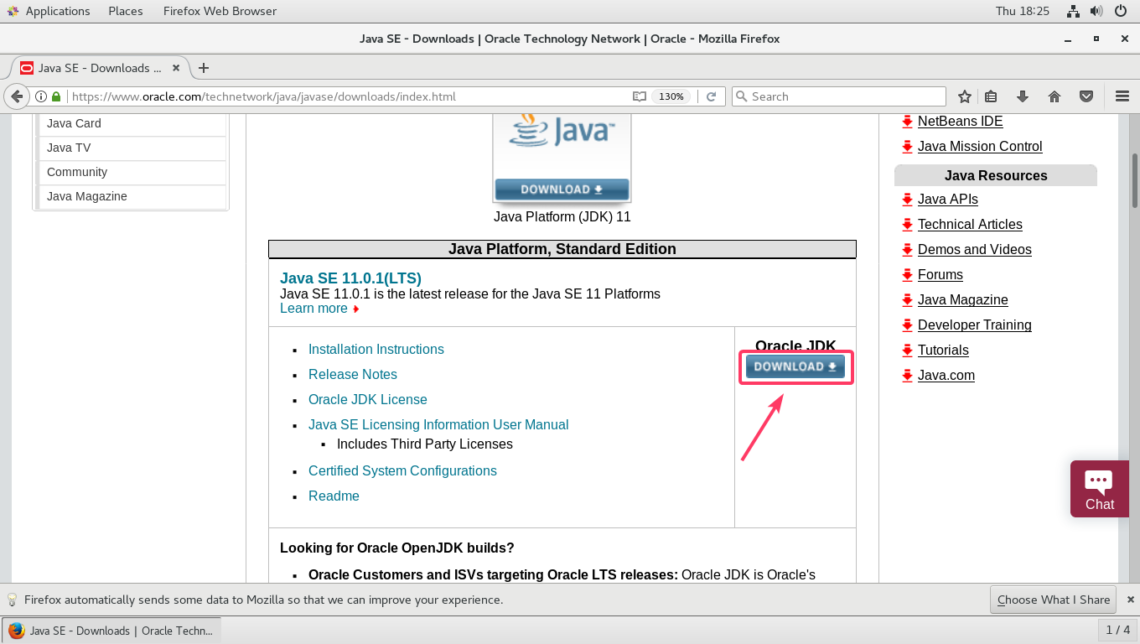
Now, navigate to the Java SE 11.x.y (LTS) section and click on the DOWNLOAD button as marked in the screenshot below.
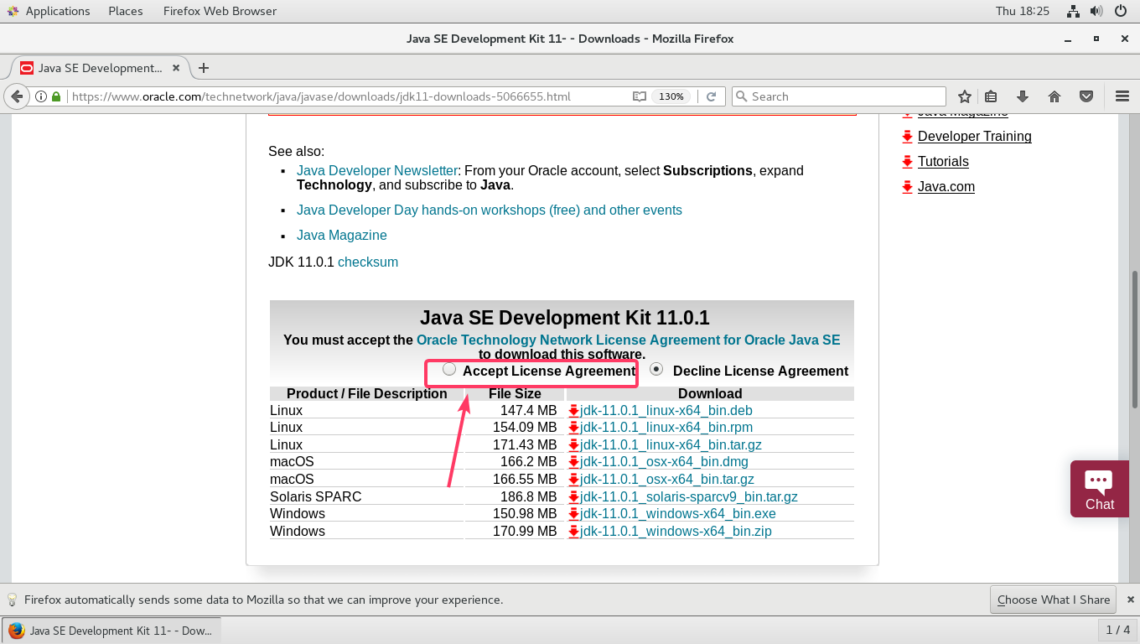
Now, scroll down a little bit to the Java SE Development Kit 11.x.y section. Now, you have to accept the Oracle Technology Network License Agreement for Oracle Java SE in order to download Oracle JDK 11. To do that, click on Accept License Agreement as marked in the screenshot below.
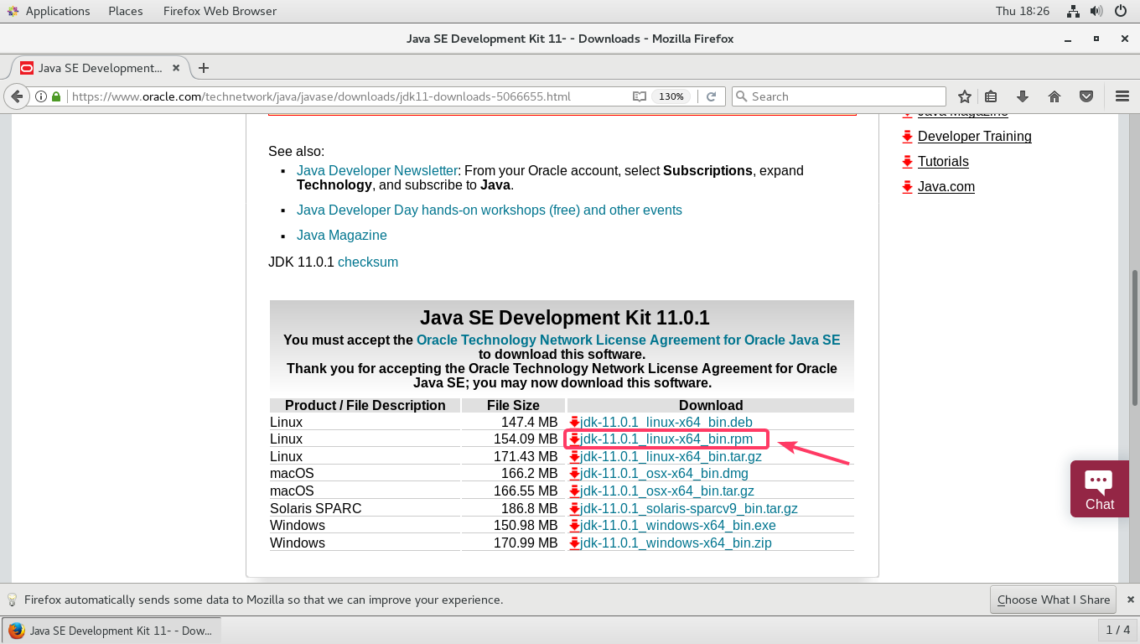
Now, click on the RPM file link as marked in the screenshot below.
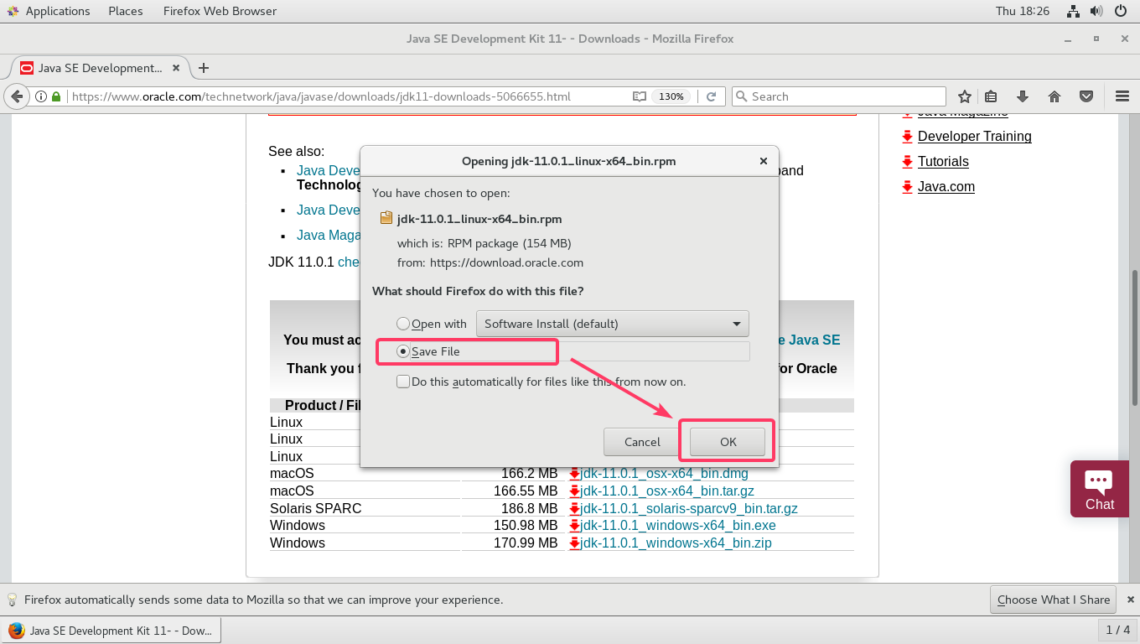
Your browser should prompt you to download the RPM package file. Just select Save File and click on OK.
Your browser should start downloading the JDK 11 RPM package file. It may take a while to complete.
Installing Oracle JDK 11:
Once the download is complete, navigate to the directory (usually the ~/Downloads directory) where you downloaded the RPM package file with the following command:
You should see jdk-11.0.1_linux-x64_bin.rpm RPM package file. The filename may be different at the time you read this article. So make sure you replace it with yours from now on.
Now, run the following command to install Oracle JDK 11 RPM package file on your CentOS 7 machine.
Oracle JDK 11 should be installed.
Now, to make sure Oracle JDK 11 is working correctly, run the following command:
As you can see, Java 11 is working. So, Oracle JDK 11 is successfully installed.
Compiling and Running a Java Program with Oracle JDK 11:
In this section, I will compile and run a simple Java program with Oracle JDK 11.
I wrote a simple Java program in a file Hello.java and put it in the ~/codes directory on my login users HOME directory.
The contents of the Hello.java Java source file are given below.
public static void main(String[] args) {
System.out.println("Welcome to LinuxHint!");
}
}
Now, to compile the Hello.java Java source file, navigate to the directory where the Hello.java source file is and run the following command:
Once the Hello.java source file is compiled, a Hello.class file should be generated. This is a Java class file. It contains Java bytecodes that the Java Virtual Machine (JVM) can understand.
Now, you can share the Hello.class file to your friends and they can run it if they have Java installed no matter what operating system they are using.
To run the compiled program, run the following command:
NOTE: When you run a Java class file, don’t type in the .class extension. Only type in the filename. Otherwise it won’t work.
As you can see, the correct output is printed.
So, that’s how you install Oracle JDK 11 on CentOS 7. Thanks for reading this article.


