Linux Mint 19 features a nice looking Cinnamon desktop environment. Linux Mint 19 also has images for MATE and XFCE desktop environment.
Beta version of Linux Mint 19 is available for download at the time of this writing. Stable version should be released at the end of June according to Linux Mint’s blog.
In this article, I will show you how to make a Linux Mint 19 bootable USB drive and install Linux Mint 19 from it. Let’s get started.
Downloading Linux Mint 19:
When the stable version of Linux Mint 19 will be released, you can download an image of Linux Mint 19 from https://linuxmint.com/download.php
Linux Mint 19 “Tara” Cinnamon BETA can be downloaded from https://blog.linuxmint.com/?p=3581
Linux Mint 19 “Tara” MATE BETA can be downloaded from https://blog.linuxmint.com/?p=3582
Linux Mint 19 “Tara” XFCE BETA can be downloaded from https://blog.linuxmint.com/?p=3583
I am going use Linux Mint 19 “Tara” Cinnamon BETA in this article.
Making Bootable USB Drive from Linux:
If you have a Linux distribution such as Ubuntu/Debian/Fedora etc installed on your computer, you can make a bootable USB drive of Linux Mint 19 “Tara” with the following command:
NOTE: Here /dev/sdb is the USB drive. You may have a different identifier. Make sure you check with sudo lsblk before you run this command.
Once the process is completed, you should be able to boot from the USB drive.
Making Bootable USB Drive from Windows:
From Windows, Rufus can be used to make a Linux Mint 19 bootable USB drive.
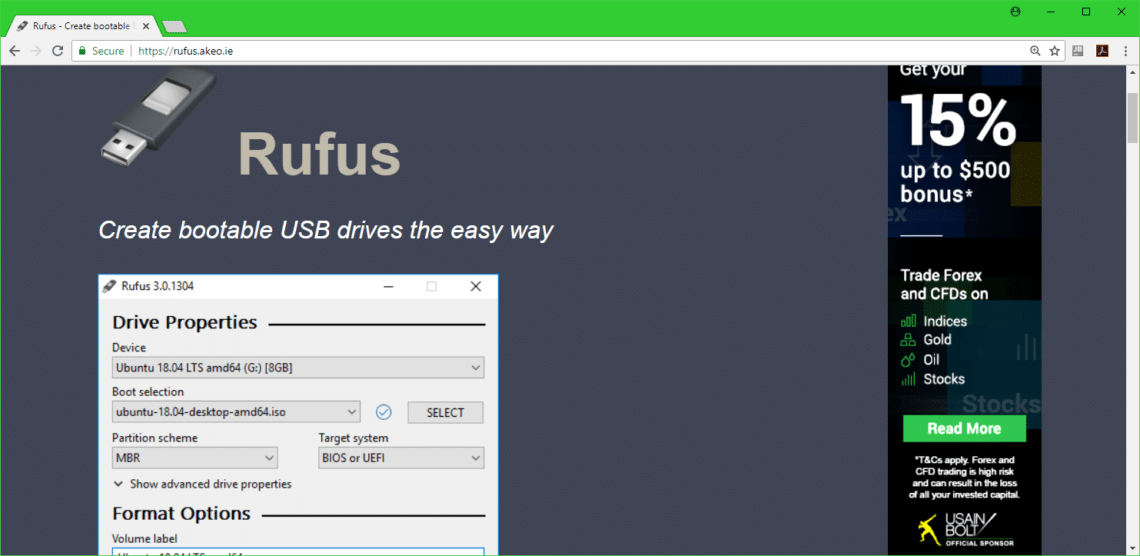
First go to the official website of Rufus at https://rufus.akeo.ie/ and you should see the following window.
Scroll down a little bit to the Download section and click on Rufus Portable link as marked in the screenshot below.
Rufus Portable should be downloaded.
Now run Rufus Portable.
Click on No.
Rufus Portable should start.
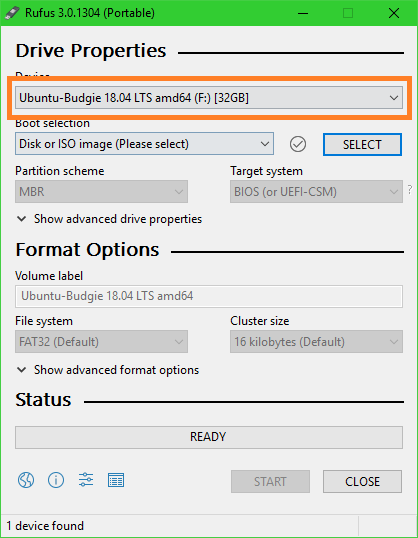
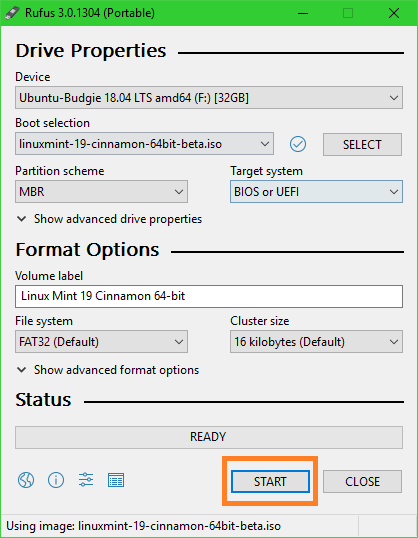
Now insert your USB drive. Rufus should detect and select it as you can see from the marked section of the screenshot below.
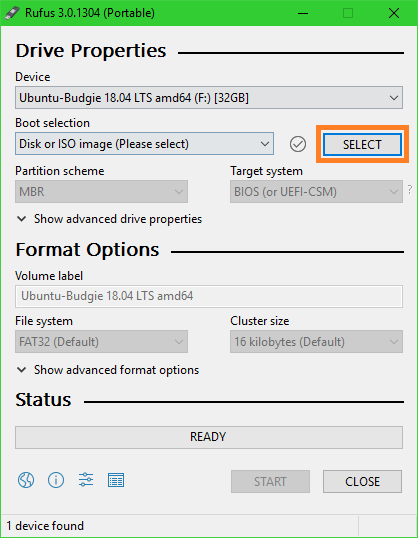
Now click on Select.
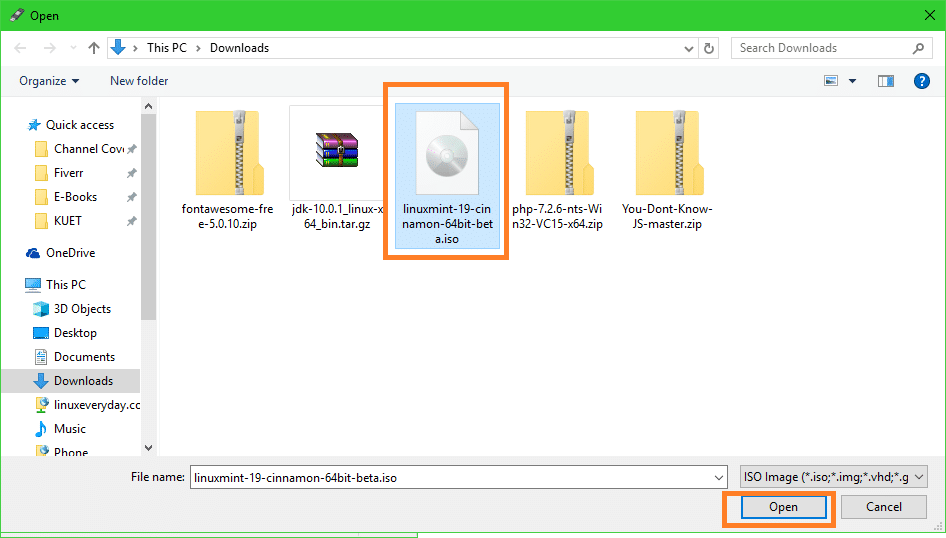
A file picker should be opened. Select your Linux Mint 19 iso file you just downloaded and click on Open.
It should be selected. Now click on START as marked in the screenshot below.
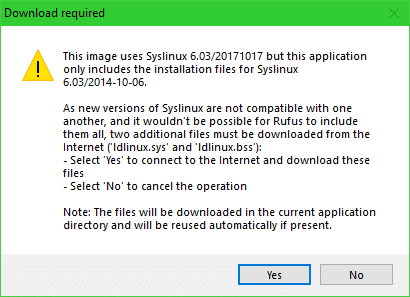
Click on YES.
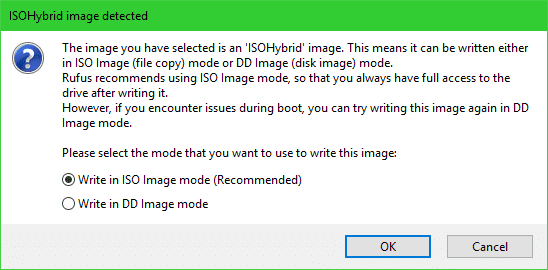
If you don’t know what it is, just leave the default and click on OK.
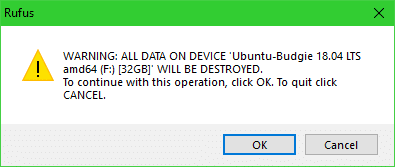
All the data of your USB drive should be erased. If you don’t have anything important on your USB drive, click on OK. Otherwise, make a backup of your data and try again.
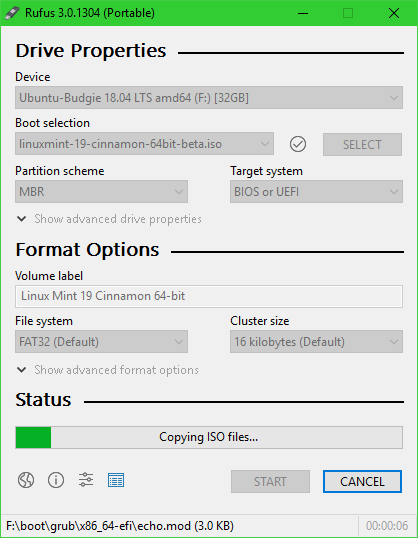
It should take a while for the process to complete.
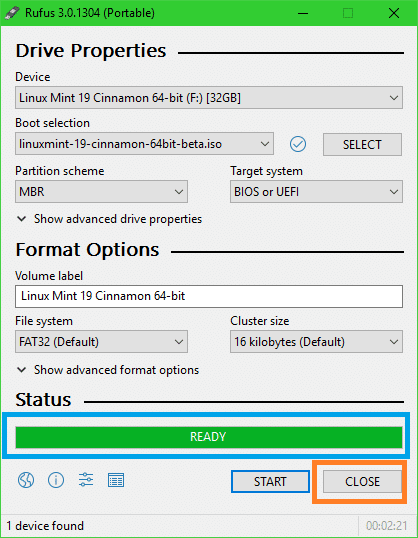
Once it’s completed, you can click on CLOSE.
You USB drive is now ready.
Booting from the USB Drive:
Now that you have a bootable USB drive of Linux Mint 19, you can boot from it and install Linux Mint 19 on your computer. First insert your USB drive to your computer. Now you have to select your USB drive from the BIOS of your computer. Usually you press F2 or Delete or some other keys just after you pressed the power button of your computer. It depends on the motherboard of your computer. Please check the manual of your Motherboard for more information.
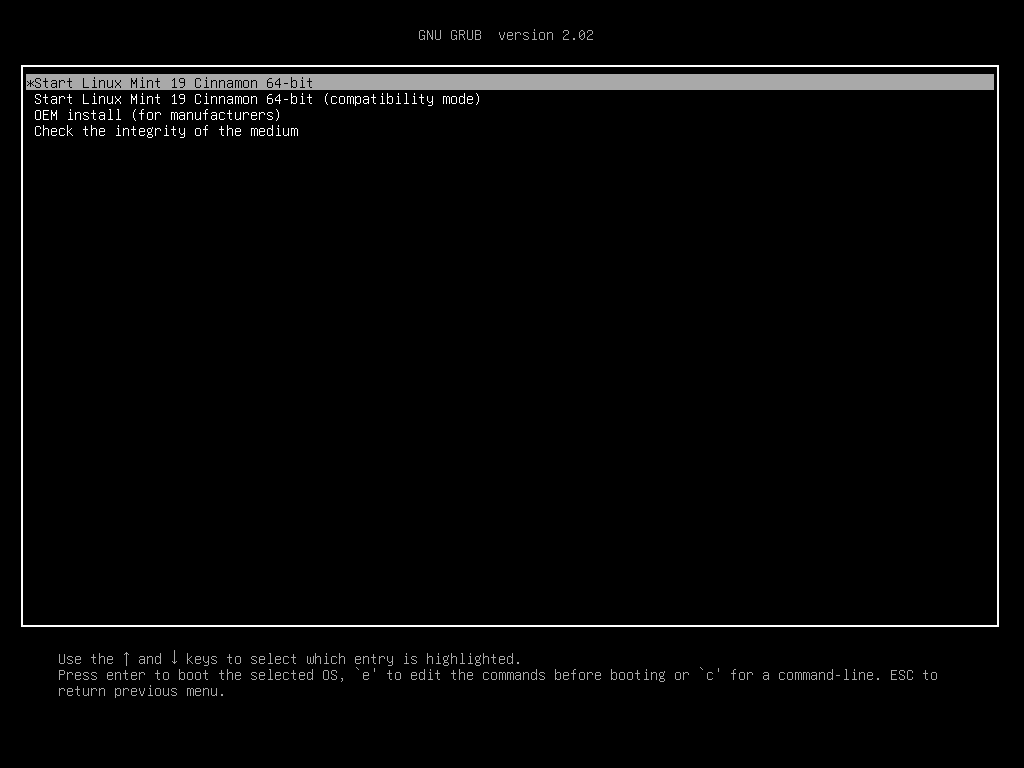
Once you select your USB drive from the BIOS, you should see the following window. Select Start Linux Mint 19 Cinnamon 64-bit and press <Enter>.
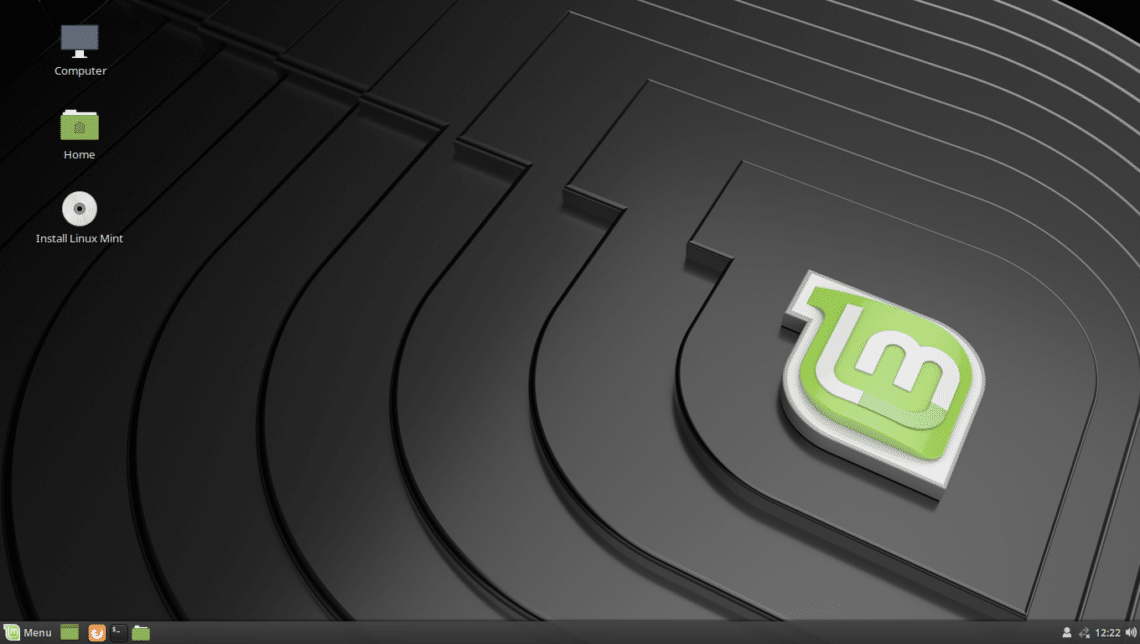
You should be booted into the Linux Mint 19 Cinnamon Live DVD.
Installing Linux Mint 19:
In this section, I will show you how to install Linux Mint 19 on your computer.
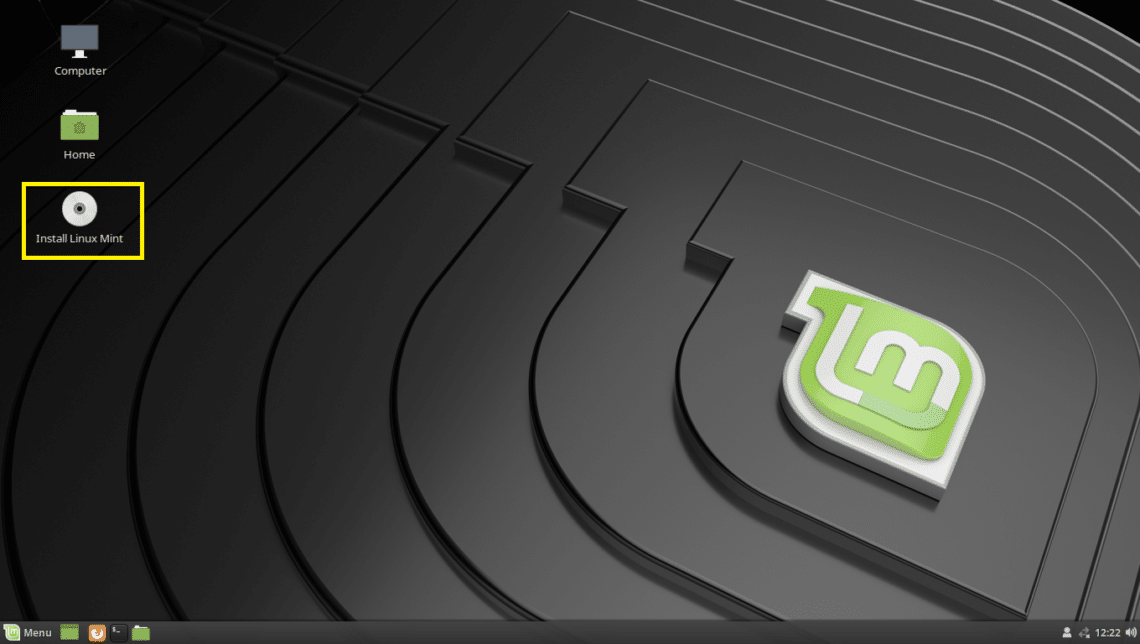
First double click on Install Linux Mint icon as marked in the screenshot below.
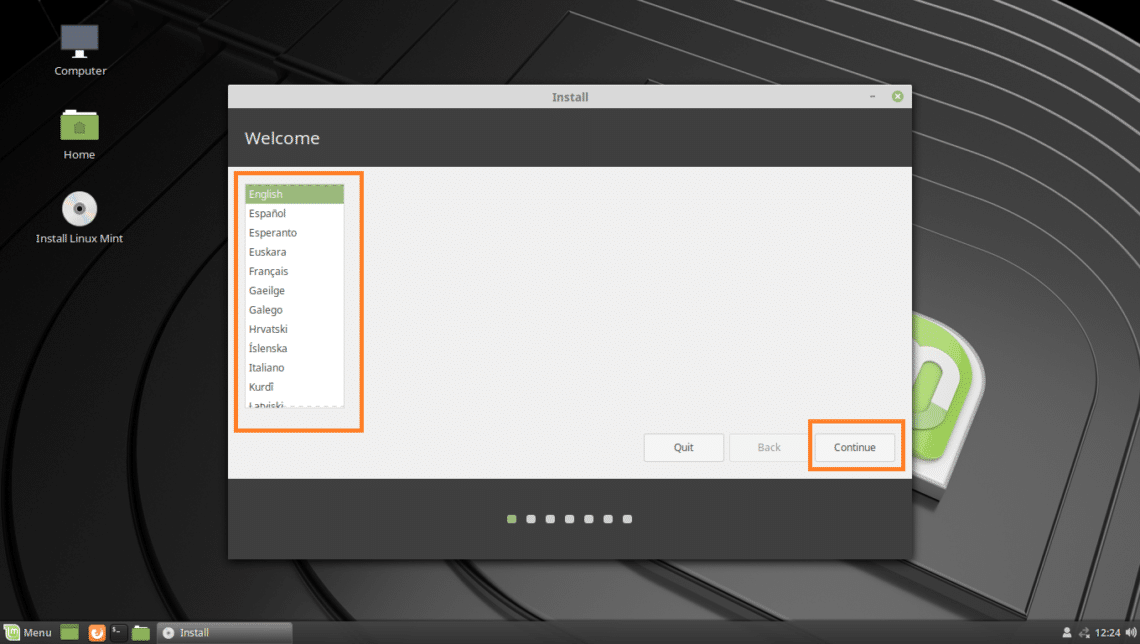
The Linux Mint 19 installer should start. Select your language and click on Continue.
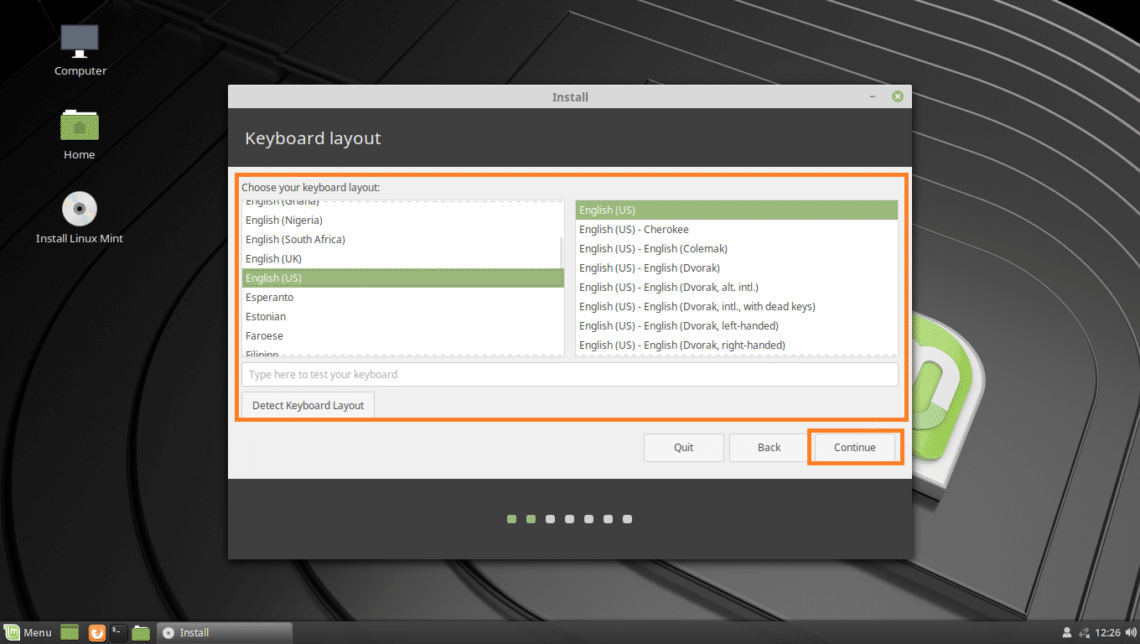
Now select your Keyboard layout and click on Continue.
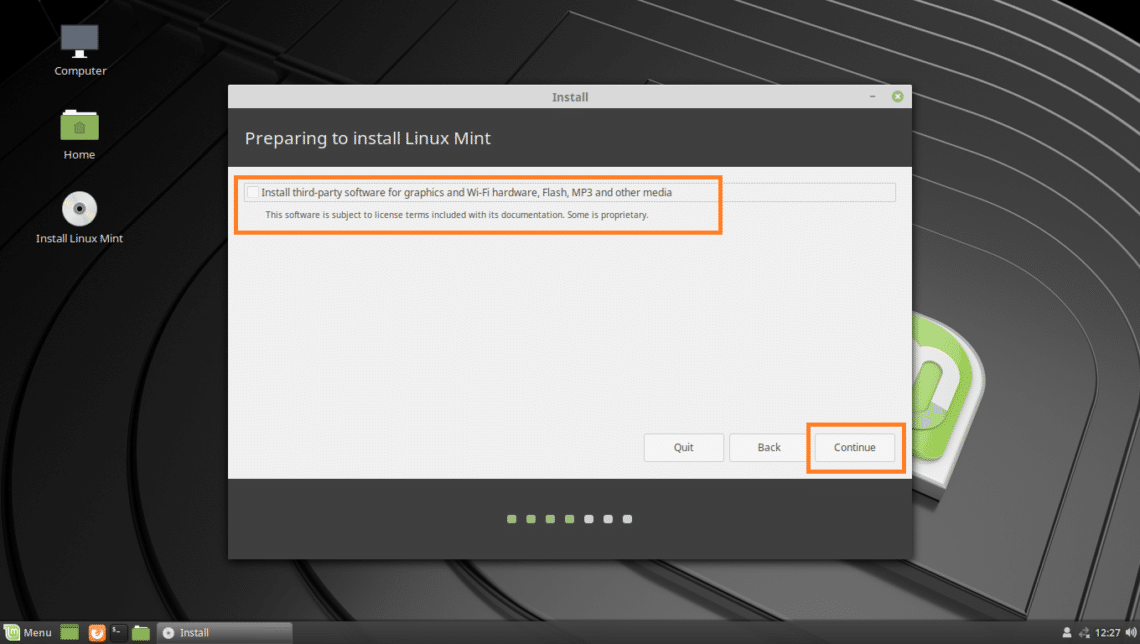
If you want to install third party drivers and multimedia codecs while installing Linux Mint 19, mark the Install third-party software for graphics and Wi-Fi hardware, Flash, MP3 and other media as marked in the screenshot below. You will need internet connectivity for that. Once you’re done, click on Continue.
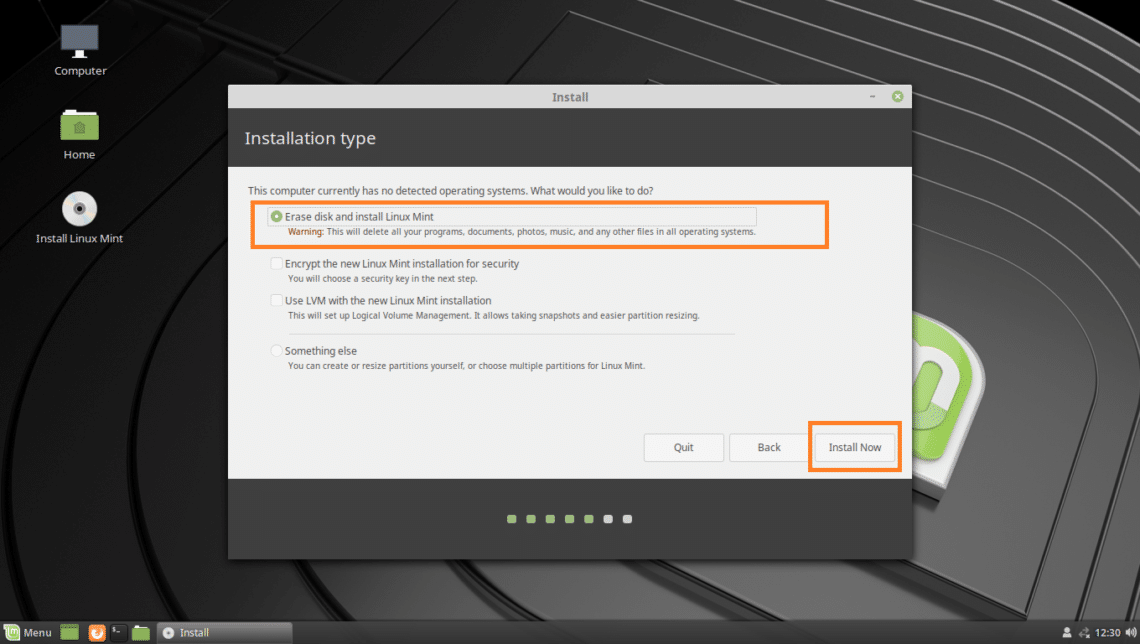
If you want to erase everything and install Linux Mint 19 on your hard drive, the easiest option is Erase disk and install Linux Mint.
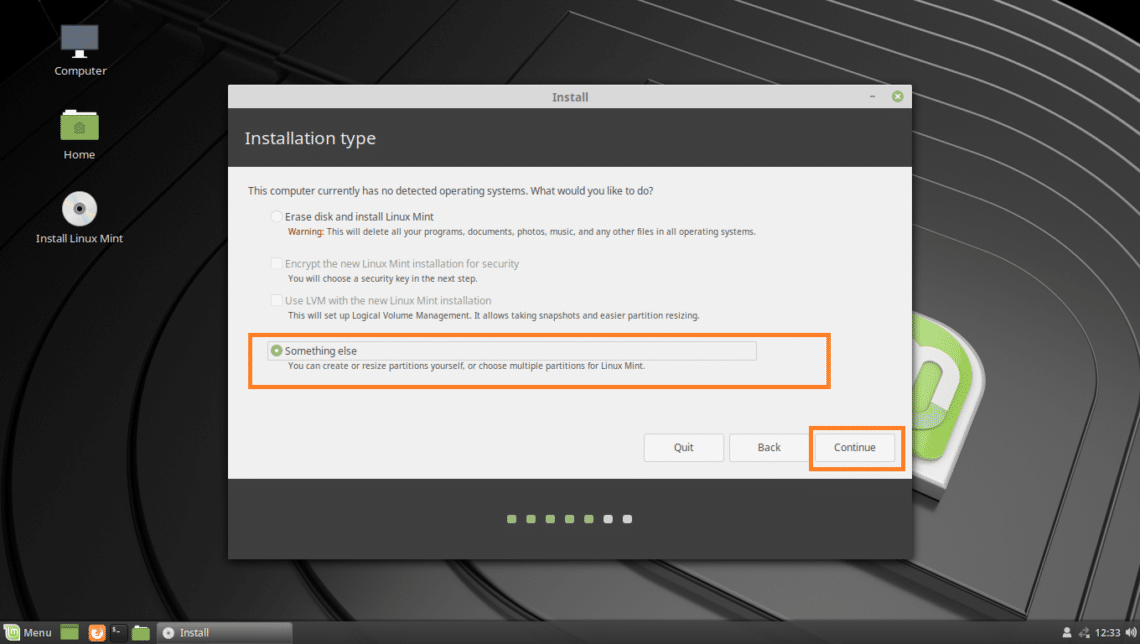
But if you want to dual boot Windows and Linux, then you will have to select Something else. In this case you can do manual partitioning and install Linux Mint 19 on custom partitions. That’s what I am going to show you in this article.
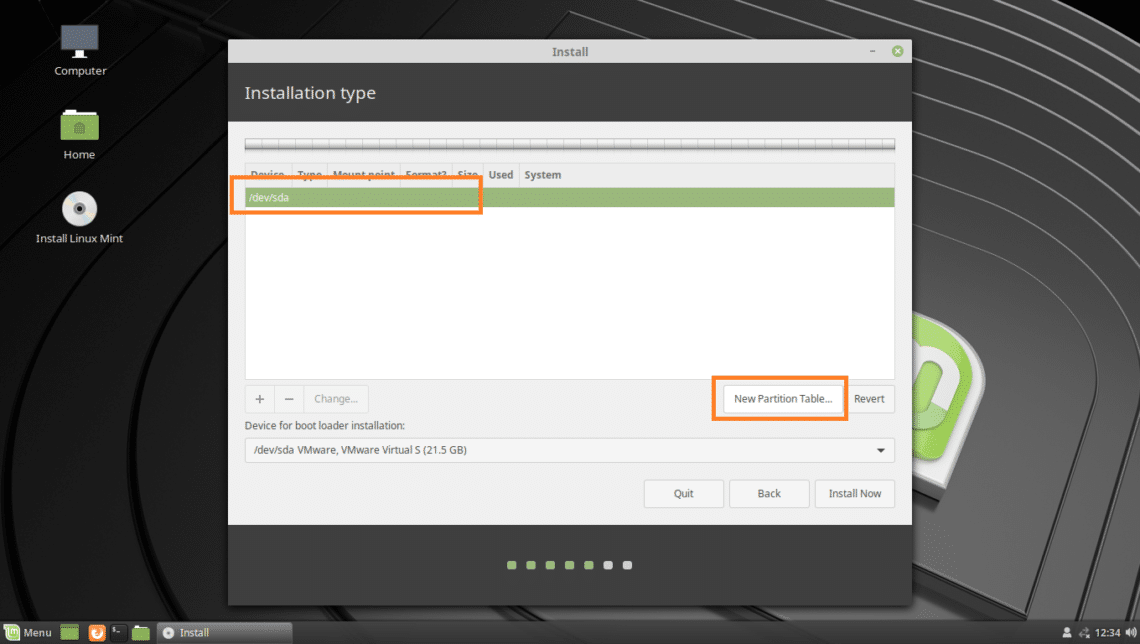
You may not have a partition table on your hard drive. Just select your hard drive and click on New Partition Table…
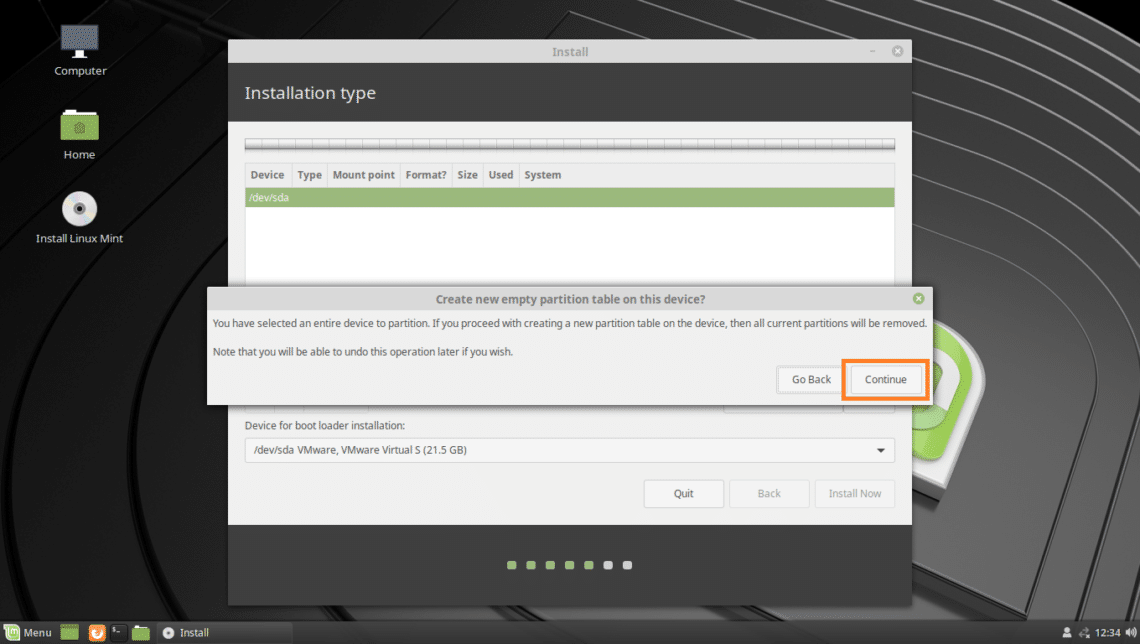
Now click on Continue.
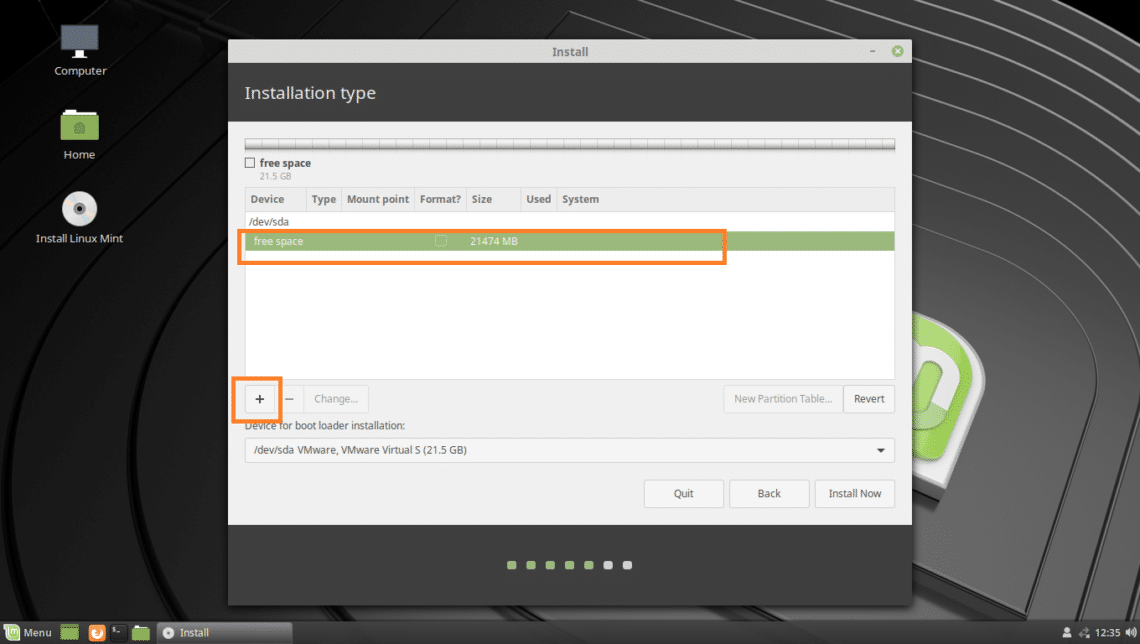
For UEFI installation, you need an EFI System partition and a Root(/) partition. For BIOS installation, you only need a Root(/) partition. I am going for the UEFI installation.
To create a new partition, select free space, and click on the + button.
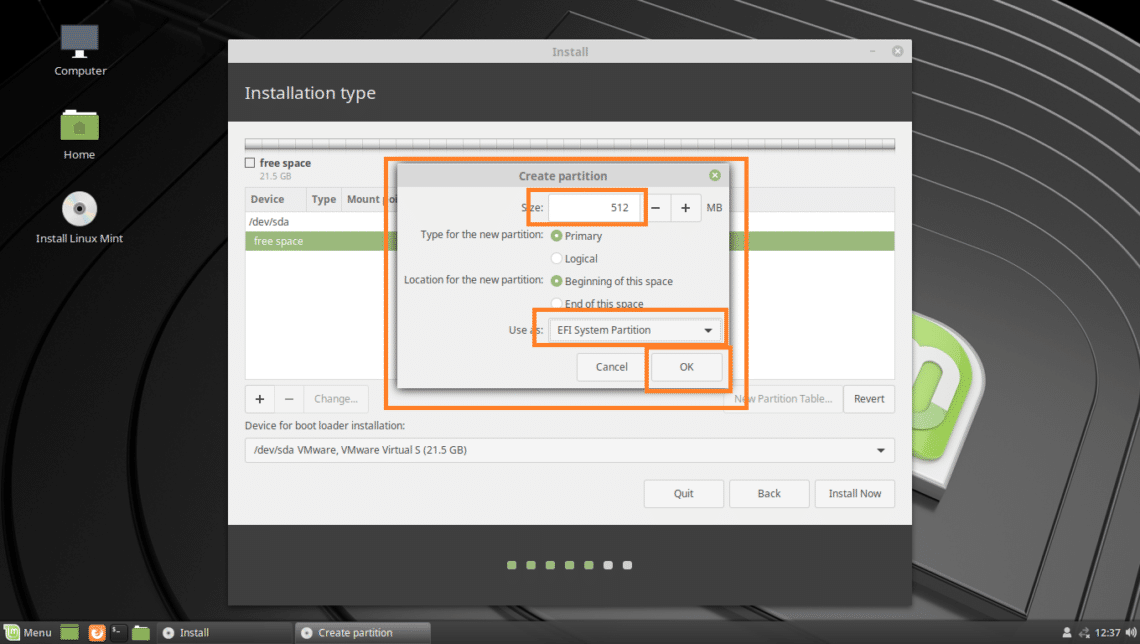
On the Create partition window, make sure the following options are selected. Once you’re done, click on OK. EFI System Partition should be 512 MB in size.
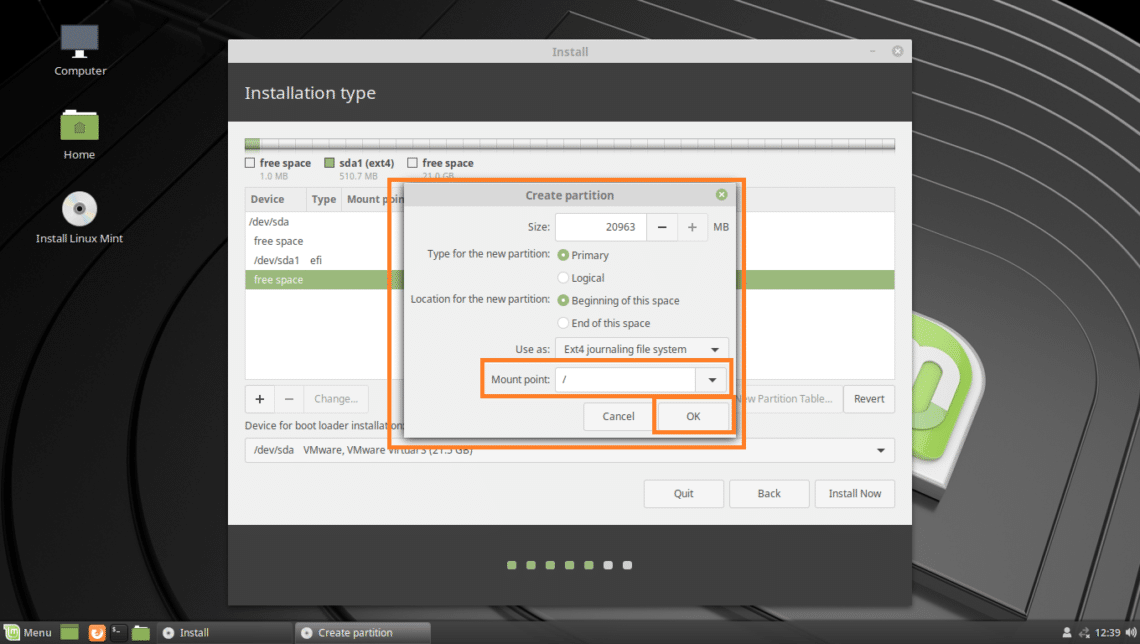
Now create a Root(/) partition with the rest of the free space. Make sure the Mount point is set to /. Once you’re done, click on OK.
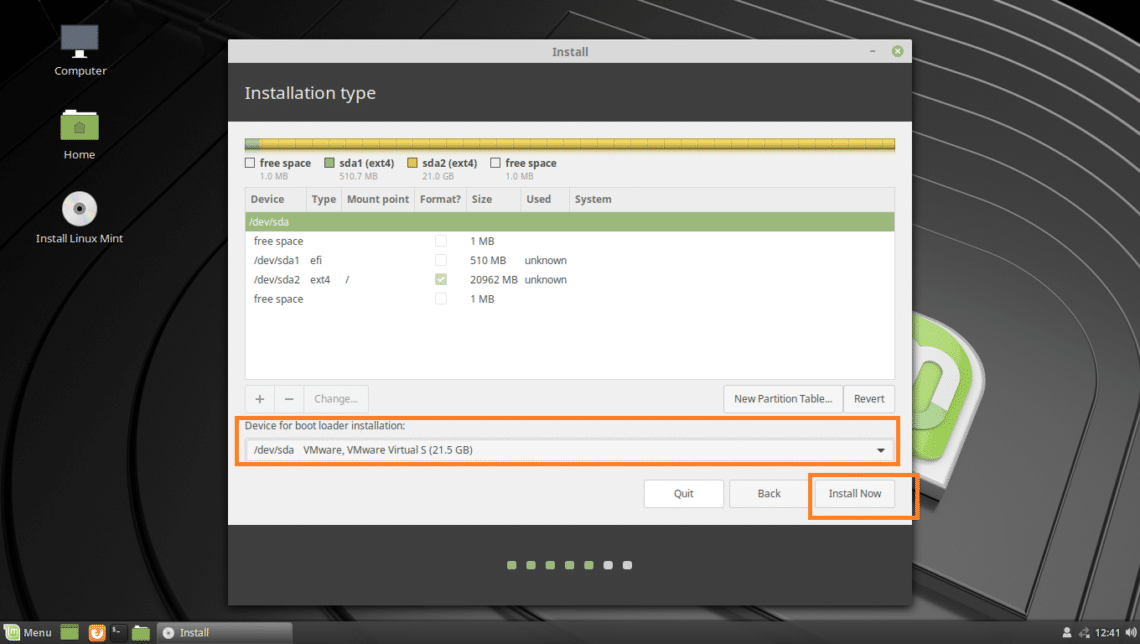
Now make sure the correct Device for boot loader installation is selected and then click on Install Now.
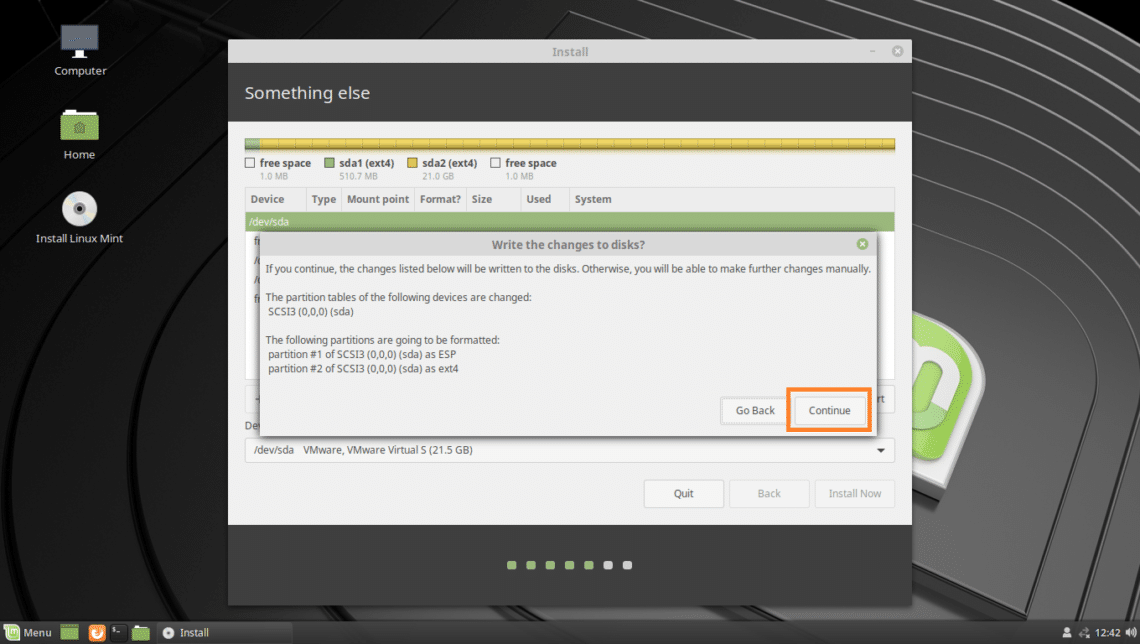
Click on Continue.
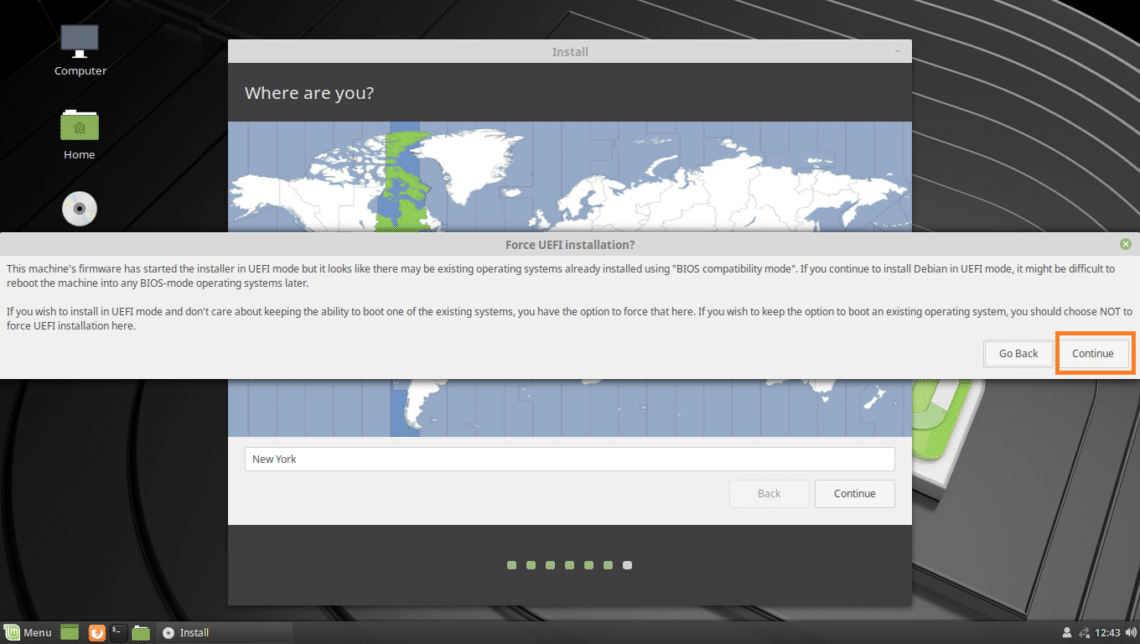
You may see this warning, just click on Continue.
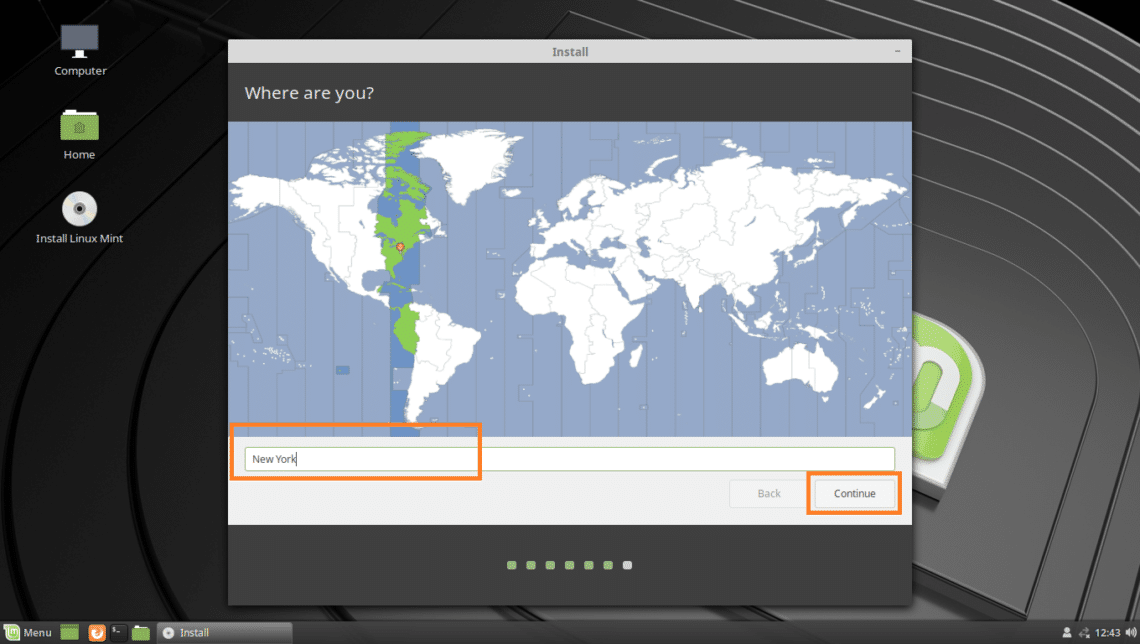
Now select your location and click on Continue.
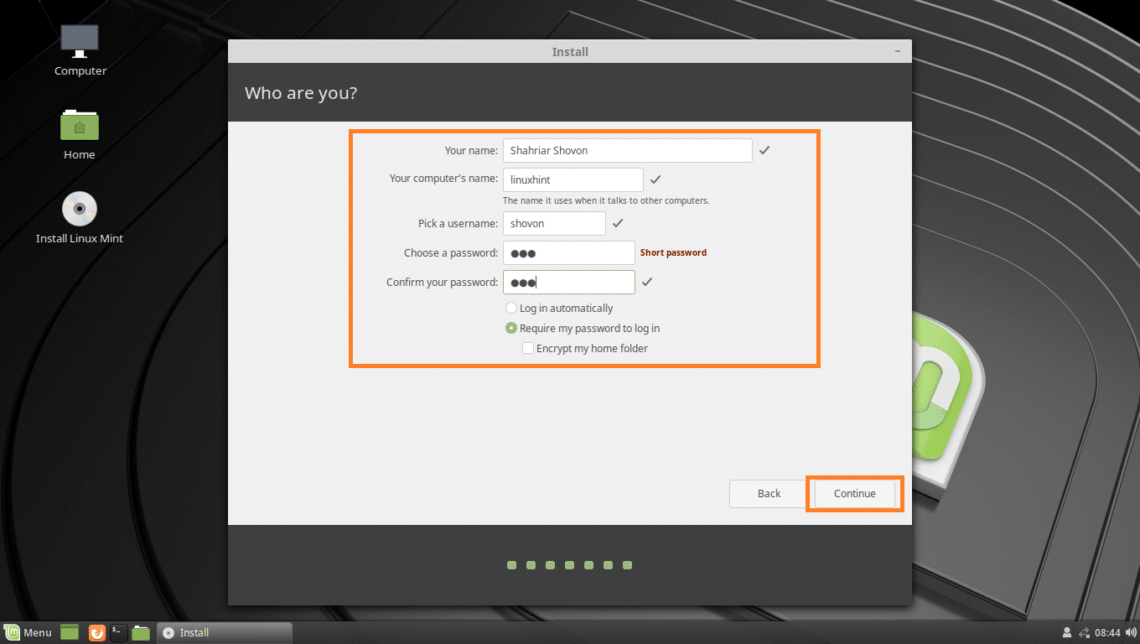
Now fill in your personal details and click on Continue.
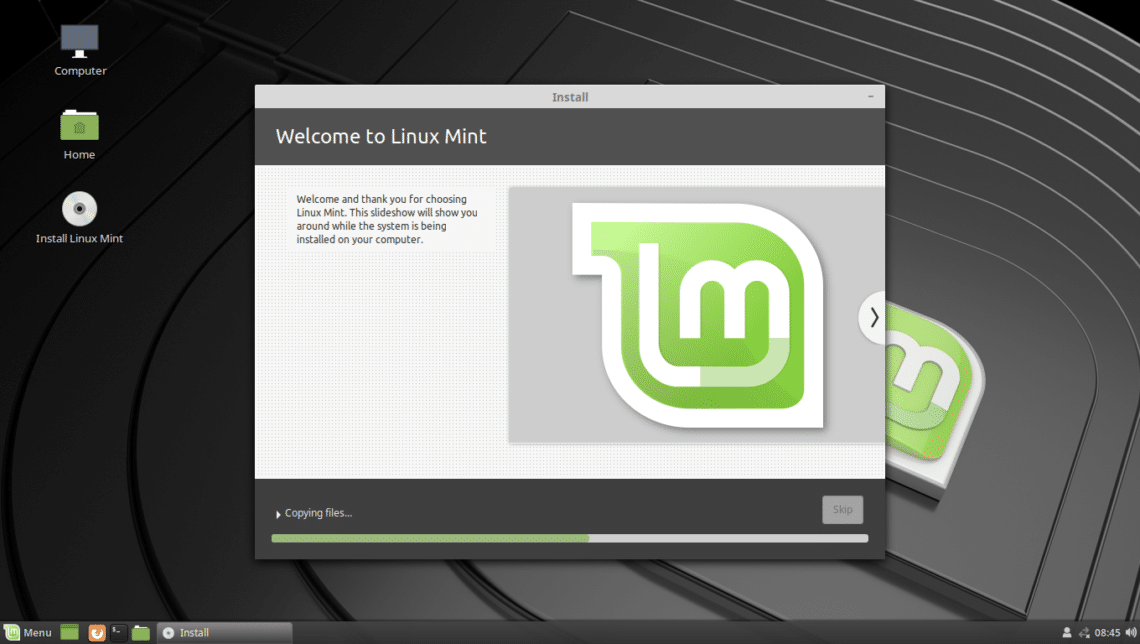
The installation should start.
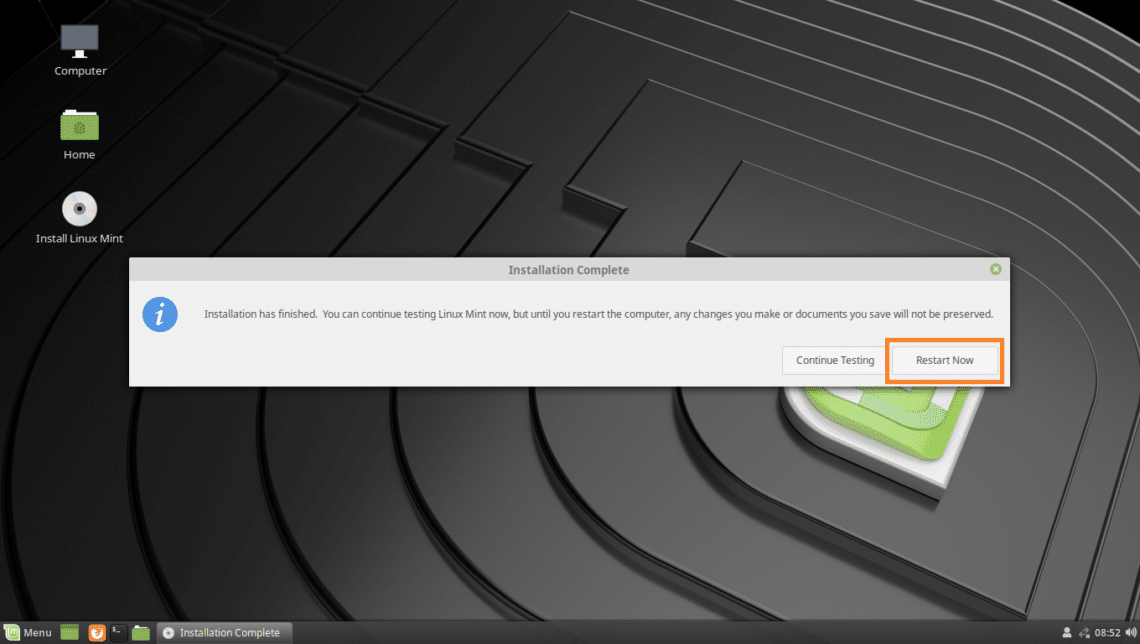
Once the installation is complete, click on Restart Now.
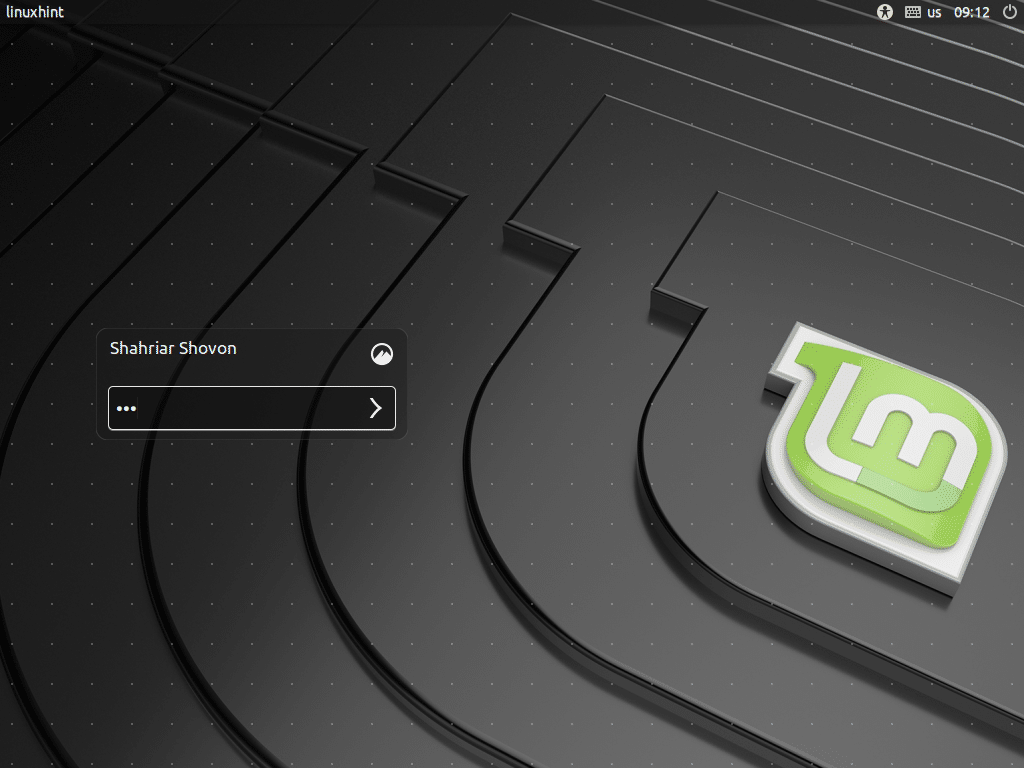
Your computer should restart and once it starts you should be booted into your newly installed Linux Mint 19 operating system.
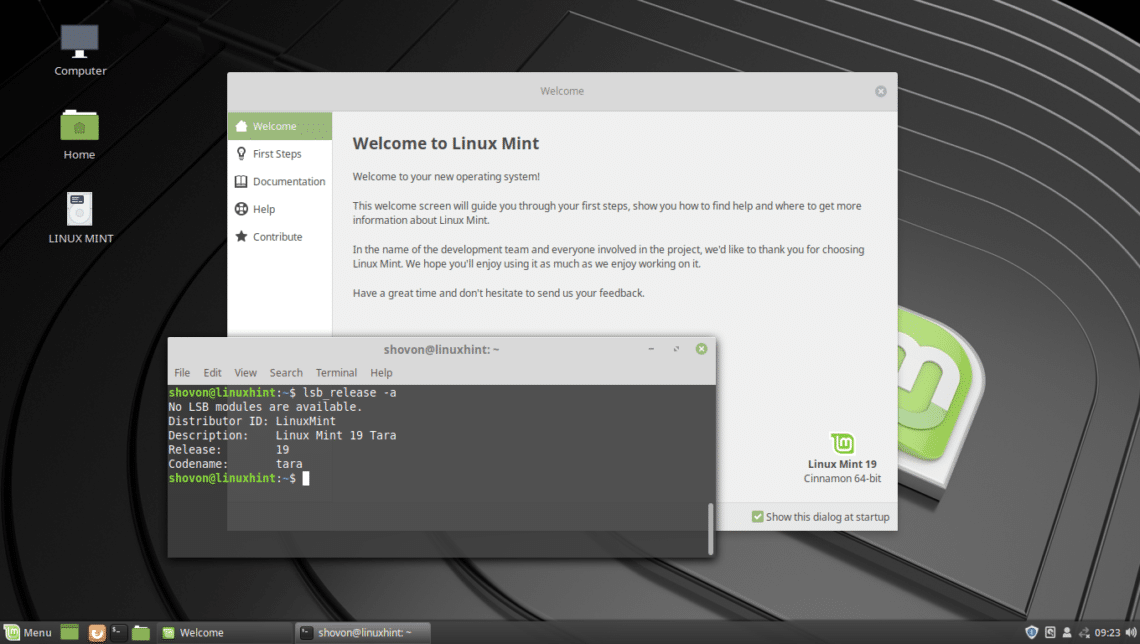
Linux Mint 19 Cinnamon Desktop Environment:
That’s how you make bootable USB drive of Linux Mint 19 and install Linux Mint 19 from the USB drive. Thanks for reading this article.

