Step 1: Checking your Chrome OS version
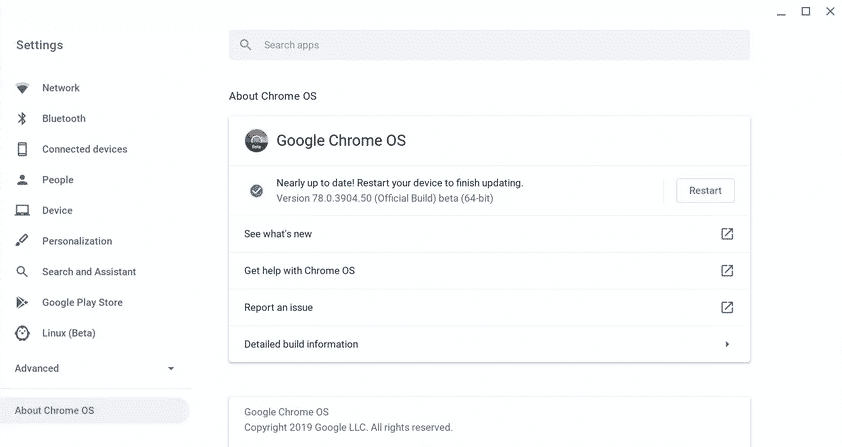
Before we actually move onto the step of installing Linux applications on our Chromebook, we must first check whether your Chromebook actually has the ability to support them. For running Linux applications, your Chromebook should have the Chrome OS 69 or later versions installed. To check the version that you’re currently running, open the Settings window, which can be simply be accessed from clicking on your profile picture icon (See the image below).
Next select the Hamburger/ three-line menu icon found in the upper-left corner and choose the About Chrome OS option.
If you see a Check for Updates sign, then it means your Chromebook isn’t running the latest version. To solve this, simply click on the button asking you to download the latest version. This will be followed by a request of asking you to restart your Chromebook. Please do so.
Step 2: Turning On Linux Beta
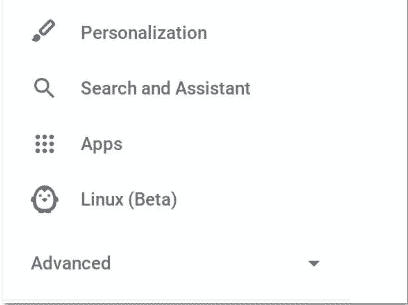
Once your Chromebook has been updated to the latest version, there is one more step to do before we actually begin to install Linux applications. This is to turn on the Linux Beta option found in your Chromebook which is a newly introduced feature that allows you to install and run Linux applications. Once again, open the Settings window and select the Hamburger/ three-line menu icon found in the upper-left corner. Now similarly, as done in Step 1, search for the Linux (Beta) option in the scroll down menu. See the image below.
If Linux Beta, however, doesn’t show up in your Settings menu, please go and check to see if there is an update available for your Chrome OS (Step 1). If Linux Beta option is indeed available, simply click on it and then select the Turn On option.
After this, you’ll get a prompt asking you whether you want to Install or Cancel the setting up of Linux Beta on your Chromebook. Please click on Install.
Depending on the specs of your Chromebook and your internet speed, the installation time can vary. When the installation will be complete, you’ll get a terminal window opened in front of you which would be an indication of having successfully installed Linux Beta.
If after installation, however, the terminal window doesn’t open, then go to the search bar and under the Linux apps subfolder, you’ll have a Terminal icon present. Click on it to get the Linux Bash at your disposal.
Step 3: Updating your Linux
Now you are ready to install Linux apps on your Chromebook. However, before we actually move onto the installation step, we must first check for any updates or upgrades that our Linux requires. This is because Canonical, the developers of Ubuntu, continually release new updates for Ubuntu which are designed to fix common bugs as well as improve the overall system performance and efficiency. With the latest update, Ubuntu will have most of the issues in the old version sorted out and will be able to run much more smoothly. To do this, enter the following commands in the terminal:
Moreover, to check for any major upgrades available, run the following command:
On Linux, this would have required you to type in your password when using the sudo command. However, there is no need to do so on your Chromebook.
Step 4: Installing Linux Apps on your Chromebook
With all the initial preparations out of the way, now finally it’s time to install a Linux application on your Chromebook. We’ll be using the command line to install our applications. The commands used here to install our applications will be the exact same as what we used in Ubuntu. Simply enter the following command and then press enter:
Note: app name here indicates the name of the application that you’re installing
Now you’d be greeted with a huge chunk of text which basically is indicating the downloading and installation of different components and dependencies of the application. Once the installation is complete, the terminal will return to its original green command prompt. To access the application you just installed, go to your list of programs installed and you’ll find your application present in the Linux apps subfolder.
Let us show you an example. We’ll be installing LibreOffice which is an excellent open source alternative to Microsoft Office. For installation, as told before, simply open the terminal and enter the following command and hit enter:
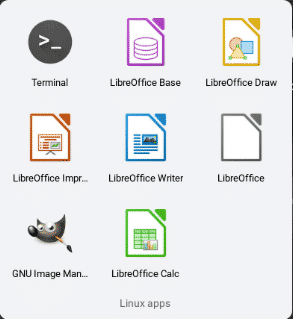
When the installation is done, simply exit the terminal and go look in your list of programs to find the different Libreoffice components installed under the Linux apps subfolder.
Voila, you can now edit your documents on a Chromebook with Libreoffice.
Importance of having Linux Apps on your Chromebook
With the technological field expanding at such a fast rate, Google’s introduction of Linux applications in Chromebooks is another feat worthy of being called a huge achievement as this not only diverges and opens up the possibilities of what Chromebook can accomplish but also helps in broadening its diversity of users. With the capabilities of running a diverse set of applications, Chromebooks have become something of a revolution in the industry and are continuously on the rise.


