On servers, the preferred operating system of choice is Linux. If the networking hardware is also Linux, it will be very easy to deploy, configure, and manage as the whole stack now runs on Linux. You have access to the same commands and same utilities for every computer in your Data Center.
You can build a Linux based network switch or router very easily with Cumulus Linux. All you have to do is install the number of network interface card (NIC) you need in your computer and install Cumulus Linux on it. The advantage is that you can combine the power of Linux with networking. You can run all the Linux commands and software to manage and automate your Cumulus Linux router and switch.
Cumulus Linux can be installed on x86_64, ARM, PowerPC hardware and many other ASIC hardware. It supports a wide range of network type and hardware from a lot of manufacturers. You can check whether it supports your hardware at https://cumulusnetworks.com/products/hardware-compatibility-list/
Cumulus Linux is a replacement for the proprietary Router and Switch operating systems such as Cisco IOS. Using a Cumulus Linux switch and router instead of a Cisco switch and router reduces cost and increases flexibility.
Cumulus Linux brings the best features from Cisco and Juniper networking devices. It has a very easy to use command line interface called NCLU. The full form of NCLU is Network Command Line Utility. With NCLU, you can configure your Cumulus Linux machine very easily. It is very simple. You can auto complete through Cumulus Linux network configuration commands. It has many examples to help you learn how to use the NCLU utility. NCLU prevents typos and mistakes with Guardrails. NCLU also has commit and rollback features as well. It is one of the best thing about Cumulus Linux.
In this article, I will show you how to install Cumulus Linux. Let’s get started.
Downloading Cumulus Linux:
You can try Cumulus Linux for free. Cumulus Linux offers Cumulus VX, which you can download and run on your laptop with VirtualBox, KVM, VMware ESXi, VMware Workstation, and VMware Fusion (on Mac). You can also use Cumulus VX on GNS3 to simulate your network. If you’re planning to migrate your existing network to Cumulus Linux, then this may be a great option for you.
The official website of Cumulus Linux clearly states that Cumulus VX is only for learning, testing, and development. It is not production ready virtual switch or router. It is also not intended to run on production environment.
To download Cumulus VX, First, go to the official website of Cumulus Linux at https://cumulusnetworks.com/ and you should see the following page. Now click on TRY FOR FREE.
From the Cumulus VX section, click on Learn more as marked in the screenshot below.
Now scroll down a little bit and click on the Download now button.
You will be asked to login to your Cumulus Networks account. If you don’t have one, click on Register.
Now fill in the details and click on Create Account.
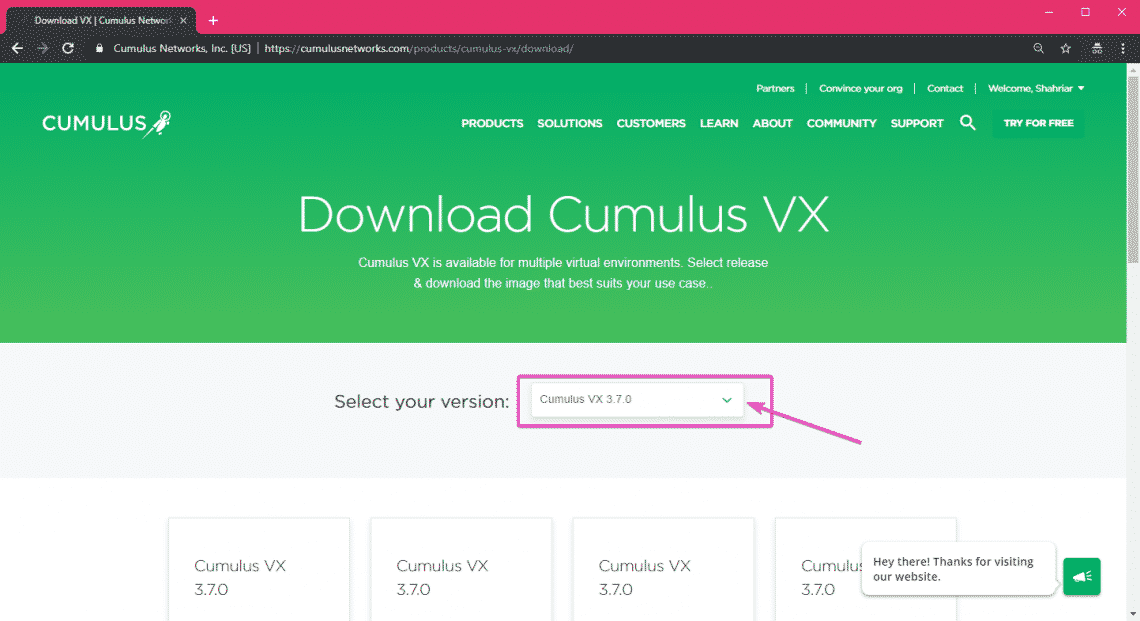
Once you create an account and login, you should see the following page. By default, the latest version of Cumulus VX (which is version 3.7.0 at the time of this writing) is selected.
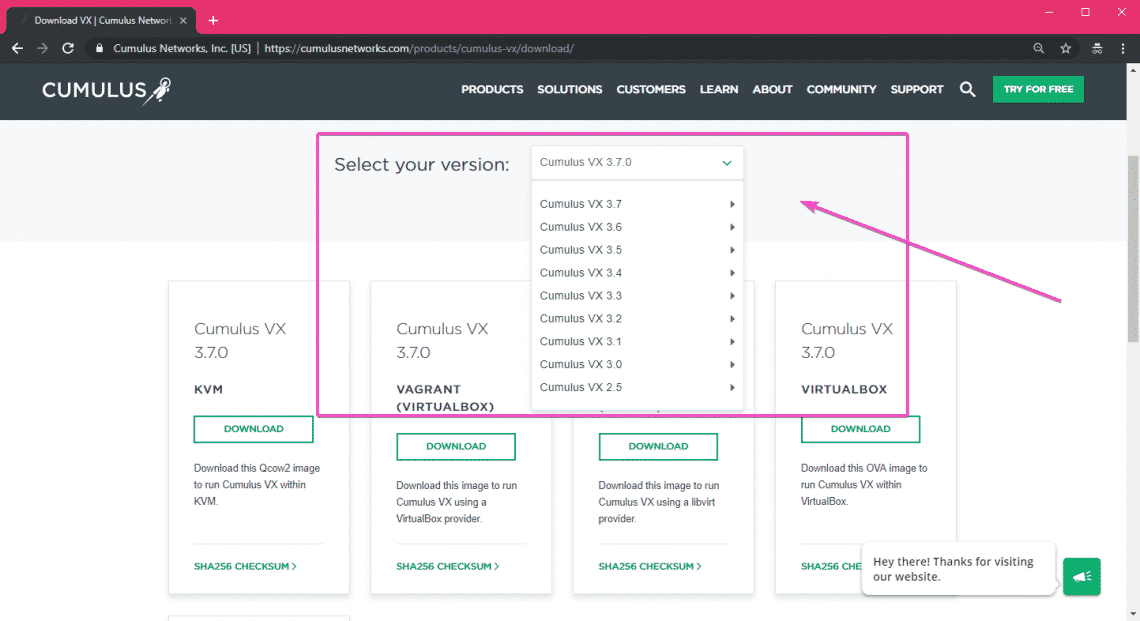
If you need specific version of Cumulus VX, then you can select it from the dropdown menu as you can see in the marked section of the screenshot below.
As you can see, Cumulus VX image is available for KVM, Vagrant, VirtualBox and VMware. I will be using VMware Workstation Pro 15 in this article for the demonstration. To download Cumulus VX image for your desired Virtualization platform, just click on DOWNLOAD.
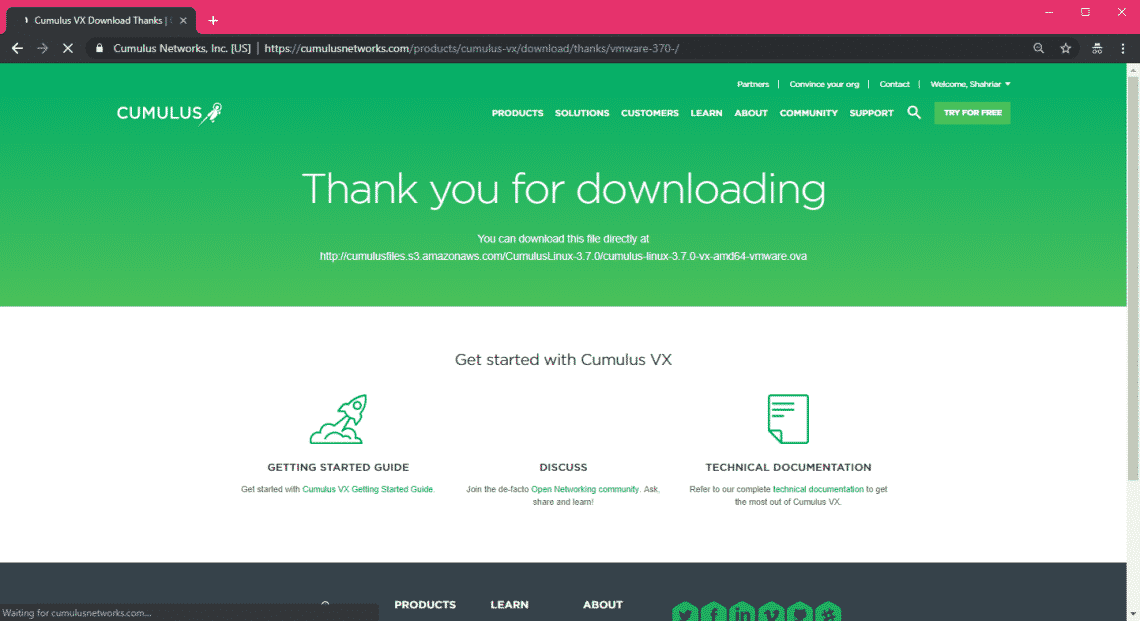
Your download should start in a few seconds.
As you can see, the Cumulus Linux VX VMware image download has started. It should take a while to complete.
Installing Cumulus Linux VX:
Once the Cumulus Linux VX image for your desired Virtualization platform is downloaded, you can easily use it to deploy a Cumulus Linux Virtual Machine.
If you’re using VirtualBox or VMware, then the process is as simple as importing the image into VirtualBox or VMware.
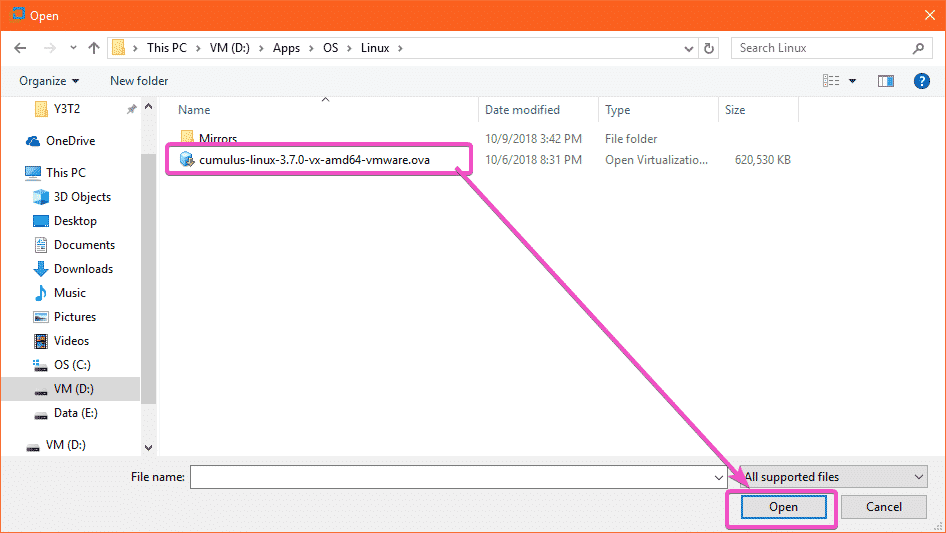
If you’re using VMware, then first open VMware and go to File > Open… or press <Ctrl> + o. A File Picker should open up. Select the Cumulus Linux VX OVA image and click on Open as marked in the screenshot below.
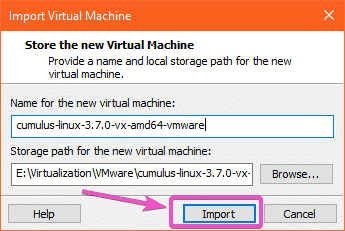
Now type in the name and location where the Cumulus Linux VX Virtual Machine data should be saved. Then click on Import.
Cumulus Linux VX virtual machine is being created. It should take a while.
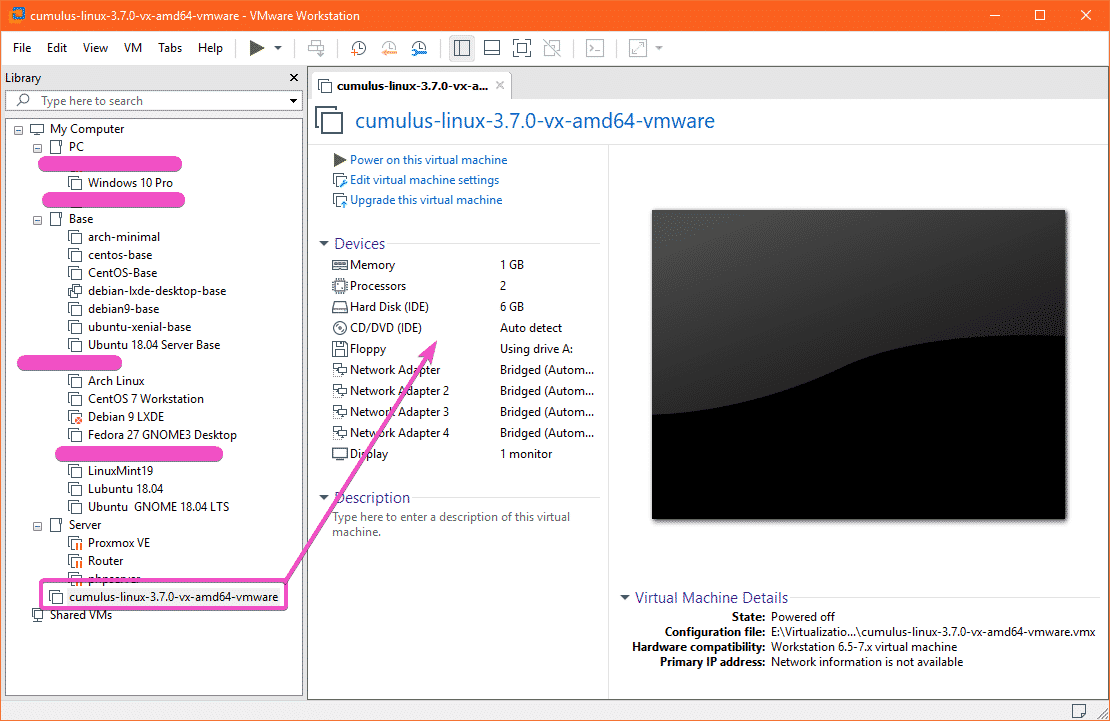
Cumulus Linux VX virtual machine should be created.
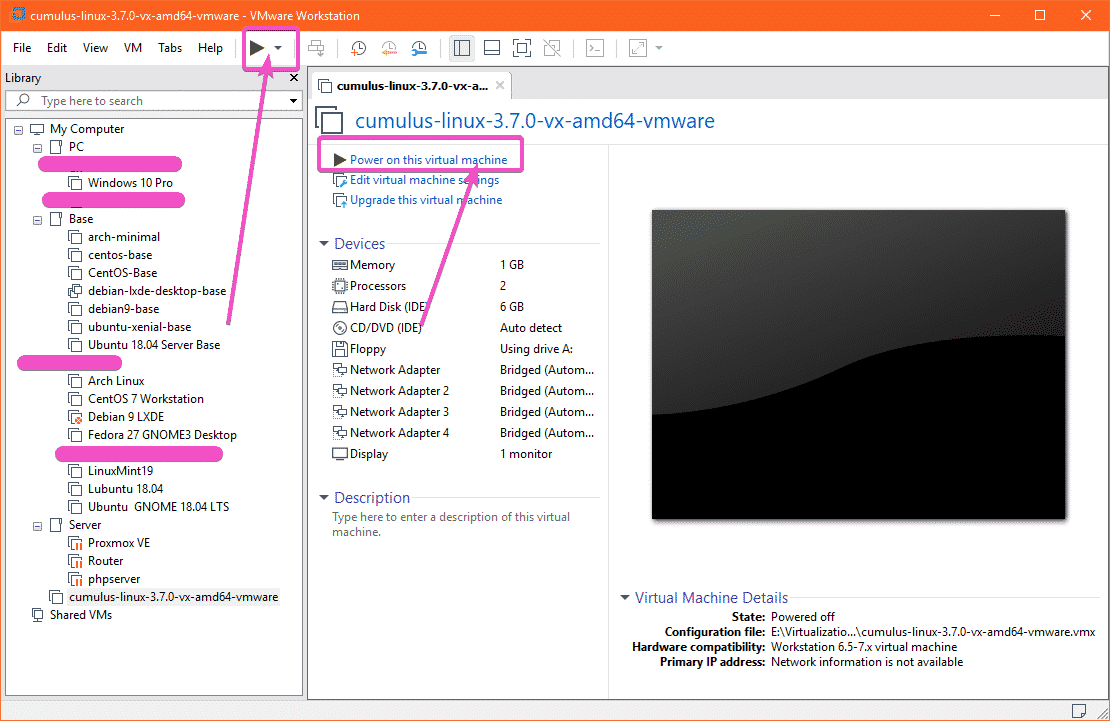
Now to start the virtual machine. Click on the Power on this virtual machine or the Play button as marked in the screenshot below.
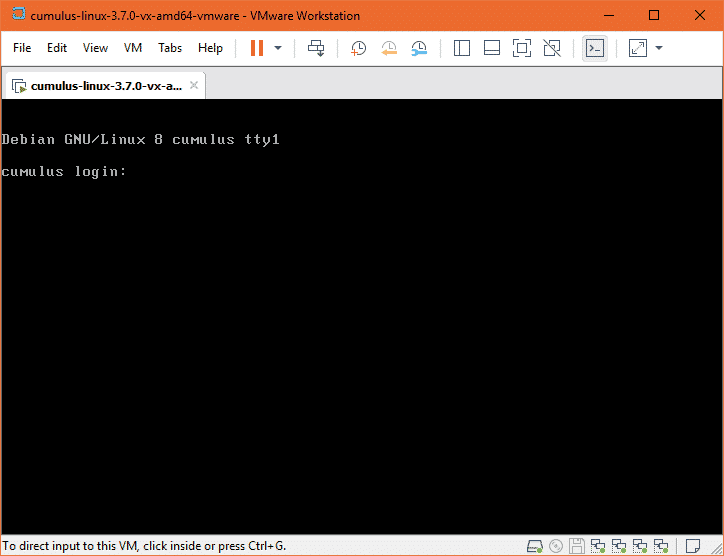
Cumulus Linux VX should start.
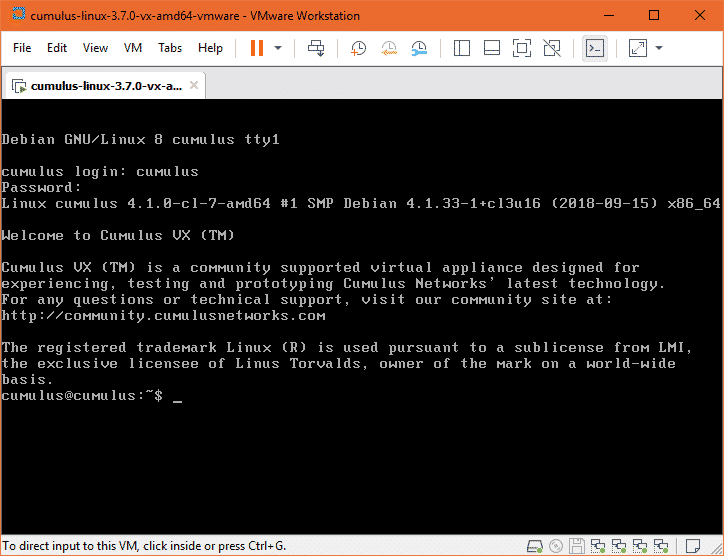
Now you can login to Cumulus Linux VS with the username cumulus and the password CumulusLinux!
As you can see, I am logged in.
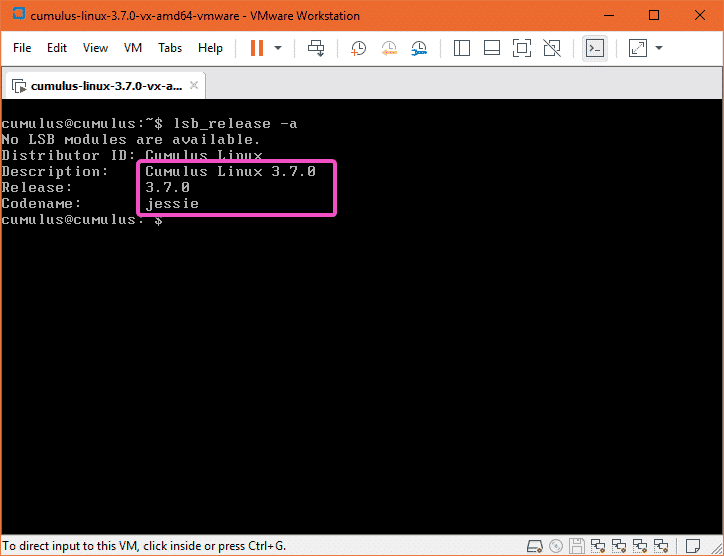
As you can see, I am running Cumulus Linux 3.7.0, which is based on Debian 8 Jessie.
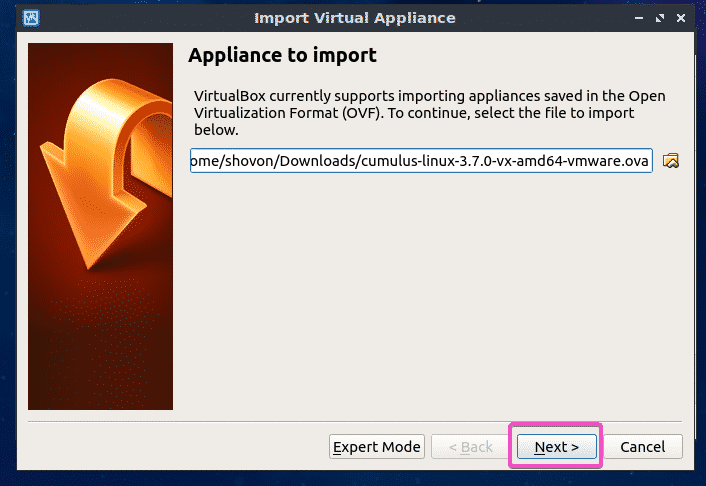
If you’re using VirtualBox, then first open VirtualBox and go to File > Import Appliance… or <Ctrl> + i.
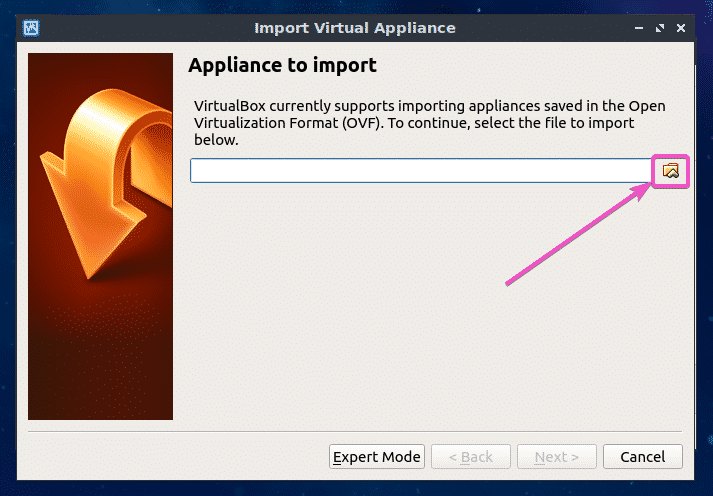
Now click on the file manager icon as marked in the screenshot below.
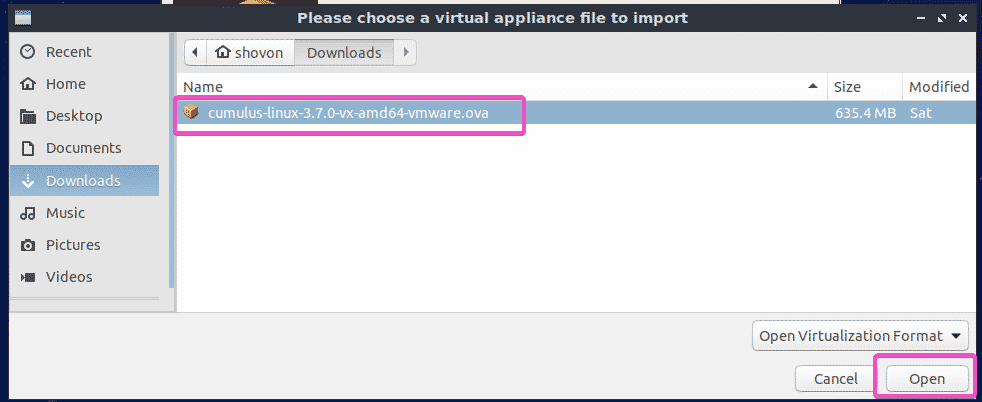
A File Picker should open up. Select the Cumulus Linux VX OVA image and click on Open.
Now click on Next >.
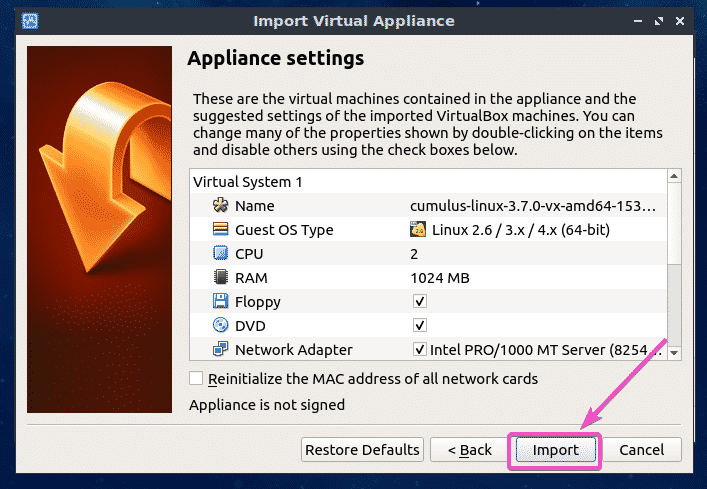
Now click on Import.
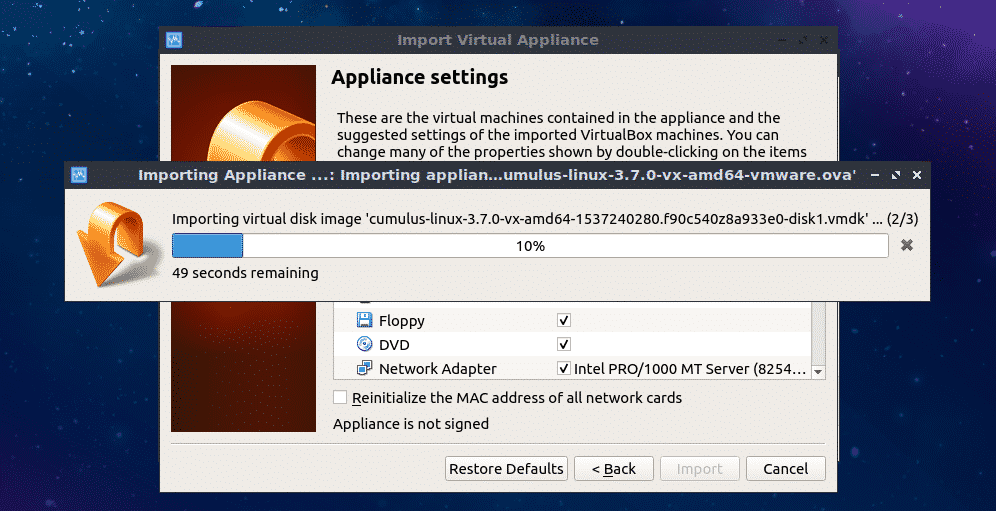
Cumulus Linux VX virtual machine is being created…
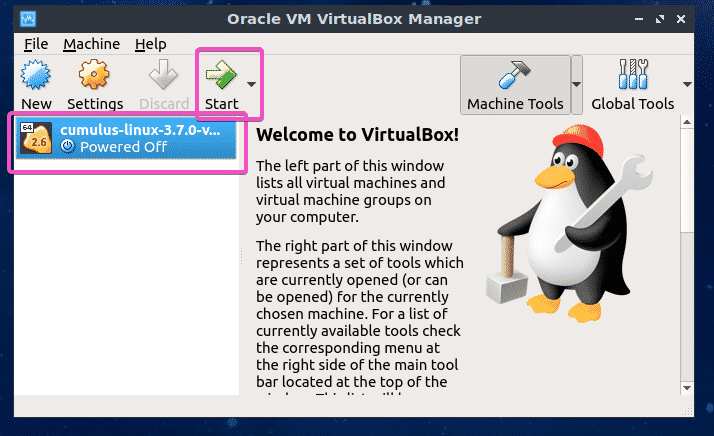
As you can see, Cumulus Linux VX Virtual Machine should be created. Now, to start the Cumulus Linux VX virtual machine, select it and click on Start.
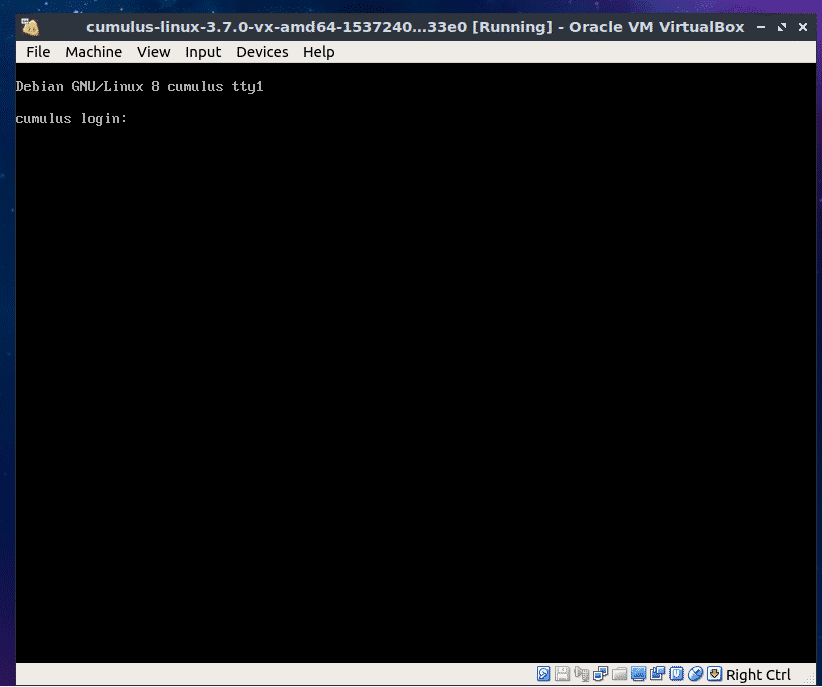
As you can see, Cumulus Linux VX is running.
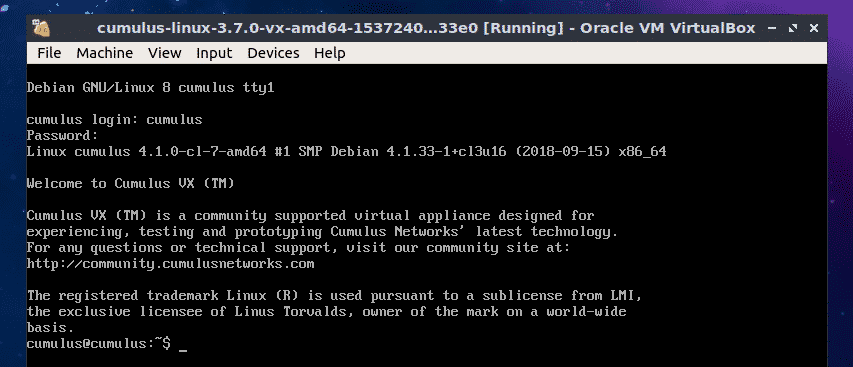
You can login with the username cumulus and password CumulusLinux!
Cumulus Linux Documentation:
Cumulus Linux Quick Start Guide is the best place to start learning Cumulus Linux. You can read the Cumulus Linux documentation at https://docs.cumulusnetworks.com/display/DOCS/Quick+Start+Guide
So that’s how you install Cumulus Linux VX on VMware Workstation Pro and VirtualBox. Thanks for reading this article.


