Before starting, let’s open the tftp port (69) using UFW (Uncomplicated Firewall), as shown in the following image.

Once the port is open, we can proceed with the TFTP installation.
Installing TFTP server and client:
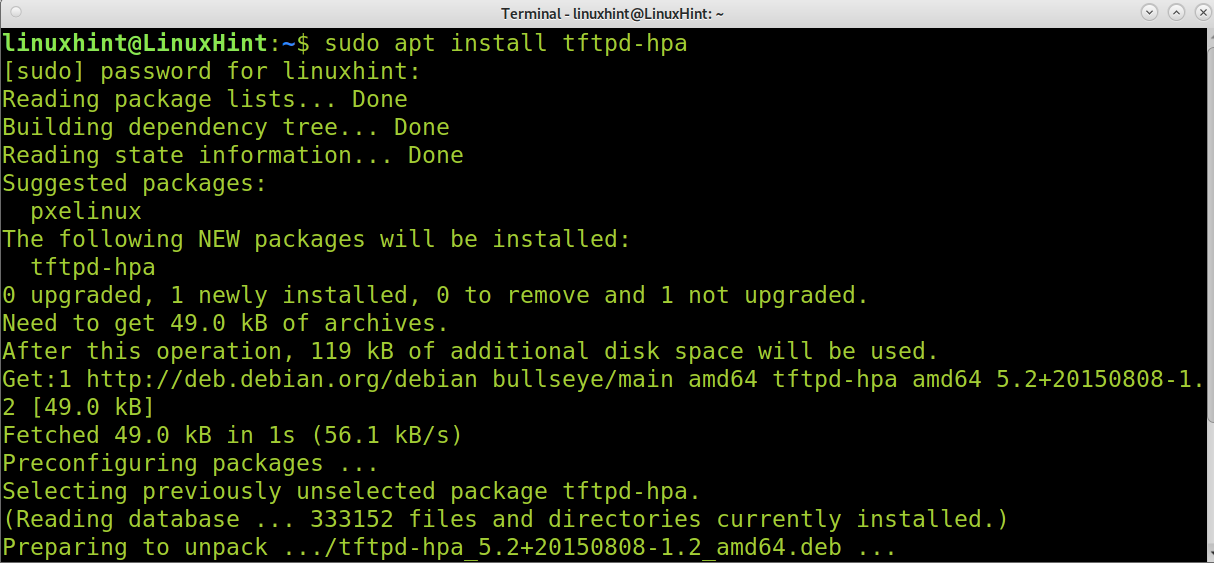
To begin installing the TFTP service, use apt as shown in the screenshot below.
As said, the previous command installed the TFTP service. To install the TFTP client using apt, run the following command.
Configuring the TFTP server:
Once the TFTP server is installed, you need to configure it. The TFTP configuration file is located at /etc/default/tftpd-hpa. You can edit the configuration file using nano, as shown in the example below. On debian, run the following command.
The default configuration file seems like the image below where:
- TFTP_USERNAME: Here, you can specify the TFTP user; the default user is tftp.
- TFTP_DIRECTORY: Here, you can specify the TFTP directory to upload or download files from. By default, the directory /srv/tftp is created; you can leave it or define a new one (in such case, you’ll need to create it using the mkdir command).
- TFTP_ADDRESS: Here, you specify the TFTP IP address and port, which by default for TFTP is port 69
- TFTP_OPTIONS: Here, you can specify options; we’ll add the needed option to upload files to the TFTP server in our following examples.
In the screenshot below, you can see I only edited TFTP_ADDRESS to define the server IP and TFTP_OPTIONS to allow uploading files by adding the —create option.
After editing the configuration file, exit saving changes (For nano, press Ctrl+X and Y)
As you can see, the default tftp directory is where files are stored in /srv/ftp. On Debian 11, this directory is created by default when installing tftp. You can create a different one if needed. But you’ll need to change the user and group ownership to allow the defined user in the configuration file (By default, the tftp user) to store files inside.
To change the directory ownership to the tftp user, use the chown command as shown below.
Once reconfigured, restart the tftp service; you can do it using systemctl, as shown in the following example.
Upload and Download files using TFTP:
To connect to a TFTP server, just run tftp followed by the server IP address as shown in the following screenshot, in which tftp is used to connect to the server with IP address 192.168.1.103.
Once connected, to upload a file, you can use the put command followed by the file name you want to upload. In the example below, the file named linuxhintfile is uploaded to the server with IP address 192.168.1.103.
To download files, use the get command followed by the file name you want to download, as shown in the image below.
TFTP vs FTP vs SFTP:
Unlike FTP and SFTP, TFTP works under the UDP protocol; it is a faster but less secure and flexible alternative. TFTP doesn’t allow authentication, and users can’t modify files. Even the regular FTP protocol (Port 21) is the safest alternative. TFTP is mainly used for network boot processes and is almost unused.
The TFTP server doesn’t allow to show the TFTP directory content; users must know the file name they want to download.
Conclusion:
As you can see, the main advantage of the TFTP protocol is the simplicity of implementing it. Any Linux user level can easily set up a TFTP server. It is important to remember that TFTP is an unsafe implementation, and SFTP must be considered the main alternative to transfer files and filter unwanted access. Users must remember to open port 69 to allow TFTP traffic; this can be achieved using Iptables or UFW, as shown in the first step of this article.
You can get additional information on TFTP at https://linux.die.net/man/1/tftp.
I hope this tutorial explaining how to install a TFTP server on Debian 11 was useful. Keep following Linux Hint for additional Linux tips and tutorials.


