
In this post, we will demonstrate a step-by-step guide on how to install TensorFlow on CentOS 8 in a python-oriented virtual environment.
TensorFlow Installation
TensorFlow can be installed on CentOS 8 in a python-oriented virtual environment; CentOS 8 has Python3 built-in installed, which is needed for the later steps.
Step 1: Verify the version of Python on CentOS 8
Let’s verify the python3 version:

If it is installed, the next step is to create the python-oriented virtual environment. Otherwise, if Python 3 is not installed on your computer, you can install Python 3 using the command given below:
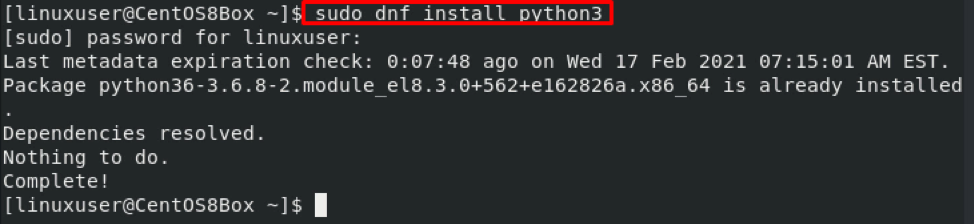
After the installation of Python 3, you can run both python3 and pip3 commands in your CentOS 8 system.
Step 2: Create a Virtual Environment
To create a python-oriented virtual environment, go to the directory in which you want to create it. It is also recommended to create the python-oriented virtual environment in the home directory or where you have read and write privileges. After navigating to the directory where you want to create a virtual environment, make a new directory for creating a TensorFlow project in it.

Now, navigate to the newly created “tensorflow_dir” directory.

Inside the “tensorflow_dir” directory, type the command given below to create a virtual environment:

In the above command, we have created a “venv” directory and a python-oriented virtual environment with the name “venv”. If you want to give a name of your choice to the virtual environment, change the second “venv” with your desired virtual environment name.
Step 3: Start the Virtual Environment
To start the virtual environment, type the command given below:
After starting the virtual environment, you can see the environment’s bin directory at the start of the $PATH variable.

We have successfully created a python-oriented virtual environment for TensorFlow. Let’s install TensorFlow now.
Step 4: Install TensorFlow Using pip
Before running the installer, upgrade the pip version using the command given below:
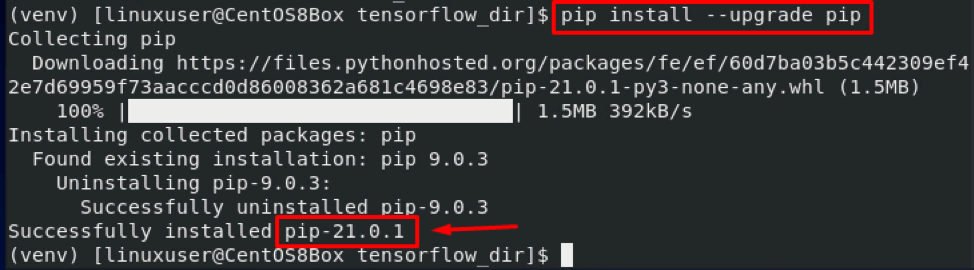
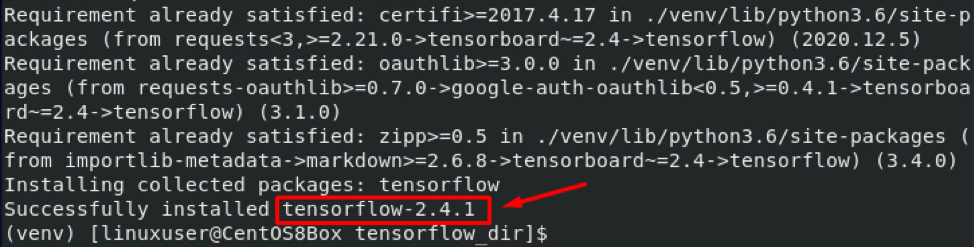
After upgrading the pip, run the installer using the command given below:

Now it is installed and you can verify that version 2.4.1 of TensorFlow is successfully on CentOS 8.
After using TensorFlow, type the following command to deactivate the python-oriented virtual environment:

This is it!
Conclusion
In this post, you have learned to create a python-oriented virtual environment and install TensorFlow on CentOS 8. We hope you found this post helpful in installing TensorFlow on CentOS 8. If you are new to TensorFlow or want to know more about TensorFlow, read the getting started guide of TensorFlow from their official website.